



Low Hardware Bipod (Picatinny for Nerf and Airsoft)
 Byleedle-dynamicsLikes0Downloads332
Build another version of this model.
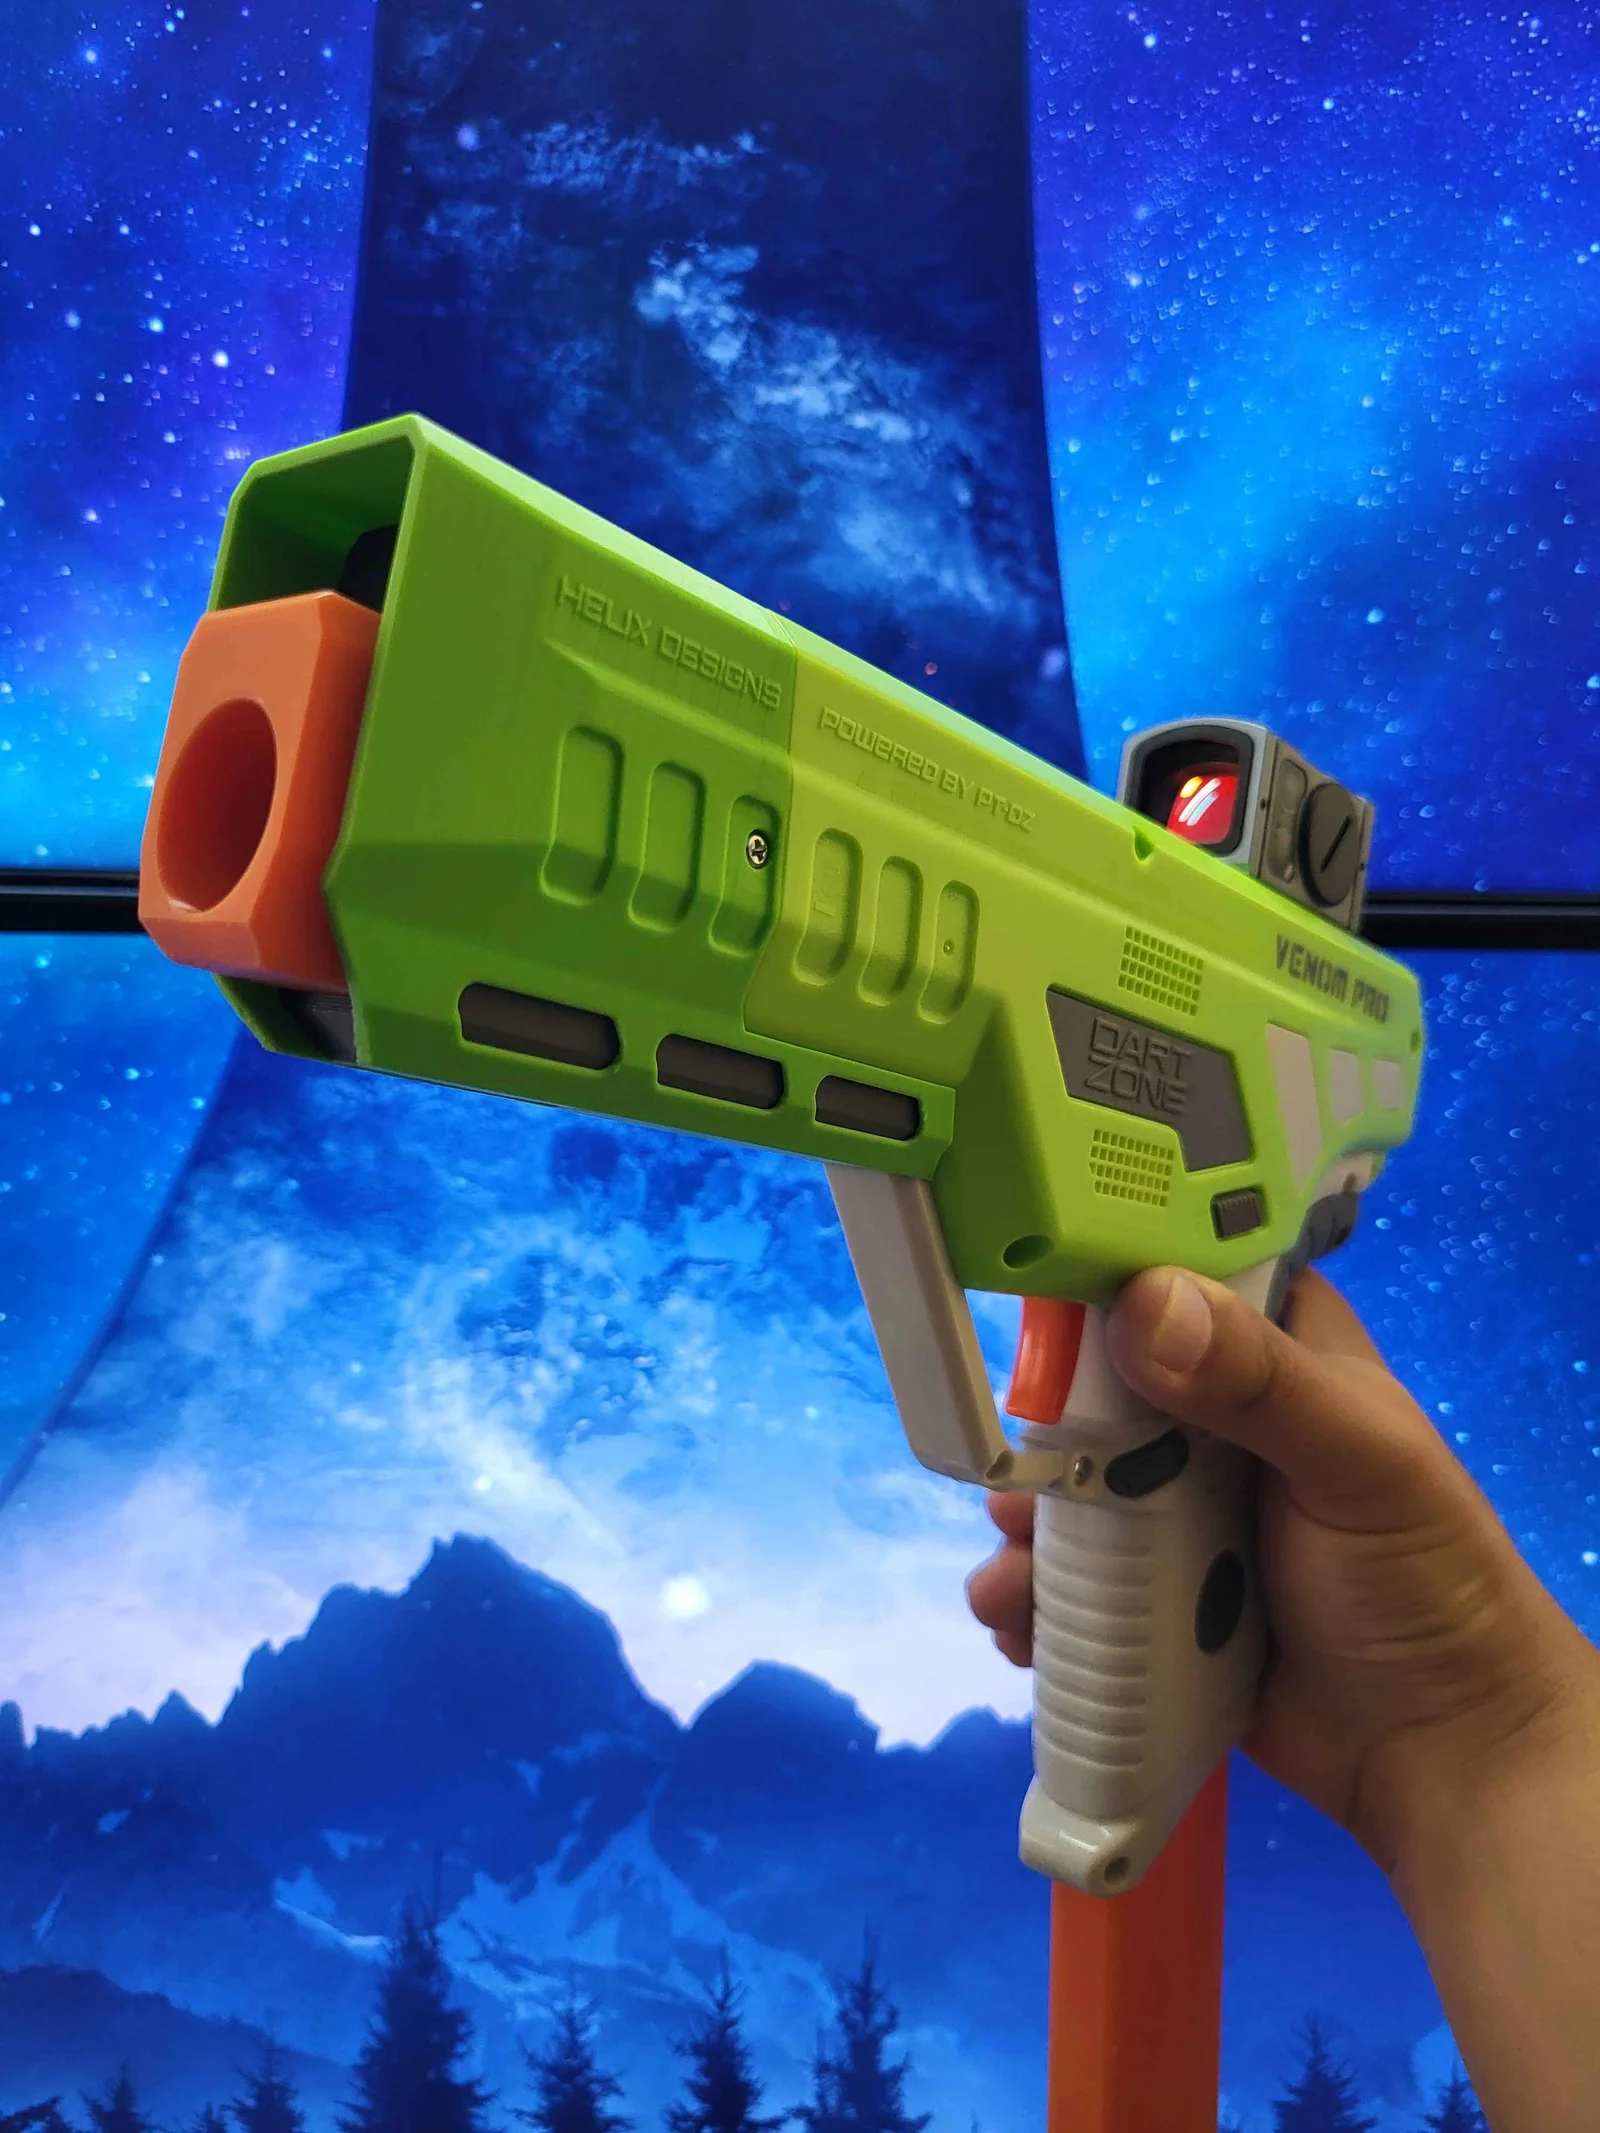
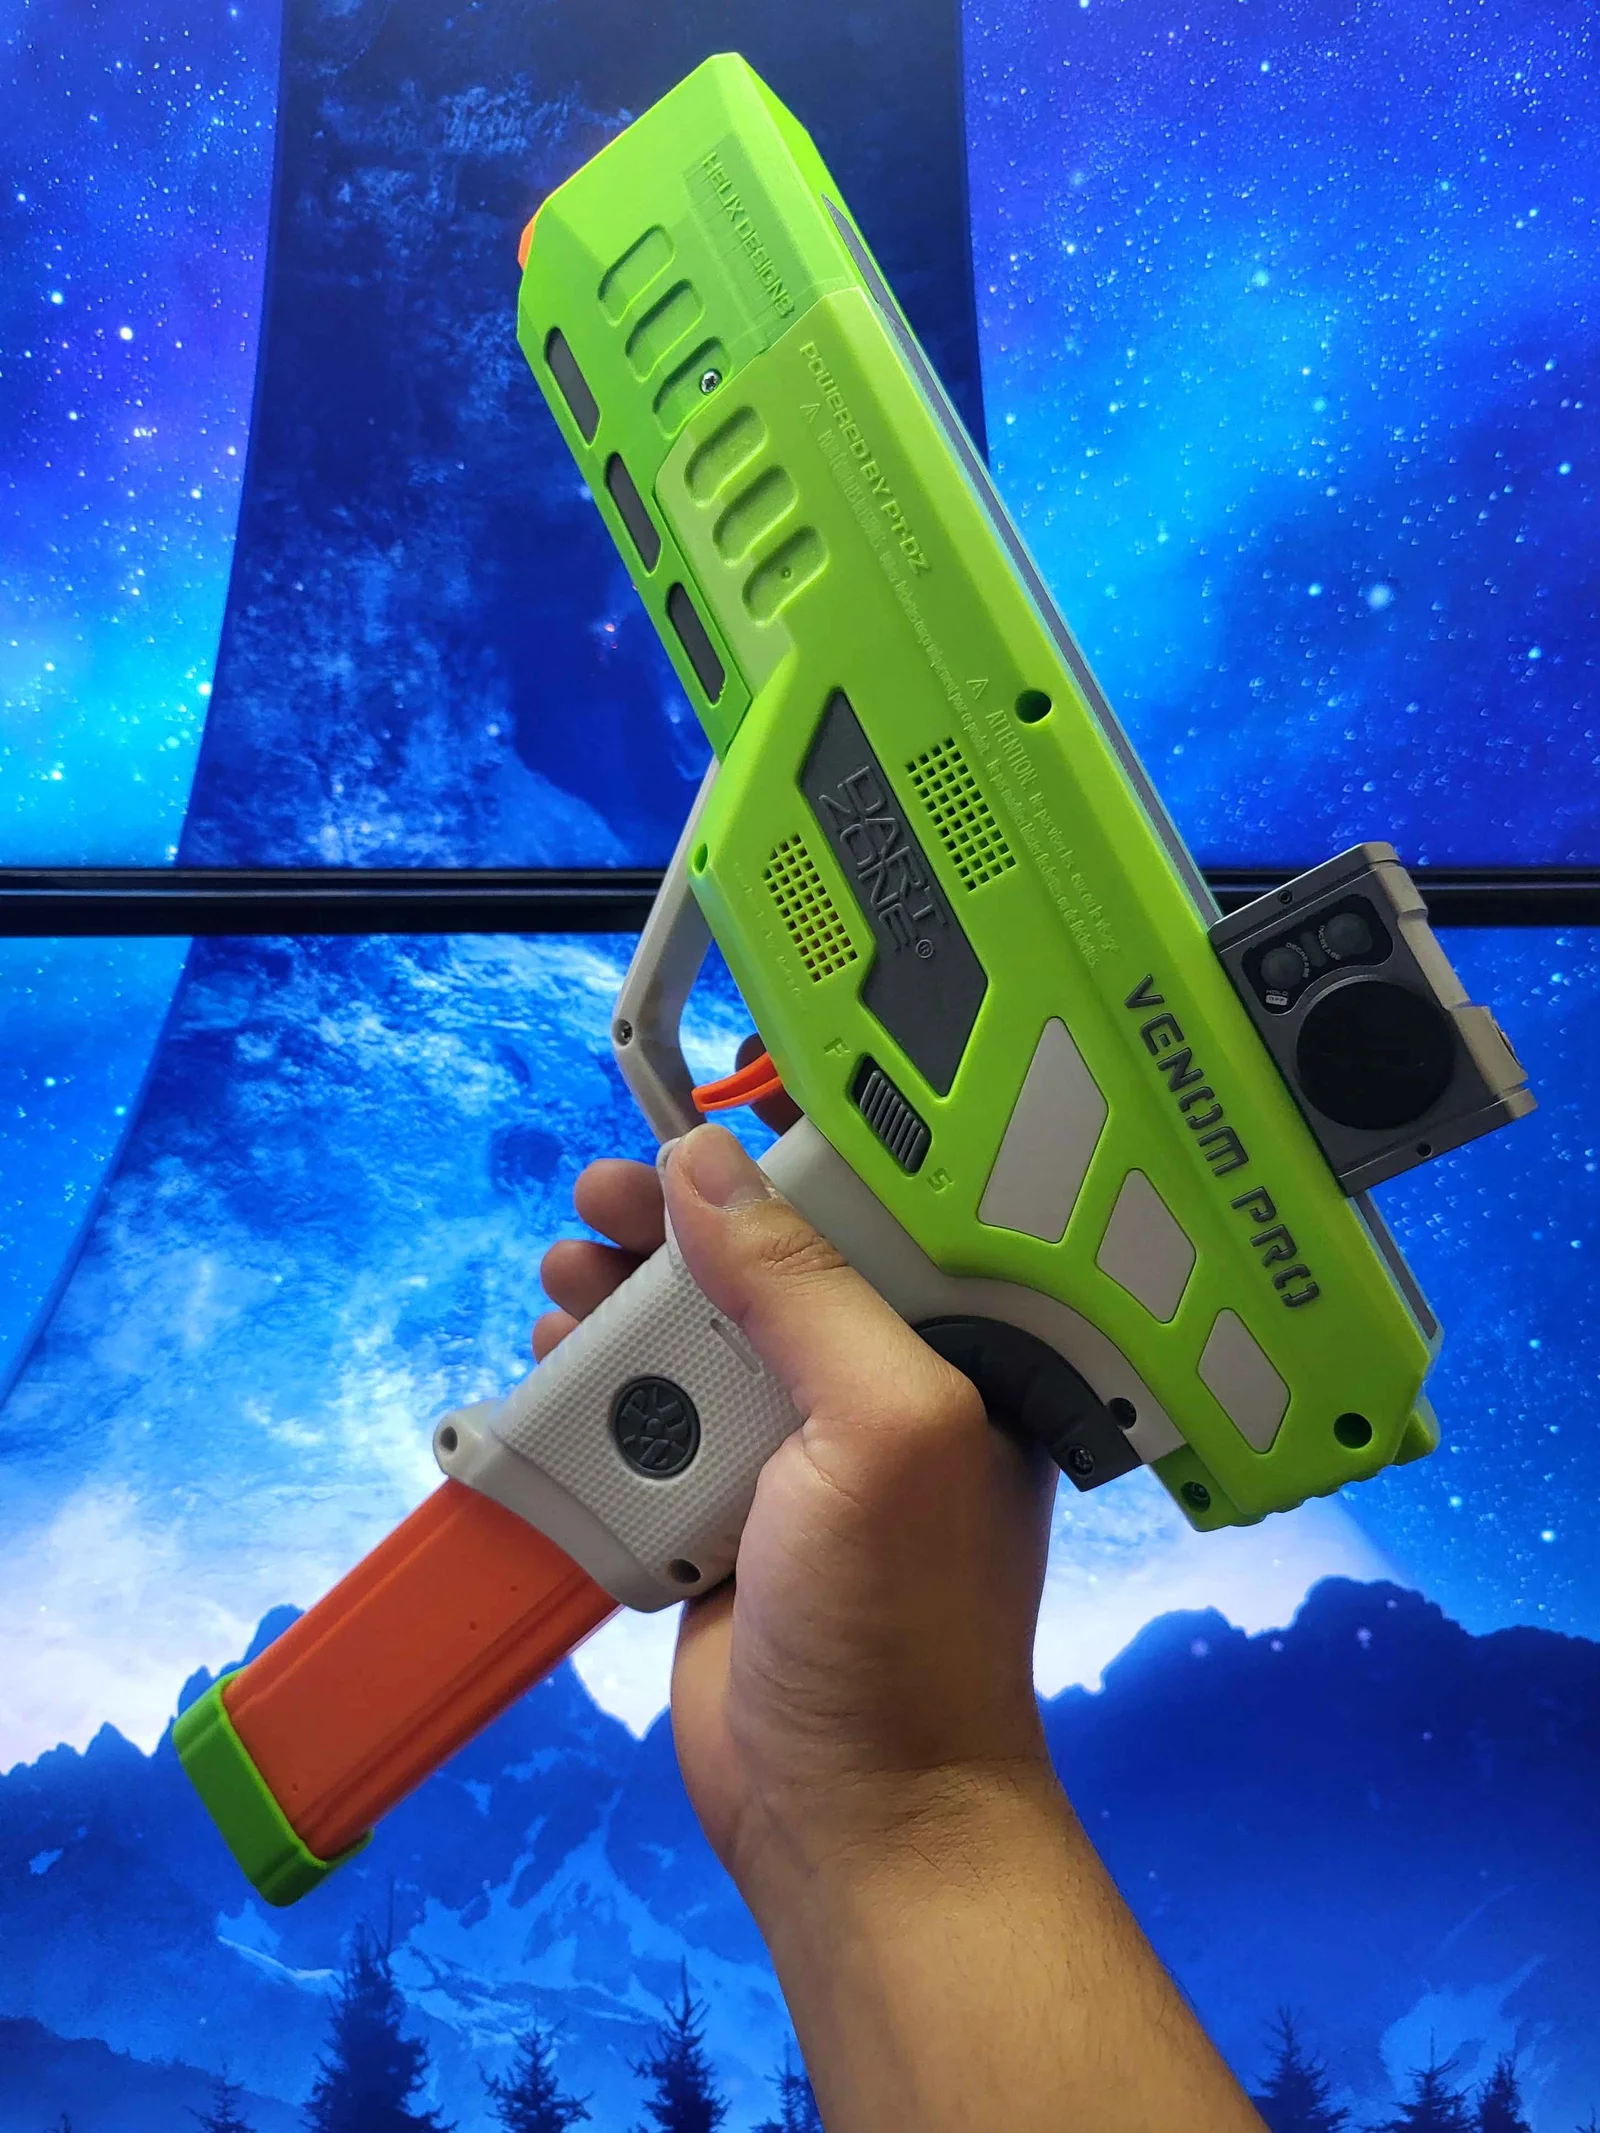
The VP-S (or the "Venom Pro, Streamlined") kit for the Dart Zone Venom Pro is a kit that evens out the proportions of the blaster while also extending the battery compartment and allowing the use of Acro P2 mount pistol red dot sights. A top strap without the Acro P2 mounting dovetail is included for those who want a totally streamlined pistol.
I know a common question will be “why the lack of any picatinny rails”? And my answer is that there are both really good kits for that already (XFoxGames, AlpacaBlasterCo, etc.) and that I wanted a more streamlined sci-fi pistol secondary. This kit is meant to make the Venom a smooth pistol that won't snag on gear if drawn from a holster while making the proportions more appealing. Thus, I decided to completely remove the top picatinny rail and only use a pistol red dot.
And yes, this is only compatible with red dots that use the same mounting solution/dovetail as the Aimpoint Acro P2. This is due to the width of the top strap; an RMR-footprint red dot mount does not fit and is too wide. You can get an Acro P2 clone from Aliexpress for $40 shipped, and there are also a few other red dots that utilize this mount. Of course, being Nerf, you can get away with just watching where your darts fly, but I love the boxy design of the Acro P2 when paired with the Venom Pro.
You will basically only need a 3D printer and some super glue. All of these parts should be able to fit on an Ender 3, and I think will fit on smaller 180x180mm printers too. You will reuse 2 of the screws from the blaster to hold the shroud on, but that is all. Depending on how good your printer is, the tolerances on all the parts should be sufficient, and no sanding should be required.
However, if your printer isn't dialed in, then sanding might be required to make some parts fit together. (A good way to avoid sanding is to either dial in your printer, or just… buy a better one.)
The only hardware you will need is 8x 6x3mm magnets. These will get glued into the front shroud and the front insert, helping the front of the blaster not fly off when you swing it around. I might've gone overkill about how many magnets is required, but its better to be overkill in this scenario than sending the front of your blaster across the room under play.
Assembly is simple. You will not have to totally disassemble the blaster to install these parts. These are some rough instructions:
All parts come pre-oriented for printing; yes, you will need supports for some of the parts. (especially the top strap) This part orientation leads to the best part quality and strength, so it is not advised to reorient the parts.
For good color matching to the rest of the blaster, I suggest printing the shroud top insert, shroud bottom insert, and top strap in a dark grey. The muzzle brake should be printed in orange for safety reasons. If you are proficient enough in filament-swapping mid-print, you can print the first portion of the front insert in dark grey, and then swap to another color partway through. See the video above for more about this.
I recommend printing everything with a minimum of 4 walls and 25% infill. All parts benefit being printed with lots of walls and high infill; I personally printed everything out with 6 walls and 50% grid infill. I suggest using a really fine layer height for the shroud, as this part has an angled section that mates with the blaster, and with a taller layer height you will have pronounced steps instead of a seamless angled face.
Parts that require supports:
I can be found on Reddit and Discord, but I am most active on Discord. I can be found on the /r/Nerf Discord server, but if you need, you can DM me. If you do make this blaster, I'd love to know!
My Discord username is: @brooklyn_tony198
My Reddit username is: u/BrooklynTony198
Please note that I will generally not be accepting friend requests for DMs; to DM me on Discord, please join the /r/Nerf Discord server first and DM me through there.
NONE of my files are to be used or sold by Frontline Foam, by downloading my files, you agree that you are not Frontline Foam and/or related to Frontline Foam or Derrikk Sun.
Byleedle-dynamicsLikes0Downloads332

 BybmprintshopLikes0Downloads170

 ByCorvus_1914958Likes42Downloads108

 ByGhostmanta_3143708Likes6Downloads14

 ByBruceLeedleLe_328938Likes86Downloads141

 ByBaudler Art & Design Art & DesignLikes62Downloads111

 ByMircoGottsch_748972Likes196Downloads294

 ByRT3DLikes1.6KDownloads5.9K

 ByLoneWolf052Likes26Downloads113

 ByFlygonialLikes52Downloads80

 ByOUTOFDARTSLikes47Downloads188

 BySillybuttsLikes38Downloads127