



Kẹp giữ sợi Filament
 Bytinx_1344834Likes1.2KDownloads6K
Build another version of this model.
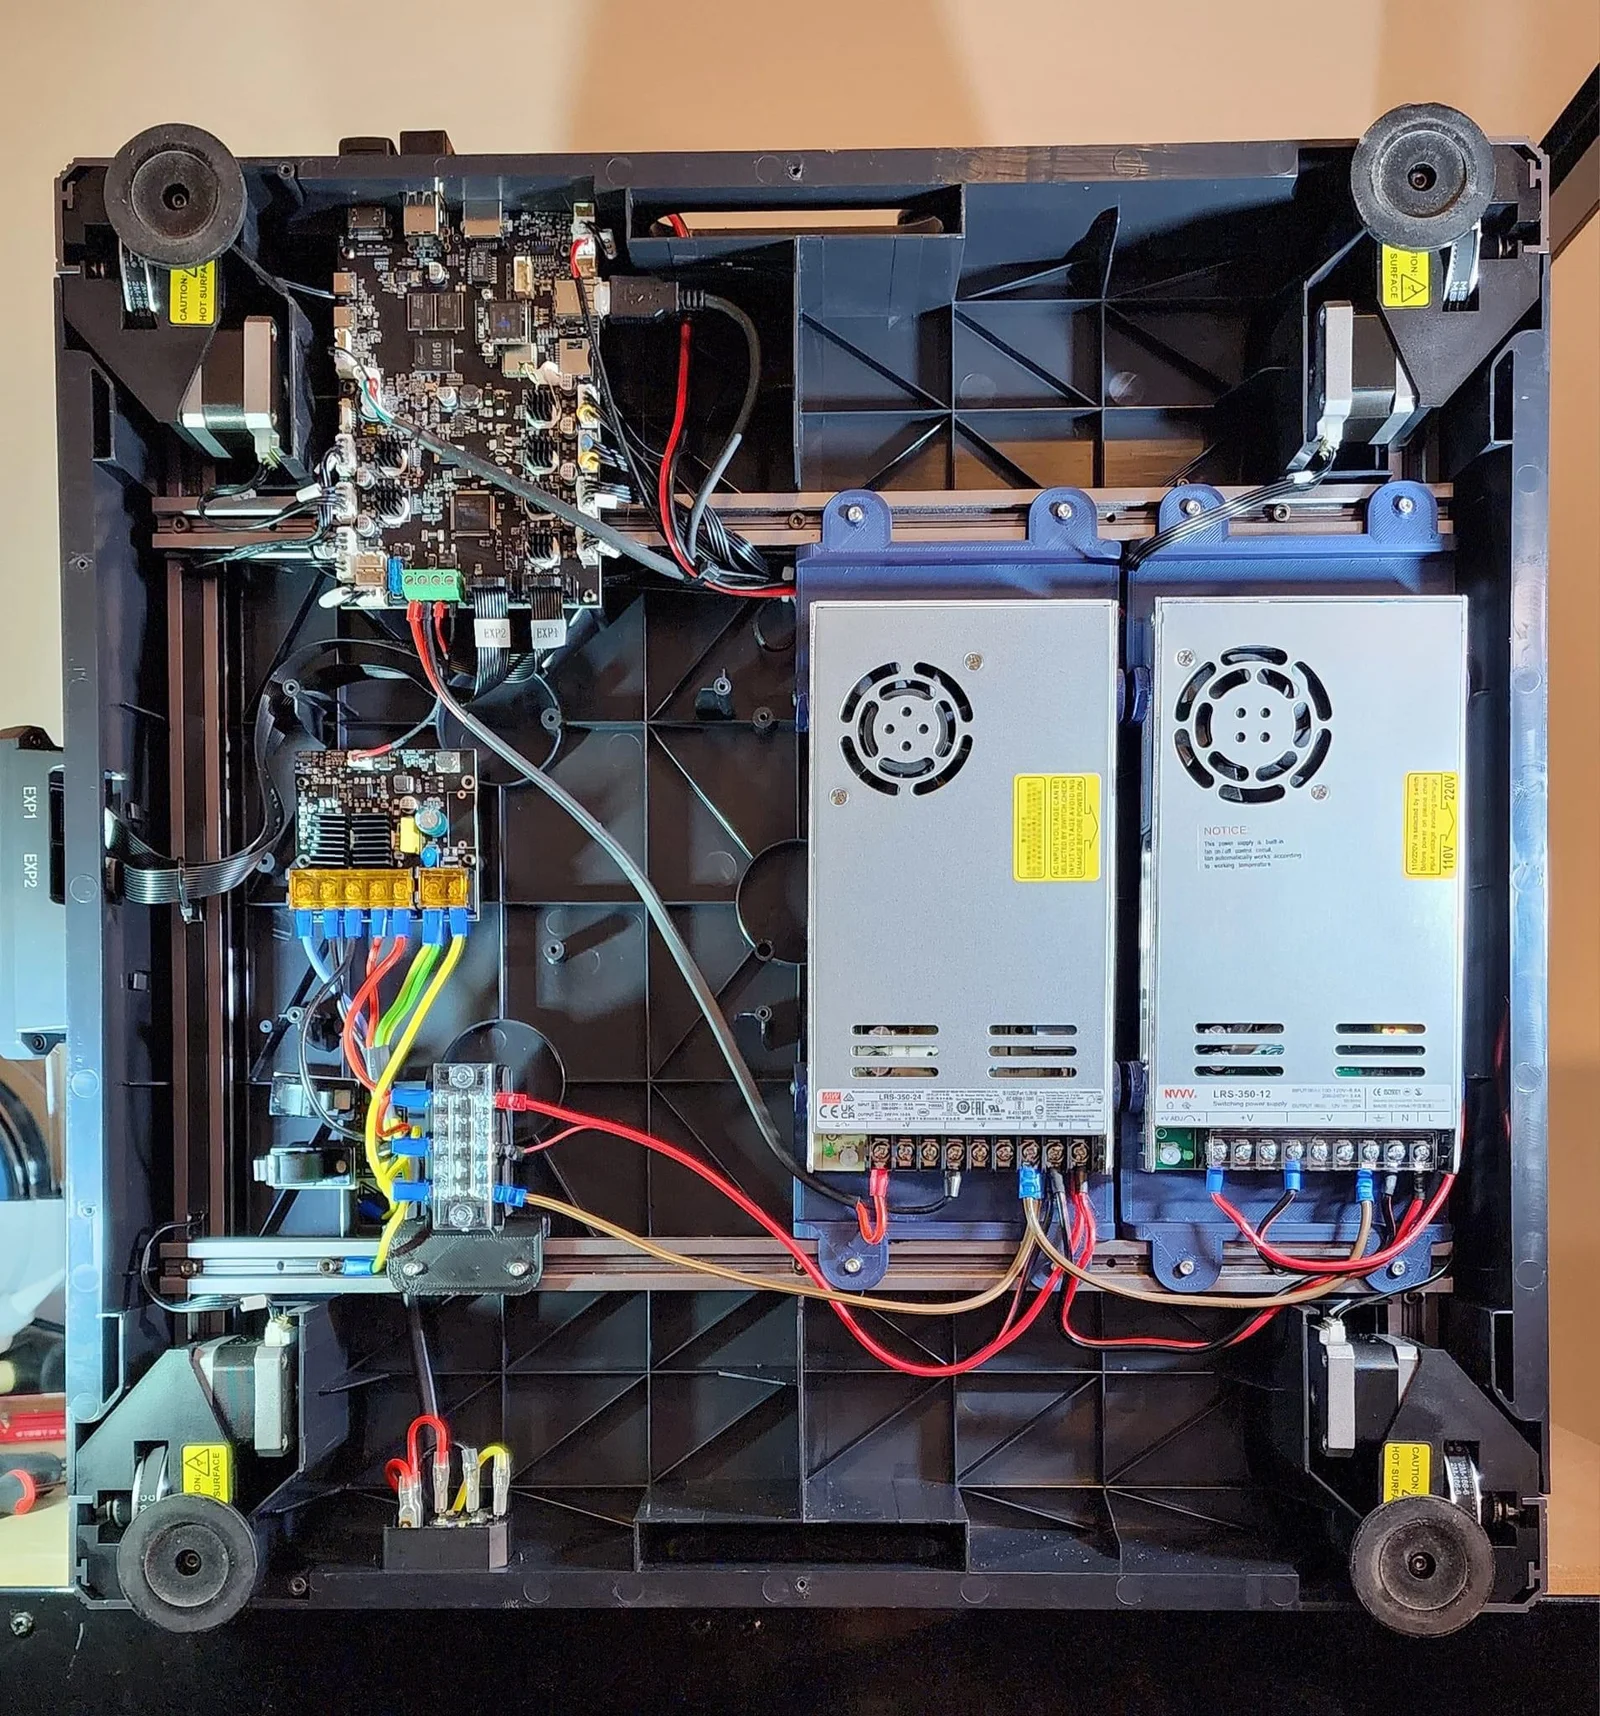
In preparation for the CoPrint multi color printing release that is due any day now, here is a power supply mounting solution for the SV08 to replace the anemic but sufficient for stock needs 24V OE power supply with one that can handle the additional needs of the CoPrint hardware to not require a second separate power box for those pieces. I also have mounted a second 12V supply to handle the heaters that my Top Hat uses to allow easier printing of materials like ABS and Nylon.
Print two mounting brackets for each power supply you are mounting. These use 4 M4 x 6mm screws to connect each to the power supply, and 2 M3 slip in and rotate T-nuts with 12mm M3 screws to connect to the 2020 extrusions on the bottom of the printer. To assemble them:
use two M4 screws to fasten the sides of each mount to the power supplies. but do not tighten them. Do not install screws in the top holes yet.
attach the T-Nuts to the mount, rotate them so they will slip into the 2020 extrusion, and temporarily tighten the M3 screws to hold the T-nuts parallel to the end of the power supply.
slip the entire assemble between the 2 extrusions, adjusting the mounting bolts within the slots to get the spacing correct to let the assembly slip in.
tighten the M4 screws in the power supply to fix the spacing.
Pull the assembly out of the printer base and insert the M4 screws into the top of the power supply/mount assembly and tighten all M4 screws.
Repeat steps 1-5 for the second power supply if you are using two (the side screws will become inaccessible with two of them in place so you need to do these one at a time.)
Install the two power supplies - place them back in the printer with the T-nuts in the slots, then loosen each M3 screw about 6-7 turns and tighten it again. That will allow the T-nut to turn and hold in the slot.
The terminal block assembles mount in about the same way, except it uses 2 M4x6 (up to M4x10) heat set inserts and 2 M4x12 Cap head screws to mount the block to the mount, and two of the M3 twist in T-nuts to hold it to the 2020 extrusion.
Parts (I assume you can find the M4 and M3 screws without help, contact me if not):
https://www.amazon.com/gp/product/B010UDG6NG - Terminal block
https://www.amazon.com/gp/product/B013ETVO12 - 24V Power Supply
https://www.amazon.com/gp/product/B08GM17QZ8 - 12V Power Supply
https://www.amazon.com/gp/product/B0CJFDN717 - M3 T-Nuts
Bytinx_1344834Likes1.2KDownloads6K

 Byprusa-researchLikes0Downloads2.7K

 Bydet-manLikes0Downloads179

 Bygummiegecko8477Likes0Downloads172

 Bychukwufumnanya-arinzechukwuLikes0Downloads155

 BydalleLikes0Downloads154

 Bychris-barwickLikes0Downloads134


 BynasikLikes0Downloads125

 Byarhi_585078Likes64Downloads547

 ByHanzo3dLikes155Downloads417

 BydarienLikes0Downloads1K