


Mẫu tranh treo tường nghệ thuật phong cảnh thiên nhiên Nature Decor
 ByCodyMeyer_2545340Likes163Downloads726
Build another version of this model.
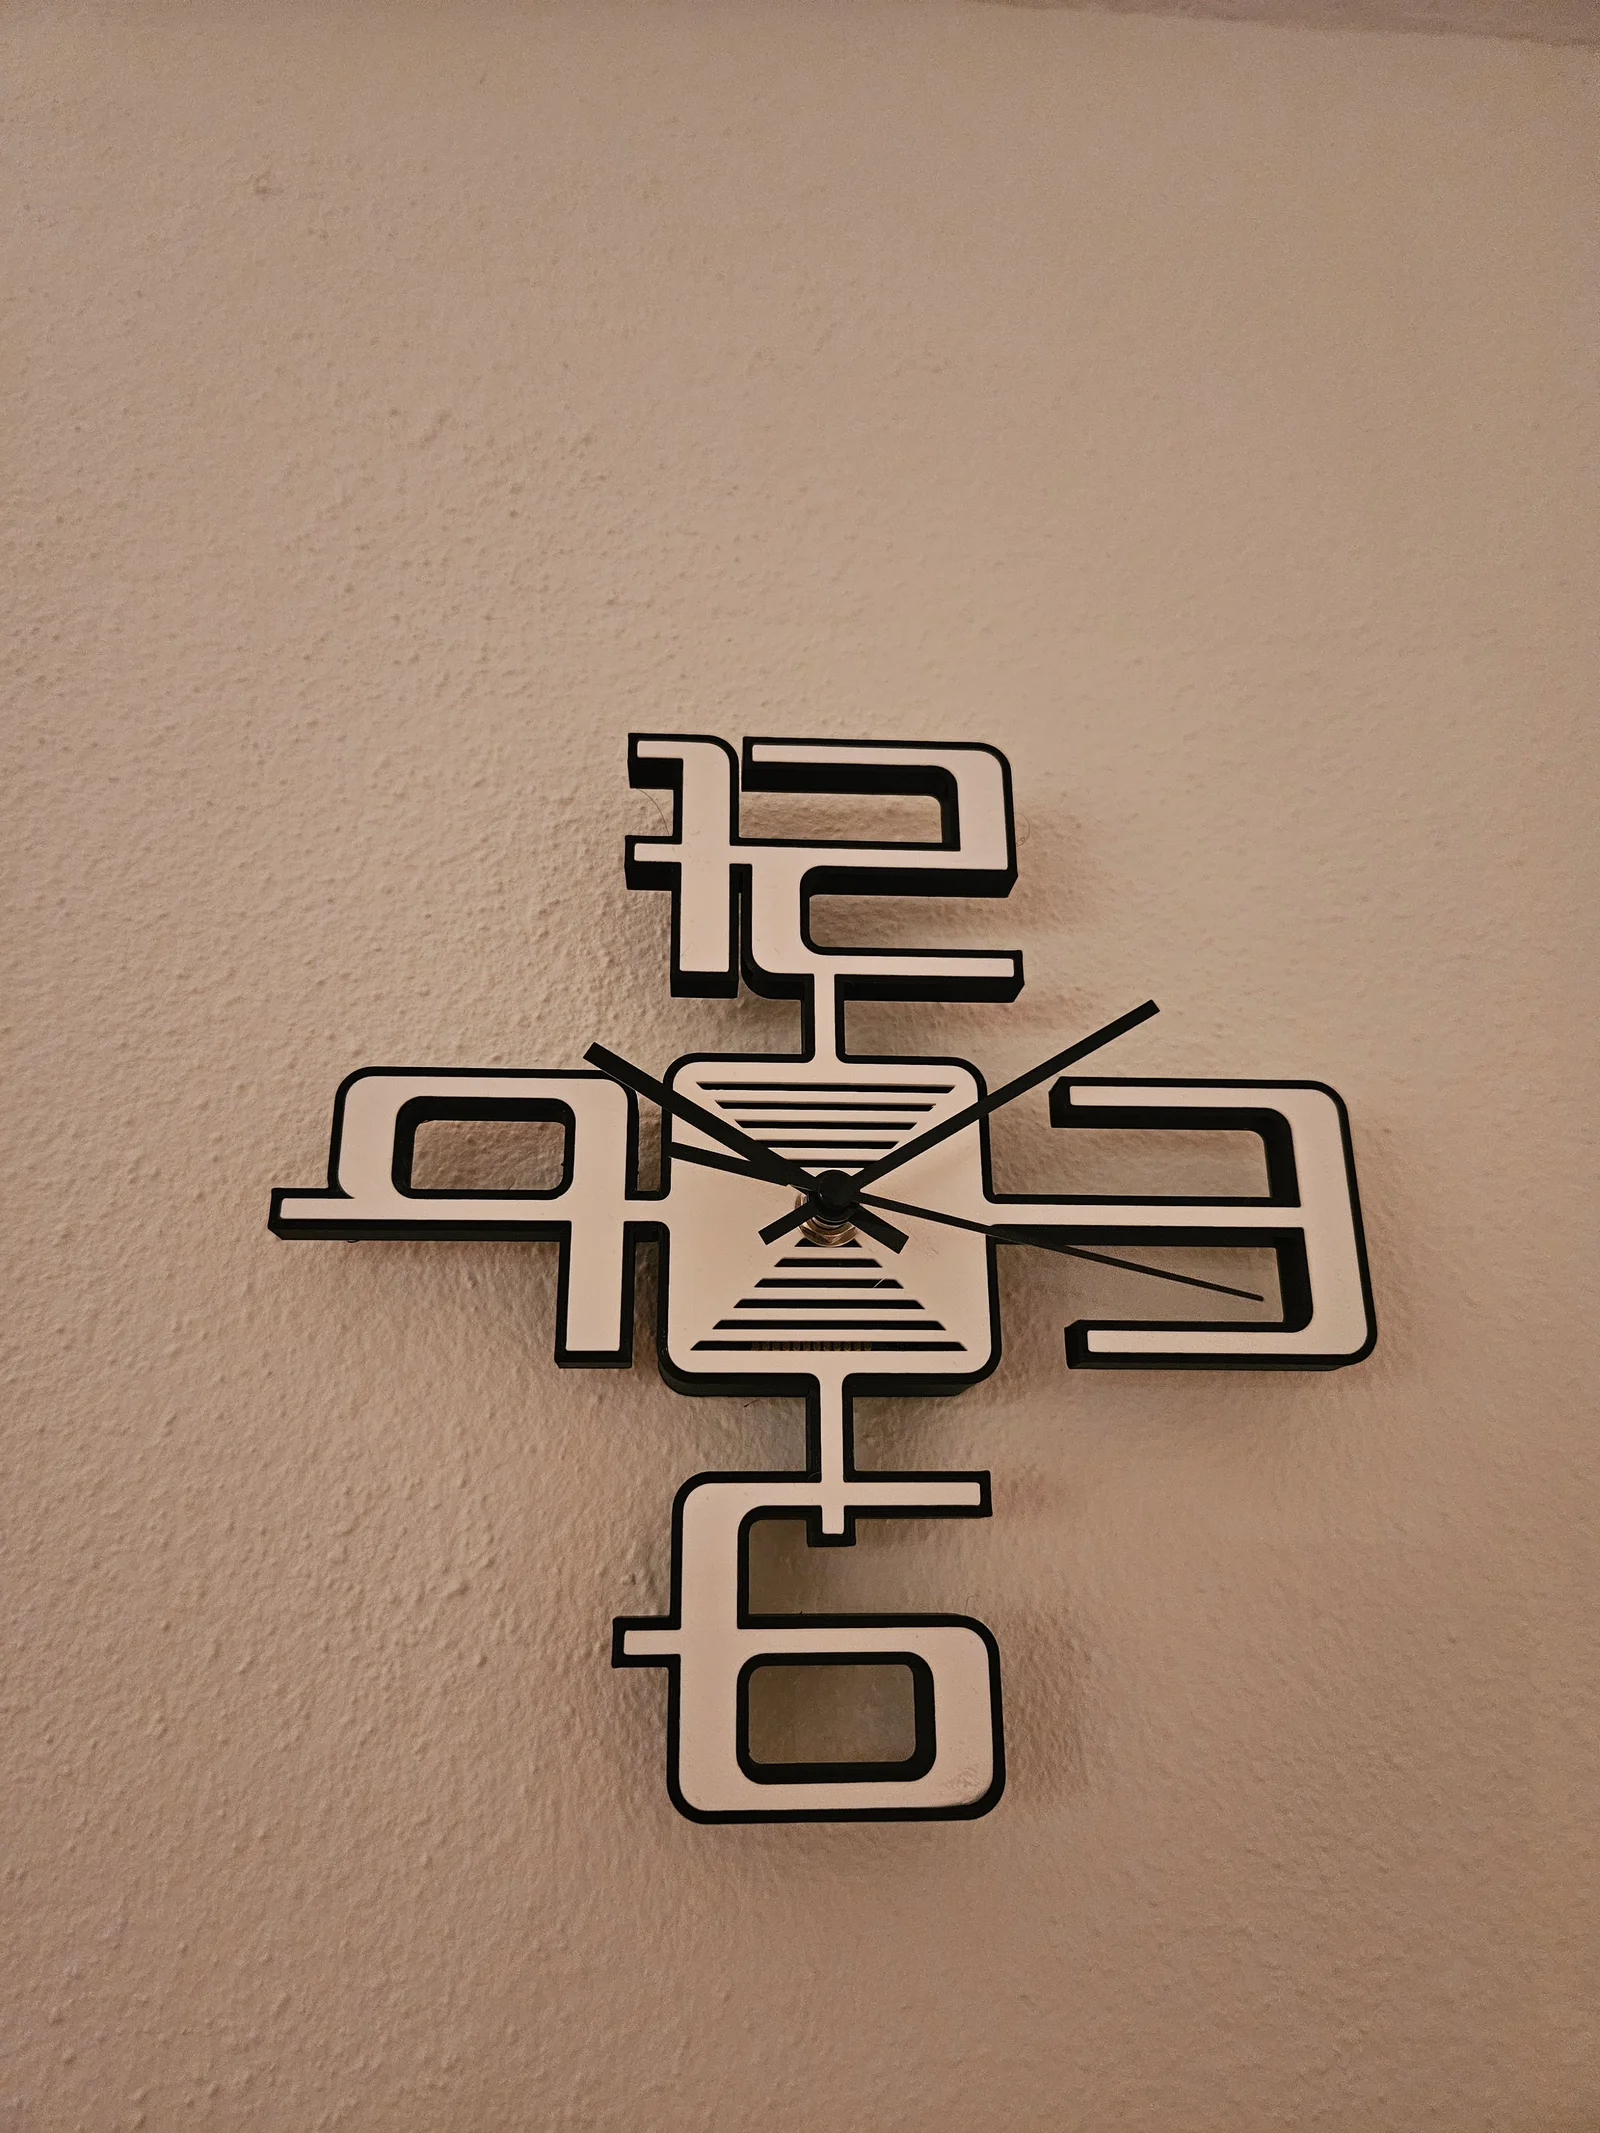
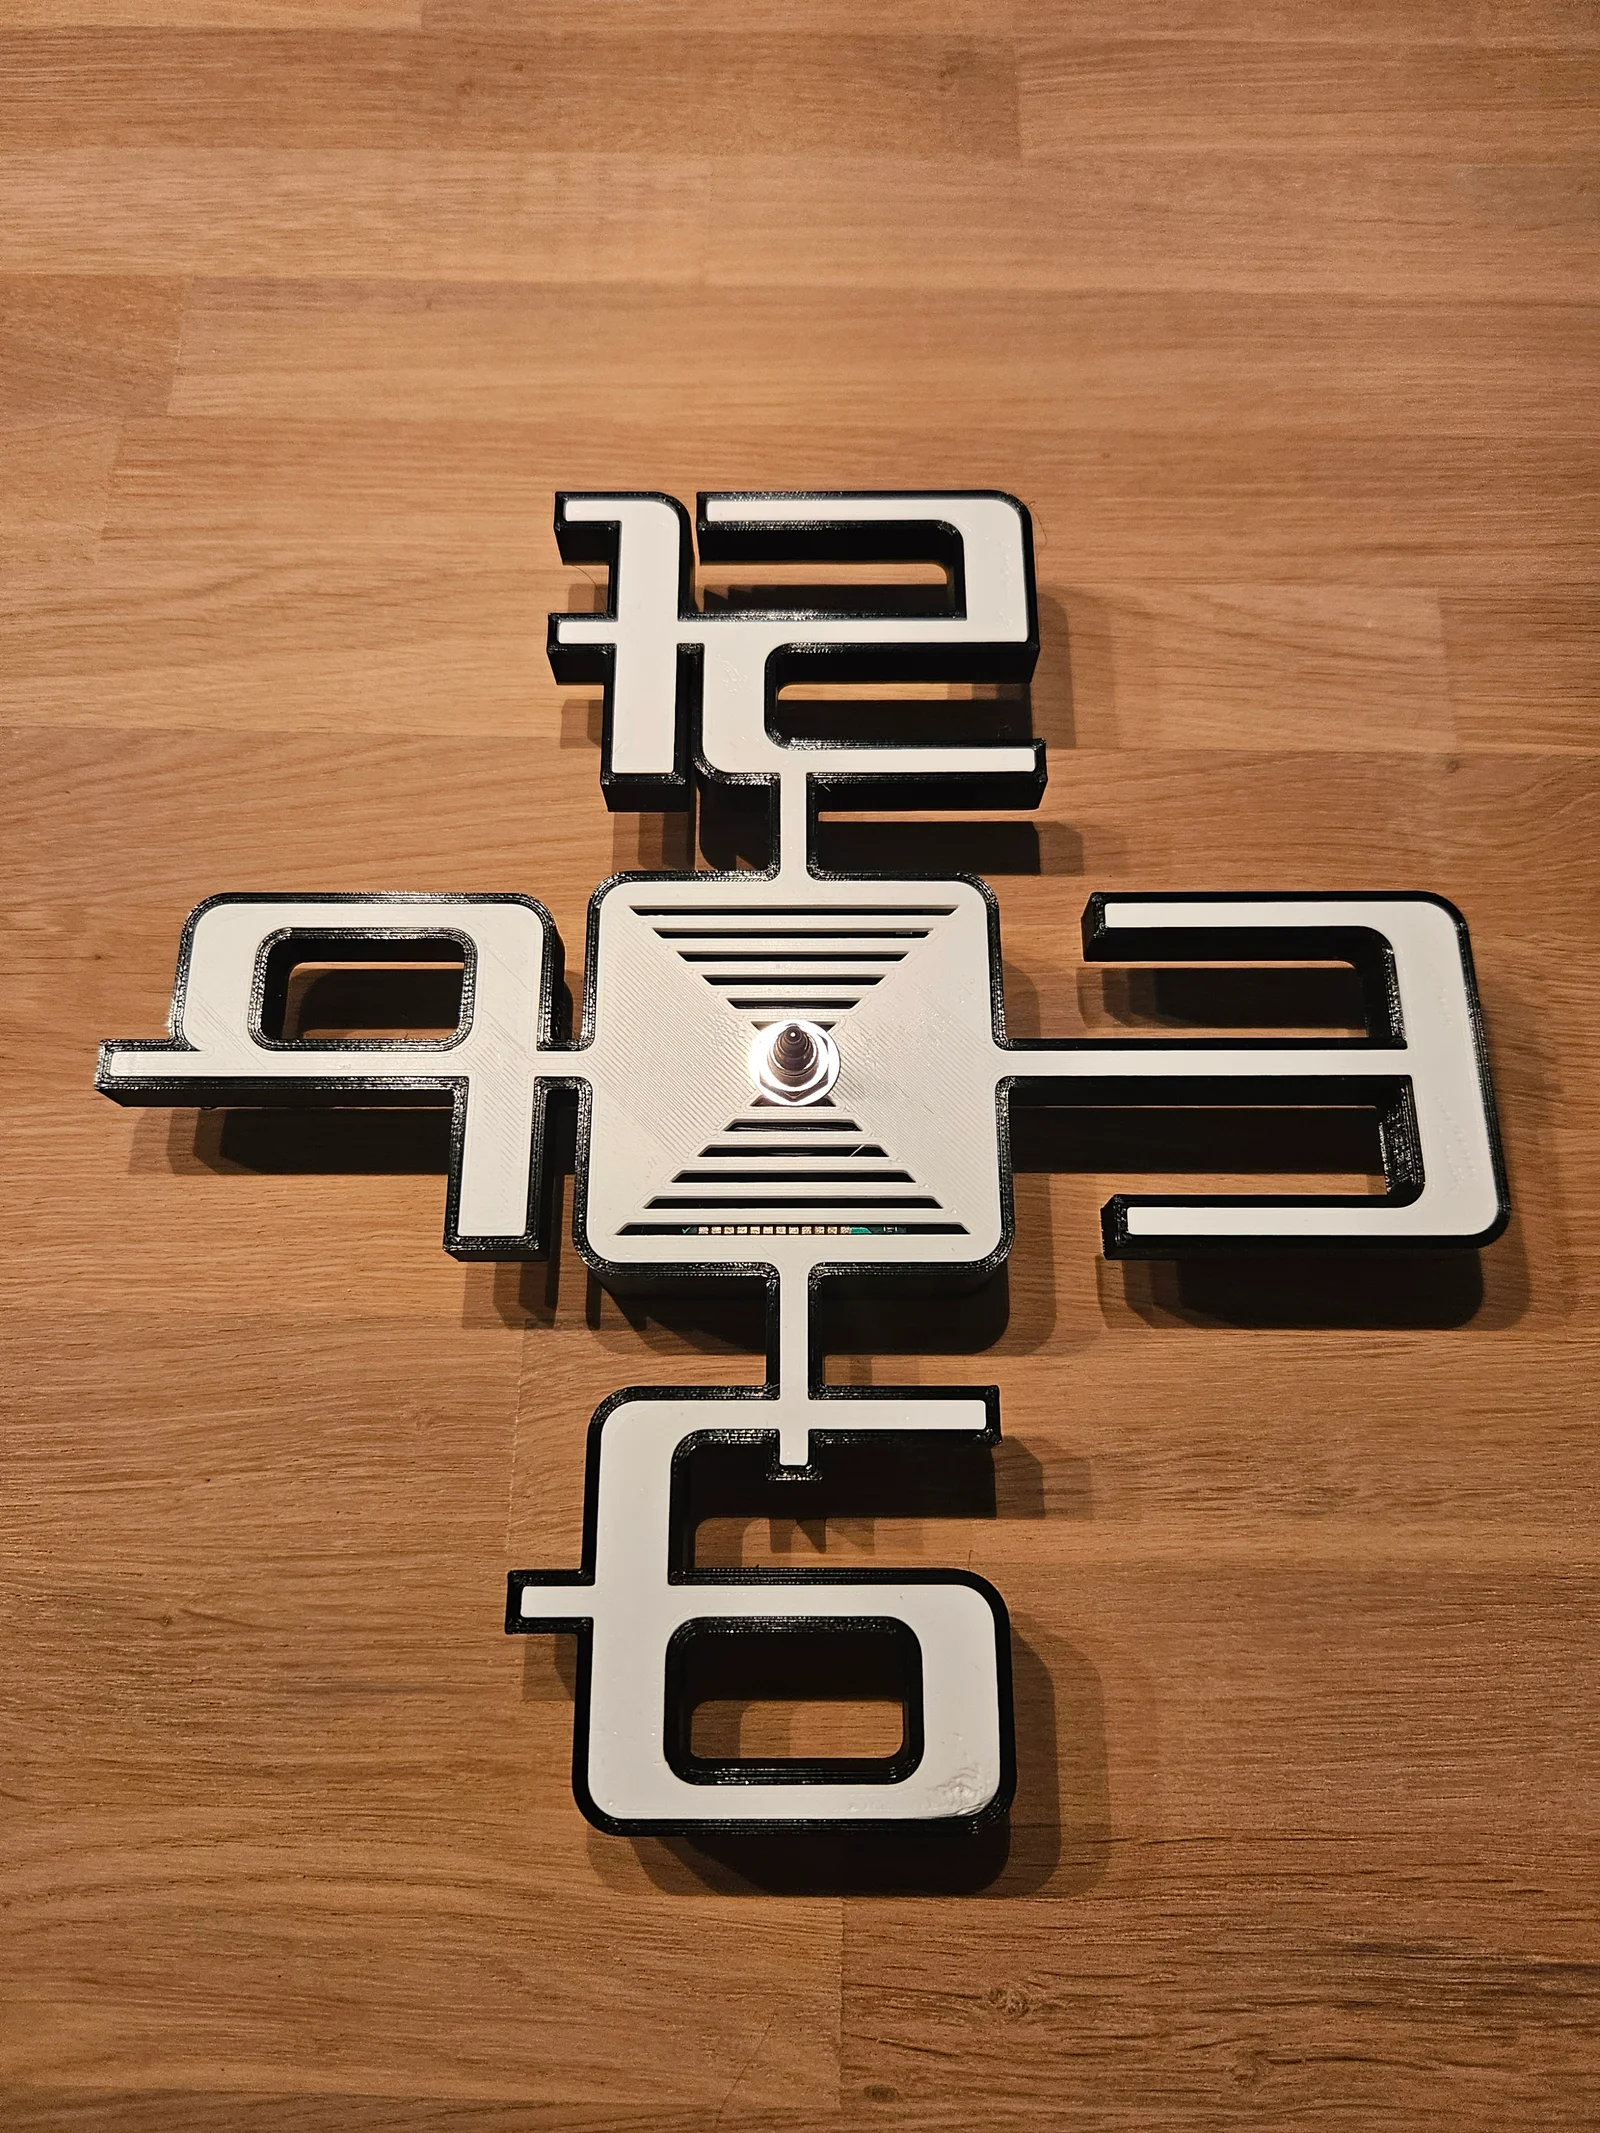
This clock consists of several parts. I called them dial(clock plate) and outer parts. The dial is the largest part and covers the entire print bed. The figure in the middle has a link with time and is meant to represent an hourglass.
The outer parts follow the outer circumference of the clock. I have divided the outer parts into 5 separate ones. Consisting of a center part and the 4 numbers. You don't need a multiple filament printer for this design, just change the filament after each print.
You can create a different style/look, by printing the outer parts in a different color. There's a small tolerance between the dial and outer parts. The parts fit together well and can be taken apart if you want to adjust the color. I made a couple of different center parts. You only need one, for your assembling. The standard one is basic with no extras, others one have striping, etc.
You also need a quartz clock insert. You can find them at various online shops. The size must be 55mmx55mm or 56mmx56mm. Anything bigger than 57mmx57mm won't fit inside the dial plate.
This model just fits on your bed (210mmx210mm). Don't change the scale, you might have some trouble sliding in the clock insert or the outer parts.
To get your model sliced in Prusa-slicer, you need to switch off, Skirt and Brim. These can be found in your printsettings. Skirt loops (minimum): set to zero and select Brimtype: no brim.
There are two options for orientation, face down or face up.
It's pretty straight forward, there's no specific order. I like to start with the clock insert.
ByCodyMeyer_2545340Likes163Downloads726

 Bykallekubinsk_3569049Likes37Downloads187

 ByMrCoolGaming_2947996Likes47Downloads176

 ByJous42Likes35Downloads116

 Byst0rmyLikes0Downloads462

 ByMichael Phillips PhillipsLikes26Downloads112

 ByStreamMovieY_3470525Likes30Downloads122

 ByvanessaLikes0Downloads113

 Bylame_3949573Likes42Downloads106

 Byjimreurink1_902740Likes25Downloads82

 ByCederbLikes32Downloads185

 ByTomYumLikes33Downloads160