



Kẹp Kính Mát Gắn Xe Hơi
 ByVC_DesignLikes721Downloads2.9K
Build another version of this model.
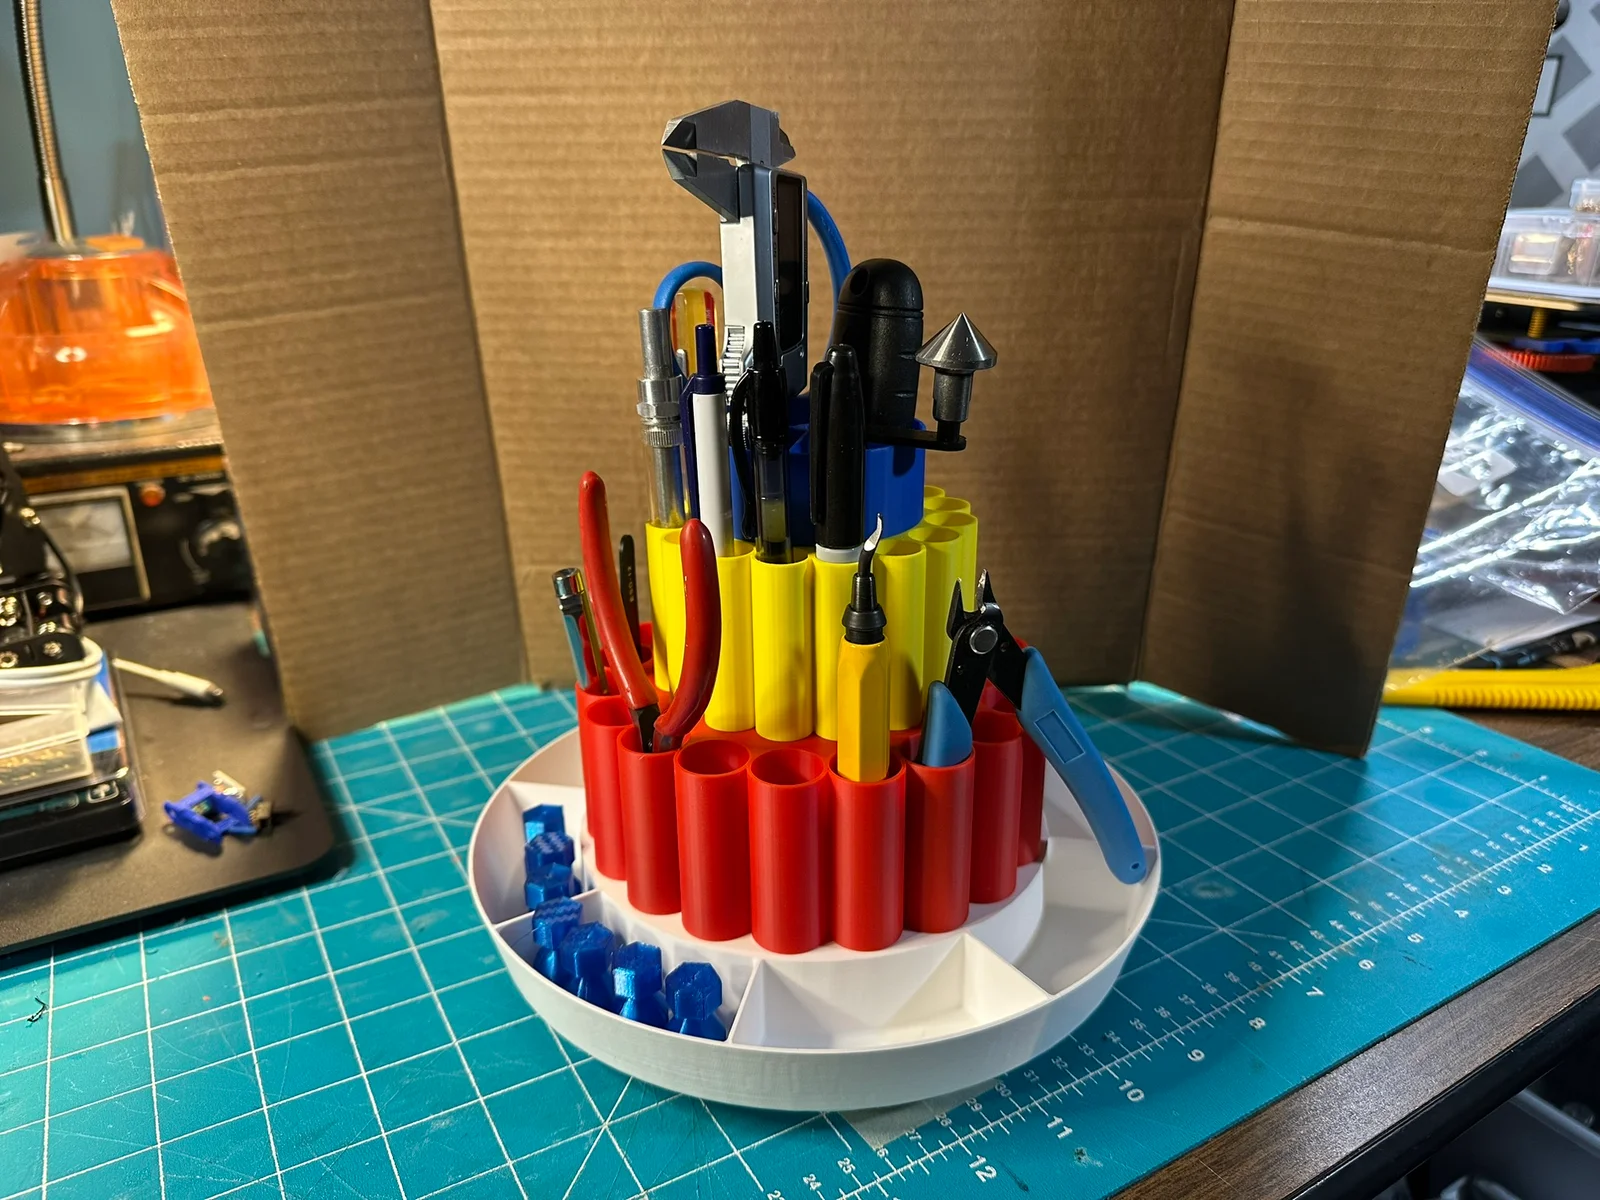
This is a remix of a model I found on MakerWorld.
I didn't change the base or bearing race or how it mounts from the original.
You may also refer to those assmbly instructions if you wish.
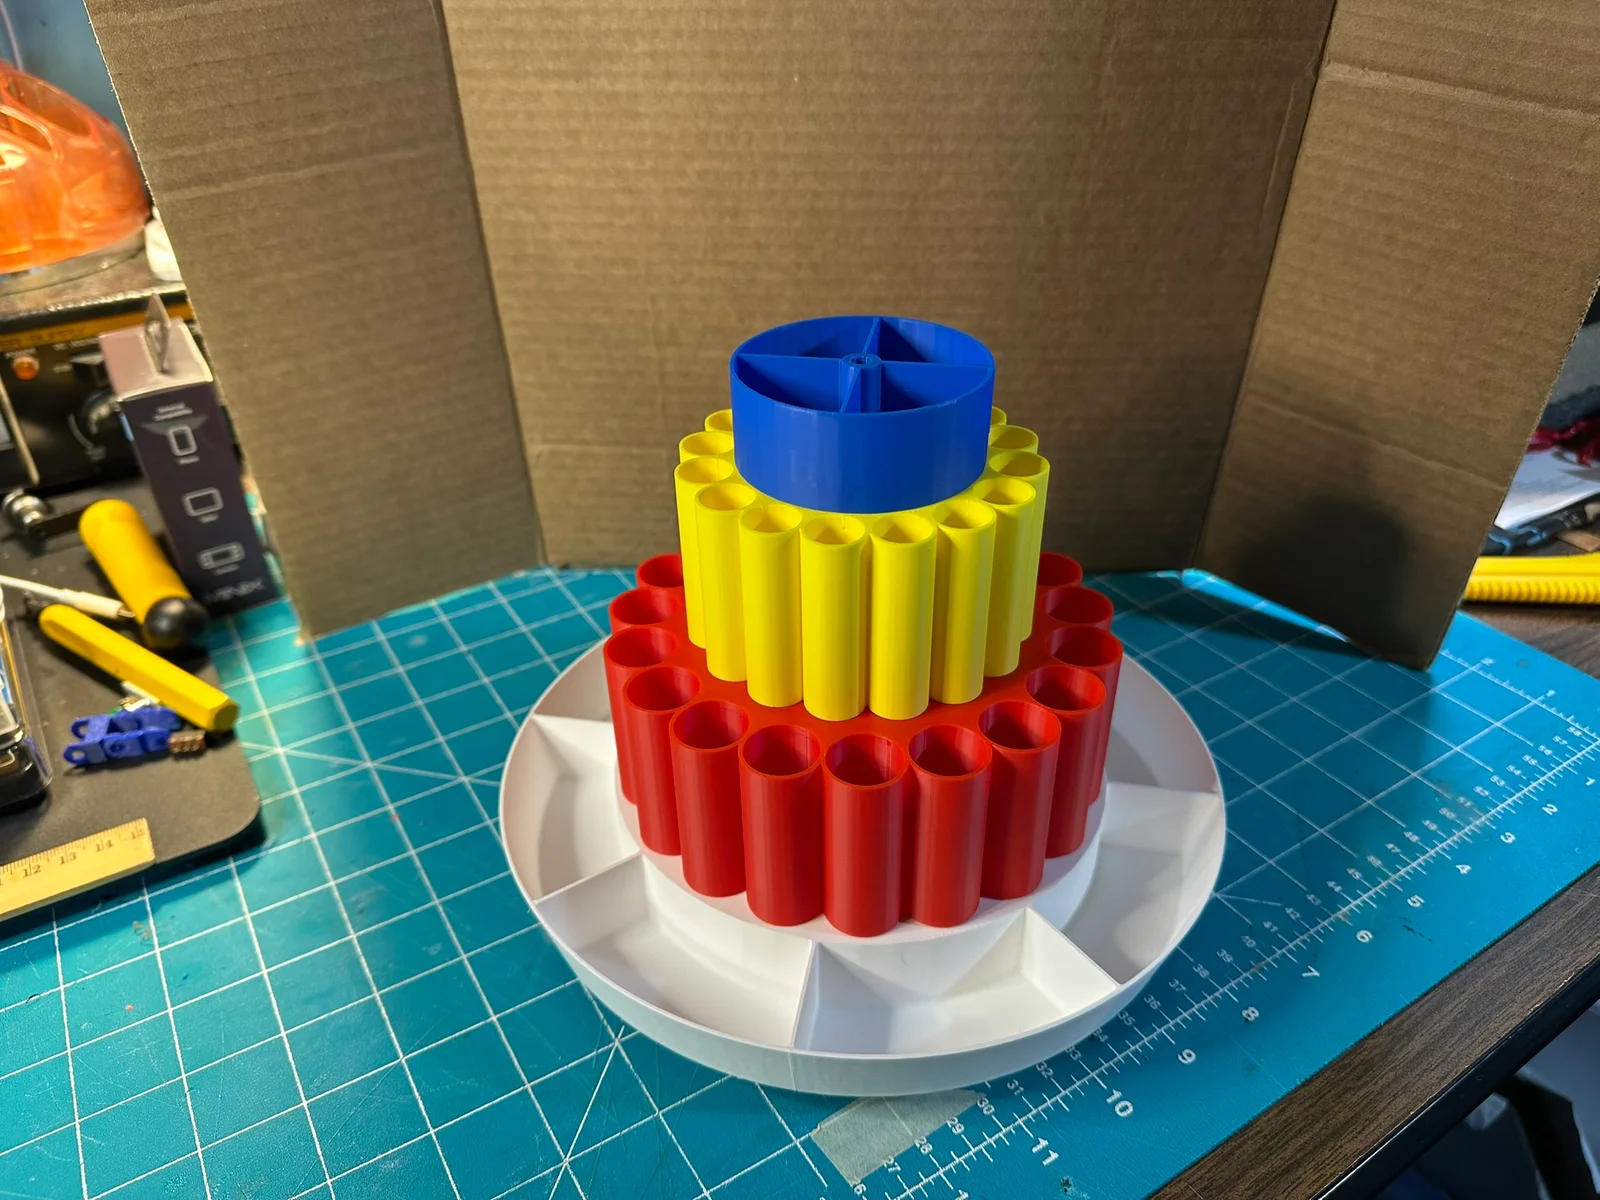
But the original upper section was a single piece. So, I split it into 3 tiers and added alignment / connector pins and sockets.
This modification allows printing in separate pieces and in different colors if desired.
I have also added 2 different size “plugs” for the round wells to block openings you don't want to use OR to prevent small tools from dropping into the deep holes. The plugs and tool sockets are optional.
I have also added optional pockets for the center openings if you don't want something to go all the way down inside the center well.
Printing Instructions:
The 3rd and 4th tiers are inverted in the 3MF file to reduce the need for supports
The 3MF contains "extra" plugs and center well pockets - print more or less as you like
I did enable tree supports when printing but, these were only needed on the overhangs from the alignment lugs
The top and bottom bearing races, bearings, cage, rivets and connector pins were all printed in PETG (I felt this would offer better wear resistance)
All of the tiers were printed in PLA+
Assembly Instructions:
Place the flat side of smaller top race against the bottom of the bottom tier and attach it with the 4 rivets
Place the bearing race cage in the top race with the tabs toward the top race
Fill the small pockets in the bearing race with the conical roller bearings - the bigger end shoud be toward the outer rim
Cover the assebled bottom tier, top race and bearings with the bottom race and screw in the center screw till it stops. Ensure that its fully seated but, don't over-tighten
Assemble the top three tiers with the alignment pins ensuring that the wells align with the tier below. You can use glue if you want to make this part of the assembly permanent. There is a small "goof" in the second tier bottom alignment holes - they're not deep enough. I remedied this by drilling them out with a 7/64 drill bit - a 2mm bit will also work
I hope you find this remix useful!
ByVC_DesignLikes721Downloads2.9K

 ByUpcrid3D_1585693Likes808Downloads2.1K

 ByWilko_SLOLikes935Downloads2K

 ByshoheiyLikes0Downloads429

 ByRobertoGalloc_356815Likes549Downloads1.8K

 ByTater_364200Likes486Downloads1.6K

 ByfifindrLikes709Downloads1.7K

 Bywhilex_1739192Likes644Downloads1.1K

 ByGi_TLikes801Downloads1.3K

 ByzeroflowLikes186Downloads1.2K

 ByMatthew_GhostLikes350Downloads942

 ByleonicLikes0Downloads1.4K