



Atomic Stack — Hệ thống hộc tủ và khay đựng mô-đun phong cách MCM
 ByGi_TLikes801Downloads1.3K
Build another version of this model.
Design Intent:
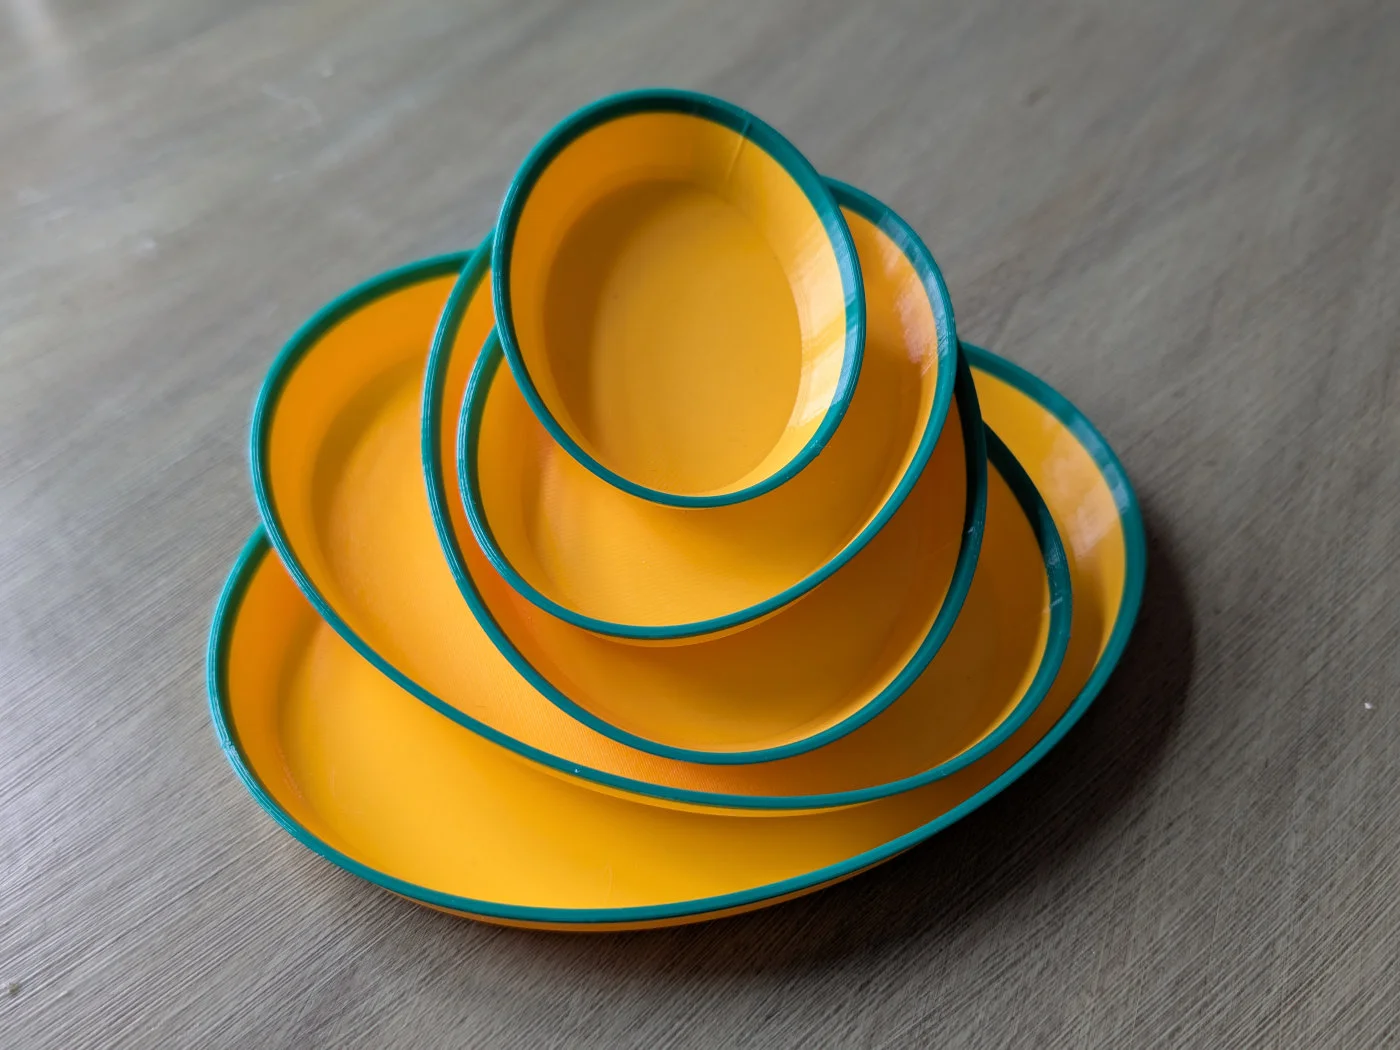
I’ve seen plenty of tray models online, but I struggled to find a set that looked "organic" enough for the living room while still being technically sound for the workshop. I made these because I needed a system that could handle two things: nesting different sizes inside each other to save space, and stacking identical sizes vertically when I'm in the middle of a project.
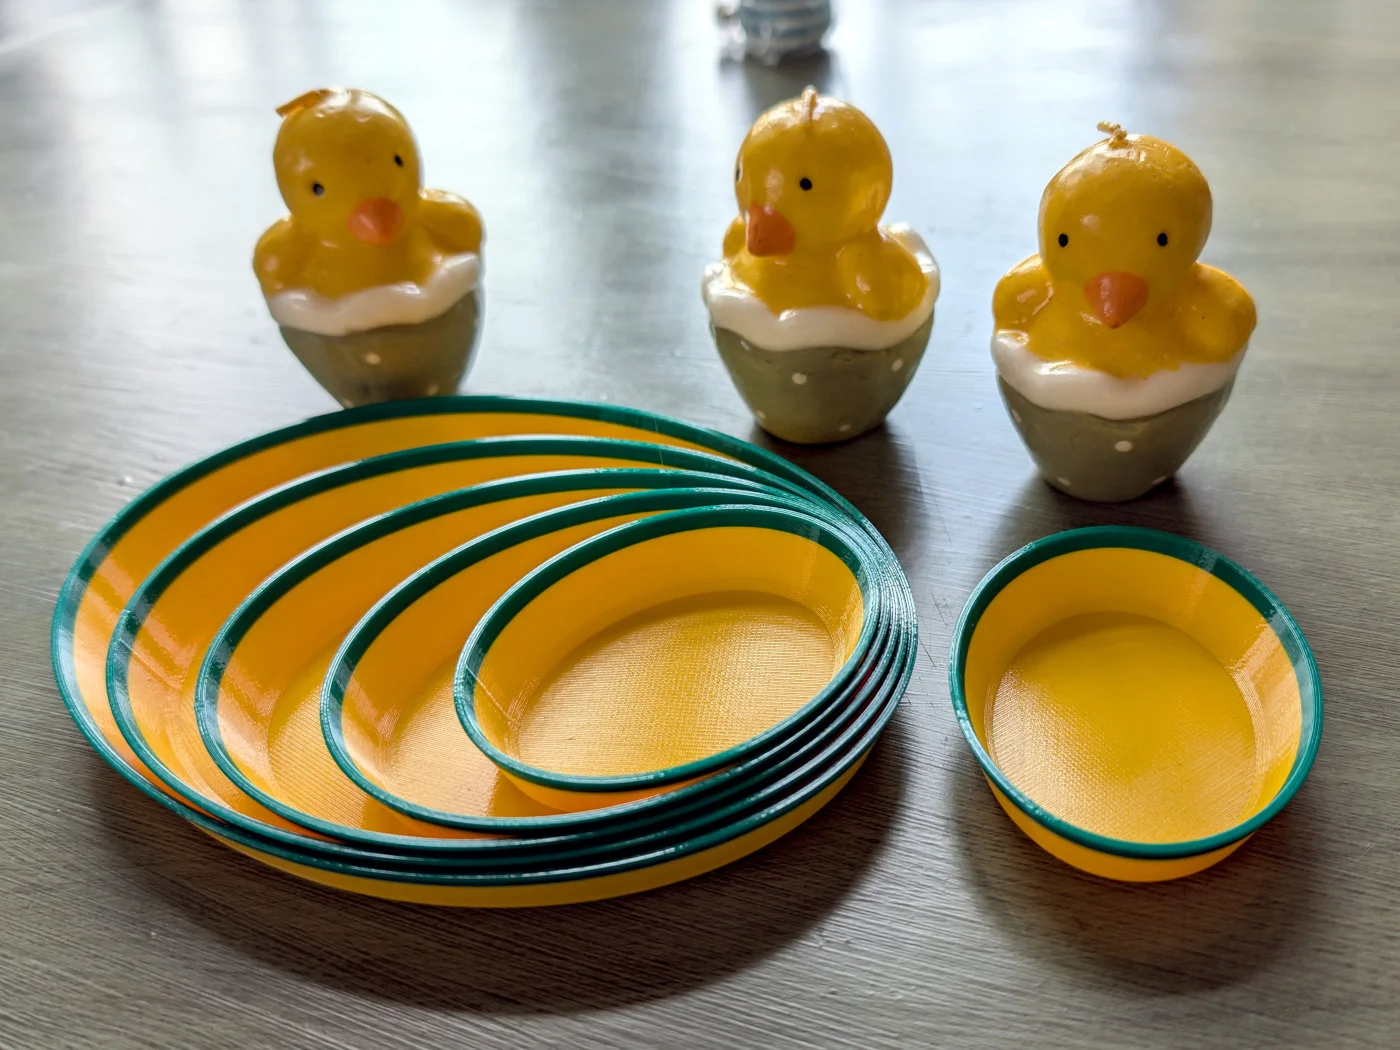
In the pictures shown, I use the trays for Easter decorations (printing in two colors, see print instructions), but the trays can be used for all small parts like screws, pearls, etc.
Technical Depth:
Dimensions: The set includes six sizes: 60, 80, 100, 120, 140, and 160mm. All have a height of 15mm.
Sizing Logic: The size refers to the footprint of the base. Since the sides are sloped (draft angle), the actual top opening is slightly larger.
Identification: I engraved the size into the bottom of every model. It saves a lot of guesswork when you’re digging through a drawer of printed parts.
Tolerances: I added a significant 45-degree chamfer to the bottom edge. This effectively eliminates "elephant’s foot" issues, ensuring the trays stack perfectly without requiring you to calibrate your first layer to the absolute micron.
CAD: Parametrically designed in FreeCAD 1.1 on Linux Mint.
Print Instructions:
Don't overthink the settings. I’ve engineered these to be "slice and go."
Profiles: Standard 0.20mm layer height with a 0.40mm nozzle works perfectly.
Infill: You don't actually need to set any. With standard perimeter settings in PrusaSlicer, the walls are thick enough that the slicer will just generate solid shells.
Material: I used PETG for the versions in the photos because I like the durability, but PLA is perfectly fine for decorative use.
Two-Tone Effect: To get the high-contrast rim shown in my prints, insert a color change (M600) at the 12mm mark. This isn't just for looks, a contrast rim makes the tray much easier to see on a cluttered workbench.
Usage Tips:
The organic curve isn't just for aesthetics—it makes it significantly easier to "scoop" out tiny electronic components or sewing needles compared to a tray with sharp 90-degree corners.
If you like my models, please leave a like, a make, or a rating... :-)
ByGi_TLikes801Downloads1.3K

 ByWilko_SLOLikes935Downloads2K

 Bydona3d_Likes456Downloads685

 ByGray_m4Likes36Downloads138

 Bymarketar_4049646Likes42Downloads140

 ByRobertoGalloc_356815Likes549Downloads1.8K

 Bydawid-ku-akLikes0Downloads105

 ByUpcrid3D_1585693Likes808Downloads2.1K

 ByshoheiyLikes0Downloads436

 ByfifindrLikes709Downloads1.7K

 ByMatthew_GhostLikes350Downloads943

 BymoonyxLikes0Downloads700