



Kẹp giữ sợi Filament
 Bytinx_1344834Likes1.2KDownloads6K
Build another version of this model.
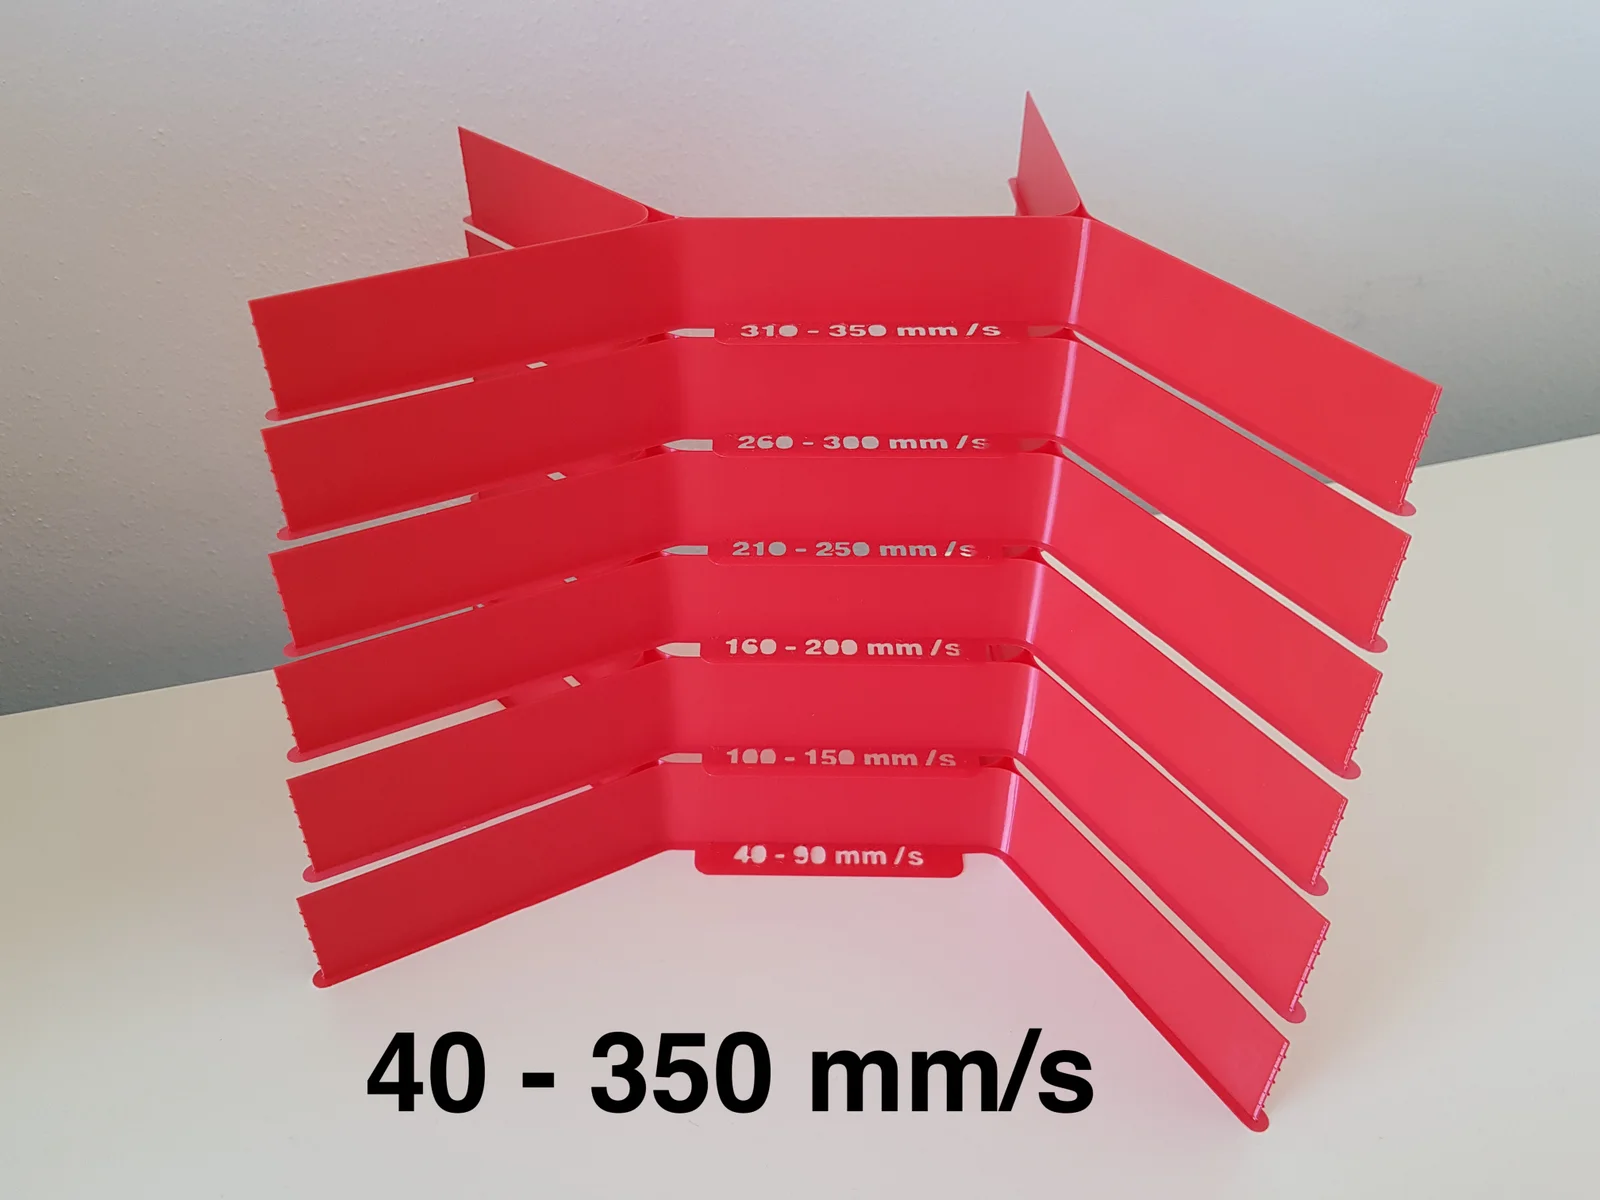
VFA (Vertical Fine Artifacts) test models for a wide range of Prusa Core One printing speeds from 40 to 350 mm/s.
There are notches 5 mm apart at the edge of the models, marking speed changes in 10 mm/s increments.
To observe VFAs, you need to use shiny filament and achieve glossy prints.
Make sure silent mode is turned off, as it limits printing speed.
G-codes and PrusaSlicer projects are prepared for PLA using a 0.4 mm high-flow nozzle. The first layer is printed at 230°C, while the rest of the layers are adjusted to:
High printing speeds (high volumetric flow rates) usually require a higher nozzle temperature, as the melted plastic absorbs heat and acts as a nozzle cooler. Properly melted shiny PLA should remain shiny after printing. If your prints are not coming out glossy, you have two options:
Some printers hide VFAs by using low printing temperatures, which result in matte surfaces. However, be aware that matte prints from shiny filaments often indicate weak layer bonding and fragile prints.
VFAs may appear only at specific speeds, print angles, and directions. Unlike similar models, these are designed for optimal visual inspection of prints. They are also large enough to accommodate high speeds, minimizing the impact of acceleration and deceleration zones.
How it's made
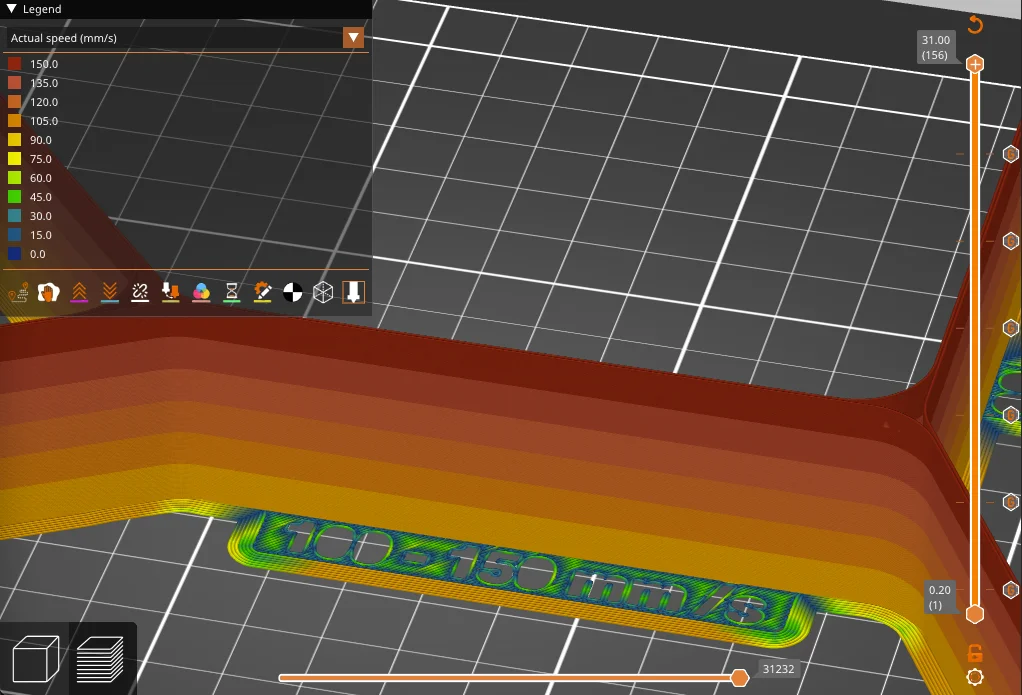
Changes in printing speeds are prepared in PrusaSlicer with inserted M220 G-code at specific layers that adjust the feedrate. For example, in the 40-90 mm/s file, the feedrate is set to 40%, 50%, 60%, and so on, of the 100 mm/s external perimeter speed. Files for speeds above 200 mm/s are based on a 200 mm/s external perimeter speed.
I was inspired by other tests for slow printing speeds, but I created everything from scratch.
Bytinx_1344834Likes1.2KDownloads6K

 ByBretDorssers_4183352Likes19Downloads50

 ByreddLikes216Downloads2.2K

 ByJasonOlliff_519145Likes241Downloads2K

 By3DPDP_3140983Likes2Downloads15

 Byarhi_585078Likes64Downloads537

 BydjcodyLikes1Downloads5

 ByfilamentalistLikes71Downloads108

 ByHanzo3dLikes155Downloads411

 ByGeek5DLikes147Downloads482

 ByBrokentooth_designsLikes23Downloads403

 By3DSourcererLikes48Downloads374