



canon a-1/ae-1 battery door and latch
 BycharlieLikes0Downloads116
Build another version of this model.
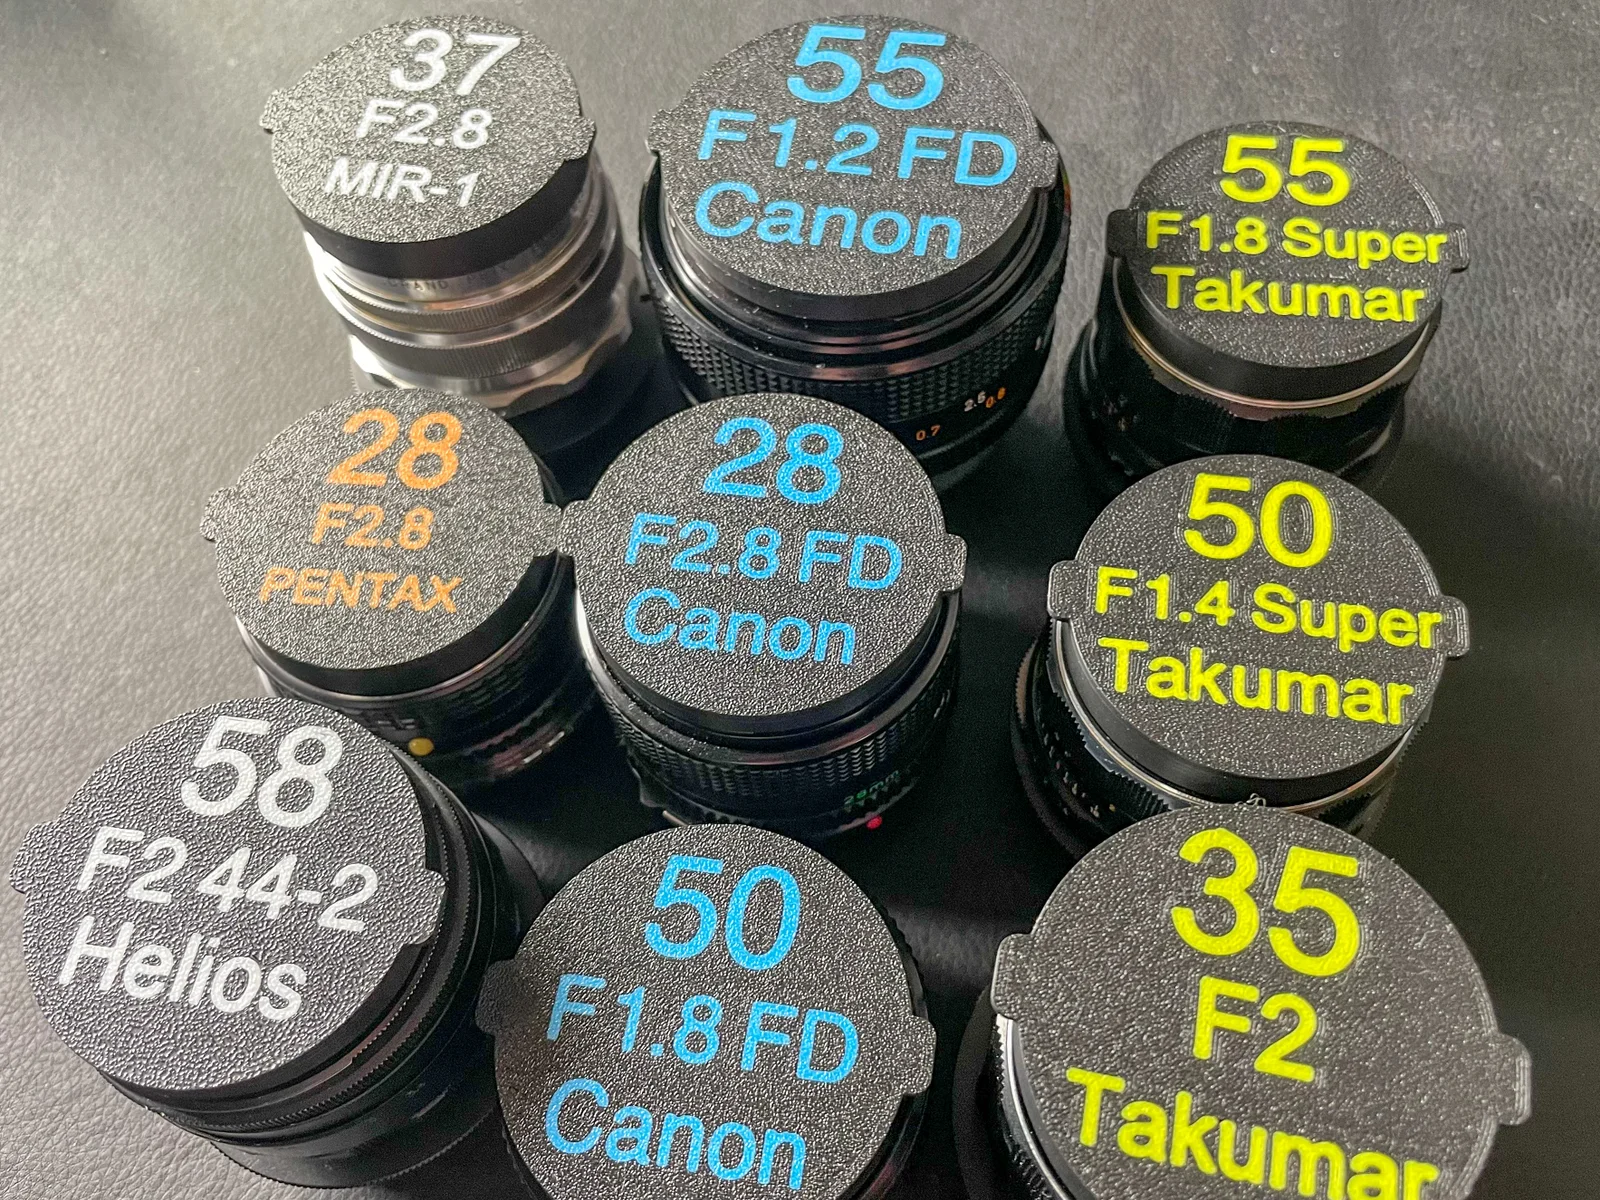
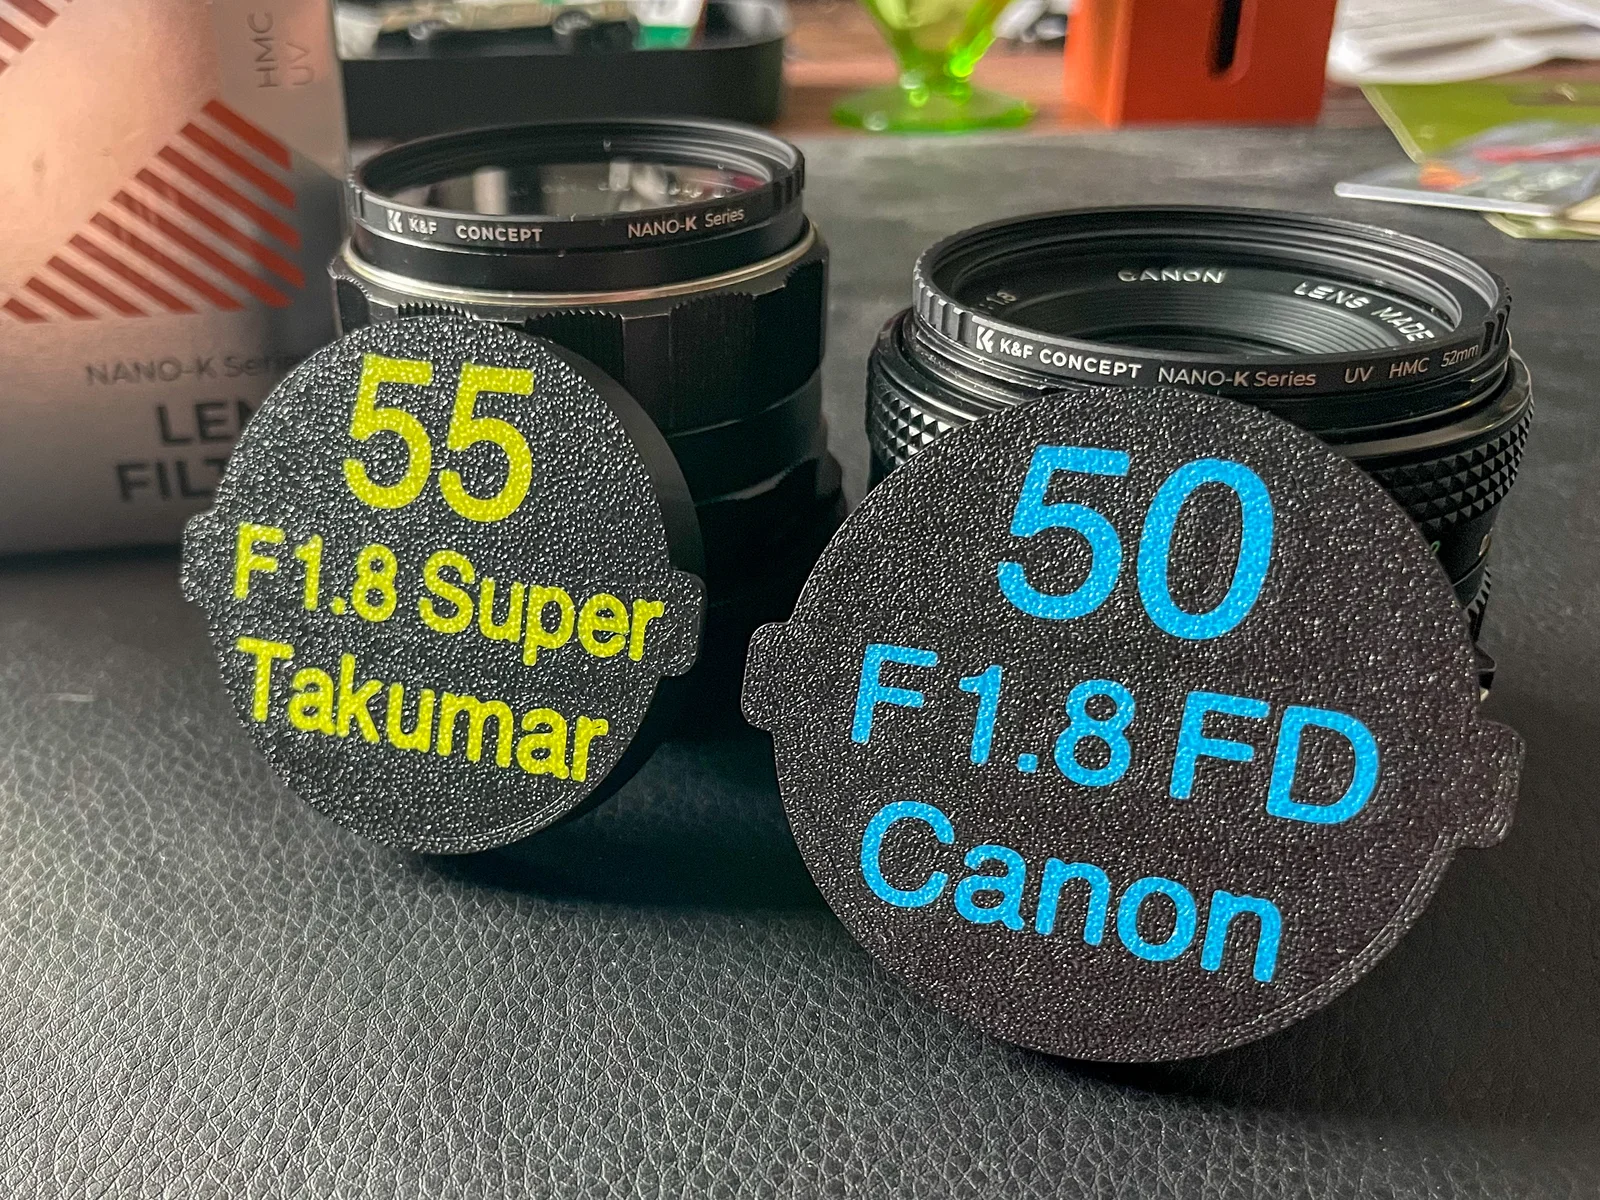
When organizing my vintage lenses I struggled to find lens caps that met my needs, so I designed my own. My goal was to make a lens cap that was push-on, had space to add in large labels, had tabs for easy removal, and also gripped my lens filters for a tight fit. More specifically, the modern K&F Concept UV filters with ridged edges that I have on all my lenses.
Included Sizes: 40.5mm, 42mm, 49mm, 52mm, 55mm, 58mm, 62mm, 67mm
First and foremost, these are Push On caps. They're not super fancy with moving parts, they're as dead simple to print and use as possible. I'm not a fan of the modern ‘squeeze’ mechanism caps; they seem to fall off easily in my camera bag.
Second, to easily get the caps off I added two grab tabs.
Third, the bottom is flat and thick enough to add in two layers of text if you want. It's also thick enough for solid protection if your lens gets bumped.
Forth, there are pressure ridges inside. Why more people don't do this baffles me. This allows the cap to grip the lens body. I use K&F Concept UV filters on all my lenses and they have a ridged outside edge. Easy to get a grip on BUT they don't tend to play nice with push on caps. These caps fit them like a glove
Fifth, I've included a “tall” and a “short” version of each cap size. On many of my vintage lenses there is ample room for the “tall” version, but about a third of my vintage lenses lack that extra space. More or less the “short” version is the same height as the K&F Concept filters. I do recommend that if you use the taller version whenever you can.
I use Bambu Studio to add text to the bottom of my caps. Use the following setting:
Thickness: 0.4mm (but 0.6 also works if you need it)
Depth: 0mm
Operation: Modifier
If you've never added text onto a model. Just rotate your view so you're looking at the bottom of the cap, click on the cap, then click the add text icon (which looks like a capital T icon). Add in your text, make it BOLD, and then play around with the size until it works for you.
If you're following my approach of the focal length, the F stop value, and the manufacturer name, you'll need to do each line of text individually. Just follow the above steps three times.
When setting Thickness, a layer height of 0.4 will be the most efficient as your machine will will only need to change colors twice; once to text color and once to body color. That's assuming you're printing at a 0.2mm layer height.
I used Bambu Basic PLA at a layer height of 0.2mm. No need for a purge tower or supports.
Typically these take 20-25 minutes to print. Print several at once to save time with the color change.
You may need to slightly increase or decrease the size of the caps depending on the filter you're using, or if you're not using a filter.
Please use, remix, and modify these caps. If you're interested in the Gridfinity holders seen in some of the pictures I also have those posted on my account.
BycharlieLikes0Downloads116

 ByckthLikes148Downloads2.4K

 ByvideograndpaLikes36Downloads286

 ByNK01_3850118Likes13Downloads215

 BynasikLikes0Downloads273

 ByBaGooNLikes64Downloads142


 ByjoranLikes0Downloads213

 ByJaronLikes310Downloads1K

 Byw3rN42Likes127Downloads935

 ByMandicReallyLikes0Downloads137

 ByTomDDLikes89Downloads576