
Giá đỡ cuộn nhựa Creality Space Pi Spool Holder
- Downloads
- 441
- Likes
- 86
- Views
- 1,885
- Remixes
- 0
- Comments
- 0
Files 8 4.4 MB
- Screw_1774172678.stlSTL · 902.2 KB
- Nut_1774172679.stlSTL · 421.9 KB
- Inner-Spacer_1774172680.stlSTL · 4 KB
- Wedge_1774172680.stlSTL · 41.4 KB
Make a variant with AI
Build another version of this model.
Details
- Model ID
- #261078
- Category
- Máy In 3D
- Published
- License
- Creative Commons — Attribution
Description
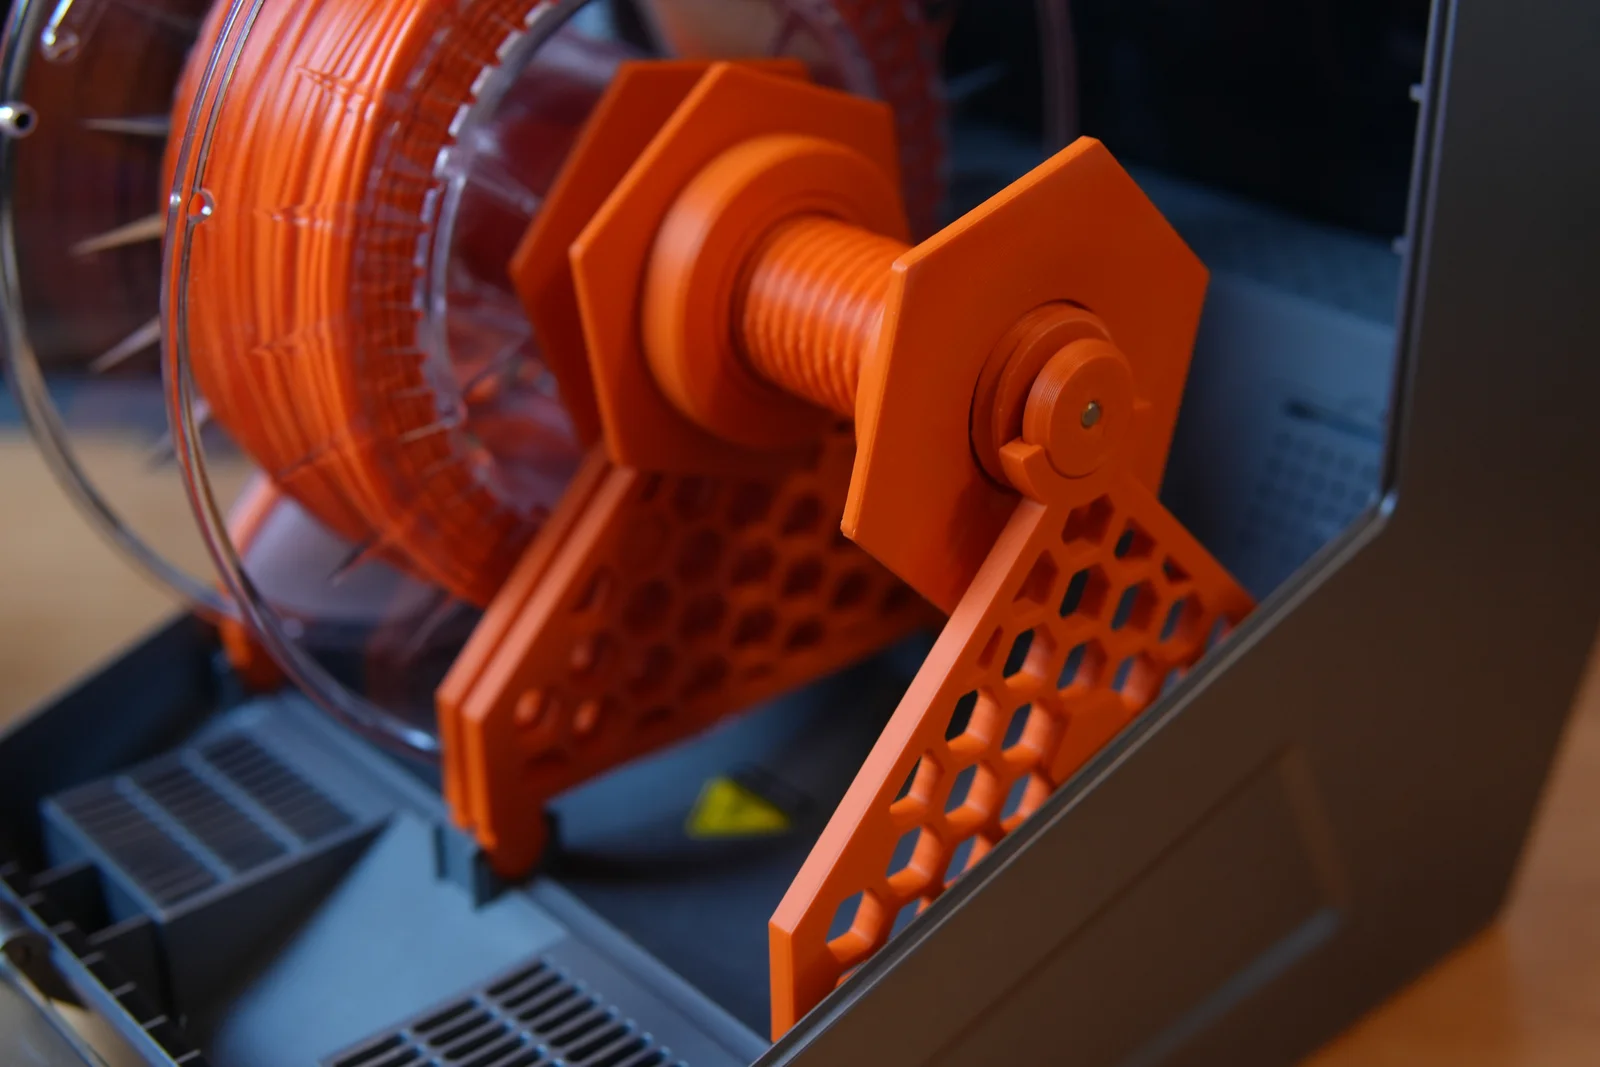
Space Pi is great, but it has two major problems regarding spools:
- Spools are tipping when become light, especially in case the spool itself is cardboard.
- Noticeable rolling resistance of stock shafts makes it hard to print with flexible materials like TPE or TPU.
This solution solves both problems.
- No extra hardware required. Print reuses original bearings and shaft.
- Single design for Space Pi and Space Pi Plus.
- Support for any spool center bore - central washer, that aligns the spool, can be replaced to fit your spool needs.
- Support for all spools widths (that were initially supported by the box).
- Easy spool changes.
Parts list
Following amounts required for assembly of single holder (Plus version requires two holders).
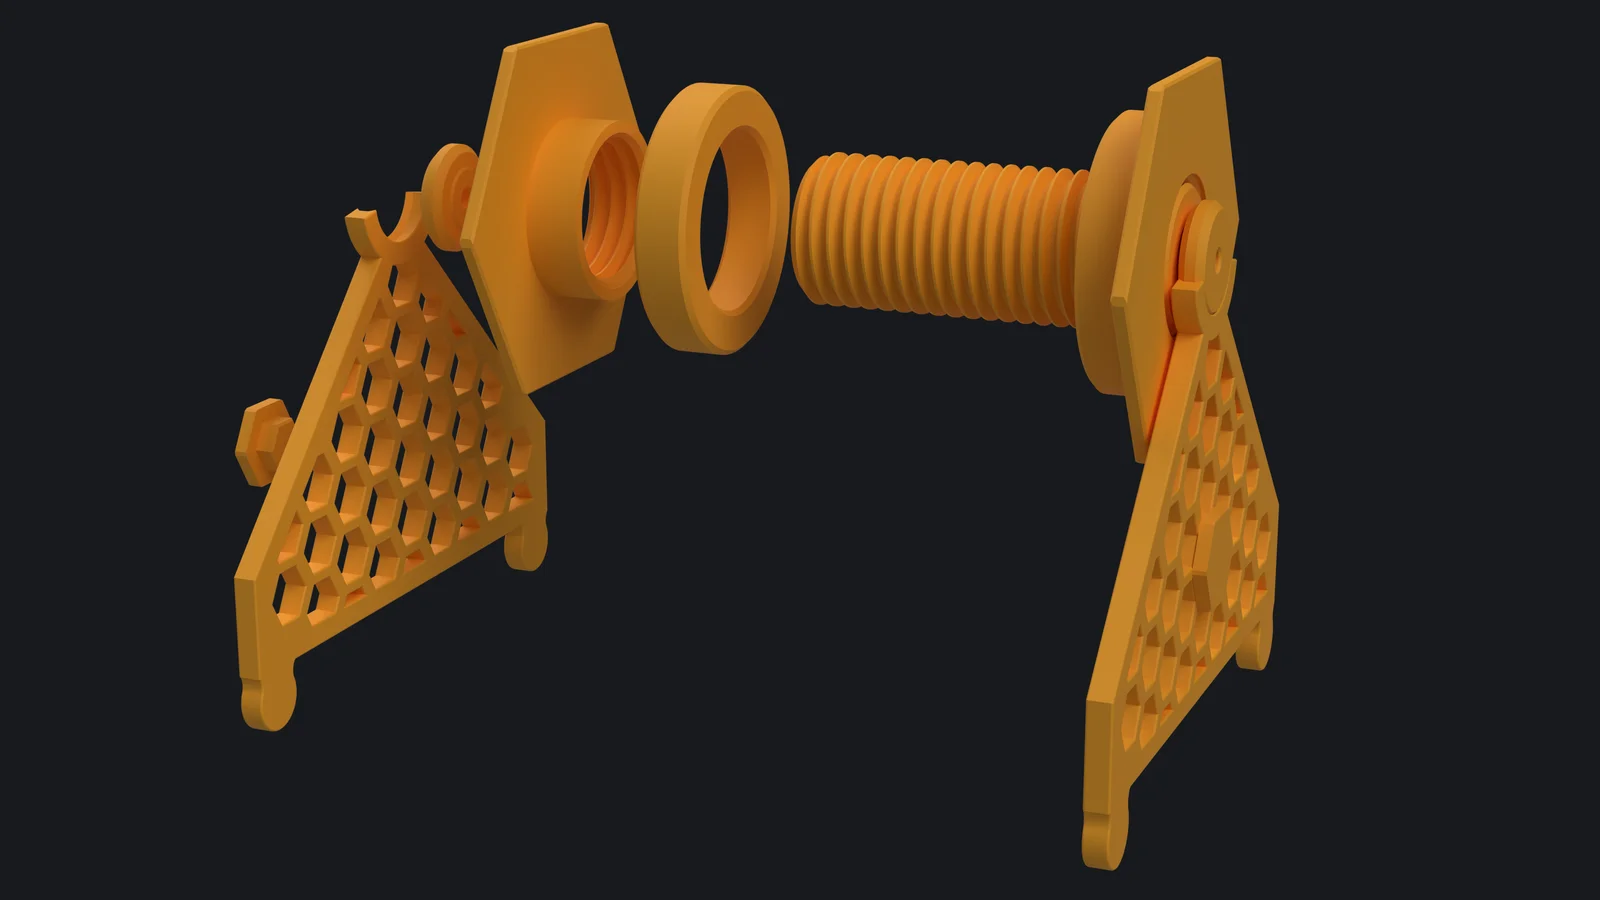
- 2 stands.
- 2 wedges.
- 2 nuts.
- 2 washers.
- 1 screw.
- 1 outer spacer (2 in case of non-Plus version).
- 1 inner spacer (0 in case of non-Plus version).
Printing
Internals of the chamber can heat up to 70 degrees therefore it is necessary to print everything with something more heat-resistant than PLA, theoretically PETG should suffice.
I've printed with:
- ASA.
- 4 walls and top/bottom layers.
- 15% gyroid infill.
- No supports.
As print relies on the parts clearances and some parts are press-fit. Personally i would recommend printing everything in singular amount, test fit and then proceed to seconds parts.
Assembly
- Print all the parts =)
- Remove stock bearings and shafts.
It is possible to remove them bare hands, but pliers makes process easier. - Press bearings into the slots on both edges of the screw.
- Press shaft into the wedge. Flat side of the wedge must be facing outside. Make shaft edge flush with the face of the wedge.
- Insert the shaft into the bearings of the screw and put second wedge on, applying same logic as before.
After installation screw should freely rotate on the shaft. - Press washers onto the nut.
- Assemble center part.
- Insert outer spacers in the center of the stand.
UPD: Since in the middle position outer spacer may interfere with the lid - you may put spacer deeper into the dryer. - FOR PLUS VERSION ONLY
Insert inner spacers into the stand that will be in the middle of the box, so it ensures spacing between two holders. Actual position of spacers is not very important. You can install both spacers on one stand or one per stand, on your choice. - Put stands in the place of bearings. Stands itself are symmetric, so there is no difference which goes where. Only thing that should be considered is the placement of spacers.
- Grab a drink of your choice to celebrate new life of the box =)
Print spec
- Formats
- stepstl
- Model files
- 8
- Total size
- 4.4 MB
- Largest file
- 2 MB
0 comments
You may also like 12 models
See all-

-

-

-
New -
New -

-
New -

-

-

-

-