


Kẹp giữ sợi Filament
 Bytinx_1344834Likes1.2KDownloads6K
Build another version of this model.
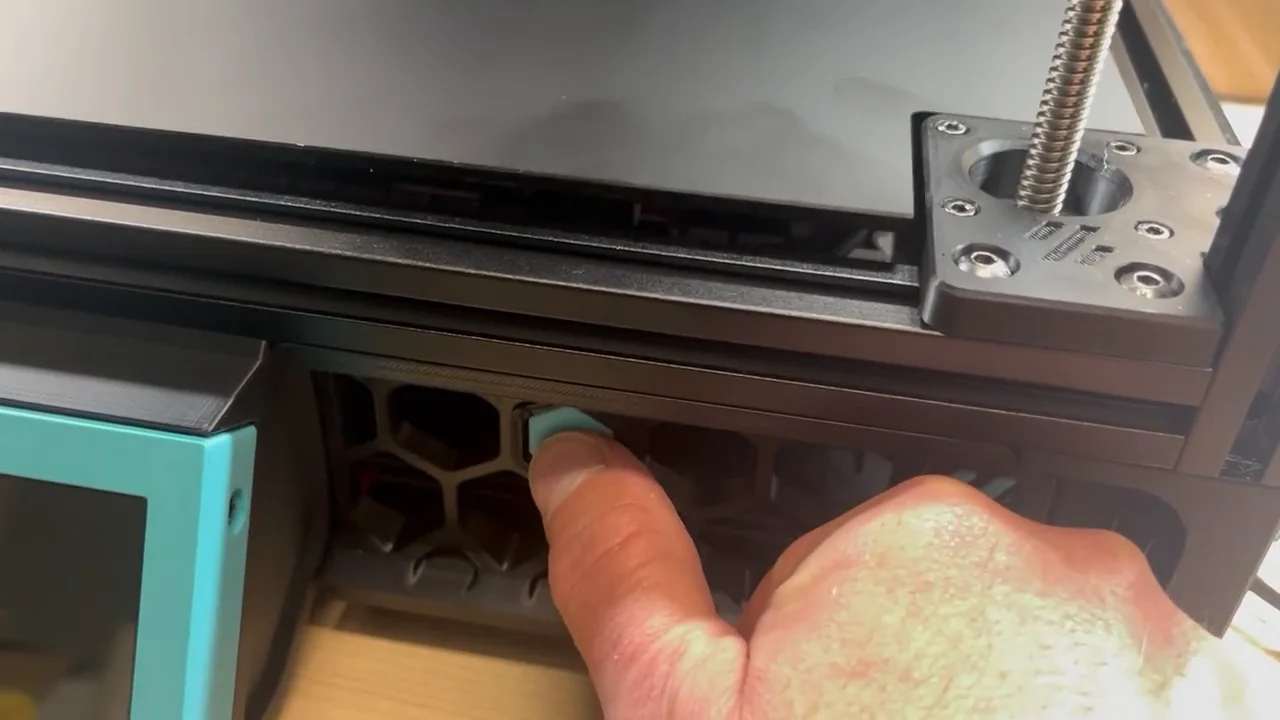
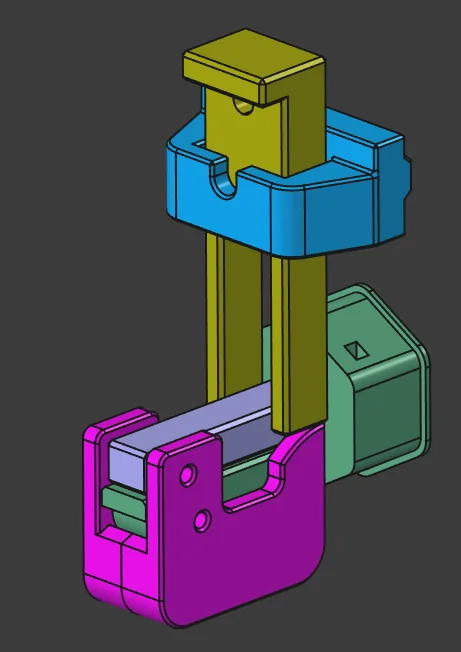
This contraption makes it easy to get the deck panel out of a Trident with the inverted electronics mod without attaching a handle to the panel. The push-button mechanism provides enough lift to grab the panel and lift it out the rest of the way.
I used ASA filament with the standard Voron print settings. All files are in the correct orientation. The skirt_insert.stl file needs support. Make sure to either use manual supports or check the “On build plate only” option, otherwise the slicer might generate supports for the pivot hole near the top. It might be beneficial to print this part a few degrees hotter than normal for better layer adhesion.
After printing, make sure that a piece of filament can be pushed into the pivot holes in the two halves of the cam. Open the hole with a small drill bit and deburr as necessary. Then, glue the two halves of the cam together with a drop of super glue. Glue the button onto the push rod with a drop of super glue, making sure you do not accidentally glue in the end that has the hole on the side.
The skirt insert is secured with two small pieces of filament on the back side. I recommend heating the filament with a lighter and then pushing it against a flat surface to form a flat spot similar to a nail head. This ensures that the filament cannot fall through the hole.
After installing the skirt insert, attach the cam by pushing a short piece of filament through the bottom hole on the cam and the corresponding hole in the skirt insert. Next, attach the push rod with another piece of filament. I recommend not trimming the filament so that it is easy to disassemble in the future. Finally, loosely attach the extrusion mount with an M3x8 screw and a roll-in nut. Insert the lift bar and align the mount so the fork is centered on the push rod and then tighten the mounting screw. The finished assembly should look as pictured below.
Update 5/25: Uploaded complete assembly step file that includes the lift bar and extrusion mount. Also made small changes to the cams. The original ones had a duplicate control point in the spline which prevented chamfering the bottom. The new cams now have a small chamfer on the bottom, but work exactly the same as the previous version.
Bytinx_1344834Likes1.2KDownloads6K

 Byprusa-researchLikes0Downloads2.7K

 Bydet-manLikes0Downloads172

 BydalleLikes0Downloads148

 Byarhi_585078Likes64Downloads544

 ByHanzo3dLikes155Downloads417

 BydarienLikes0Downloads1K

 ByGeek5DLikes147Downloads490

 ByBrokentooth_designsLikes23Downloads412

 Byla-cave-au-chatLikes0Downloads968

 Bycrawler-3903250Likes0Downloads909

 ByvertigomakesLikes0Downloads564