



Kẹp giữ sợi Filament
 Bytinx_1344834Likes1.2KDownloads6K
Build another version of this model.
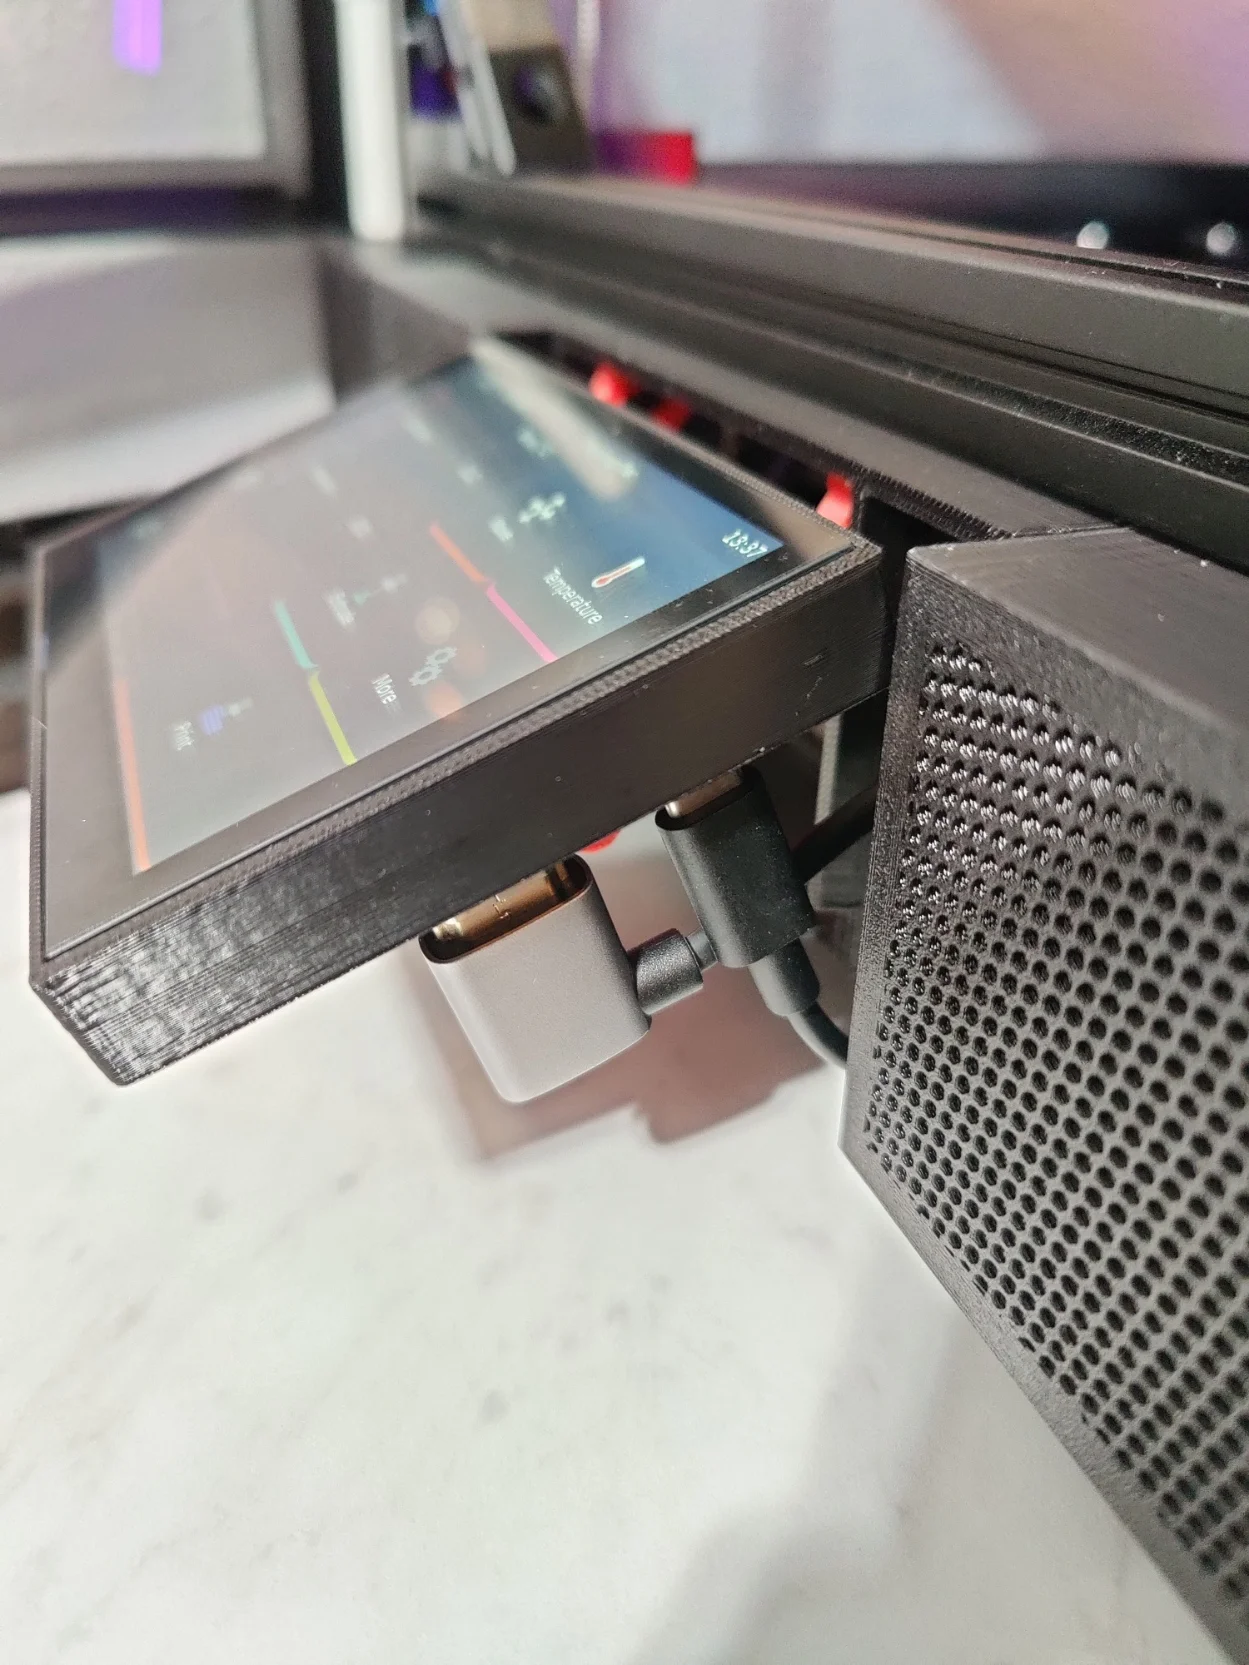
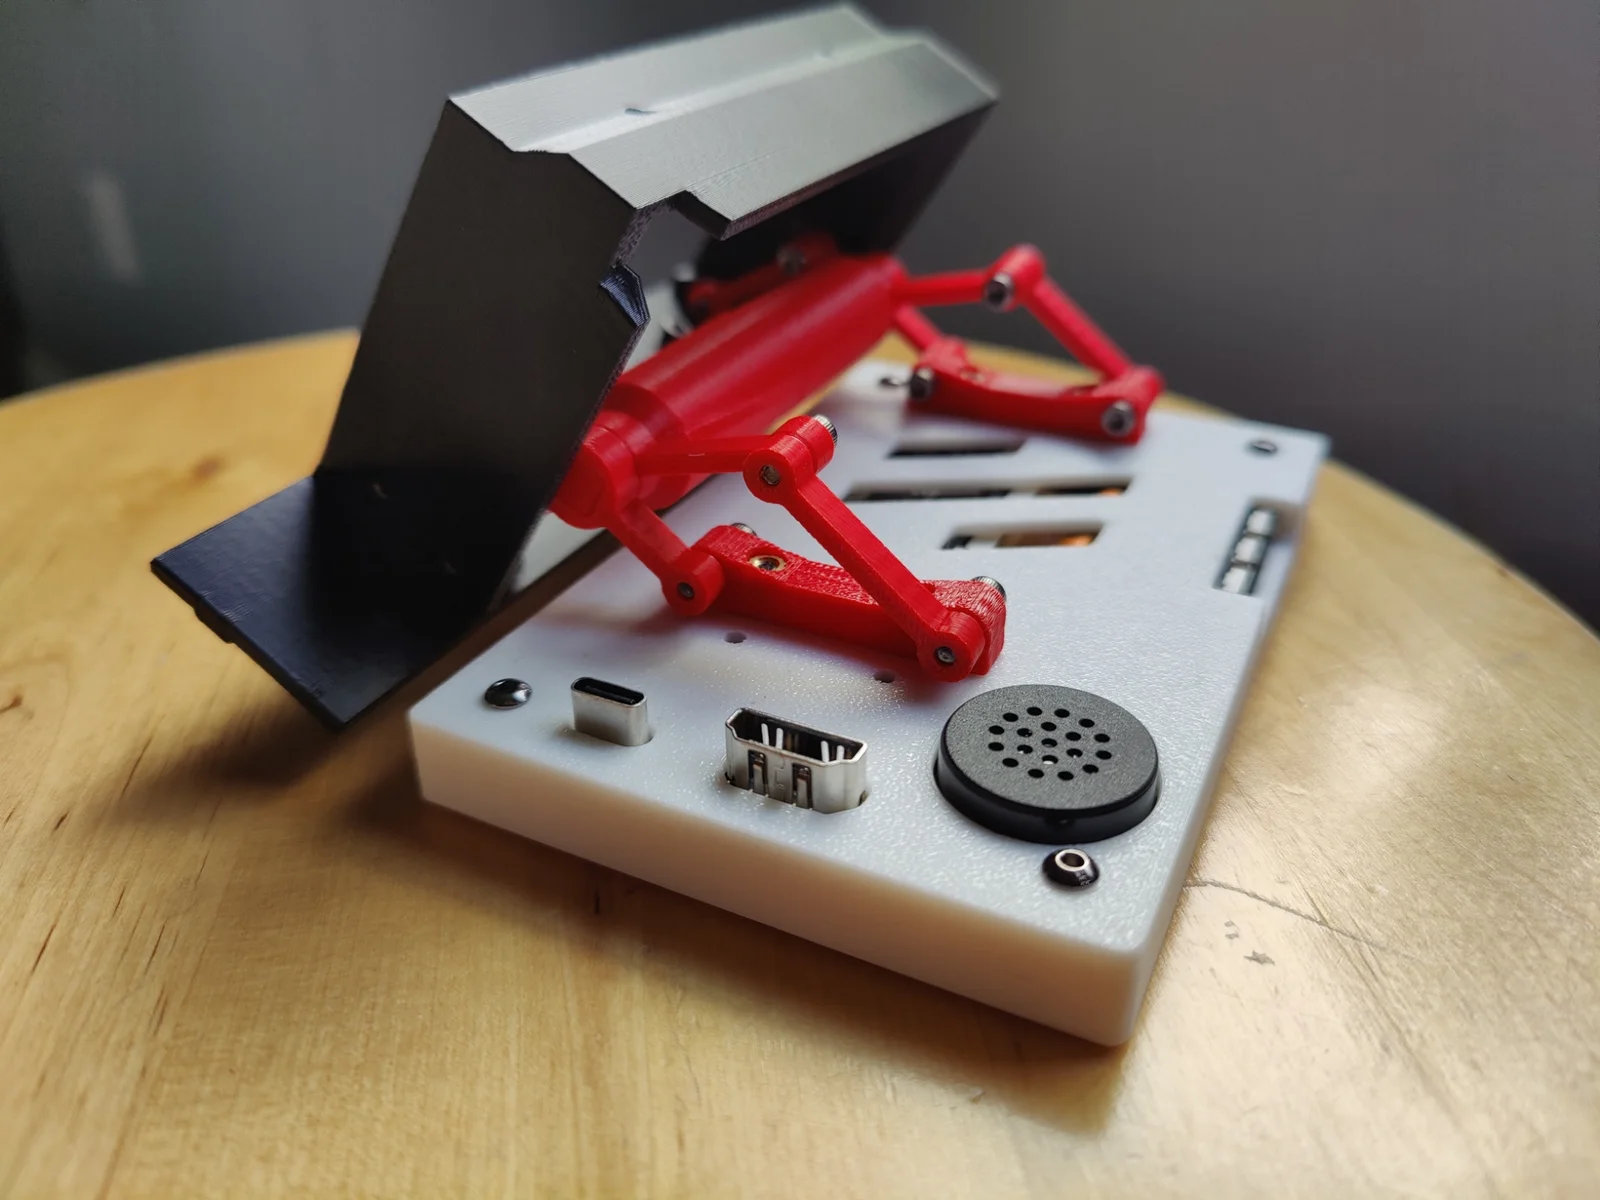
This is a folding mount that allows you to change the angle of the BTT HDMI display or collapse it flush with the frame when using Flat Mesh Skirts on your Voron Trident.
The hinge uses a novel constant friction design to hold the screen at any angle. The screws are not responsible for adding/removing any rotational friction.
This was designed for use with a Siboor Voron Trident AWD 300mm and modified Flat Mesh Skirts. This mostly means the hinge will only provide the correct motion for a 2020 frame Trident with ClickClackyDoor and will only fit in between the modified skirts. I have only provided files for the 300mm variant of the Flat Mesh Skirts because that is what I have. For other sizes you will need to modify the front skirts yourself and remove the notch the screen would have normally sat in.
Note: Links are just to items I bought personally for this project.
Part
Quantity
Comment
Link
m3x10
12
SHSC or BHSC
m3x6 BHSC
4
For attaching screen to case
m3x8 BHSC
4
For attaching screen case to screen mount - m3x10 BHSC would also work
m3x16
4
SHSC or BHSC - for attaching hinge to screen mount
HDMI 90 degree to micro HDMI
1
90 degree must point up towards the frame to clear the electronics panel
https://www.amazon.com/dp/B0CMQJMX2G
USB C to USB A
1
Must shave down screen side connector for clearance, see pictures
2x need 2 copies printed.Just follow Hinge Combined.3mf or the images above to assemble.
Please note that screws will be threading directly into plastic; take care not to over tighten screws. The screws are not responsible for adding/removing any rotational friction.
The sides of linkages that were printed touching the build plate should mate together for the smoothest operation.
Short Link Frame Side - 2x.3mf has a small tab on one of the ends, this end should attach to the frame. You can break off the tab afterwards.
The Internal Nut - 2x.3mf should slide, with some friction, along Axel.3mf.
The HDMI cable cannot stick straight out otherwise it will collide with the electronics panel. Using the suggested cable avoids this problem but creates another smaller issue, the HDMI now collides with a standard USB C cable.
If using a standard USB C cable, one side of the connector needs to be shaved down to lessen the stress on the screen's USB C and HDMI ports due to the connectors colliding. Use a sharp knife and slowly take off as many layers as you can without breaking the connector. See the images for an example.
If you do not want to do cut down the USB C connector you'll need some kind of low profile cable. Something like this should work but I have not tested this personally.
Bytinx_1344834Likes1.2KDownloads6K

 Byprusa-researchLikes0Downloads2.7K

 ByAnthonyDouri_1604724Likes24Downloads224

 Bydet-manLikes0Downloads175

 Bygummiegecko8477Likes0Downloads167

 BydalleLikes0Downloads149

 Byarhi_585078Likes64Downloads545

 ByhartkLikes59Downloads119

 Bypanda-studioLikes0Downloads256

 ByPrintStructorLikes0Downloads134

 ByHanzo3dLikes155Downloads417

 BydarienLikes0Downloads1K