



Ốp lưng cho Samsung S22 Ultra
 ByckthLikes148Downloads2.4K
Build another version of this model.
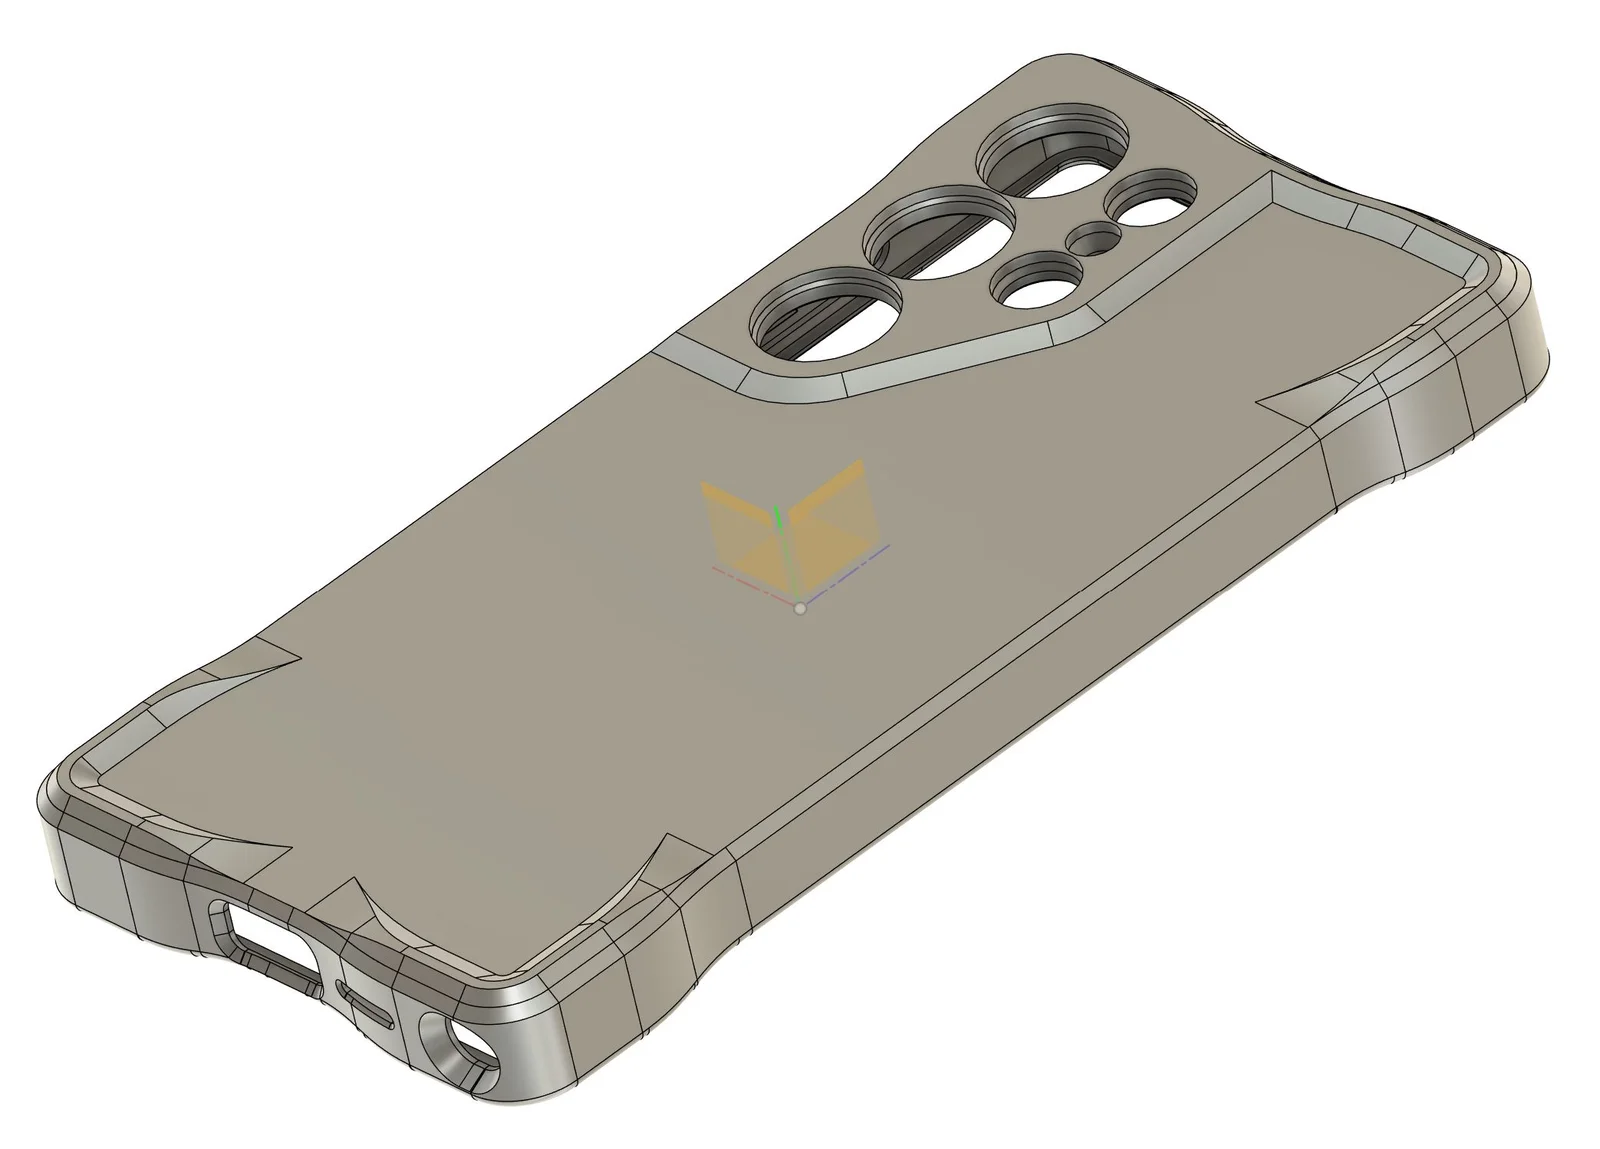
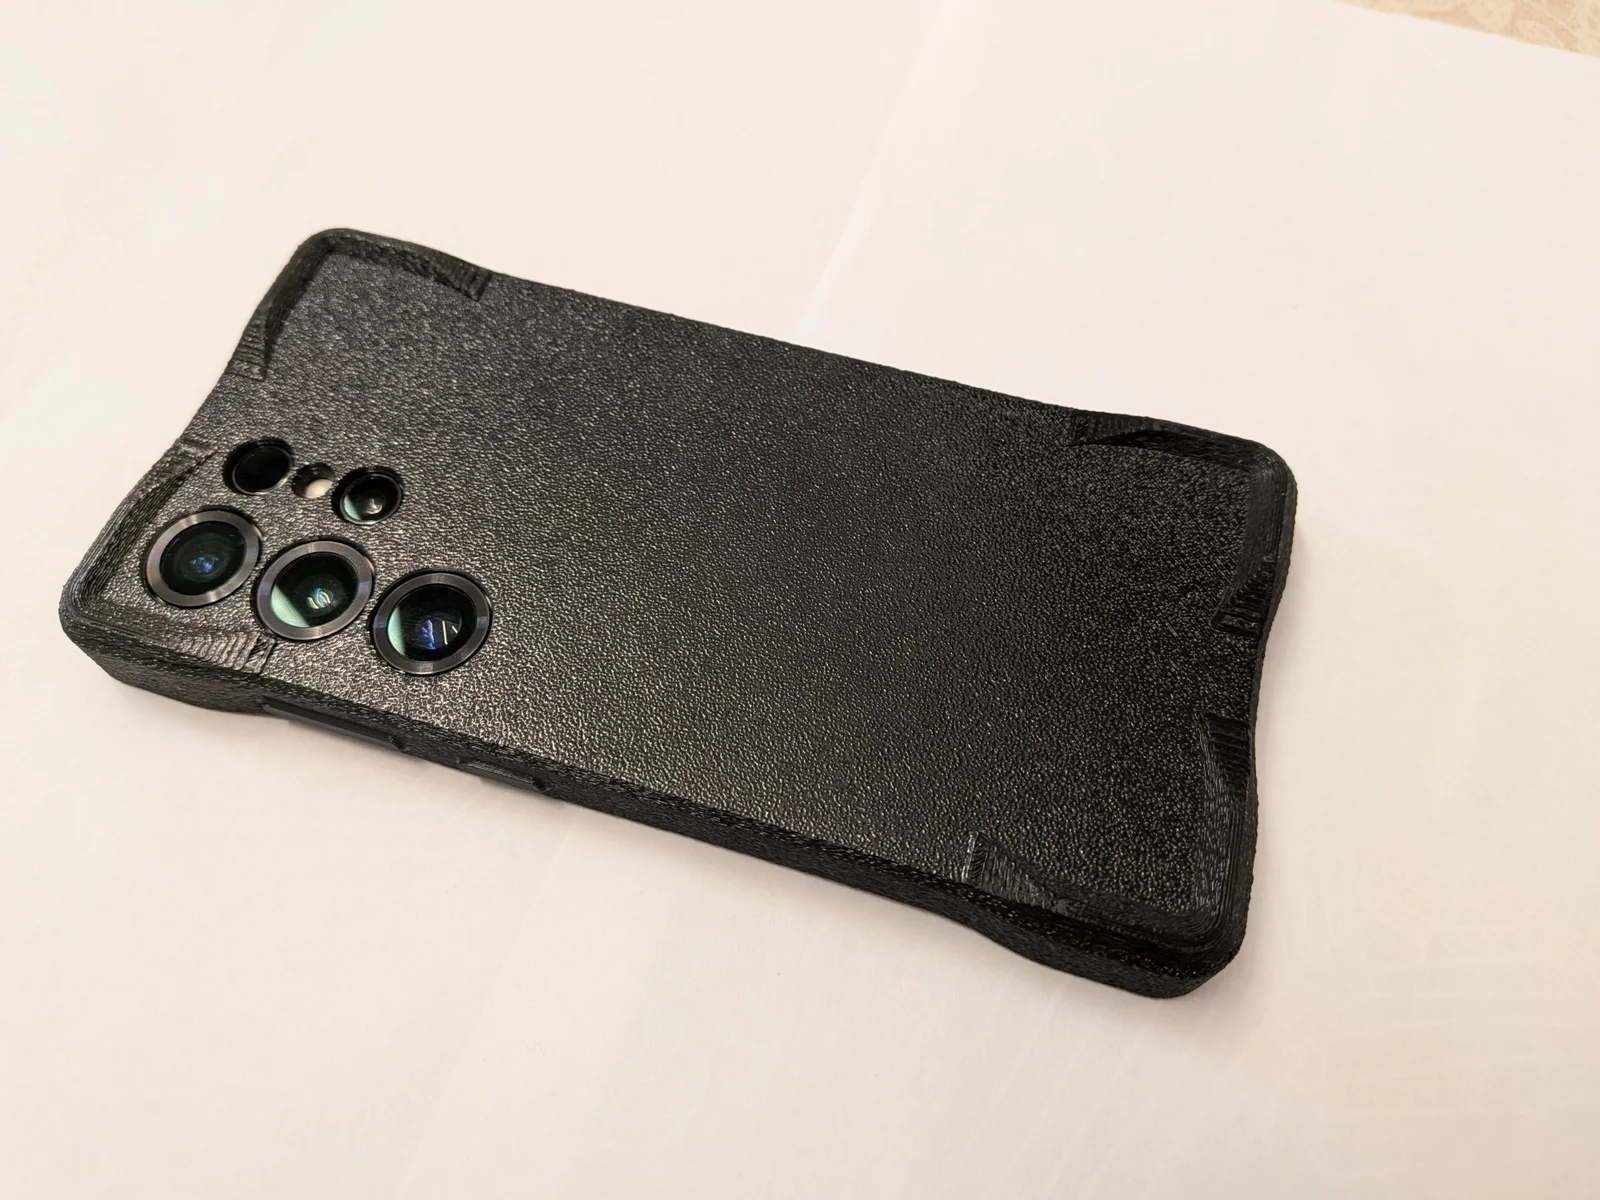
I designed this case for the Samsung Galaxy S25 Ultra to be drop resistant with minimal bulk.
Features:
Energy absorbing corners
Raised edges and corners so the phone can be laid on the screen
Sunken camera lenses
Lays flat on both sides
Optionally additional back corner raisers/ camera bump can be added for extra protection on the back
Qi2/Magsafe compatible (magnets/steel can be inserted)
Responsive buttons
The idea is to thicken the corners but leave them mostly hollow and use infill structure as energy absorbing "crumple zones":
The models include variants that are named with "qi2 magnet" and "qi2 steel" to support the following inserts:
magnetic ring:
https://aliexpress.com/item/1005006521276078.html
steel ring:
https://aliexpress.com/item/1005006994459890.html
Add a pause to the print on the layer that the qi2/Magsafe pocket will be bridged to insert the inserts of your choice.
Tip: I recommend using a color change and not a pause since TPU is oozy and the nozzle will loose priming. When doing a color change - the printer will prime the nozzle before continuing the print.
I initially used the magnets since they make it easy to align with peripherals but they cause a little interference with the S-pen which annoyed me (I use the pen a lot more than I use the Magsafe attachments) so I made the steel version (doesn't self align but is more than strong enough).
Tip: if you found a different qi2/Magsafe inserts that you want to use - you can make a model of it load it to the slicer with the standard case and set it to negative volume. or send me details and I'll add another version...
I'm printing the case on a textured sheet and using fuzzy skin (though with finer setting than the default) to have a somewhat consistent surface finish. if you also would like to do it - I recommend using paint-on fuzzy skin and use smart fill to only do it on the outside of the case.
The back of the phone is protected as it is with the basic case and the camera lenses are sunken a little under the case's surface. For those who want extra protection and to have the camera lenses higher away from the surface when the phone is on it's back - you can print corner extensions or a camera bump on the back of the case.
Note: camera bump can't be used with the qi2/Magsafe as it will interfere with the accessories placement.
Note 2: the cylinder on the side in the model is used as a priming tower to prime the nozzle after the pause. make sure it is printed before the case elements in the printing order.
print the basic case on it's back
clean the plate
slice the back protection of your choice with a pause before the first layer of the corners (i.e. after the fixture is printed) - ignore warnings of empty layers.
print the sliced file
snap the case into place over the fixture when paused (note the case orientation - the bump in the fixture is the top of the case - corresponds with the earpiece cutout)
resume print
Material: TPU
Layer height: 0.15mm
Perimeters: 2
Fill pattern: Grid
Fill density: 15%-20% (whichever makes you think will make the corners more effective in absorbing energy. I use 20%)
Snug supports.
Please make sure to tune the "top contact Z distance" (Prusa slicer) as TPU is really hard to separate (I use 0.3mm)
Don't support Bridges: enabled (in order to prevent support material from being generated inside the qi2/Magsafe cavity. if this doesn't work or also disables the supports in the charger/speaker/S-pen cutouts than you will have to use paint on supports)
ByckthLikes148Downloads2.4K

 ByjbfishLikes5Downloads81

 BynasikLikes0Downloads276

 ByjatinLikes0Downloads146

 ByrmeyLikes0Downloads210

 ByFosphorLikes20Downloads240

 ByftoerringLikes79Downloads189

 BylayerslabLikes14Downloads53

 ByJaronLikes310Downloads1K

 Byw3rN42Likes127Downloads938

 Bymateusz-tokarzLikes0Downloads141

 ByalexnotLikes0Downloads115