


GoPro Mount Clamp - Kẹp Gắn GoPro Đa Năng
 ByBaGooNLikes64Downloads141
Build another version of this model.
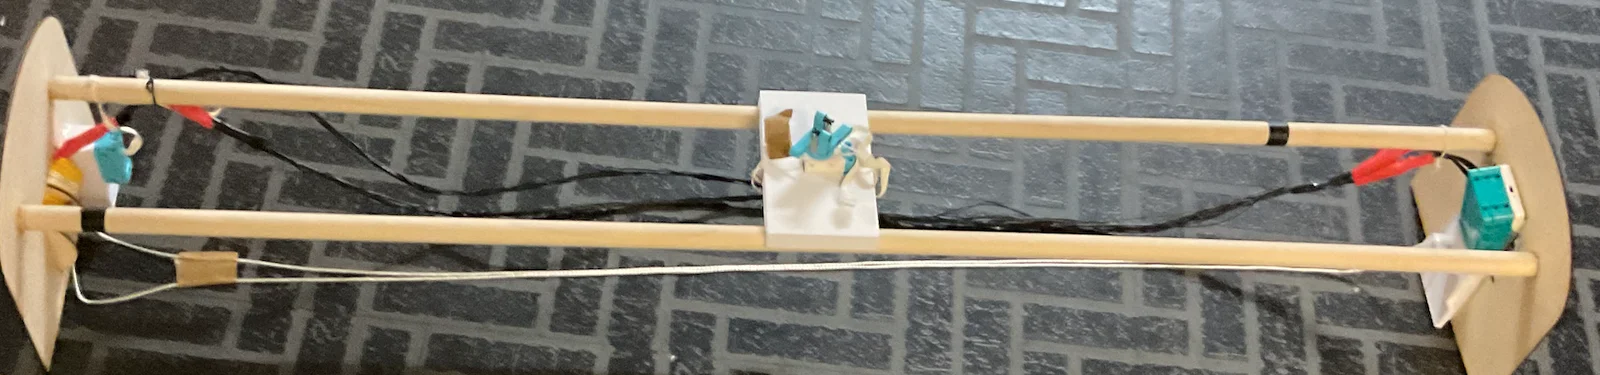
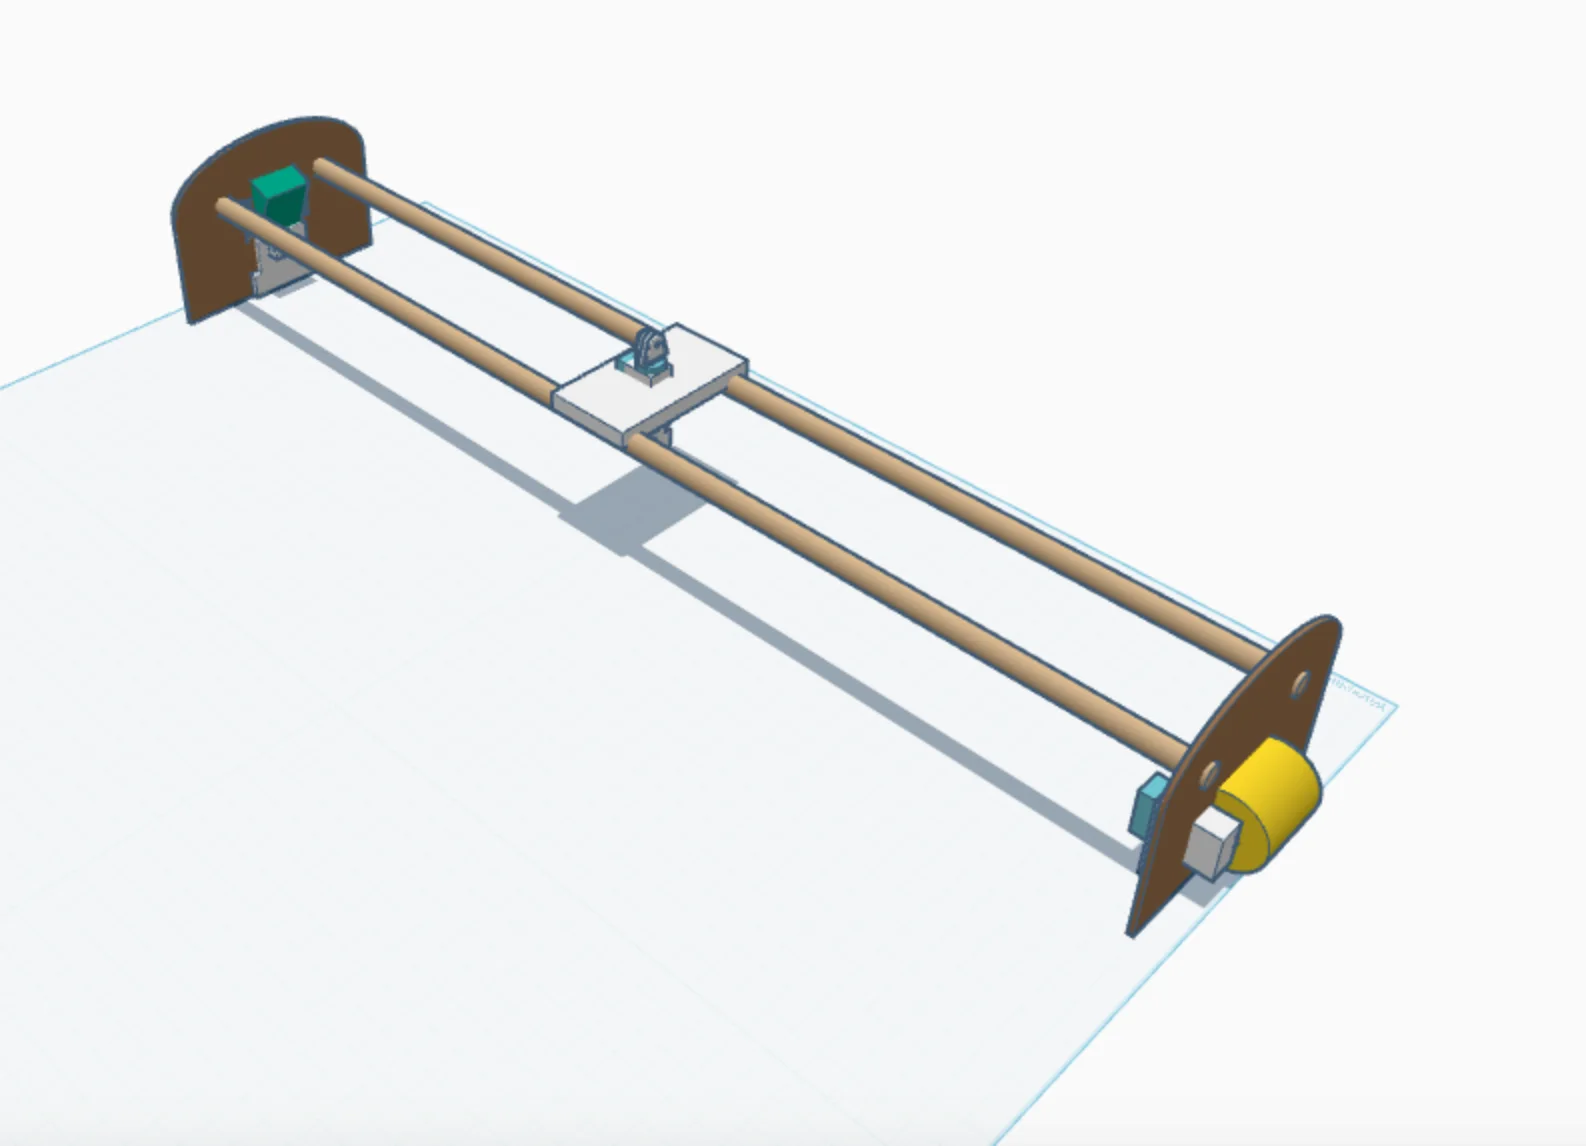
This is a camera track designed for any GoPro or any other small camera. It uses the LEGO Mindstorms and Spike platform; specifically the Robot Inventor Hub, Spike Essential Small Motor, and the Spike Prime Large Motor. It uses a DualSense wireless controller to move the camera or can be programmed. This uses block coding or python, both will be linked below. When using the controller both the controller and the hib needs to be connected to the Mindstorms Robot Inventor app to allow the controller to work.
3/4 inch dowels (2 needed)
Mindstorms Robot Inventor Hub
Spike Essential Small Motor
Spike Prime Large Motor
Large LEGO Wheels / Axles
Wood Glue (If laser cutting parts) or other strong glue (If 3D Printing everything)
Powered up cable extensions -
Soldering tools
Wire -
Heat Shrink / Electrical Tape
The "Sides" can be laser cut like I did with mine or 3D printed
Start printing / Laser Cutting the parts
Extending the extensions
Cut the extension in half
Strip each of the six wires
Solder the new 35-40 inches of cable to the powered up extension you cut earlier
Heat shrink the new longer powered up extensions
Repeat this whole process again to end up with two longer extensions
Start assembling the track
Glue the dowels into the sides with about 1/8 inches of dowel sticking out of the front of each side
Then glue the hub holder into the correct cutout on the correct side pannel
Route one end of each extension through the cable holes by the hub holder
Connect the large LEGO wheels to the Large Motor and slide the motor into the motor hole on the opposite side of the hub
Glue the motor mount onto the side panel
Connect the first extension to the motor
Place the Small Motor into the motor slot on the platform
Using tape / wire / zip ties anchor the motor into the platform
Place the platform onto the track and connect the last extension cable
Tie the string onto the wheel / spool and wrap it around the loop on the hub holder
Then wrap the string on the platform and tie the end onto the wheel / spool
Ensure the drive motor (large motor) is connected to port F and the small motor is connected to port D
Upload the code to the app and connect the hub + controller
Start the program and test it
Controls are backward - reverse connections
Controller not working - ensure "streaming mode" is on in the code
ByBaGooNLikes64Downloads141

 ByNK01_3850118Likes13Downloads213

 BycharlieLikes0Downloads114

 BykyleschiefferLikes35Downloads396

 ByckthLikes148Downloads2.4K

 ByvideograndpaLikes36Downloads283

 Bypostyourmake_4620695Likes6Downloads8

 ByJaronLikes310Downloads1K

 Byw3rN42Likes127Downloads931

 ByTomDDLikes89Downloads574

 Byrorys3DLikes0Downloads321

 BykukulinLikes77Downloads515