



Kẹp giữ sợi Filament
 Bytinx_1344834Likes1.2KDownloads6K
Build another version of this model.
I have posted a remix of this model at https://www.printables.com/model/1003325-sv08-top-hat-v320-update - the parts should be interoperable with this set, but have a better fit and require much less filing and sanding to get them assembled. I recommend using that for anything you have not yet printed.
WARNING: This is a design in progress. The parts can be printed and assembled onto a SV08 printer, but some filing may be needed to make everything fit. However it will get some additional polishing over the coming days. If you print one and have any problems. please post information about that and I will do my best to address it.
8/31 Update:
Thanks for the positive messages.
I have completed all parts, and now feel comfortable posting the final version I am installing. I apologize to the 16 people that have downloaded earlier versions - I had printed those parts and I thought they would work - likely they would work as I have them on my printer today, but I did not like the fit of some parts of them. The new corner and center side and center front parts are not compatible with the older side panels because I have made the tabs running under the side panels 5mm thick instead of 2mm because I broke so many of them trying to install. I made many other small adjustments as well.
I am posting this as 4 zip files. The basic file provides corners, center sections, and a side panel plus a side panel with switch holes fitted to the switches and heater controller in the parts list. The Display zip has the side panel and screen surround for a BTT 5" display plus a side panel with a hole to let the cables out to connect with the printer, to put on the right side front half next to the display panel. If you put this display panel on the front right position, the cables with the BTT 5" display fit (I used some right angle adapters to make the connection neater). The filter zip has the side panel and 2 smaller parts to install a fan and activated carbon air filter panel, and a second version with a hole to allow placement on the right side in front fro the display cables to exit. And the heater zip file has the heater side panel, the air box that mounts outside the printer, and a screen that allows you to place activated carbon sheets inside this panel as well.
Details:
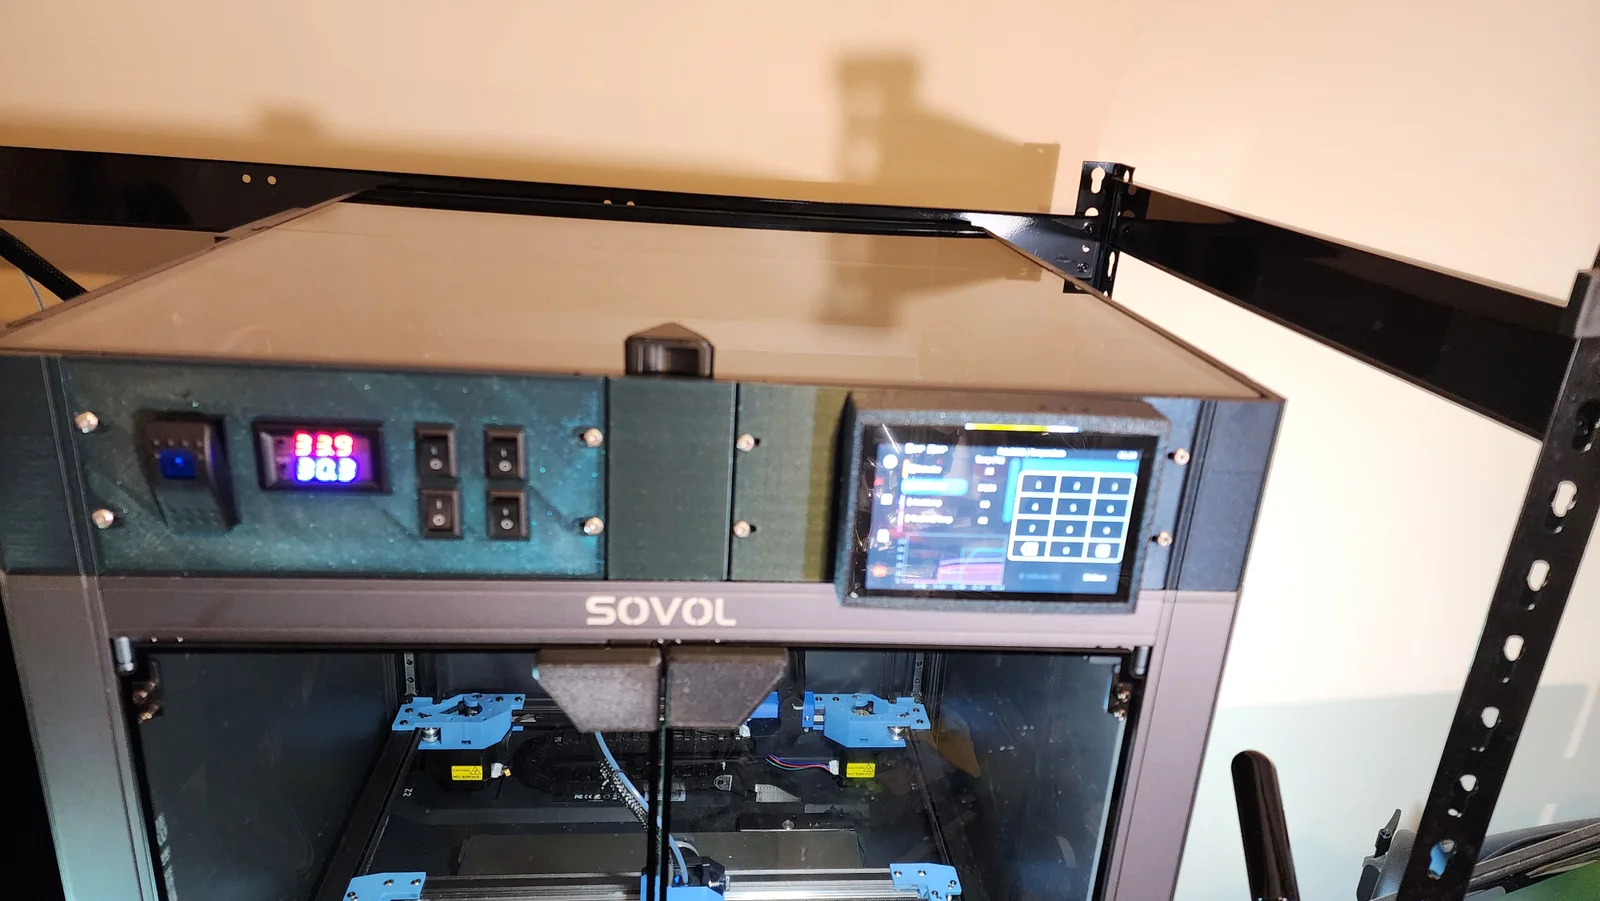
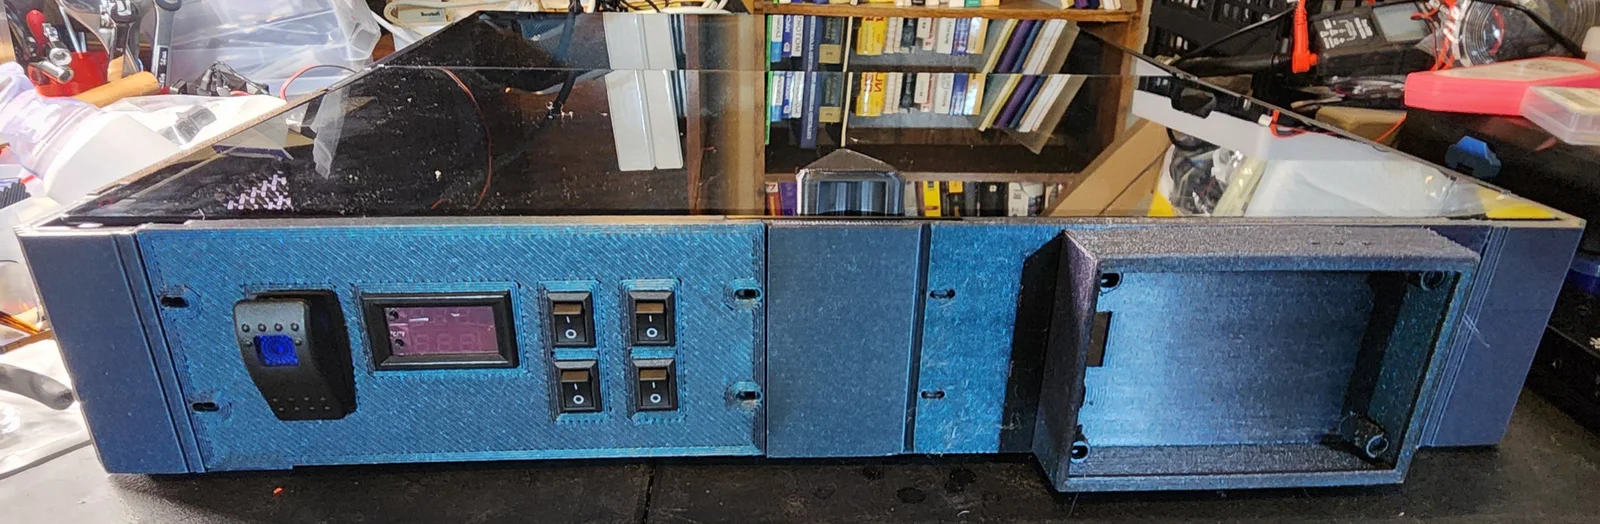
This is a modular top hat for the SV08 that allows easy customization to either add the features I have designed, or your own custom panels. It consists of 4 corner units, 4 center side parts (the front/back units are slightly smaller than the sides so you need two of each) and 8 side panels that can be interchanged. The side panels are 200mm x 91mm tall and can be interchanged as desired.
The center side panels are screwed down to the existing tapped holes in the frame of the SV08, and the corner units and the side panels are also fastened with those existing holes - all with 3mm screws. You can make a simple one with 8 of the side panels below if you just want an enclosed printer.
I included holes for 3mm screws and heat set inserts to connect the panels together in case they are loose and rattle on your printer.
For the add ons:
- the display panel and display surround are set up for a BTT HDMI V1.2 display. The surround part clips on with no fasteners required.
For the rest of these - I chose to use 12v parts, and added a 200 watt 12v power supply to the printer. (I did not want to challenge the OE power supply and impact the performance!)
- the filter panel uses a 50x15mm fan to blow air through sheets of carbon filter material to absorb fumes from ABS and ASA (and other) materials. I am using similar filter materials in other printers and it is doing the job to remove fumes for me. Print one filter panel, one filter box, and one filter screen for each panel you want to replace with a filter. NOTE: I printed the filter screen with no top or bottom layers, 6 outlines, and the infill shape of your choice to make an attractive screen. I used the sinusoidal infill that Simpliy3d provides, but any other one would work. Experiment with the % infill, I used 20%.
- the heater panel is designed to use a 60mm fan based 100 to 150 watt small area (automotive) heater. It uses a heat duct on the outside of the part. The 100 watt heater can raise the temperature in side the enclosed printer 12 degrees C (from 33C to 45C in about 10 minutes and easily holds that temp. I will do more testing over the next few days.
- and I added a switch panel to turn these all on and off, along with a temperature controller to manage the heater unit andstss prevent over temp situations. These will be on the parts list.
If you have other ideas for things that could be done, feel free to leave ideas here and if I like them they could appear as new panels.
Wiring hints:
I am wiring the thermostat to 12v power to show the internal temp any time the printer is on. The output from the thermostat goes to the big switch which controls whether the heater is enabled. I have the fan for the heater on a separate small switch so I can run it as just an air filter. I am considering adding a diode connected to the heater enable switch to assure the fan is running any time the heater comes on. I am using two of the other small switches for the 2 filter panels, and the fourth one for some LED strips stuck around the top hat.
Parts needed:
To fasten the 16 pieces to the top rail of the printer: 12 M3 screws, length about 14mm (length is not critical as there is a lot of room under that rail, if you have 20mm length or even longer you can use them.)
To fasten the panels together to stop rattling or better seal the air gaps:
32 M3 x 6mm heat set inserts
32 M3 x 8mm screws
To mount the BTT HDMI5 V1.2 display:
4 M3 x 6 socket head screws
To use the air filtration panel:
WINSINN 50mm 5015 Blower Fan (Available in 12v and 24v versions)
To mount the fan:
2 M4 x 4mm heat set inserts
2 M4 x 20mm screws
2 M4 washers
To close the cover on the filter:
Universal Cut To Fit Carbon Activated Air Filter Sheet
2 M3 x 4mm heat set inserts
2 M3 x 6mm screws
To use the 100 watt heater:
1 PTC Heating Fan, Fast Heating, Constant Temperature, PTC Air Heater for Car DC
2 M4 x 10mm heat set inserts
2 M4 x 14mm screws
2 M4 washers
Finally, for the switch panel:
Joinfworld Marine Rocker Switch 12V 24V Lighted Rocker Switch - This is a master power switch for heater, lighted to remind me it is on.
DC12V-50-110℃ W1209WK Digital Thermostat Temperature Control Smart Sensor Waterproof NTC Sensor - Controls the heater.
6 Pcs Boat Rocker Switch Snap in Toggle Switch SPST - I used 4 for 2 separate filter panels, LEDs, and to turn in the heater fan. Probably overkill, but I like switches…
Parts Links:
http://www.amazon.com/dp/B0BC4CPDC3/ref=nosim?tag=psv08printer-20 - BTT HDMI5
http://www.amazon.com/dp/B07MDN81C3/ref=nosim?tag=psv08printer-20 - 100 watt Heater (Be careful, some older versions have slanted mounting tabs and will not fit.)
http://www.amazon.com/dp/B07DB6132Q/ref=nosim?tag=psv08printer-20 - 50x15mm fans for filter.
http://www.amazon.com/dp/B07K7KJ788/ref=nosim?tag=psv08printer-20 - Thermostat controller.
https://www.amazon.com/dp/B0CHDSG5DW/ref=nosim?tag=psv08printer-20 - Small switches to fit the switch panel.
https://www.amazon.com/dp/B09SD4X7CL/ref=nosim?tag=psv08printer-20 - large lighted switch for heater.
https://www.amazon.com/dp/B0CH36TTNX/ref=nosim?tag=psv08printer-20 - I used these screws both to fasten my enclosure panels and for the connections between side panels and the corners/center sections for the appearance.
https://www.amazon.com/dp/B0D1BPB6TP/ref=nosim?tag=psv08printer-20 - heat set fasteners in various sizes, this is a nice kit to have.
https://www.amazon.com/dp/B07VNDFYNQ/ref=nosim?tag=psv08printer-20 - assorted length M3 cap head screws.
Bytinx_1344834Likes1.2KDownloads6K

 ByNadirLikes25Downloads115

 Byprusa-researchLikes0Downloads2.7K

 Bydet-manLikes0Downloads175

 Bygummiegecko8477Likes0Downloads167

 BydalleLikes0Downloads149

 Byarhi_585078Likes64Downloads545

 ByHanzo3dLikes155Downloads417

 BydarienLikes0Downloads1K

 ByGeek5DLikes147Downloads490

 ByBrokentooth_designsLikes23Downloads412

 Byla-cave-au-chatLikes0Downloads969