

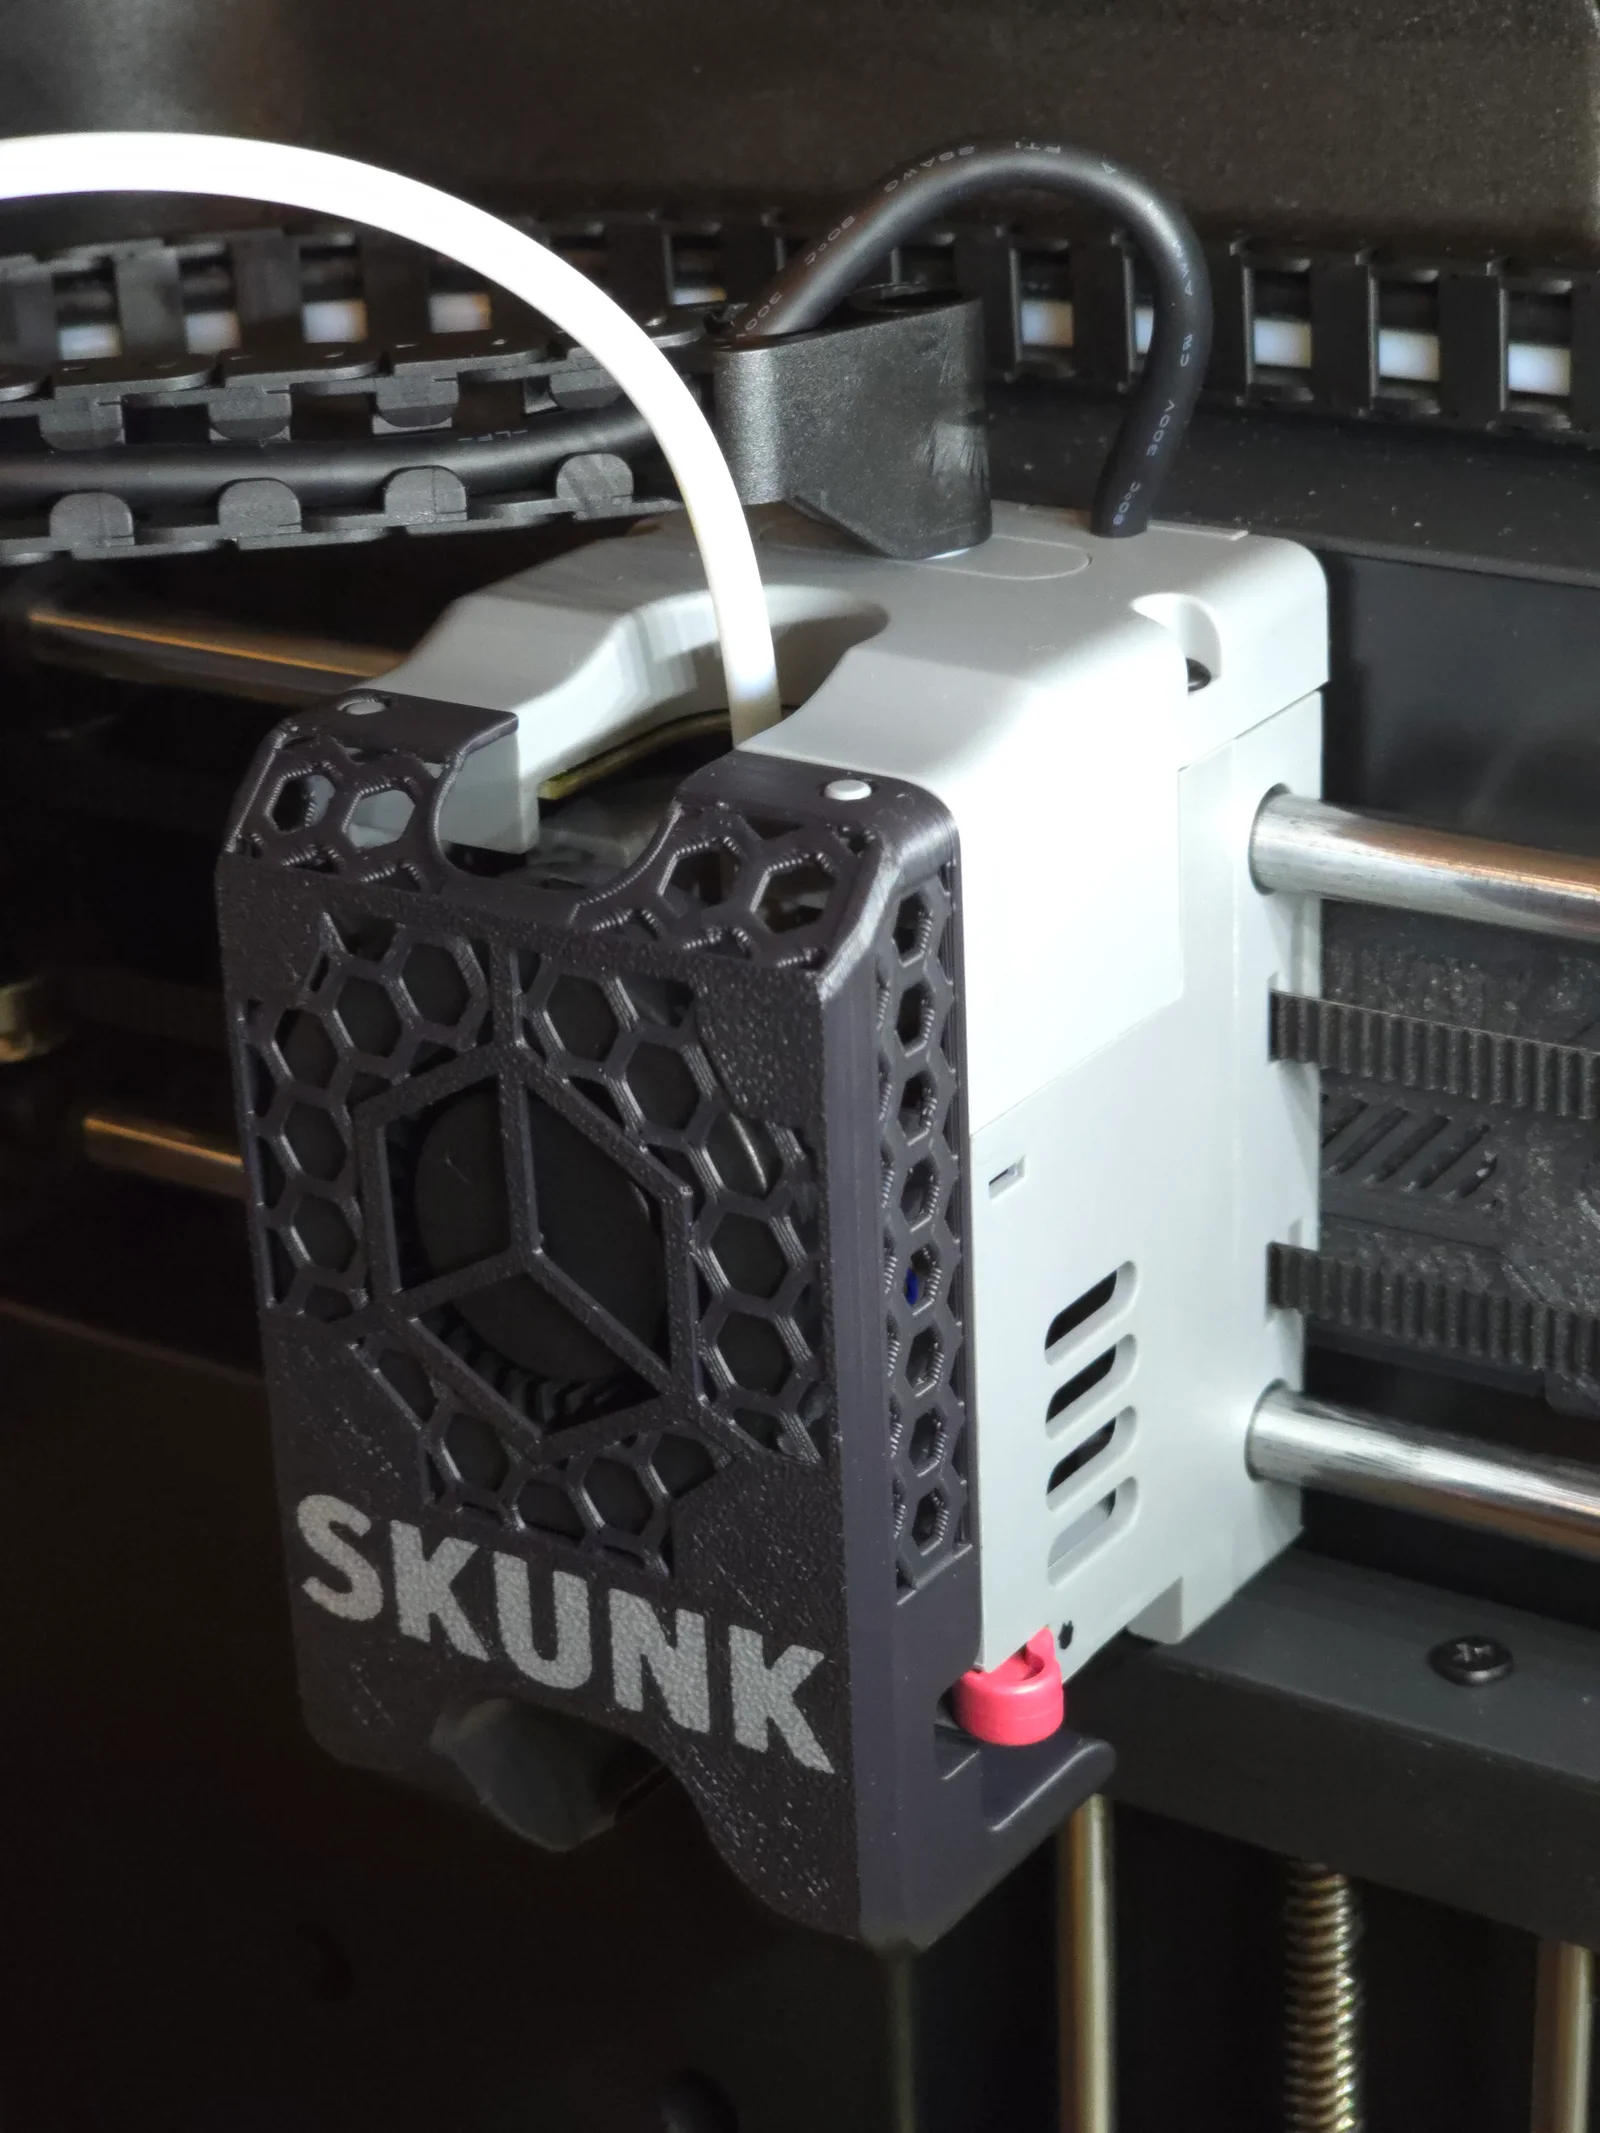



Kẹp giữ sợi Filament
 Bytinx_1344834Likes1.2KDownloads6K
Remix of Ống Dẫn Quạt Flash Forge Adventure 5M Tương Thích Với Đầu In Độ By WingWong_521453
Build another version of this model.
This one is made to work with the aftermarket Aliexpress/Amazon hot end.
Make sure you take of the plastic handle on the build plate as the longer ducts will hit it.
Modeled for 5x3mm magnets.
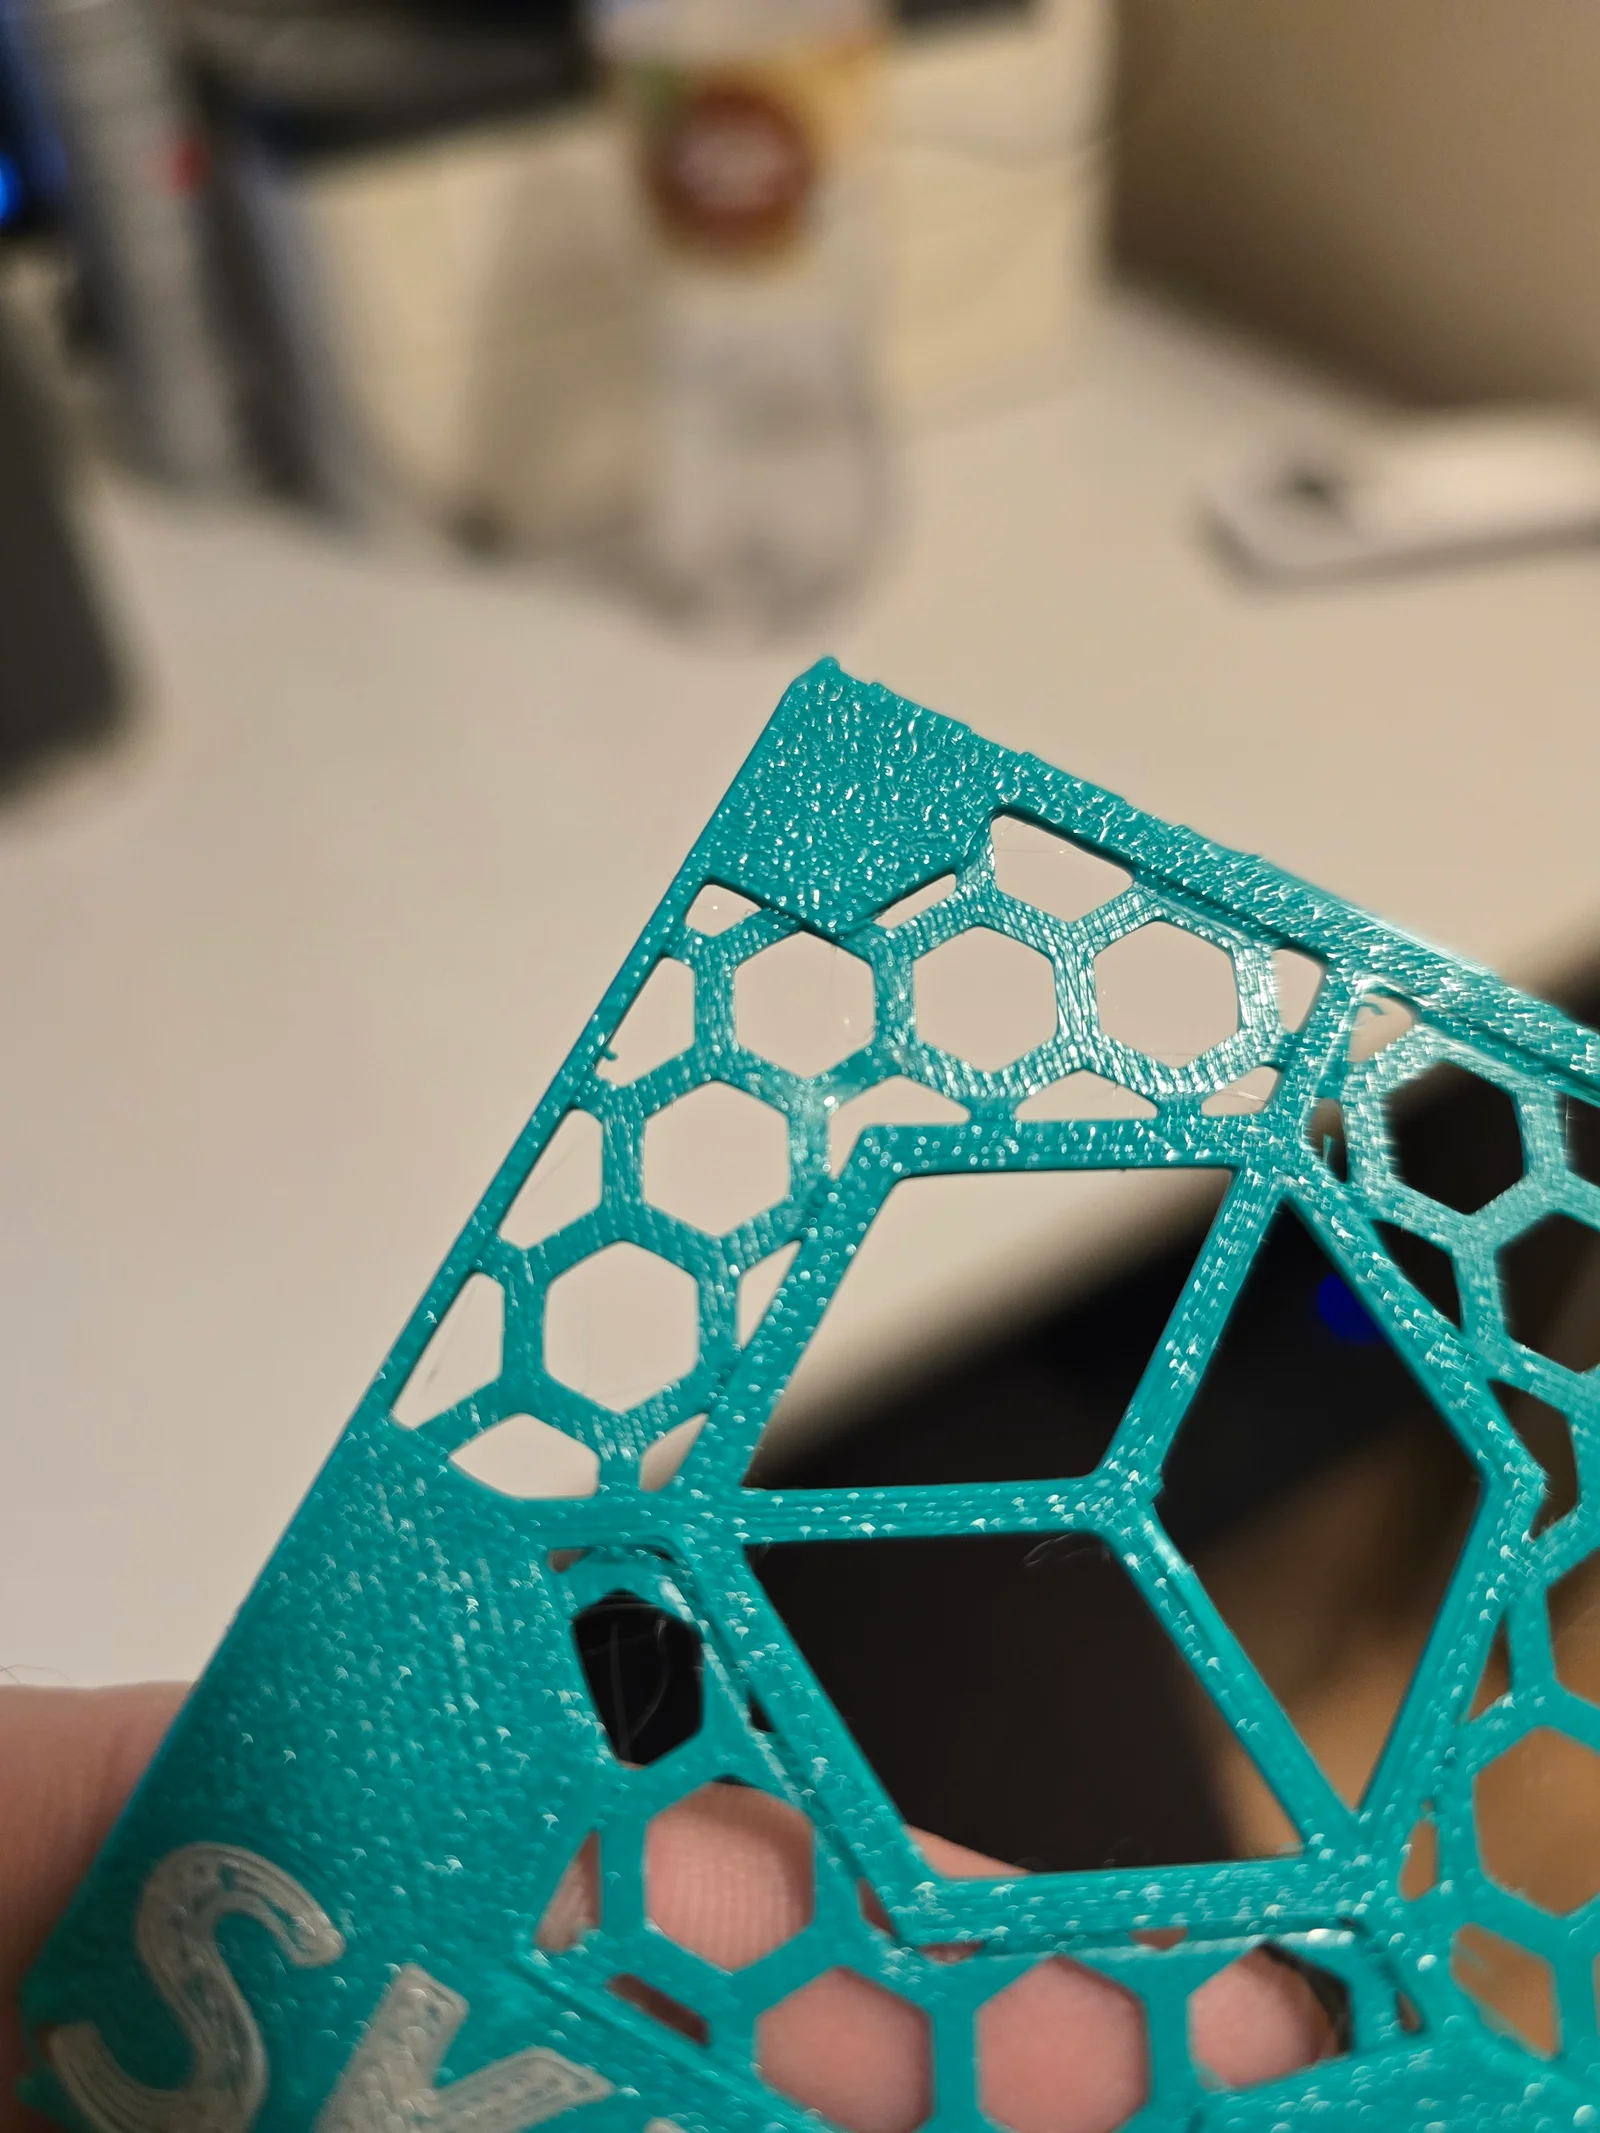
Pictured is the new V2 that I'm testing out. To get good layers like the second picture you need to have the support layers printed in PLA with the Duct in PETG/ASA or the other way around.
There is 0mm layer height difference between the support and hexagon layer so it makes a nice smooth surface and still peels off easily.
If you're doing the filament change for the text then it's only another couple of swaps to get the supports working perfectly. (MMU is ez mode).
Options for FORGE text or without. Step files as well so you can make your own text (You can also do it in Orca/Prusa Slicer)
Works in Orca Slicer (and most Bambu Lab/Creality/Klipper setups)
Import your 3D model into Orca Slicer.
The text is part of the main model, split it into a separate object using:
Right-click model → ‘Split to Objects’.
Enable single-extruder multi-material printing:
Go to Printer Settings → Multimaterial tab.
Ensure "Single Extruder Multi Material" is enabled (for filament swaps).
Select the text object in the slicer.
Right-click → "Height Range Modifier" (or "Per-Object Settings" in some versions).
Set the range to Layer 1 only (e.g., 0 - 0.2mm for a 0.2mm layer height).
Assign a different filament to this range.
Add a pause/filament change command after Layer 1:
Go to Printer Settings → Custom G-code → Filament Change G-code.
Enter the correct command for your firmware:
Marlin (Most Creality/Prusa): M600
Klipper (Maybe also Bambu Lab?): PAUSE
Older Marlin (M25): M25
Slice the model and check the Layer Preview:
Only Layer 1 should show the colored text.
The filament swap (M600/PAUSE) should trigger once after Layer 1.
Print & confirm the swap happens as expected.
If the text prints after other parts on Layer 1:
Click "Customize current plate" (right side of plate).
Under "First layer filament sequence", select:
Customize, and manually reorder objects (drag text to the left of the list).
Re-slice and check Layer Preview to confirm text prints first.
UPDATE: 13/06 - I have thickened the hexagons on the side and top for better printability
Bytinx_1344834Likes1.2KDownloads6K

 Bynamida-verascheLikes0Downloads155

 Bytopronix_2170418Likes41Downloads301

 Byprusa-researchLikes0Downloads2.7K

 Bydet-manLikes0Downloads179

 Bygummiegecko8477Likes0Downloads172

 Bychukwufumnanya-arinzechukwuLikes0Downloads155

 Bybane-fpLikes0Downloads380

 Bychris-barwickLikes0Downloads134

 BydalleLikes0Downloads153


 ByMahko Blackburn BlackburnLikes28Downloads173