




Kẹp giữ sợi Filament
 Bytinx_1344834Likes1.2KDownloads6K
Build another version of this model.
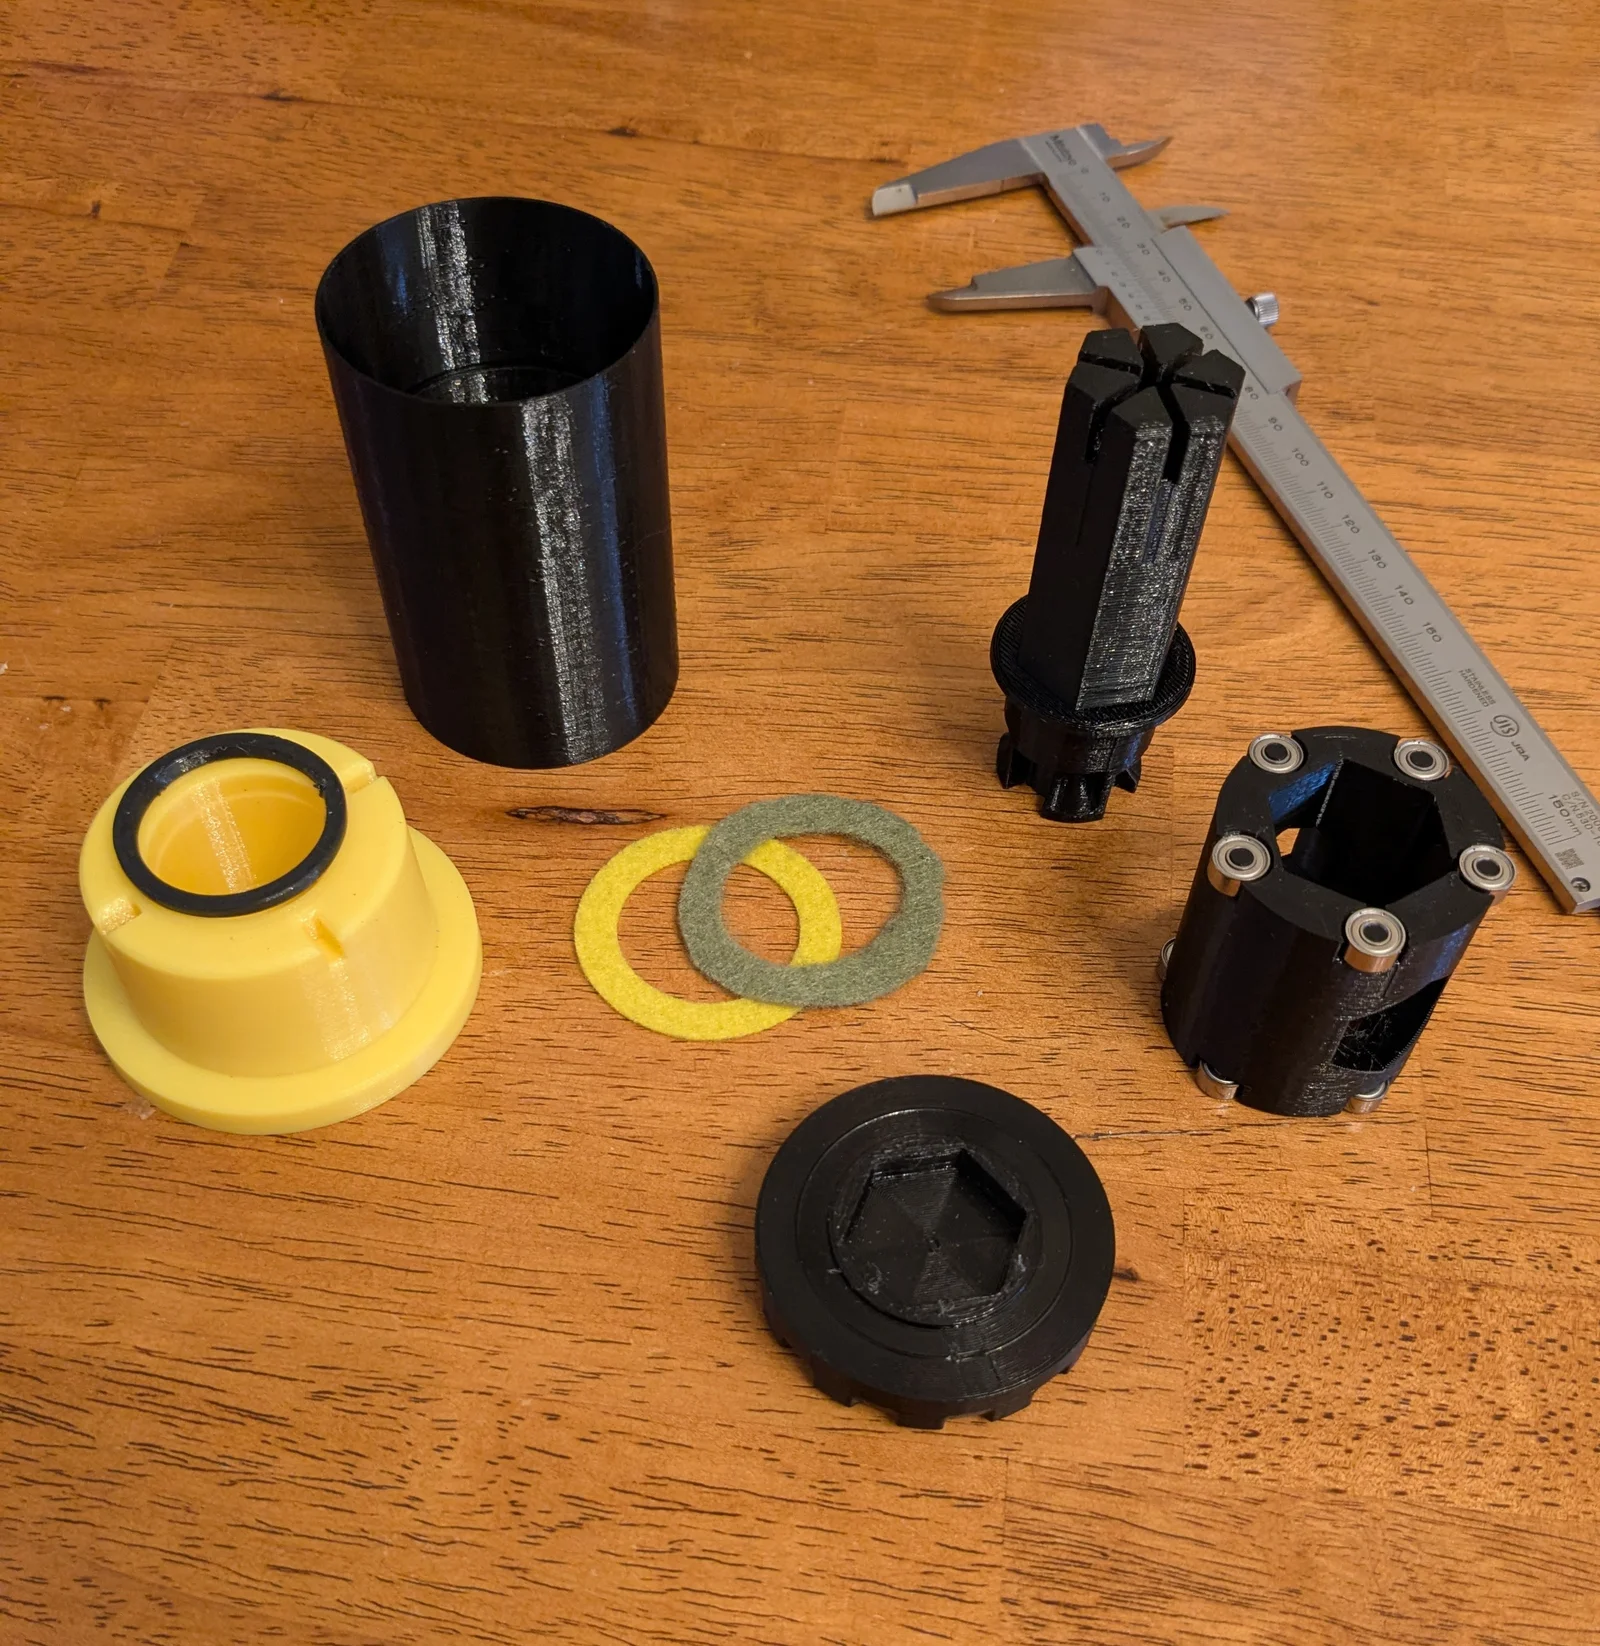
Smooth rolling spool holder modification for Core-One+ and Core One L printer spool holders. The yellow part shown is the existing bayonet base that mounts to the printer. The rest replaces the crooked post that leaves your spool hanging at an angle. You get very smooth feeding, no friction and no over-run. Overrun is due to inclusion of felt pads that act as brakes.
Parts list:
Requires 10 3mmx8mmx4mm shielded bearings uxcell 20pcs 3mmx8mmx4mm Double Shielded Miniature Deep Groove Ball Bearing: Amazon.com: Industrial & Scientific
Reuses the base bayonet puck that is mounted on the printer
Reuses the O ring that provides tension for the bayonet
Print the following
1 Post - Use supports, use support blocker 20mmx20mmx60mm cylinder inside the post
1 End cap puck - no supports required
1 bearing carriage - no supports required
1 roller cup - no supports required. Seam is important on the cup - random works the best. Once printed, use a small file or scraper to remove the seam zits at the bottom 4mm of the cup and the top 4mm of the thick part of the cup. Wipe clean with moist towel. Removing the seam zits let the bearings run smoothly. Random makes the small zits much easier to remove than a solid line seam.
2 felt brake pads - use the supplied stencil to cut two felt brakepads. These make the motion smooth and prevent over-run. If you don't use the felt pads, the roller assembly will be slightly loose. Felt brake pads highly recommended.
Assembly:
Put a bearing on each of the bearing posts on both ends of the bearing carriage. 5 per side. They fit snugly and hold in place. Push all the way down.
Position the post bayonet side down
Put one felt brake pad on the post
Place the bearing/carriage assembly on the post
Place the roller cup onto the post, mouth end down. The semi-closed end of the roller cup should face upwards.
Place the second felt brakepad on the post on top of the cup.
Push the end cap puck onto the post - it will be a snug fit - this end cap is meant to snap on and off and hold itself in place.
Turn the assembly over and place the o-ring onto the post. The smooth roller plus spool holder is now ready to use. Place the bayonet end into the Core-One-Plus base puck, and turn until it locks in place.
Happy printing
Bytinx_1344834Likes1.2KDownloads6K

 ByreddLikes216Downloads2.1K

 ByJasonOlliff_519145Likes241Downloads2K

 Byarhi_585078Likes64Downloads535

 ByHanzo3dLikes155Downloads410

 ByGeek5DLikes147Downloads480

 ByPengLordLikes32Downloads106

 ByBrokentooth_designsLikes23Downloads401

 By3DSourcererLikes48Downloads372

 ByWyomingWolf_261196Likes52Downloads422

 Bytopronix_2170418Likes41Downloads292

 ByAlex_3996727Likes29Downloads62