



Robust BUCKLES +
 Byrorys3DLikes0Downloads325
Build another version of this model.
Wobbler Engine SinapTec - Ball Bearing Remix
This is a remix of...
Wobbler Engine SinapTec
...posted by sinaptec on December 05, 2015 at...
https://www.thingiverse.com/thing:1176934
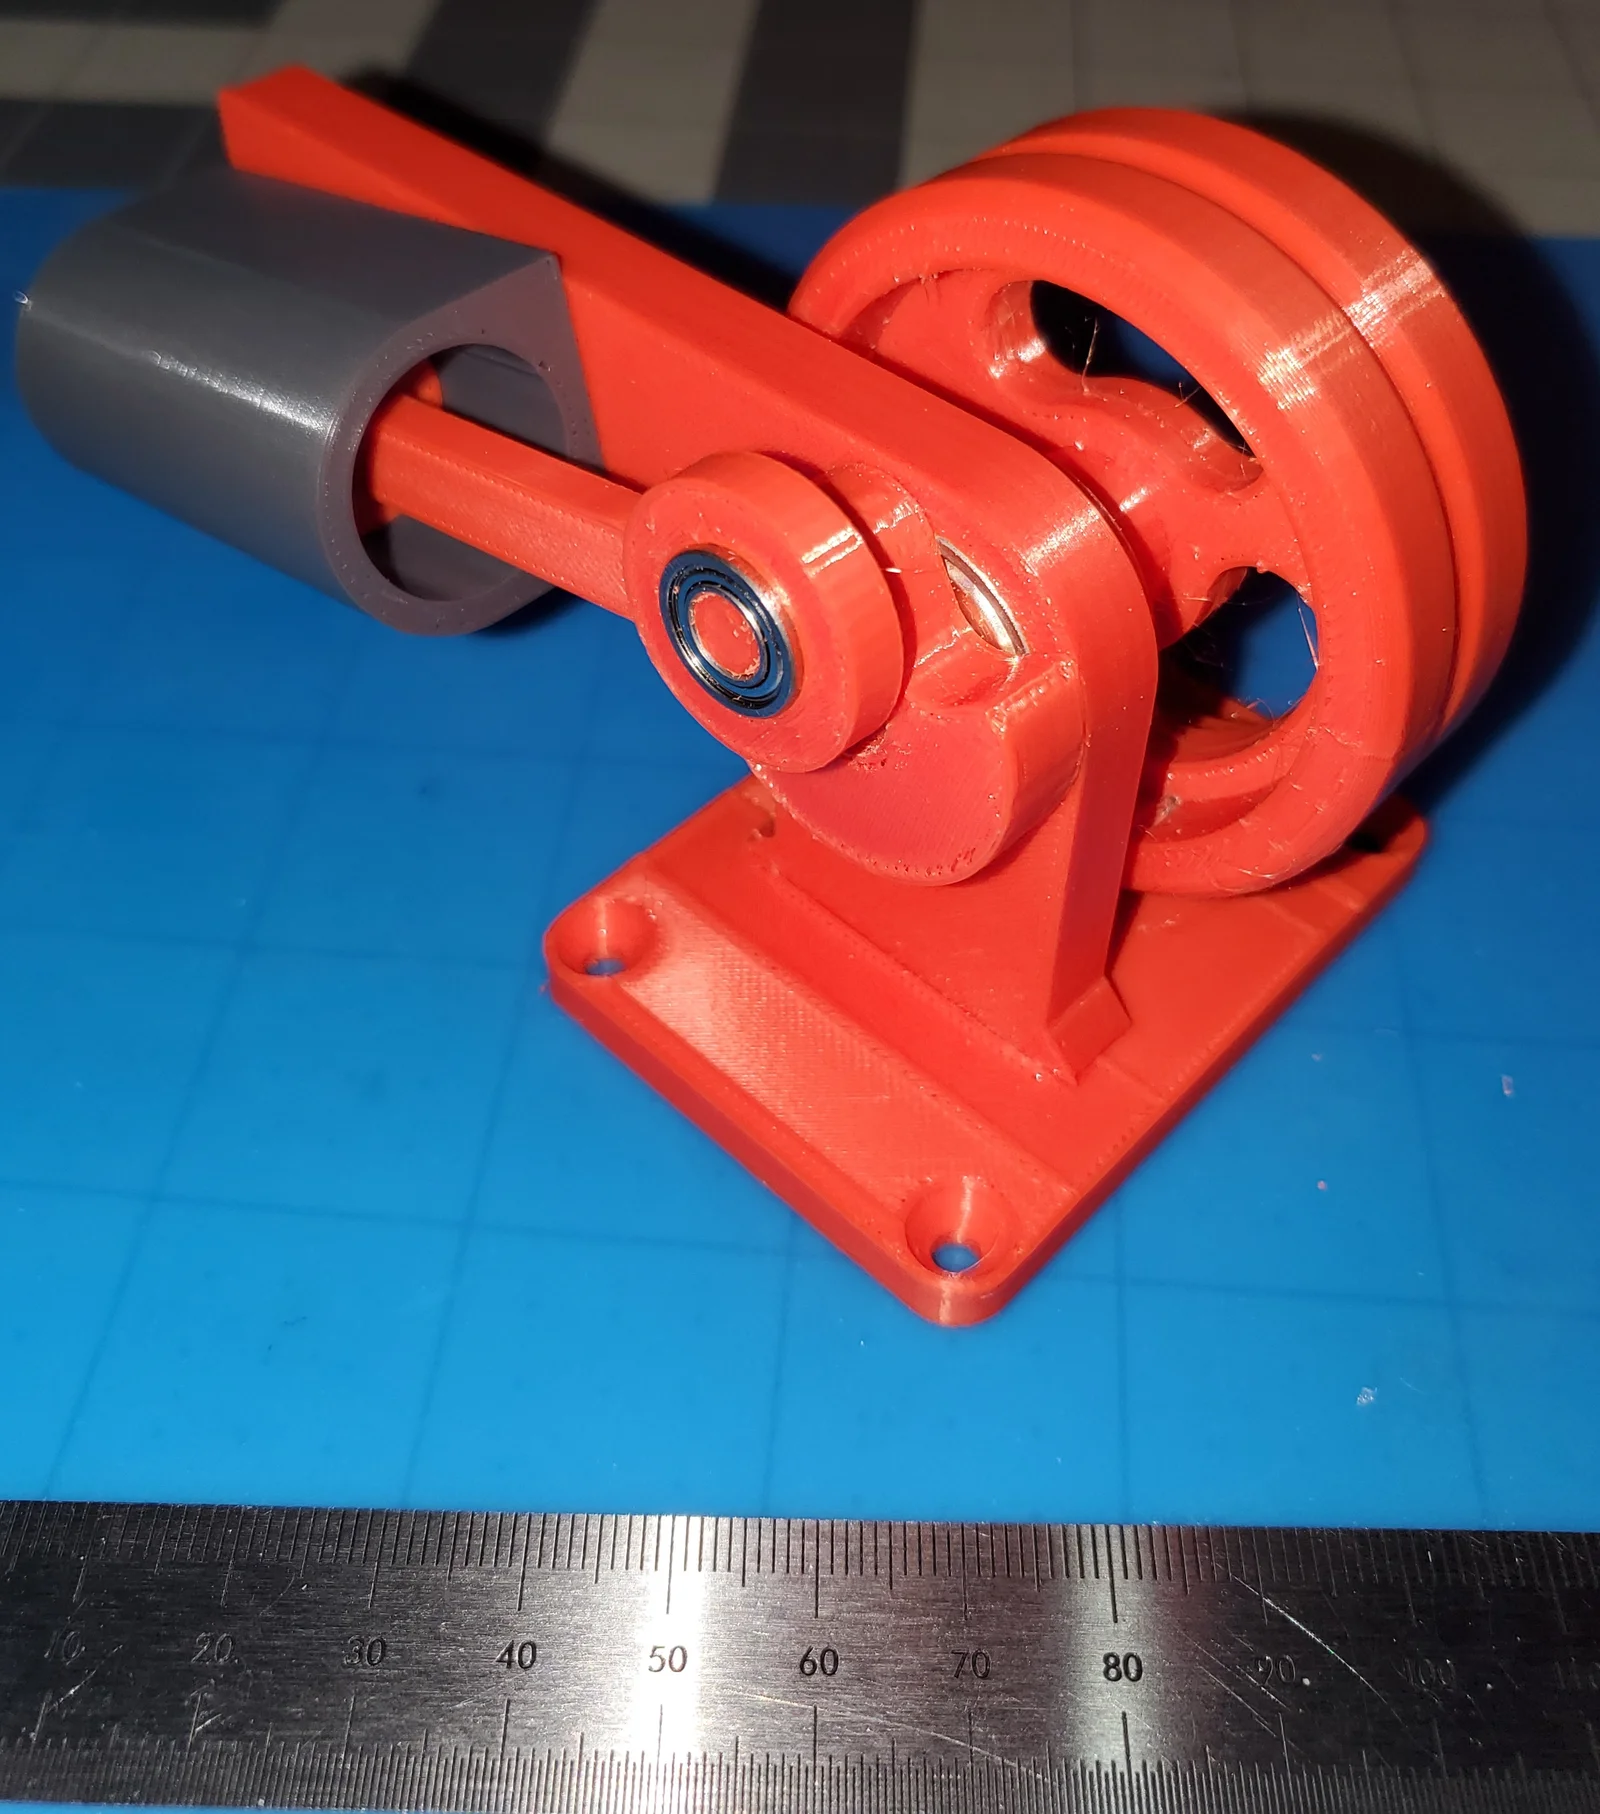
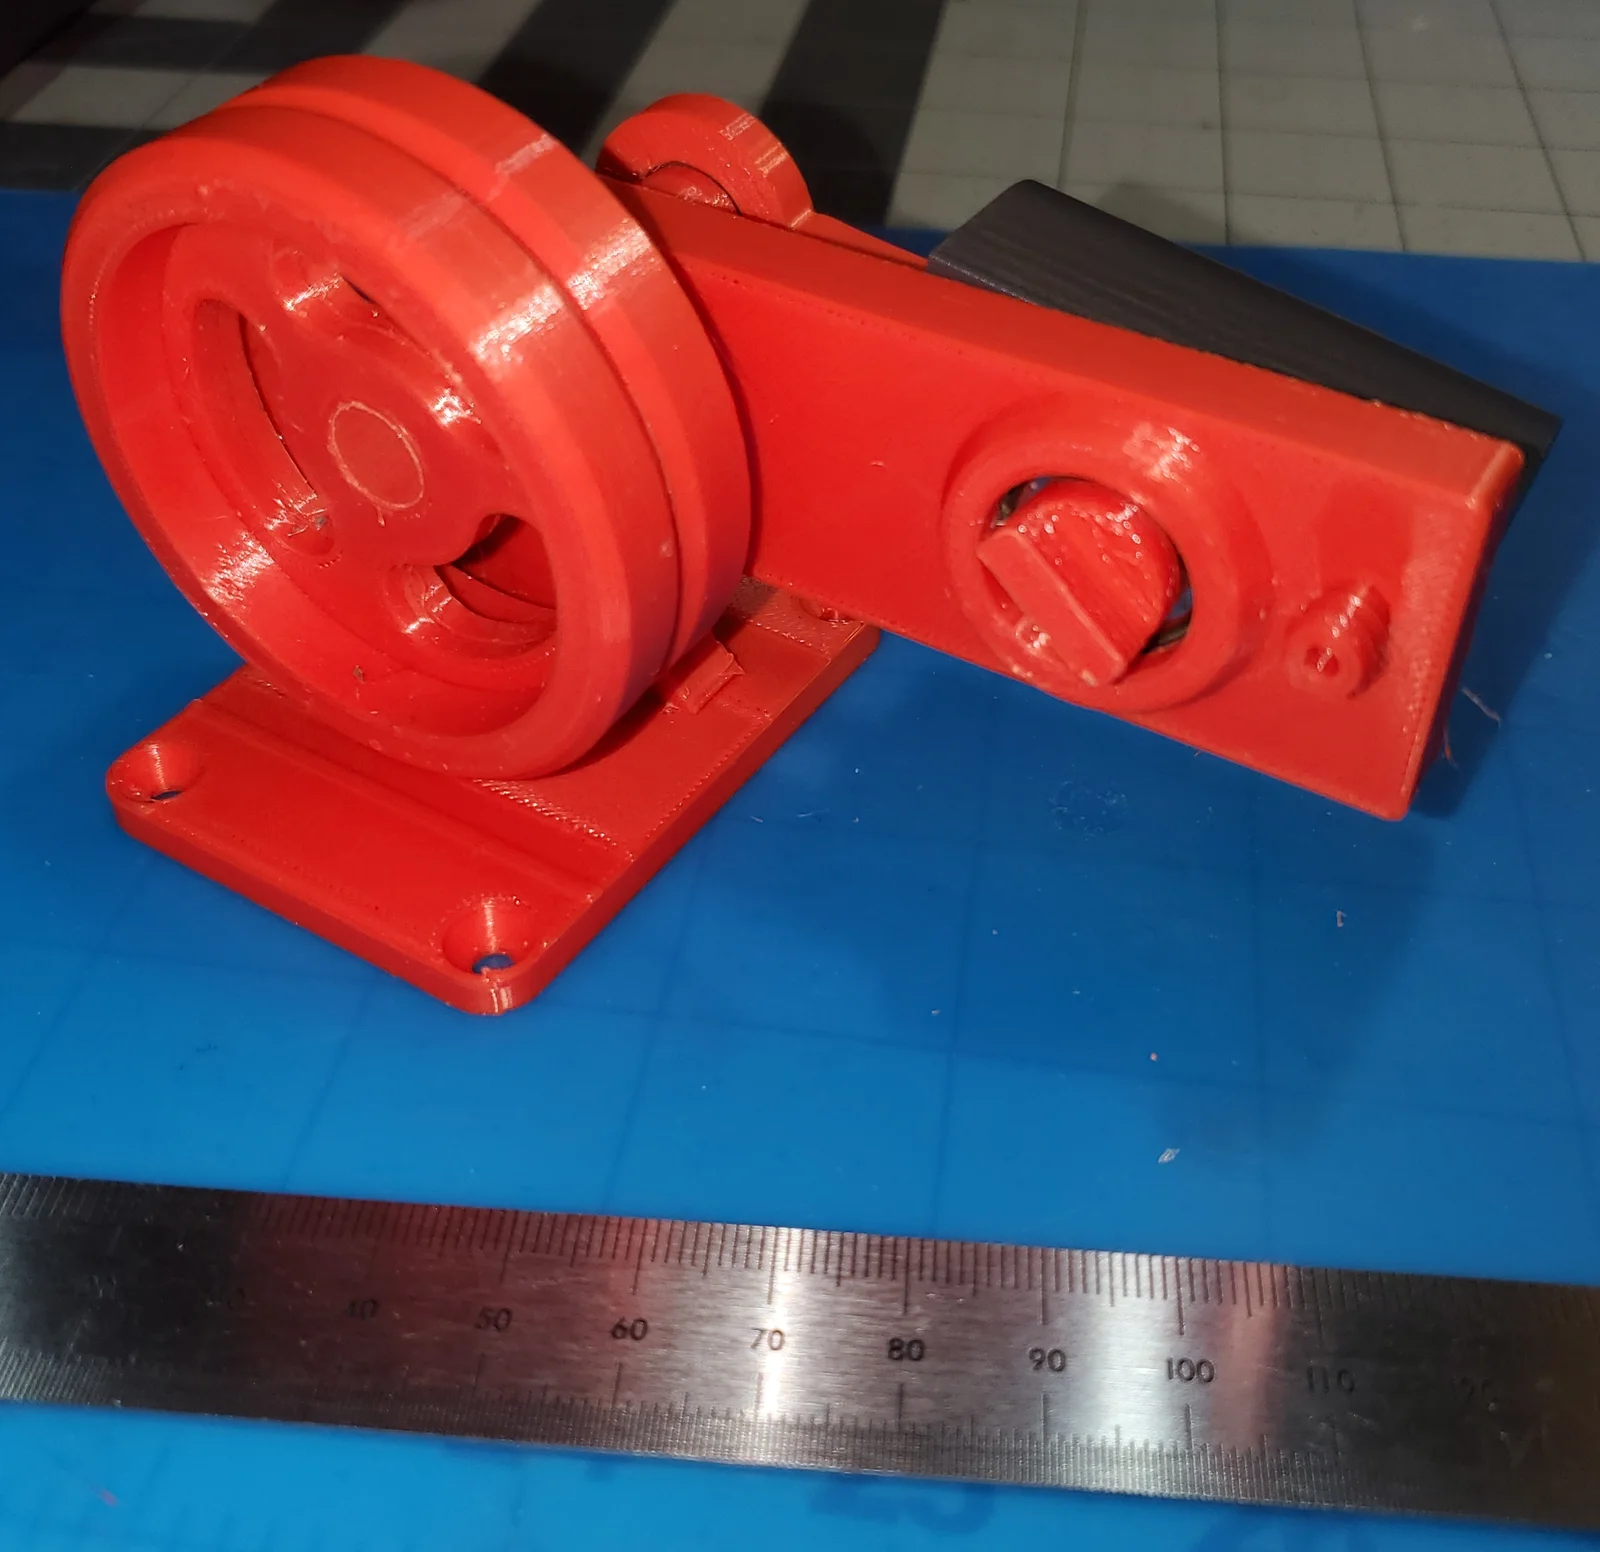
My primary objective was to incorporate ball bearings in the model. By the time it was finished I had changed every part in some way, except the cylinder. I'm pretty happy with the result. Though I haven't tested it yet on a robust air supply, it ran surprisingly well in a brief test from a can of Dust-Off aerosol electronics duster (see the five-second video).
I'm pretty confident it will be OK on a proper air supply. I'll add a video here of that once I get the fittings I need to run it properly.
Before running it I thought the exhaust port was surely too small and restrictive, but after the Dust-Off test it seems I was wrong. If the crank is placed in the right position, the engine will self-start from a blast with the Dust-Off can without a manual push on the flywheel.
The original model has a bore and stroke of approximately 20 X 20 mm. That is unchanged.
I increased piston diameter by 0.4 mm from the original model; the cylinder is the same. It's still a very loose fit but is a bit tighter than the original and seems to work well as is.
I doubled up the flywheel, printing it in two pieces that are glued and dowel-pinned together. (Within reasonable limits, more flywheel mass is a good thing on a one-cylinder engine, unless very high speed is required.)
Changes to the hubs on both sides of the original flywheel model made it a difficult print requiring supports if done in one piece. Splitting it made for easy, no-support printing. The dowel pin holes are included in the model but will need to be re-sized with a 2.5 mm drill. They always print a little undersized.
I made the shaft a separate part, vice being part of the flywheel as the original was.
The frame is thicker to match the bearing width and has bearing pockets. It also now has stops for precise alignment when gluing to the base
The base slot was widened to match the new frame and has been extended to get the two mounting screw holes on the flywheel side out from under the flywheel. It has bevels at the bottom of the slot to provide a little room for glue.
The connecting rod "big end" is now bigger to accept the ball bearing.
The wobble pin length and head are both changed from the original.
The only places I needed glue were the flywheel halves and the frame to base attachment.
I printed everything in PLA and all seems to be OK. I am concerned about the shaft and the crank, which I suspect are the weak links. If the shaft or the crank pin break I'll go to PETG or something more exotic for them.
- - - - - - - - - - - - - - - -
Printing Notes:
All parts PLA, 0.2 mm layer height, 0.8 mm shells, 25% infill, no supports, unless noted below. Nozzle was 0.4 mm.
Crank: infill 100%
Frame: supports
Flywheel - Inboard and Flywheel - Outboard: infill 100%
Shaft: layer height 0.1 mm; infill 100%
Wobble Pin: supports
- - - - - - - - - - - - - - - -
Bill of Materials
Printed Parts
- Base
- Connecting Rod
- Crank
- Cylinder
- Flywheel - Inboard
- Flywheel - Outboard
- Frame
- Piston
- Shaft
- Wobble Pin
(One each)
Purchased or Parts Box Parts
Dowel Pin, M2.5 X 4 mm - Qty. = 2
https://www.amazon.com/dp/B0F6D45WYC?ref_=ppx_hzsearch_conn_dt_b_fed_asin_title_2&th=1
Bearing, 608ZZ - Qty. = 2
https://www.amazon.com/dp/B073P4232B?ref_=ppx_hzsearch_conn_dt_b_fed_asin_title_7
Bearing, R188ZZ - Qty. = 1
https://www.amazon.com/dp/B07TWQ92JV?ref_=ppx_hzsearch_conn_dt_b_fed_asin_title_5&th=1
Glue
- - - - - - - - - - - - - - - -
Assembly:
Print everything.
After drilling out the dowel pin holes (2.5 mm), glue the flywheel halves together with the two dowel pins between them.
CAUTION: Don't pull hard on the shaft for any reason; it has very low tensile strength and will break across a layer line.
The shaft should be a light press fit in the flywheel, the frame bearing and the crank. A little sanding or filing may be needed to get a proper fit. A little grease or oil might help and won't cause a problem unless the fit is too loose to begin with.
Carefully press the shaft into the flywheel assembly until the end of the shaft is flush with the outboard end of the outboard hub (the one with the recessed hub face). I recommend doing this in vise if possible.
Assure that all the support material has been removed from the narrow shoulders in the end of the frame bearing pockets and that the shoulders are clean. Press the two 608ZZ bearings into the frame pockets, tight against the shoulders.
Press the shaft/flywheel assembly into the 608ZZ bearing that is already installed in the frame until 8 mm of shaft protrudes from the end of the bearing.
Press the crank onto the protruding shaft leaving a little space between the crank and the frame/bearing face. Use a thin temporary shim if necessary.
Press the R188ZZ bearing into the connecting rod. The bearing is a little thicker than the rod. Make the bearing flush on one side or center it in the rod; it's not that critical.
Press the connecting rod into the piston, all the way to the small stop on the connecting rod.
Place the piston/connecting rod assembly into the cylinder.
With the cylinder on the piston, push/press the connecting rod bearing onto the crank pin, assuring that some clearance remains between the faces of the crank and the frame. Use a thin temporary shim if necessary.
Install the wobble pin by pushing it through the 608ZZ bearing in the frame and all the way into the hole in the side of the cylinder. The head of the wobble pin should be against the inner race of the bearing; the side of the cylinder should be against the bearing/frame face.
Byrorys3DLikes0Downloads325

 ByAustin Wolt WoltLikes162Downloads380

 ByLecso_113752Likes76Downloads336

 Bytovelaermans_3355197Likes63Downloads427

 ByAlexMuLikes41Downloads331

 ByckthLikes148Downloads2.4K

 ByTangoOscarMik_505113Likes31Downloads251

 ByxsynaticLikes27Downloads213

 BySimin03Likes84Downloads205

 ByDerTapirLikes34Downloads174


 BynasikLikes0Downloads272