



Grippy Broom Holder
 Byvc-designLikes0Downloads3.2K
Build another version of this model.
*only for standard engine
**only for bottle mount engine
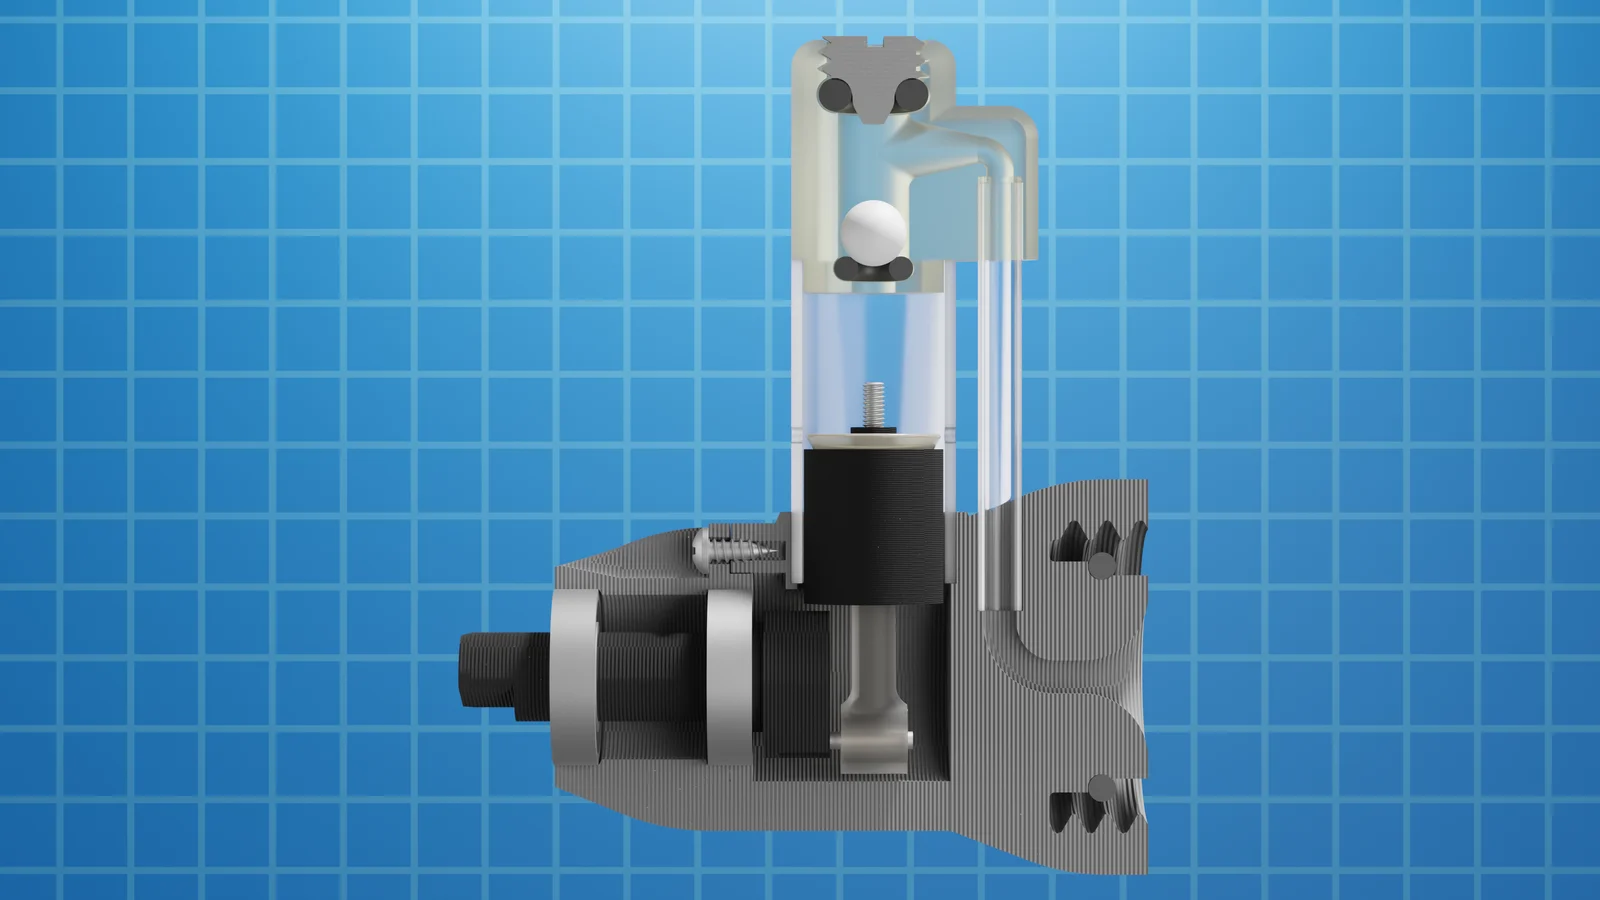
To get the correct cylinder length and exhaust port positions, I build the bottom end of the engine (crank case, shaft, conrod, piston). Then push fit (don't glue yet) the cylinder into the crank case, turn the crank until the piston reached the top, then mark 4mm above the piston and cut the cylinder to that length. That should mean the cylinder head is about 1mm above the piston when glued in position due to it's 3mm glued section.
Then move the piston down to the bottom, and mark where to drill the exhaust ports. I use a 1.5mm drill and evenly space 4 holes. Then glue the crank case (rear or bottle lid mount), cylinder and cylinder head together. The bottle mount version also requires the air tube to be glued in at the same time.
The 'Piston Seal Mold' is a mold for a mold. I printed it using resin, then poured in R PRO 20 Silicone to create a flexible mold. Then used Polycraft DuroFlex 40 Polyurethane Liquid Casting Rubber to make the actual seal. I show the molding process at 11:24 in this video:
It's a bit of a long and delicate process, so I've included a model of the seal itself if you're able to print it directly in resin (Would need shore hardness 40).
This latest piston seal doesn't require glueing to the piston, it should be a friction fit, so replacing pistons doesn't require new seals.
Byvc-designLikes0Downloads3.2K

 BySeppoTakaloLikes960Downloads1.9K

 ByleonicLikes0Downloads1.4K

 ByZED4EverLikes313Downloads5.2K

 ByfifindrLikes500Downloads4K

 ByVC_DesignLikes679Downloads3.6K

 BymoonyxLikes0Downloads698

 ByKNIN_CustomLikes112Downloads440

 ByDan Schwartz SchwartzLikes744Downloads3.4K

 Bythorin-oakenshieldLikes0Downloads532

 Bytorii-creative-studioLikes0Downloads450

 ByUpcrid3D_1585693Likes808Downloads2.1K