



Tượng Chiến binh Hy Lạp cổ đại – Người hùng Spartan
 ByTomas_tntLikes10Downloads48
Build another version of this model.
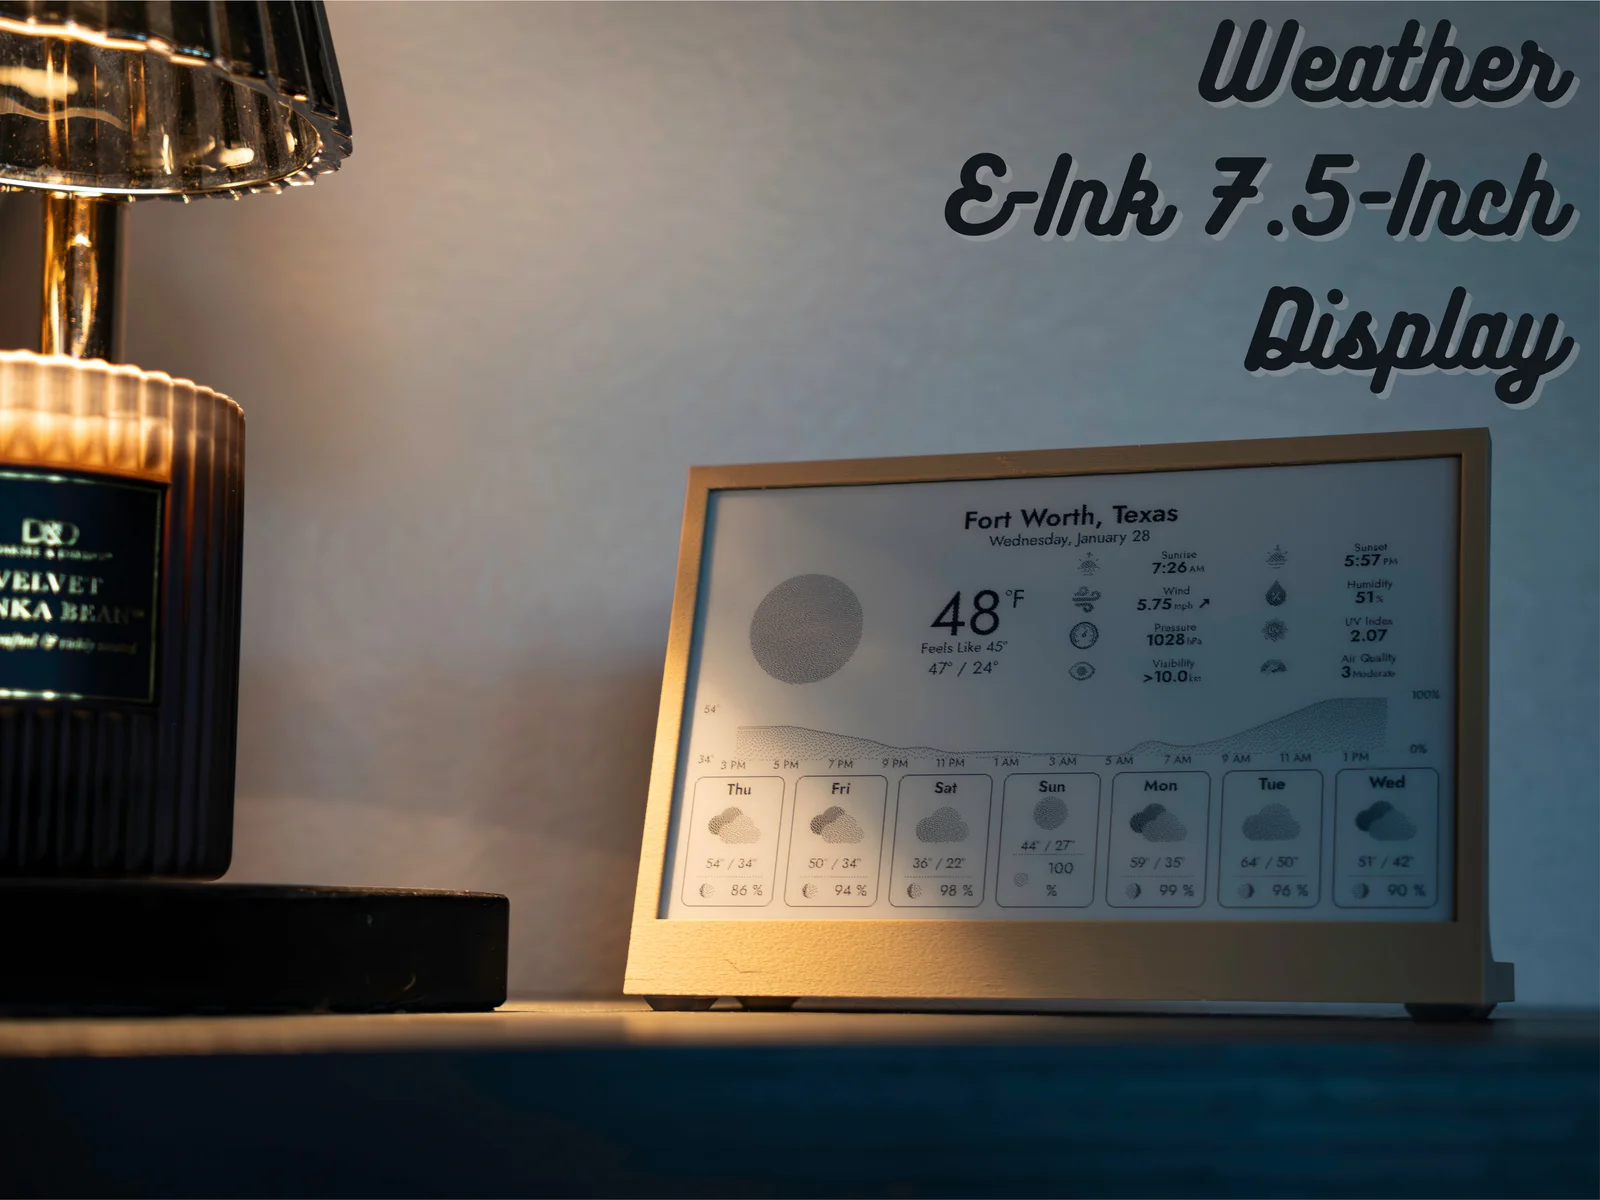
E-Ink Weather Display Frame
This is a housing for a DIY e-ink weather display using:
Raspberry Pi Zero 2 W
Waveshare 7.5” E-Ink Display
A minimal desk frame for a Raspberry Pi-powered e-ink weather station. Clean design, easy assembly, tool-less, no additional fees or subscriptions. The display shows current weather, 7-day forecast, and a 24-hour temperature graph. Update every 5 minutes via WiFi. Powered by InkyPi, a fully open source framework.
Why build this?
No subscription fees — one-time hardware cost
Open source software
Clean, minimal aesthetic
Tool-less design
Low power (~0.4W idle)
Bill of Materials
Raspberry Pi Zero 1/2 WH (or solder your own headers)
Waveshare 7.5inch E-Ink Display HAT Compatible with Raspberry Pi, 800x480 SPI Interface
5V Micro-USB Power
+8GB microSD Card
My Print Settings
Files Included
Display bezel/frame
Rear housing/lid
Assembly
Print all parts
Set HAT switches before attaching to Pi:
Display Config: B
Interface Config: 0
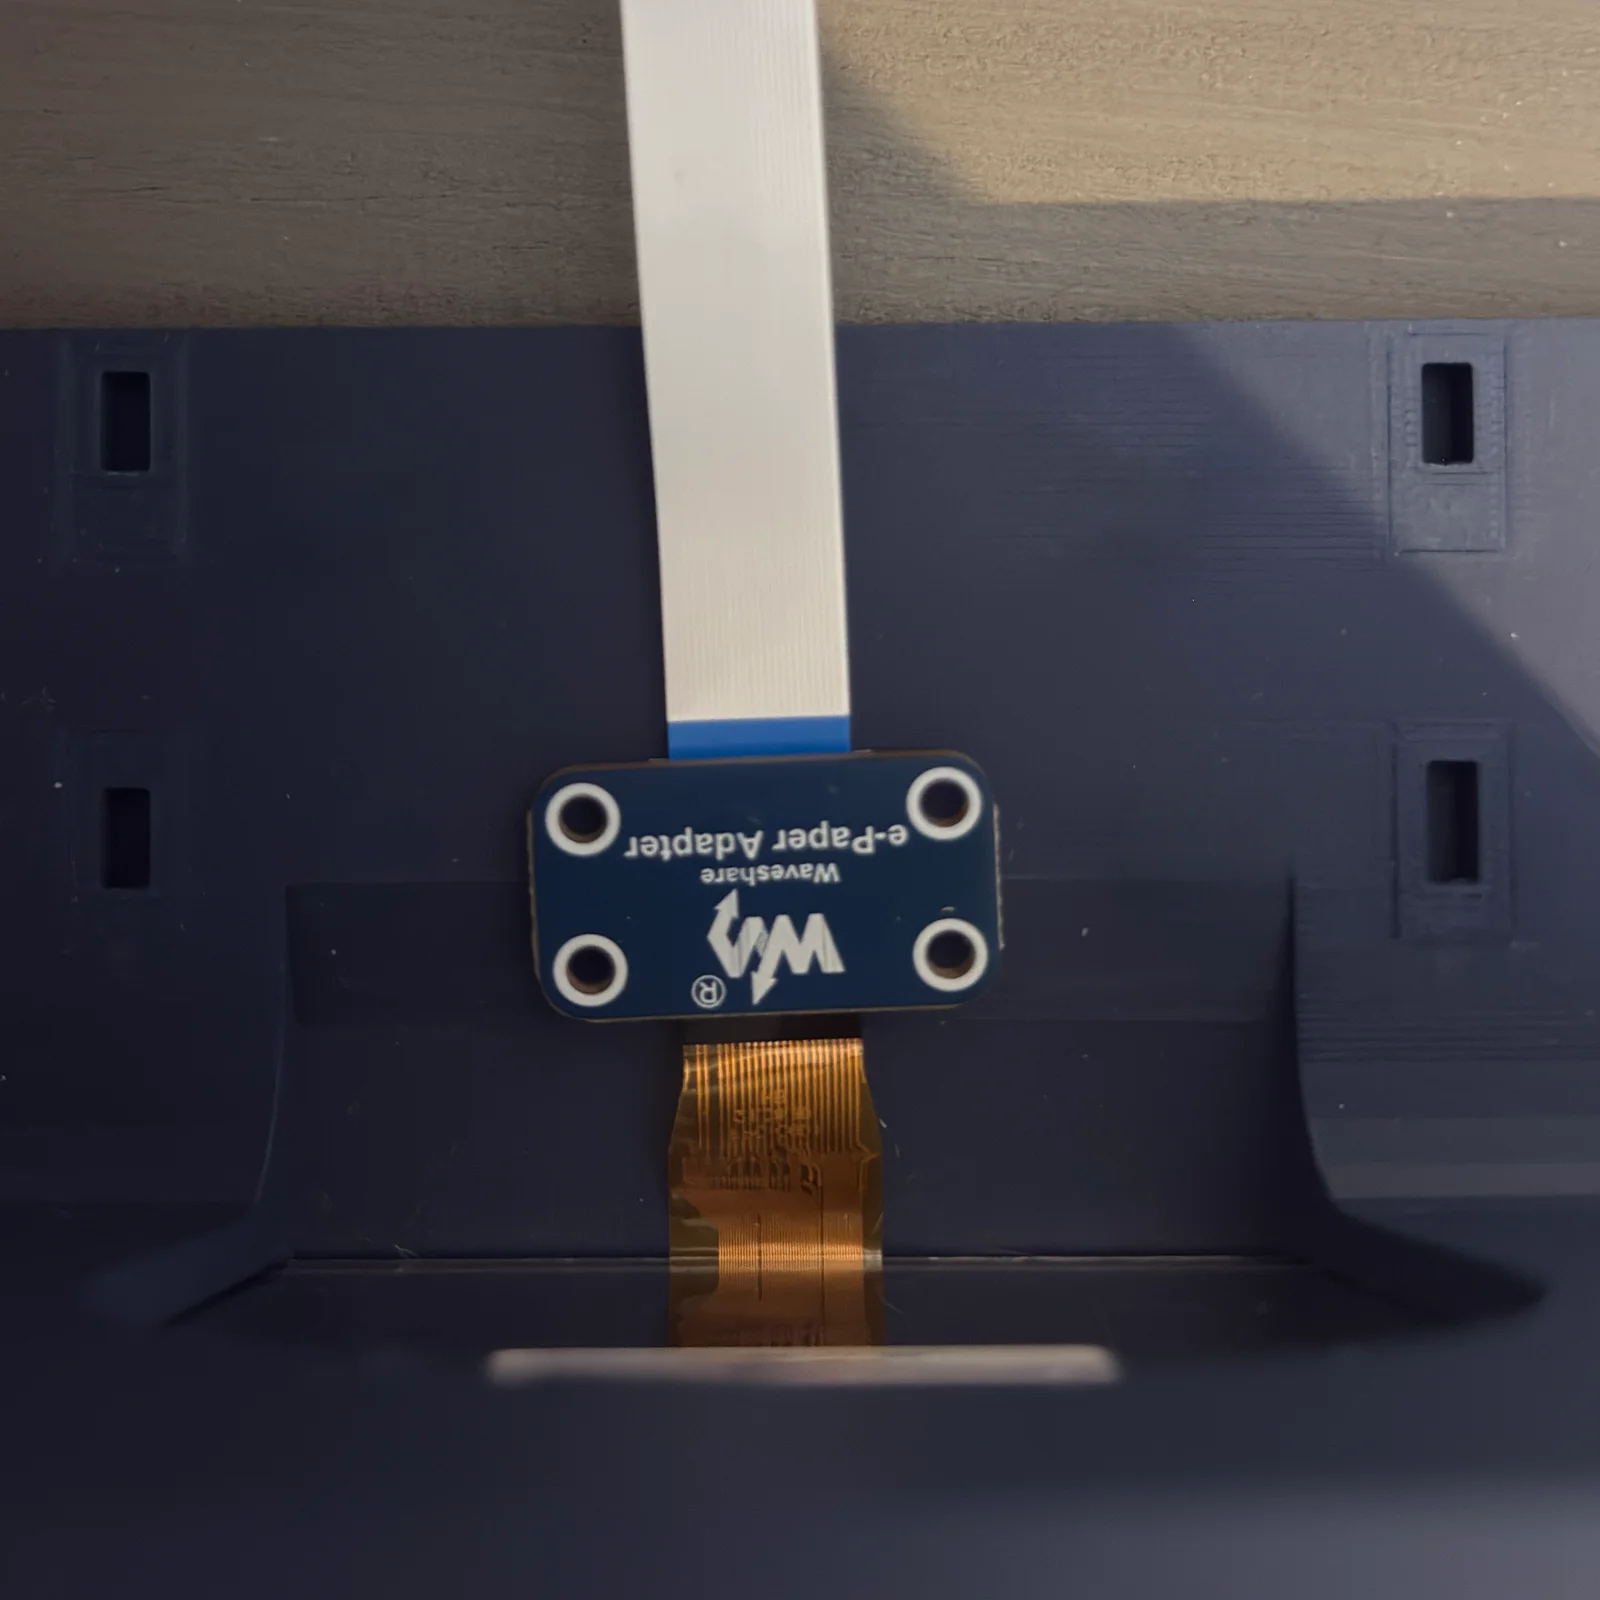
Slide Display through the top slit (be careful with the fpc cable)
Connect fpc cable to the e-Paper Adapter
- To seat the cable, push the black part in, insert the cable, and pull the black clip away from the cable
Seat HAT onto Pi GPIO headers
Insert microSD (flashed with Raspberry Pi OS Lite 64-bit)
See Pictures for how I stack each board
Software Setup (Summary)
Full instructions: GitHub Repository
Flash Raspberry Pi OS Lite (64-bit) with WiFi configured
SSH into Pi: ssh @weather.local (or IP address)
Install InkyPi:
sudo apt update && sudo apt install -y git git clone https://github.com/fatihak/InkyPi.git cd InkyPi sudo bash install/install.sh -W epd7in5_V2
Reboot, then open http://weather.local in browser
Configure Weather plugin with your location
Weather API Options:
Open-Meteo — Free, no API key required
OpenWeatherMap — Free tier (1,000 calls/day), requires account
Display Features
Current temperature + feels like
High/low temps
Sunrise/sunset
Wind, humidity, pressure
UV index + air quality
24-hour graph
7-day forecast
All in crisp black and white e-ink
Tips
WH model strongly recommended — Saves headaches with GPIO connections
Safe shutdown — Always run sudo shutdown now before unplugging
5 to 15-min refresh — Good balance of current data vs. API limits
E-ink ghosting — Normal, clears on next refresh
Credits (see for more information)
InkyPi by fatihak
Waveshare for the display
License
STL files: CC BY-NC-SA 4.0 Enjoy your new weather display!
ByTomas_tntLikes10Downloads48

 Byduo3dprintLikes0Downloads123

 Bymiepascora19_4336537Likes7Downloads18

 ByHDLikes6Downloads18

 Bylayer-forgeLikes0Downloads597

 Byh3li0Likes145Downloads490

 ByEmilySpencer_1496565Likes151Downloads512

 ByHeenkLikes118Downloads415

 Bybamingo-designLikes0Downloads256

 By3dbox42Likes0Downloads117

 Bytarik-el-hamdiLikes0Downloads123

 Byxtruderline-3dLikes0Downloads129