



Kẹp giữ sợi Filament
 Bytinx_1344834Likes1.2KDownloads6K
Build another version of this model.
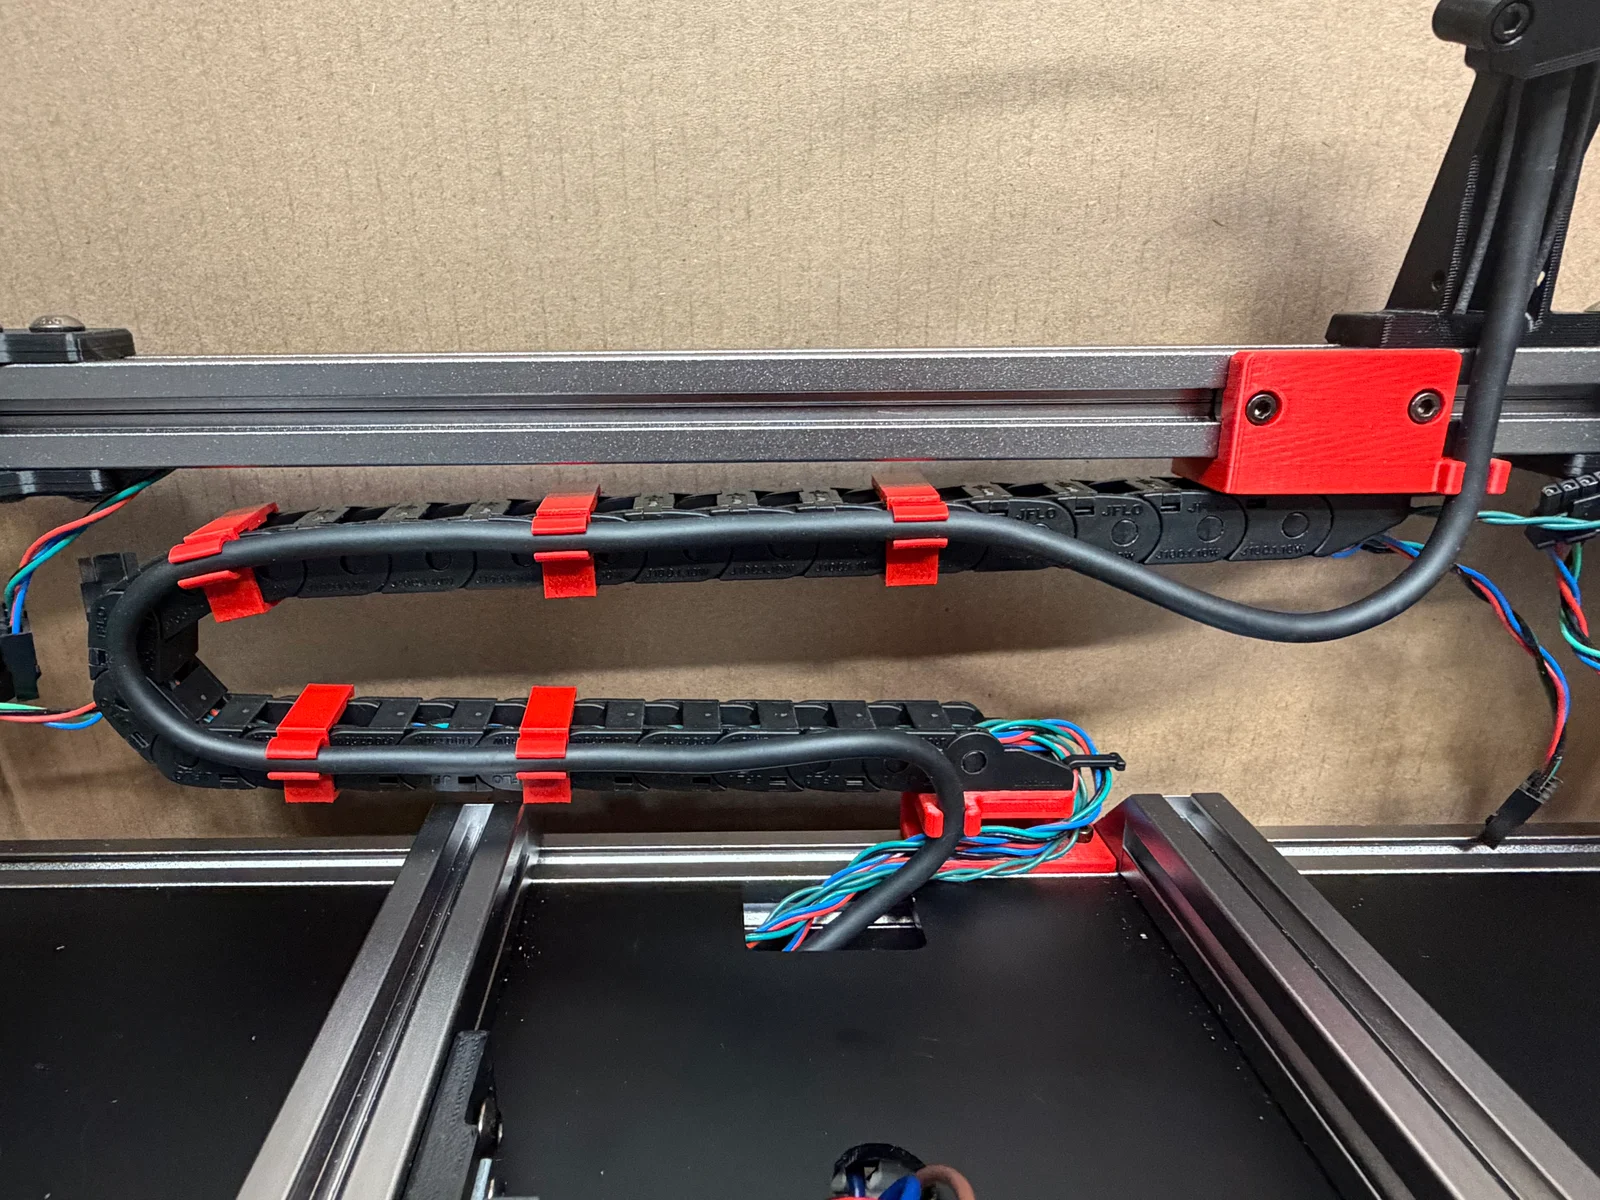
The Spine System now has a companion: Z-Chain Mount for routing the second loop from gantry to deck.
Complete System Overview
This project provides everything needed to mount and route the Nitehawk SB umbilical inside the enclosure.
Door Mount (Legacy)
Mounts to extruder door
Left in project as some may find it suitable
Could work for exhaust exit routing (not tested by me)
Works with most pre-crimped umbilicals (LDO, Siboor)
Motor Plate Mount (Current)
Bolts to NEMA14 motor plate
Keeps door free and light
More rigid mounting
Required for Spine System + Z-Chain Mount
My tested configuration
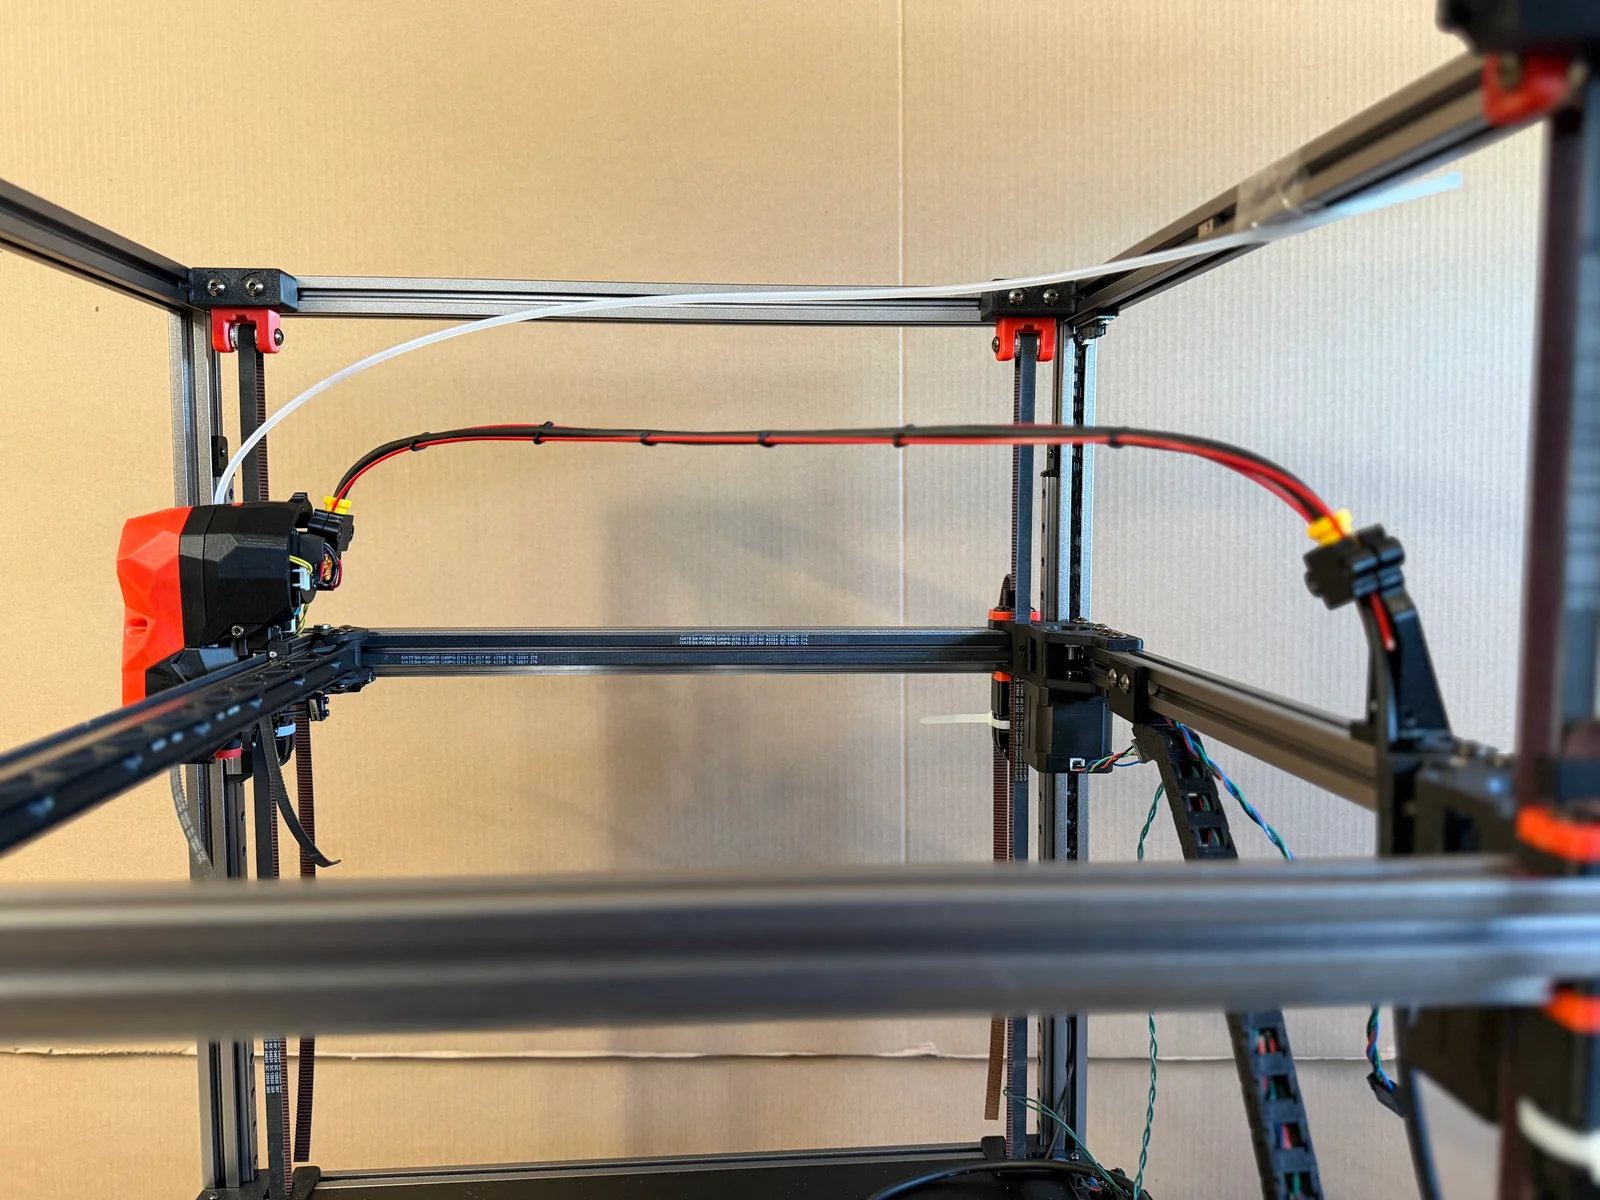
How It Works: The Spine System uses two rigid filament strands (PC/ABS) to create a self-supporting cable loop from toolhead to gantry/exhaust.
Components:
Gantry Spine Anchor (mounts to rear gantry or exhaust)
Spine Link Clips
TPU strain relief sleeves (front and rear)
Rigid 1.75mm filament strands (~2m)
Benefits:
No cable chains needed for first loop
Prevents cable twist during motion
Clean, minimal solution
What's This For? Routes the cable's second loop vertically from gantry down to deck, then through the deck center hole to electronics.
Why Add This? As a first-time Voron builder with an LDO 350mm kit, I wanted to route vertically to potentially maximize Z-height. The Z-Chain Mount works with the Spine System to complete the full routing path.
Components:
Gantry Mount - attaches cable chain to rear gantry extrusion (upper anchor)
Deck Mount - attaches chain to deck-level rear extrusion (lower anchor + cable attachment point)
Chain Clips - snap onto cable chain links to keep umbilical parallel during Z movement
Requirements:
Motor Plate Mount (toolhead)
Spine System (first loop)
Original Voron X/Y cable chain (repurposed for vertical use)
Cable Path:
Toolhead → Spine System → Gantry
Gantry → Z-Chain Mount → Deck
Deck center hole → Electronics
File Organization
Folder: Door Mount (Legacy)
nitehawk_sb_main_body_asa.stl
cable_clamp_cap_asa.stl
strain_relief_sleeve_split_tpu.stl
Folder: Motor Plate Mount
sb_umbilical_mount_body_vertical.stl
sb_umbilical_mount_body_10deg-back-tilt.stl
sb_umbilical_mount_body_15deg-back-tilt.stl
sb_umbilical_motor_mount_body_10deg-back-5deg-left.stl
sb_umbilical_clamp_cover.stl
umbilical_strain_relief_tpu.stl
Folder: Spine System
gantry_spine_anchor_body.stl
spine_link_clip.stl
(Uses extra Clamp_Cover and Strain_Relief_TPU for rear anchor)
Folder: Z-Chain Mount System (NEW)
Gantry_Mount.stl
Deck_Mount.stl
Chain_Clip.stl
Printing & Hardware
Print Settings:
Rigid parts: ABS/ASA, 4 perimeters, 40% infill
TPU sleeves: TPU 95A, 100% infill
Hardware:
M3x5x4 heat-set inserts (4x per mount)
M3 SHCS screws (14-20mm)
For Spine: ~2m of 1.75mm rigid filament (PC/ABS)
For Z-Chain: Original Voron cable chain (may need extra links)
Assembly
Install Motor Plate Mount on toolhead
Install Spine Anchor at gantry
Insert rigid filament strands through TPU sleeves
Route umbilical along spine to anchor point
Install Motor Plate Mount on toolhead
Install Spine System (toolhead to gantry)
Install Gantry Mount on rear gantry extrusion
Install Deck Mount on rear extrusion at deck level
Attach cable chain between Gantry Mount and Deck Mount
Install Chain Clips along chain
Route cable from Spine Anchor → down chain → through deck center hole
Test full Z-axis range
Note: Door Mount could work for exhaust exit routing but has not been tested. The tested configuration uses Motor Plate Mount.
Design Notes
Modular design allows easy reconfiguration
Z-Chain Mount designed for LDO 350mm kit (chain length may vary)
Motor Plate Mount may require removing stiff heatshrink near Nitehawk connector
All components designed for easy cable removal/service
Credits
Z-Chain mounting concept inspired by Richard M's Voron CAN bus Z-chain:
https://www.printables.com/model/279739-voron-can-bus-z-chain-move
Status
Z-Chain Mount System currently in testing on my LDO 350mm build. Feedback welcome.
Change Log
01 Feb 2026: Added Z-Chain Mount System (Gantry Mount, Deck Mount, Chain Clips)
30 Jan 2026: Added Motor Plate Mount option
27 Jan 2026: Initial release (Door Mount + Spine System)
Bytinx_1344834Likes1.2KDownloads6K

 ByPrintStructorLikes0Downloads132

 ByNadirLikes25Downloads114

 Byla-cave-au-chatLikes0Downloads965

 Byprusa-researchLikes0Downloads2.7K

 ByAnthonyDouri_1604724Likes24Downloads224

 Byarhi_585078Likes64Downloads541

 ByhartkLikes59Downloads119

 ByHanzo3dLikes155Downloads414

 BydarienLikes0Downloads1K

 ByGeek5DLikes147Downloads485

 BySmolboiLikes39Downloads120