



Mô hình boomerang in liền khối cực nhanh
 Byquibeck_3353173Likes1.5KDownloads11.5K
Remix of HomeRacker - Core: Hệ thống giá đỡ đa năng By kellerlab_1951139
Build another version of this model.
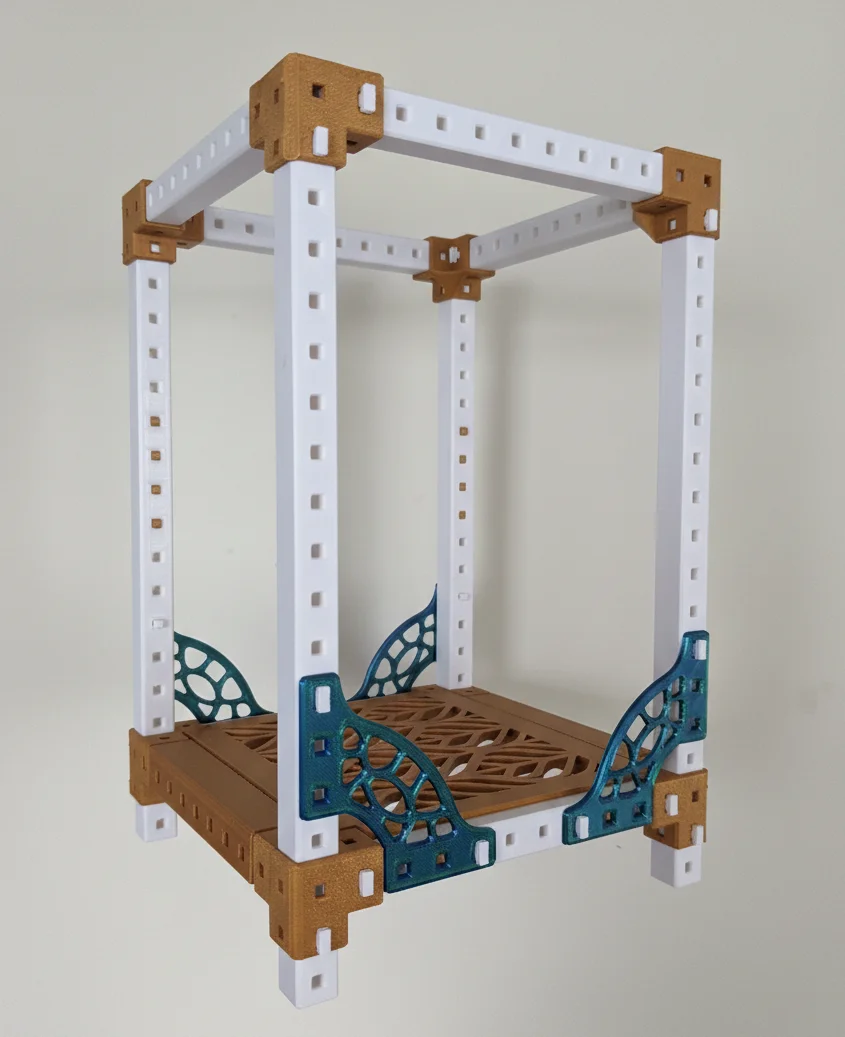
Introducing a new way to Rack and Stack your plants.
By slightly altering the HomeRacker core, and leaving a tiny gap in the support brackets on top + a small exposed piece of support as a foot, you can stack these racks on the fly - or use it as a stand alone plant shelf.
This mod uses original components and only slightly modified corner brackets, meaning it's fully compatible with the other HomeRacker components.
This rack accommodates small to medium plants, but If you wish to build bigger, you can find all compatible parts and additions here:
https://www.printables.com/model/1457986-homeracker-core
https://makerworld.com/en/collections/5970240-homeracker-official-catalog
https://makerworld.com/en/collections/6173784-homeracker-community-catalog
All parts are supportless except for the shelf support bracket - which only needs supports under the lip area. Assembled plates are pre-oriented.
All parts prefer 0.2 or less layer height.
PETG preferred but PLA will work fine, maybe a little stiffer on the push-pins.
Note: The Y corner brackets are slightly difficult to print without supports, so if you do not have confidence in your overhangs you may want to paint on some outside supports for the edges.
Please paint on supports to the 2x shelf support bracket lips:
Please leave a small gap in the top support bracket to allow stacking:
Please place all support holes oriented to the front of the rack like pictured:
For the front and back, place pins on the OUTSIDE of the frame.
For the left and right side, place pins on the INSIDE of the frame (all areas).
This will allow a flush connection like so:
If you do not do this step above, the racks will NOT be able to connect sideways as the pin heads will interfere.
The shelf and Shelf bracket must be placed sideways (NOT front-on or on the front / back edge) like so:
For the shelf, make sure you are pinning your 2x shelf brackets first:
To combine units sideways, use 2x side connector pieces:
Byquibeck_3353173Likes1.5KDownloads11.5K

 By3dprintables_4343369Likes250Downloads395

 ByowlartLikes527Downloads1.3K

 BybobmakesLikes2.5KDownloads17.5K

 ByfifindrLikes216Downloads606

 ByStuart800_1278696Likes77Downloads231

 Byaxis-prints-3dLikes0Downloads786

 ByshoheiyLikes0Downloads294

 By43DPRINTLikes295Downloads660

 ByJackLikes145Downloads762

 ByPavelBures_1259148Likes16Downloads58

 ByMichael_1442457Likes230Downloads635