


Bộ xúc xắc khổng lồ (Complete Giant Dice Set)
 BybobmakesLikes4.3KDownloads16K
Build another version of this model.
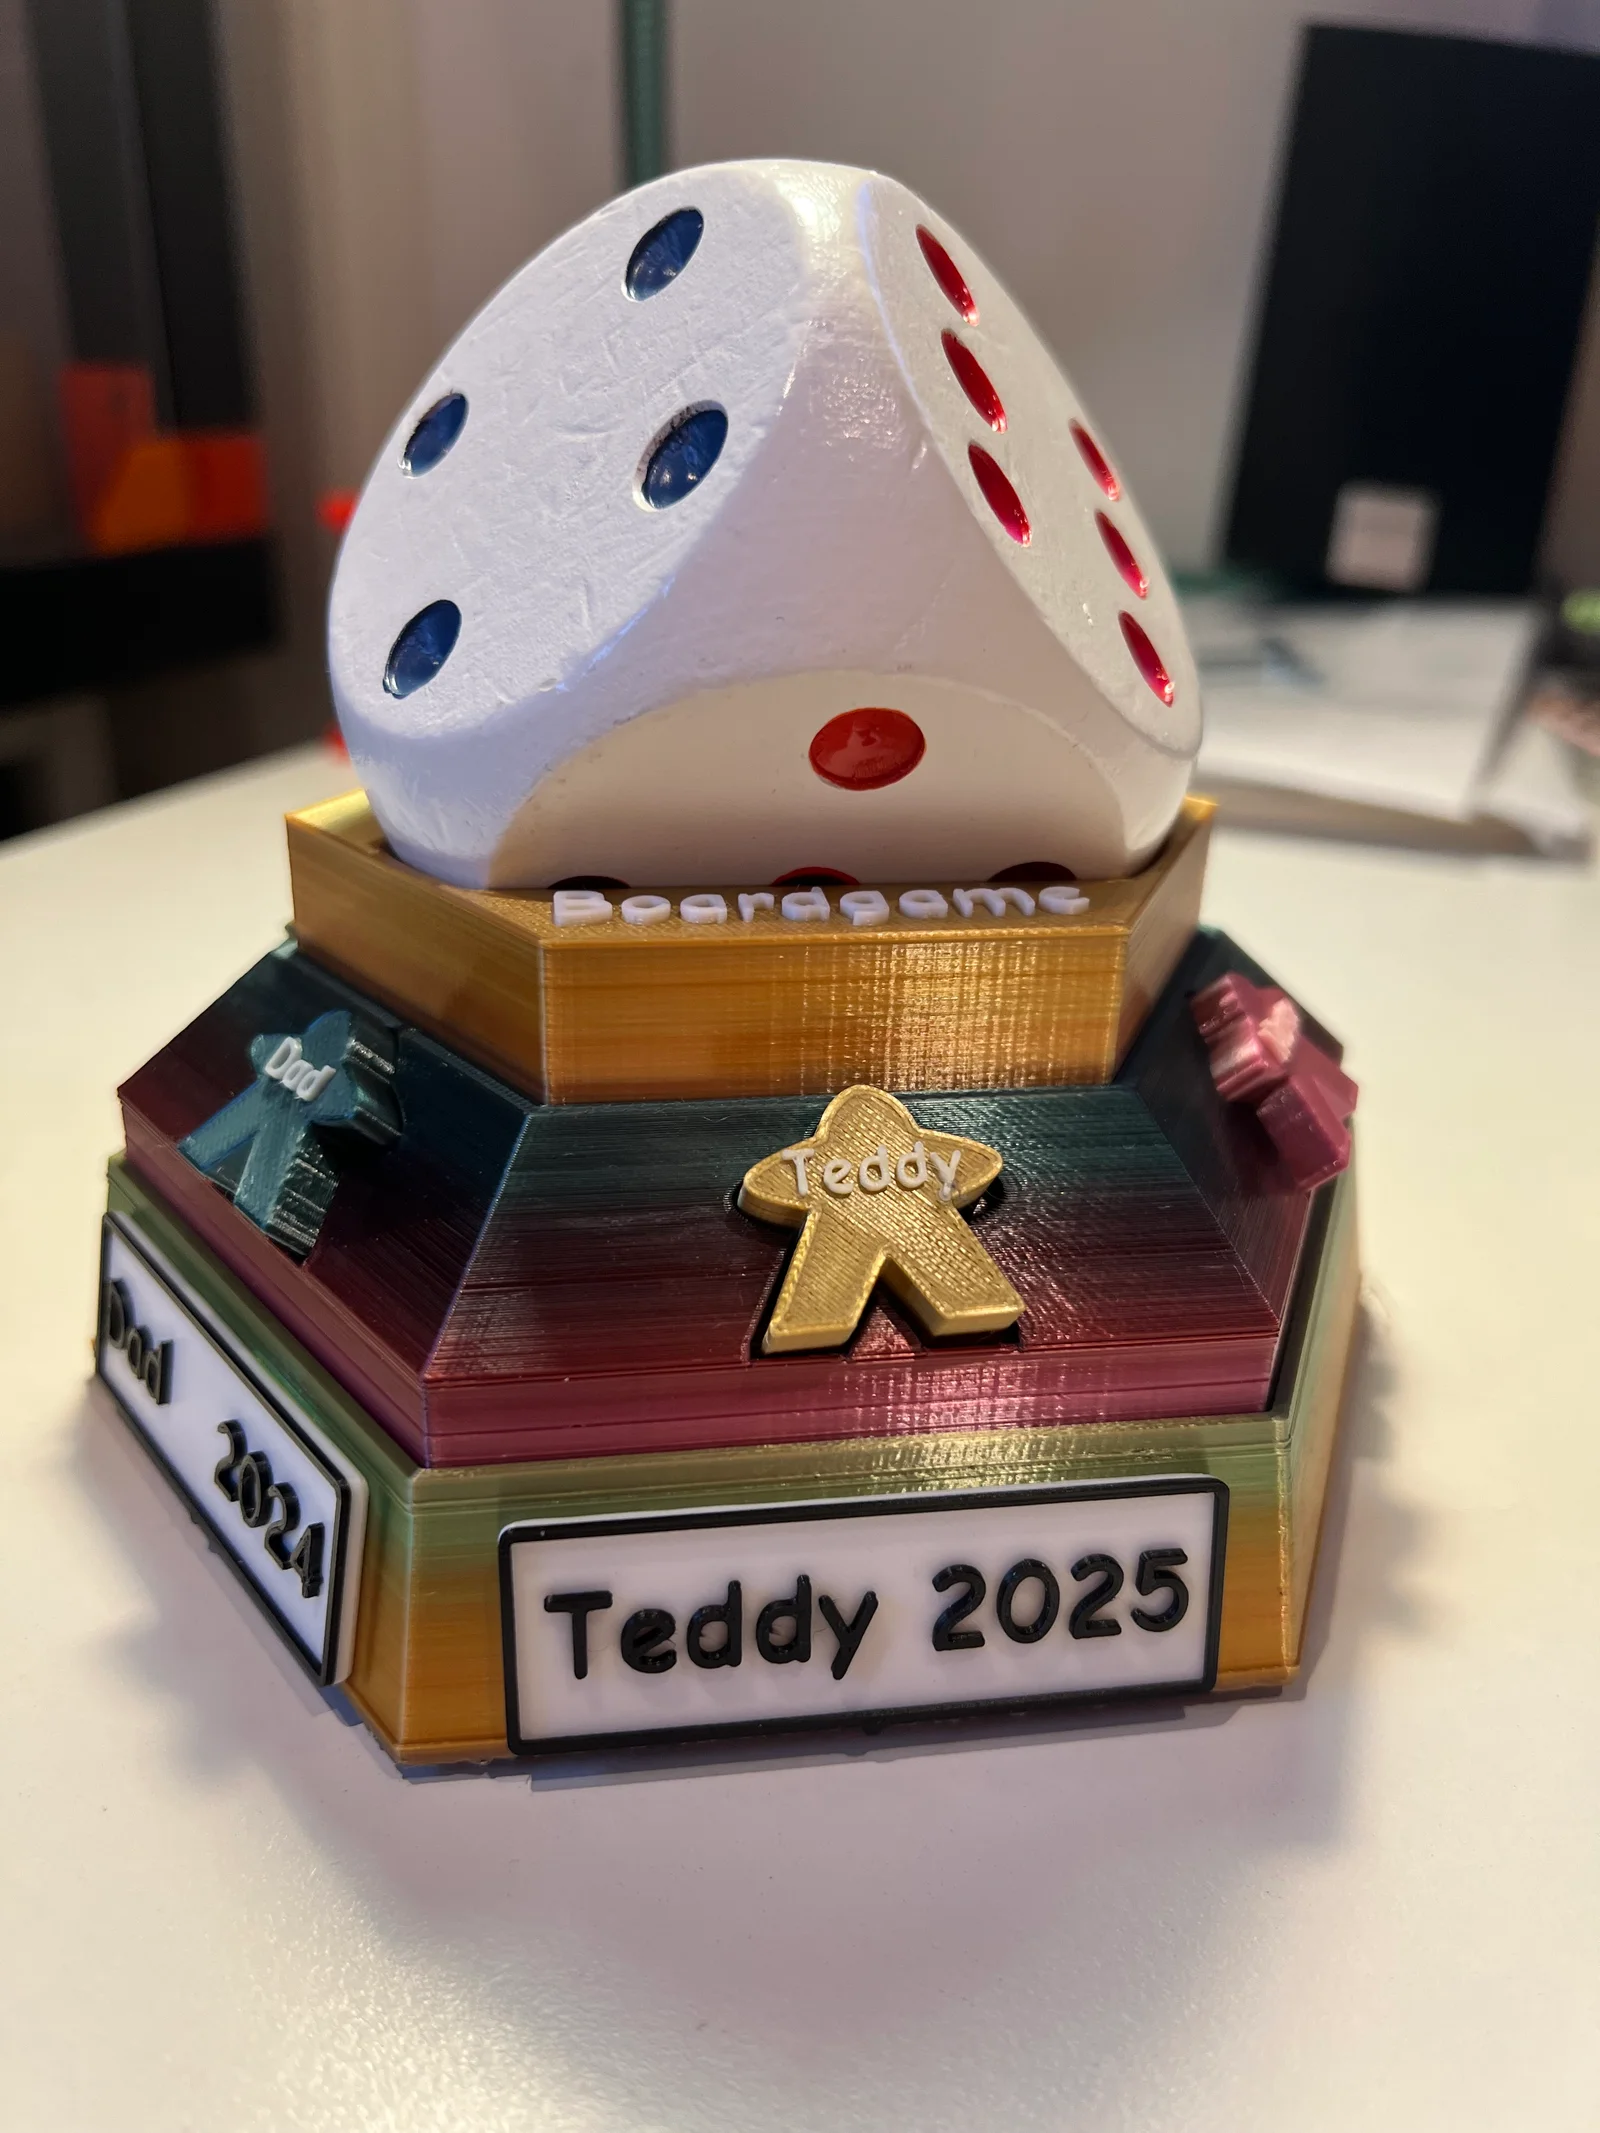
We wanted a boardgame trophy to record winners, and I couldn't find a suitable one, so this is my best effort at it. I've gone with a modular design, so that each layer can be modified or switched out, depending on what you want.
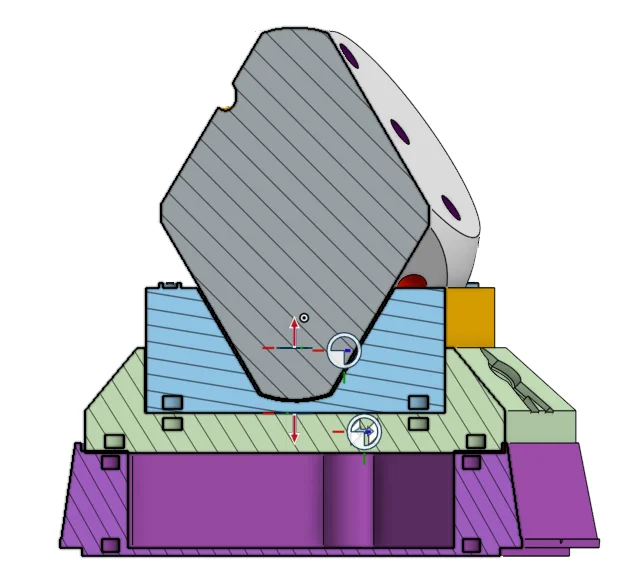
In this design, we've used a 65mm dice as the main feature. This is one of the big wooden ones you can pick up in lots of places - we used this partly as it represents boardgames for us - but also because you can then pick it up off the top of the trophy and use it during the event (eg. deciding on who goes first). I'd strongly suggest buying one of the wooden versions, rather than 3D printing it - but I've included a model dice in here for completeness (as I needed to model it to make the cradle anyway). If you're in a hurry- then just the top section makes a perfectly good small trophy. The top faces are left clear for text - so add yours and then just stop the print and change colours for these last layers. So for the top layer you pause the print once for the magnets (if you use them), and once for the colour-change for the top text.
Note that I found a lot of 50mm die on Amazon when looking again - so beware that this trophy is currently designed for a larger dice than that. If this model is popular - I'm happy to create a 50mm version - otherwise it's a good excuse to browse around some gaming/toy shops looking for that 65mm version :)
Throughout this model - I've used embedded 6x3mm magnets - so that bits 'snap' together. They aren't essential - gravity also works - but it is particularly satisfying for the meeples.
The second layer is a 'meeple' layer. I wanted to include some personalised playing pieces in the design, so that each member of the family could have a counter associated with the trophy. As I wanted to embed magnets into the meeples, and indent them neatly into the trophy- I ended up designing my own, that are very similar to standard meeples, but I've termed 'leeples' (by Jim-lee ;)). As the indents in the trophy are inclined at an angle, I couldn't easily embed magnets fully in the trophy- so those are to be superglued in after printing. This works ok though, as they're a simple glue job, and it looks nice to have a dock for each character. So for this layer, there are 2 magnet pauses (one for the bottom layer if you're going to add a winners layer under this, and one for the trophy layer, if you added magnets to that). The leeples are fully enclosed though - just pause the print at the right time, pop the magnet in the hole, and resume printing.. and you have a magnetic little leeple that can be used as a fridge magnet, or that will snap nicely into the trophy until needed on the board/table. I've included leeples for Mum, Dad, Granny and Grandad, and then a blank one that you can leave blank, or add your own names too. You'll obviously ideally want to pause printing again to change colour for this embossed text.
Finally - there is a winners layer- for nameplates. Each side has a ledge to rest the nameplate on as you glue it - to get it level. There's also a little indent in the middle of each side - so you can align it perfectly each time. There's a nameplate template in the pack - there's no getting around the need to emboss some text of your own on these - but it's a great (small, simple) design to learn on if needed. I've hollowed out the winner layers - partly for material saving and speed - but also so that they can be used as containers for more meeples as needed (if you have more than 6 regular competitors). Unfortunately, I couldn't avoid an overhang on this final layer - so they could slot into each other nicely - but it's a relatively small one - and the supports can be easily chipped away after printing. All interfaces end up out of sight underneath the trophy. There are 2 magnet pauses for this layer - as there are 2 layers of magnets.
The winners layer is designed so you can print as many of them as you want, and they should all just stack on to each other. Once you get over a few layers - you'll be grateful for the magnets to keep them snapped together..
I ended up using rainbow satin PLA to print this - which gave us a pretty colourful final result - but it also handily meant that I could time the printing of the leeples carefully, and get 6 differently-coloured leeples in favourite colours of those players - which they now enjoy playing with.
Make sure you get the polarity of the magnets right if you use them - my tips as follows:
Make a single stack of your magnets next to your printer (not a double-stack!). Always take from the top of the stack, and then keep them in that orientation until they are in the print. In this way - they will always stack nicely (assuming all your prints are the right way up when you print them - which these are designed to be). If you fumble a magnet at any point - put it back on the stack so that it flips to the right way up again, and start again.
For the leeples - follow the guidance above with the leeples themselves. And then when you're gluing into the leeples layer - have a meeple to hand - put the magnet on the leeple first, so you know it's the correct orientation to snap to it - and then make sure that it stays in that orientation as you glue it (ie, the face that was stuck to the leeple is the top exposed face when you've glued it).
Enjoy everyone :)
Jimlee
Subcomponent stuff:
These are the 6x3 magnets I used: https://amzn.to/4symYjl
Boardgame suggestions:
For anyone looking at this model (and still reading) - I suspect you might like boardgames - so here's a few suggestions that work for us:
The classics:
Carcassonne: https://amzn.to/4jzGgk0 - works for younger (6+) kids due to the very simple gameplay - but scales for adults too.
Catan: https://amzn.to/3YytZD6 - more for older kids and adults.
Newer ones we've really enjoyed recently (and both great for nature lovers):
Cascadia - https://amzn.to/49xseuI - another map builder - but easy for kids, scales for adults.
Wingspan - https://amzn.to/4puB1DT - a beautiful engine builder based on birds and habitats - has varying difficultly levels built into the main game options.
(Note: These are associate links, which means that they don't cost you any more, but I get a small cut if you purchase via these links. This isn't a big money-spinner, but I find it so useful to have sub-components linked in models that I download - so I know I'm getting exactly the right bits without much research, and it helps support my tinkering!).
BybobmakesLikes4.3KDownloads16K

 Byewr2sanLikes208Downloads824

 Byrezips_533396Likes52Downloads396

 ByJoe_84156Likes38Downloads245

 ByMZ4250Likes147Downloads919

 ByGabrielGuaran_808519Likes22Downloads149

 ByFishManooo_1312296Likes172Downloads591

 Byjk-penguinLikes0Downloads106

 BytjdesignLikes13Downloads97

 BySascha_LB_581517Likes87Downloads485

 ByKNfLrPnLikes45Downloads222

 By3DBull_639837Likes13Downloads80