


Phoenix - Mô hình thu nhỏ MGM sẵn sàng in
 ByMikeGyverMinisLikes317Downloads1.6K
Build another version of this model.
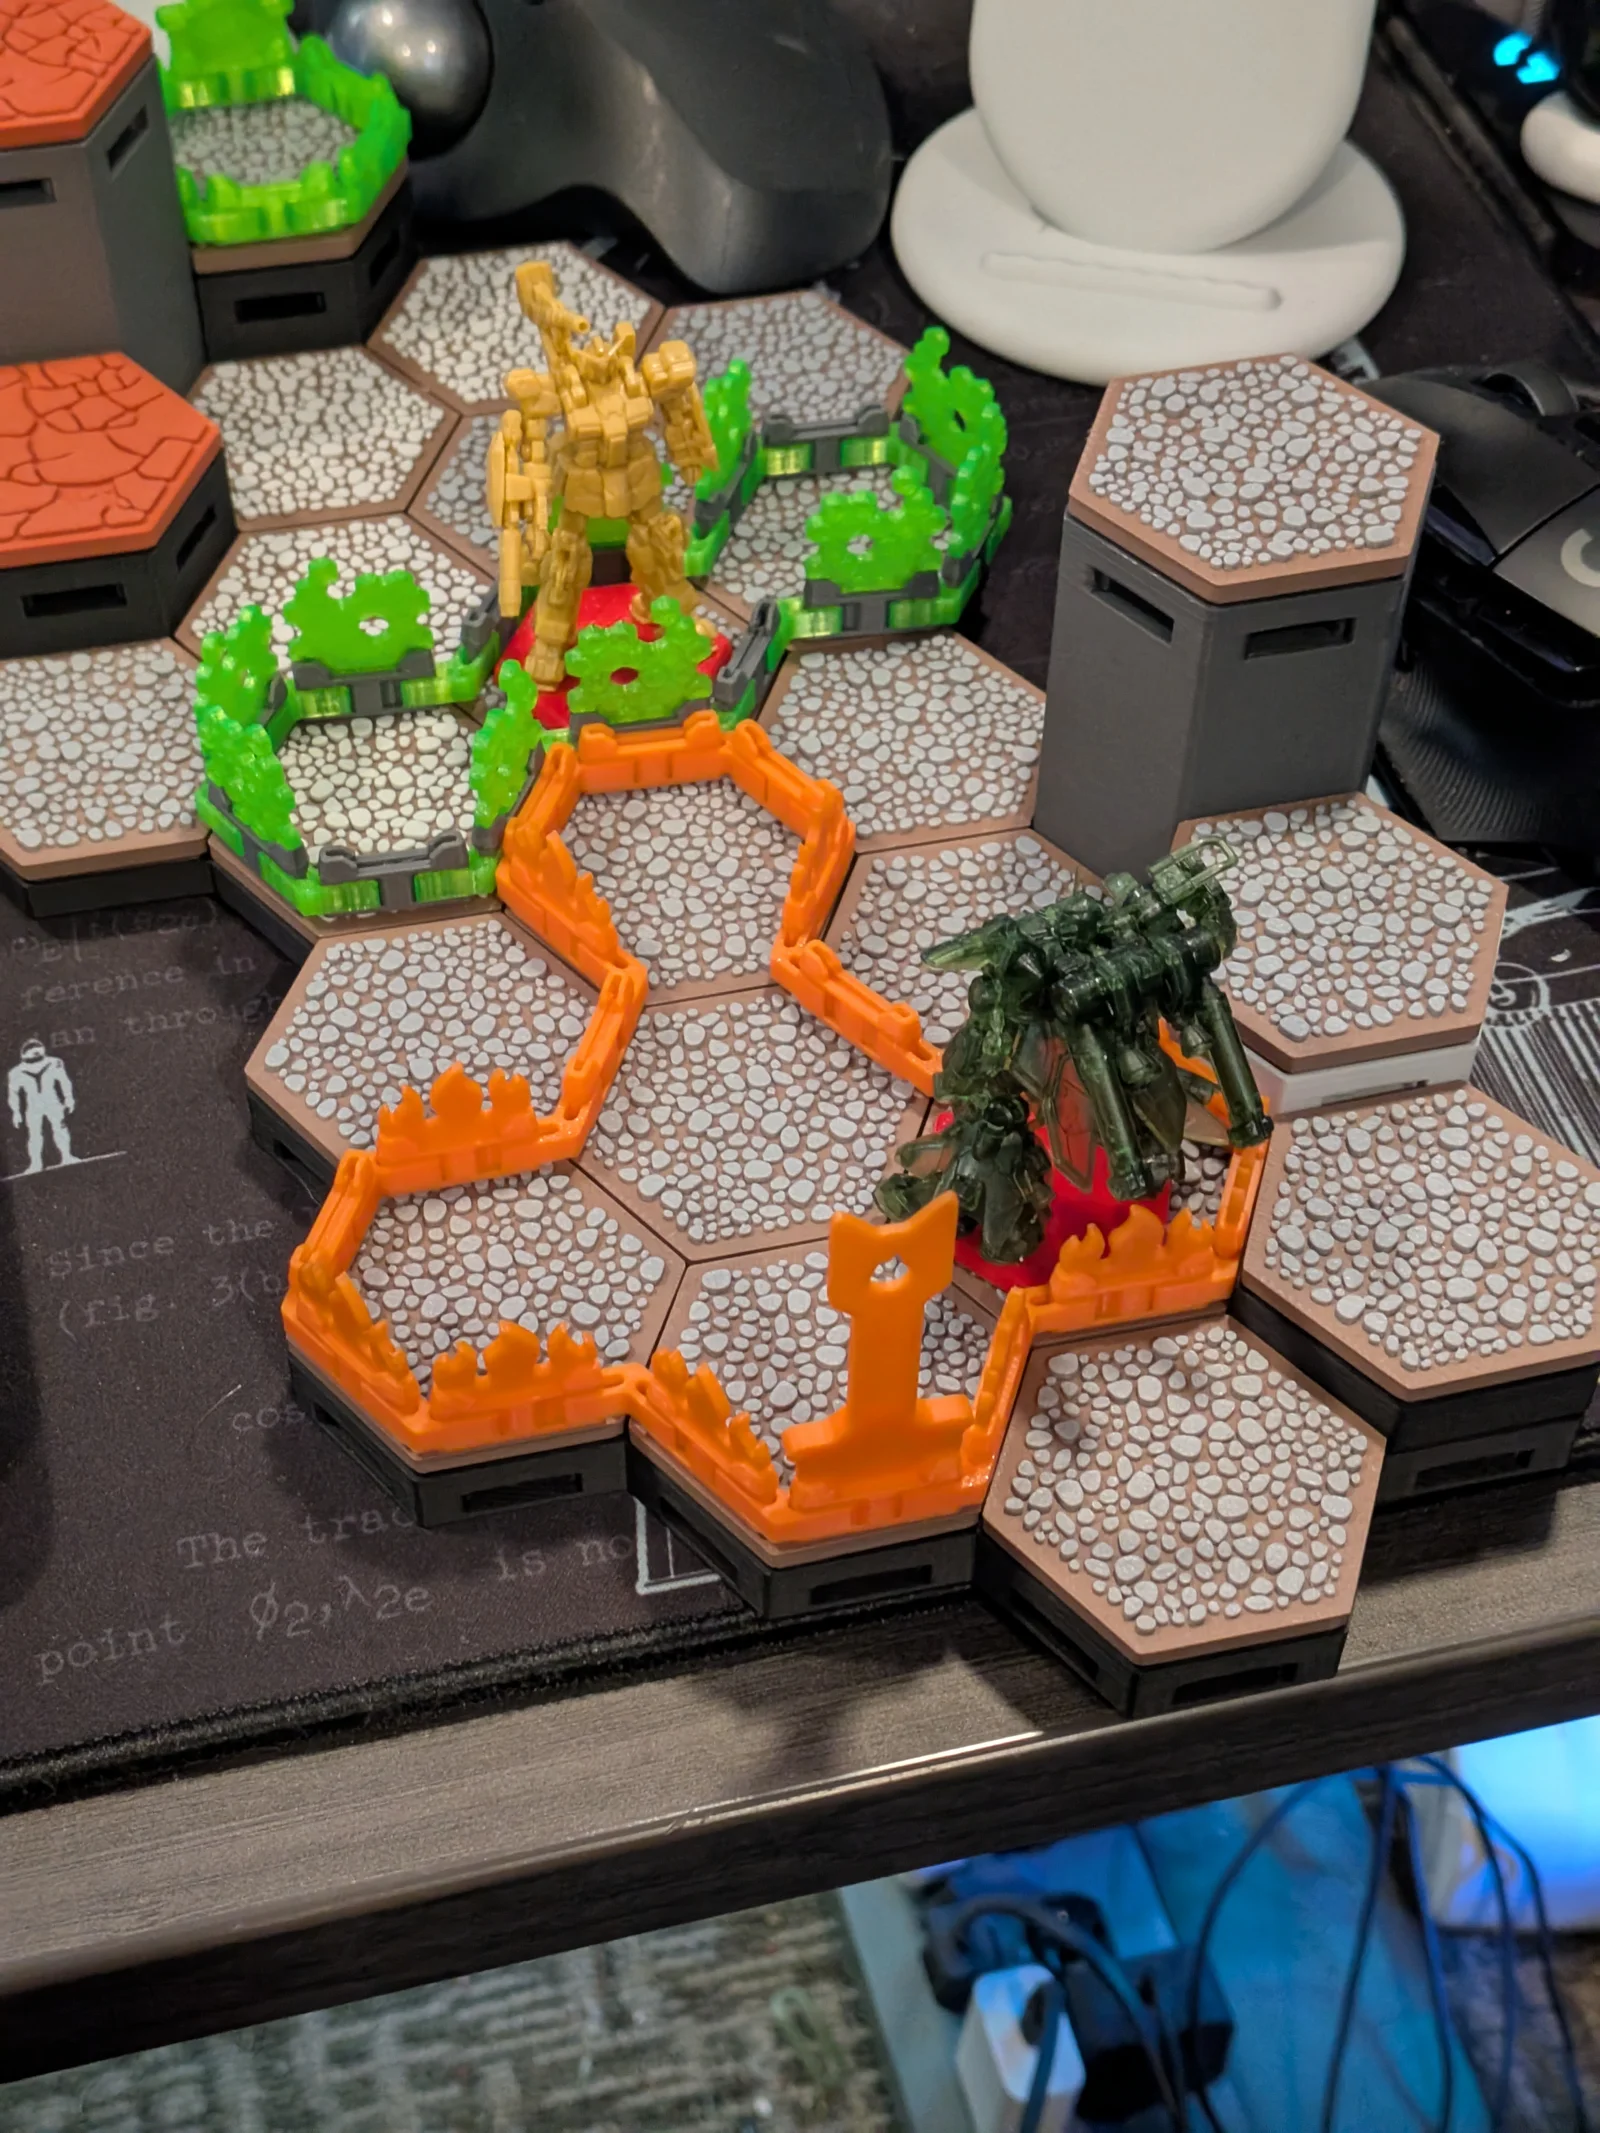
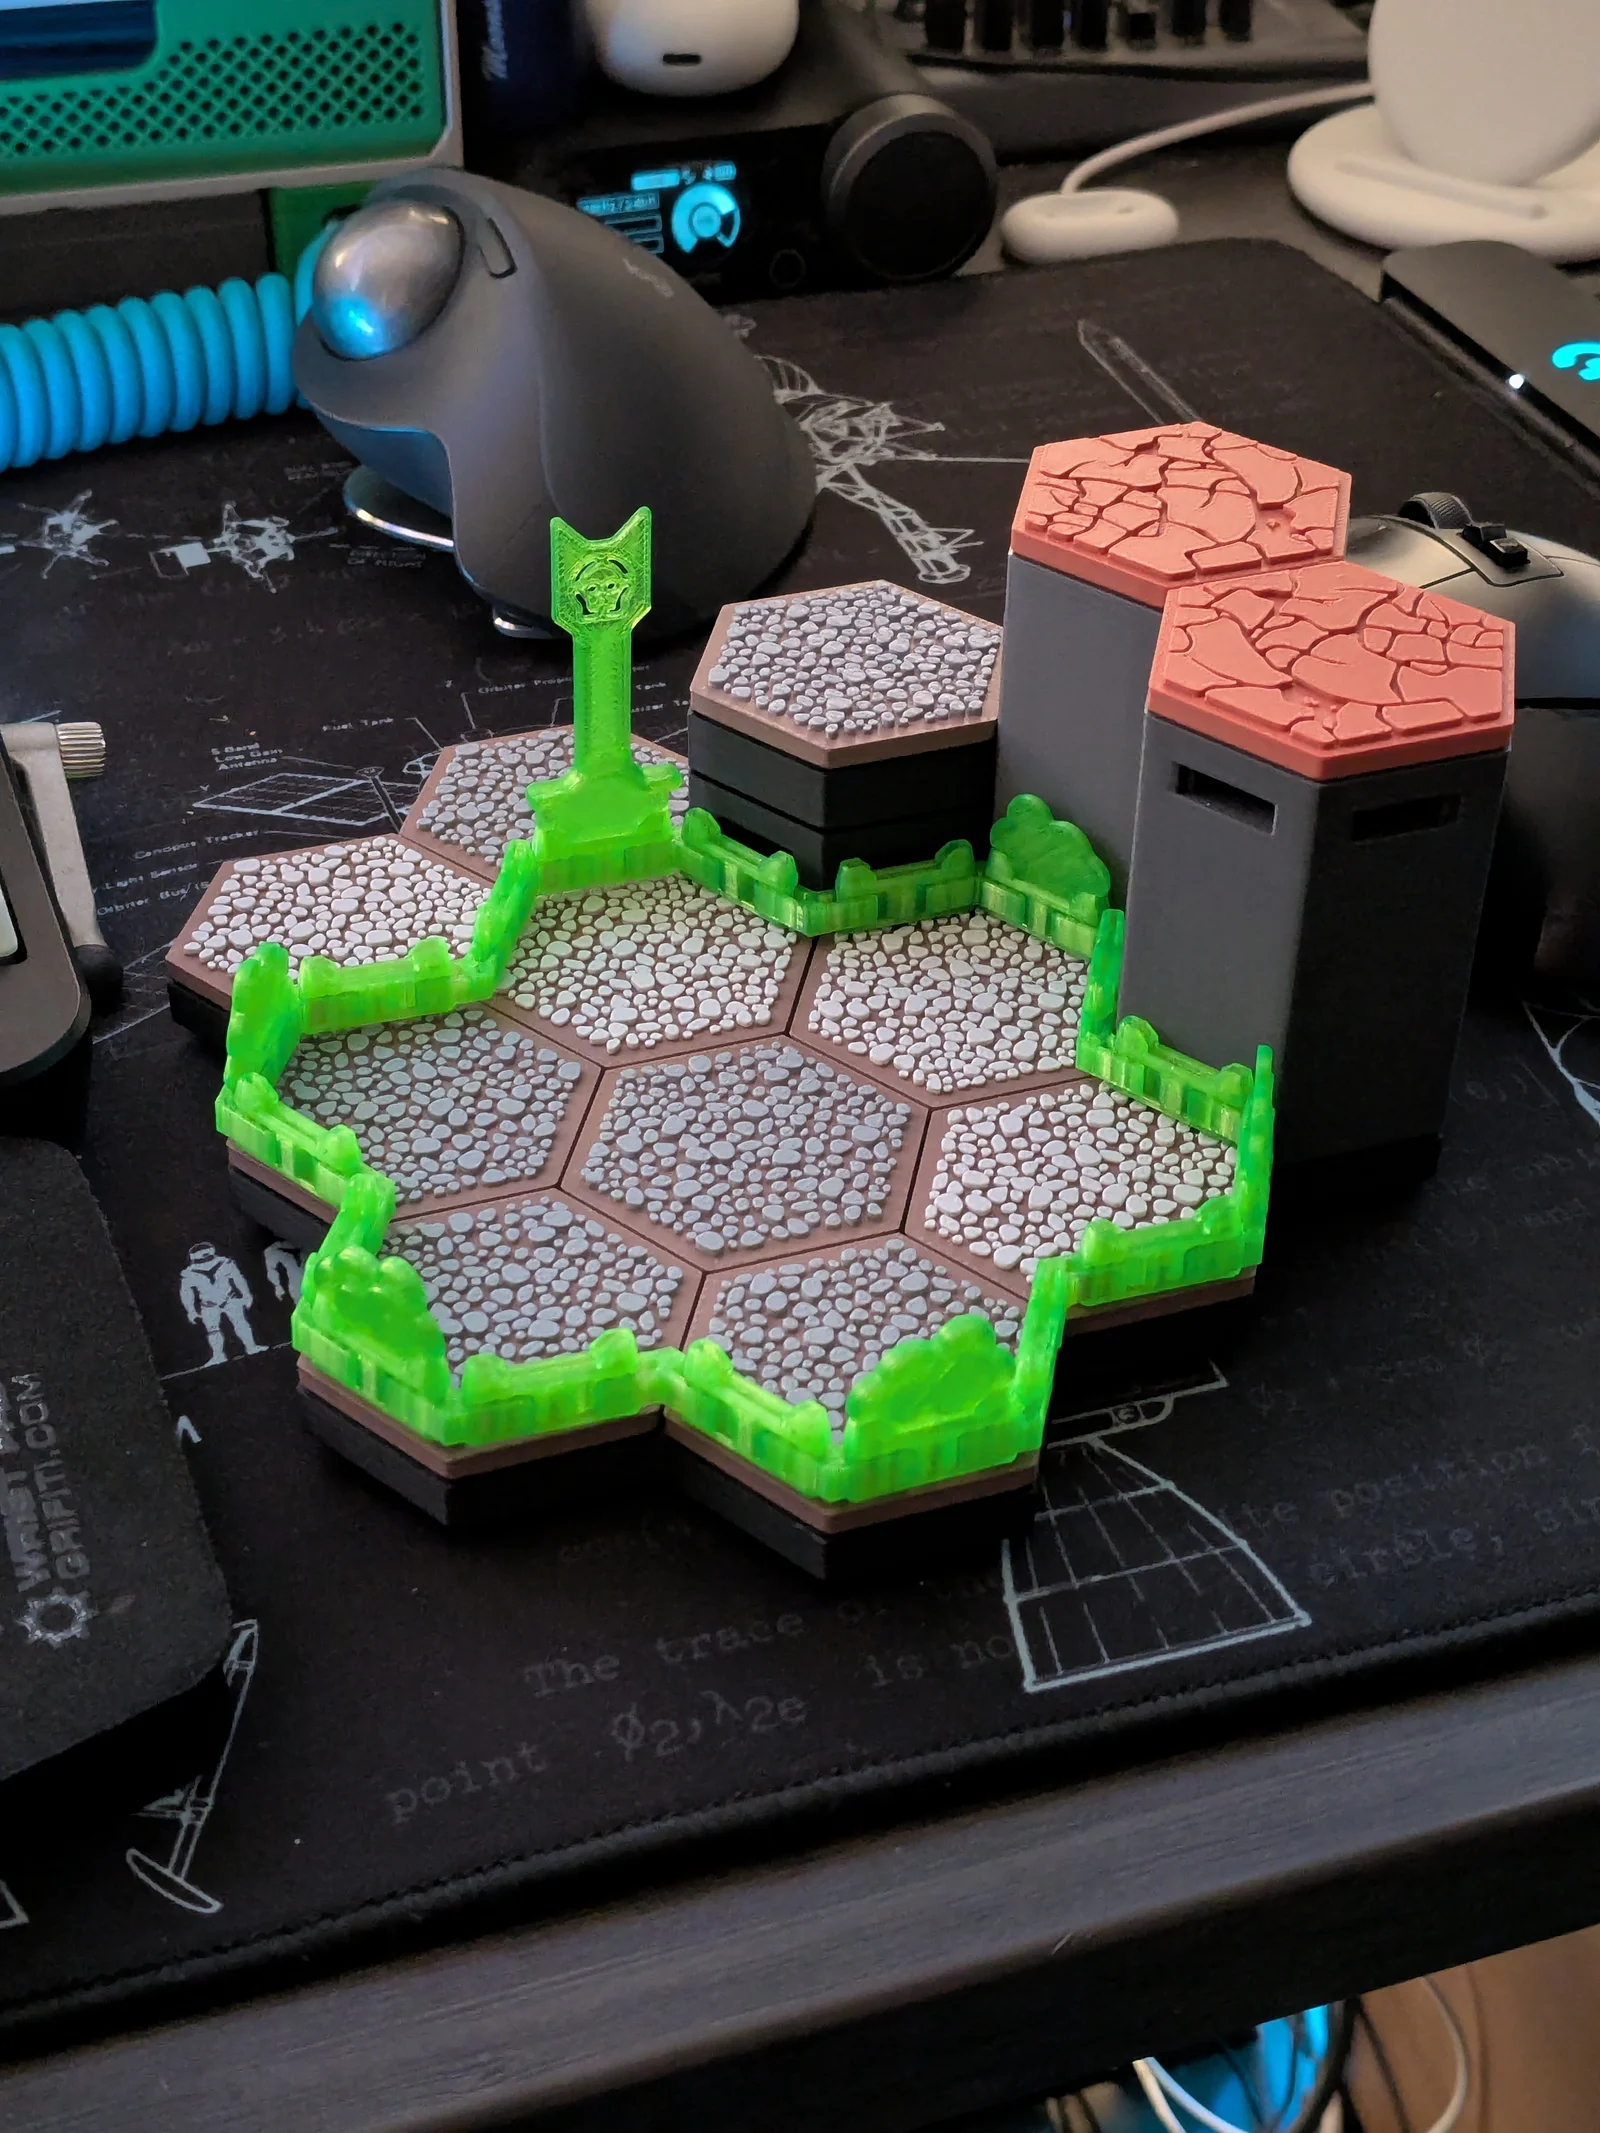
Mark off areas of dangerous terrain and lingering battlefield effects with this set of modular area terrain markers, designed to work with the FDMecha Hex Terrain system. Areas can be any arbitrary shape, and can be configured either to sit fully inside the hexes marked (so they can butt up against adjacent raised terrain) or just outside the marked hexes (so they can go around raised terrain contained within), and can be split into parts that more-or-less hold their shape to mark areas that cross multiple heights. Insert parts can be inserted to indicate what the indicators are indicating; tall inserts also act as grab handles and as a place to hang condition rings or other additional indicators.
Parts have been tested in Basic PLA, Matte PLA and PETG; Matte PLA isn't recommended for the corner clips (it proved a little too flexible in testing), but all above filaments should otherwise work for all pieces.
Print an equal number of "bar" and "corner" pieces, plus optional inserts (up to 1 per bar). For some common Lancer RPG sizes:
S1 (1 space): 6
S2 (3 spaces): 12
S3 (and/or Blast 1 and/or Cone 3): 18
S4 (and/or Burst 1 around a S2 character and/or Cone 4): 24
Line [length]: [length]x4, plus 4 for the ends.
Corners and bars should print in their default orientation; inserts and tall inserts should be auto-orientated to lay flat. No support should be necessary in either case.
Inserts should snap into the top slot on bars with a little pressure. For tall inserts, use the shoulders at the base to press the insert in.
Corners should clip onto bars in 3 tactile clicks, allowing them to be assembled in two different ways:
For a marker that sits inside the marked hexes: click convex/outer corners all the way in, and concave/inner corners out by 1 click.
For a marker that sits outside the marked hexes: click convex/outer corners 1 click out, and concave/inner corners all the way in.
ByMikeGyverMinisLikes317Downloads1.6K

 ByTomAnderson_1460797Likes208Downloads650

 ByMagig_I3PrusaLikes14Downloads113

 Bymike-gyver-minisLikes0Downloads145

 Bymagig-i3prusaLikes0Downloads120

 BydjkrevLikes0Downloads402

 ByGeorgeMiddleco_24802Likes23Downloads237

 Byraghulm_1461586Likes20Downloads139

 Bymodel-magicLikes0Downloads164

 ByPatrick_1487475Likes65Downloads856

 ByhaggiwattLikes0Downloads142

 ByandrewlbLikes24Downloads107