



Grippy Broom Holder
 Byvc-designLikes0Downloads3.2K
Build another version of this model.
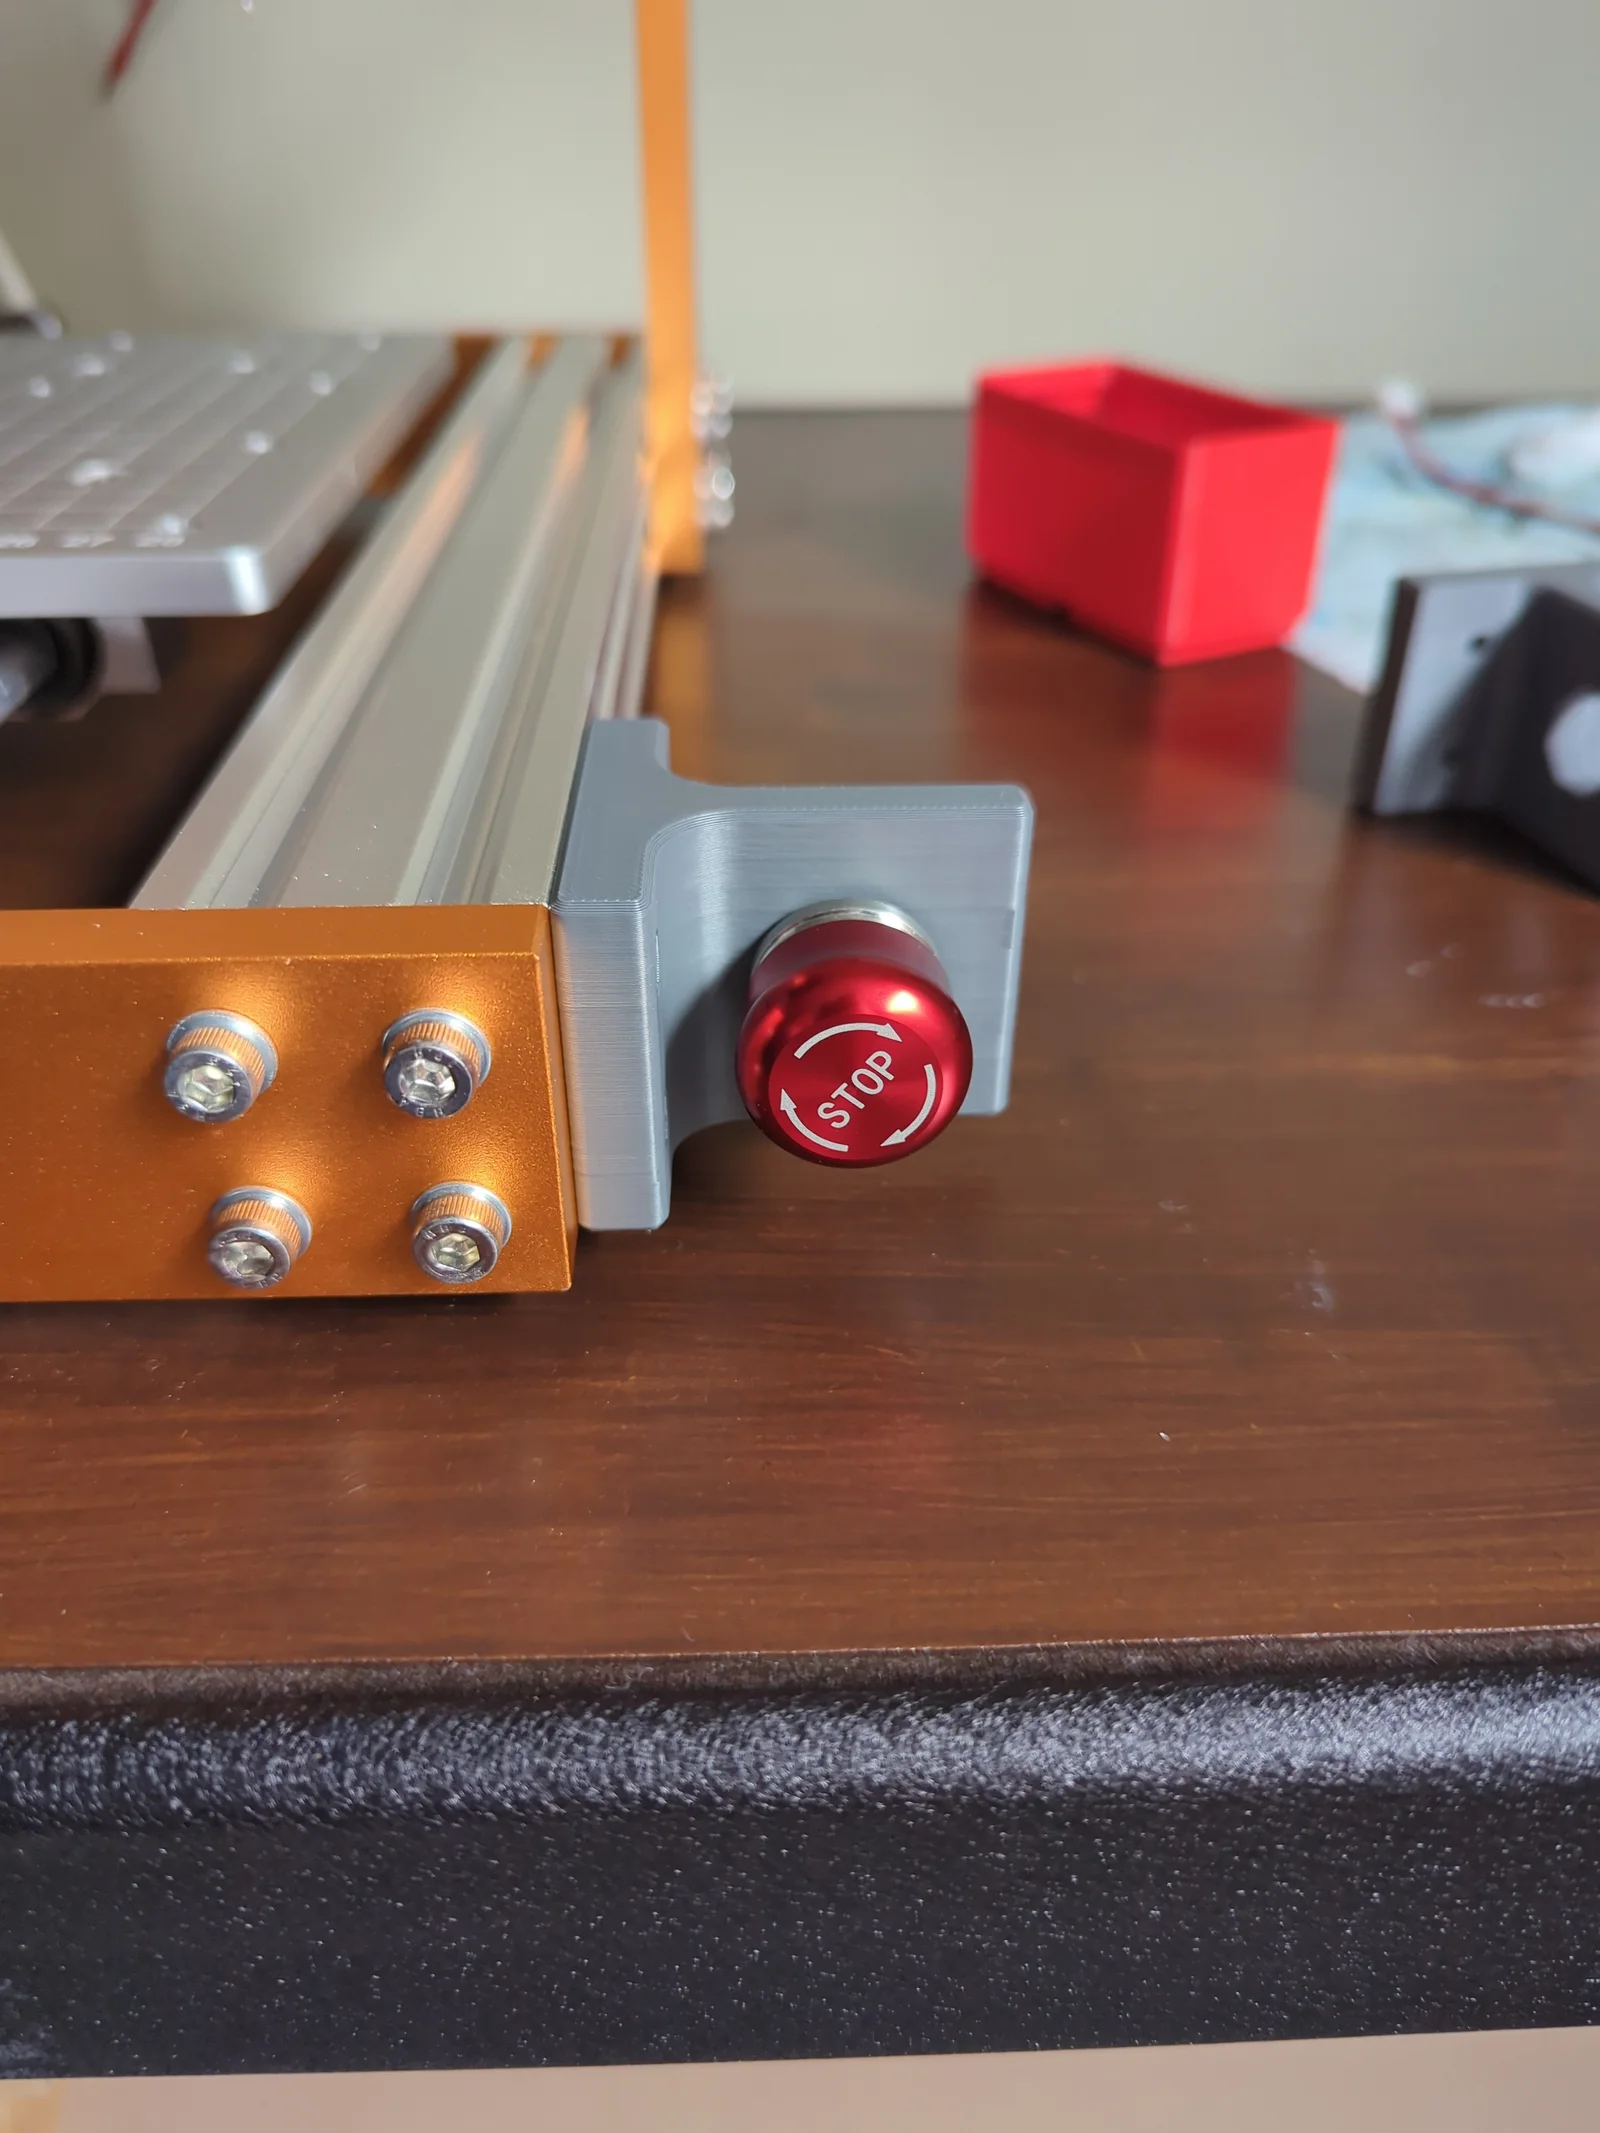
The default location for the emergency stop button on Lunyee's 3018-style machines is quite suboptimal. It requires reaching across the machine, which is at best inconvenient, and at worst quite dangerous. Furthermore, the wiring in that position is difficult to properly manage away from anything moving. An emergency stop button must be convenient and safe to access, and in a prominent place.
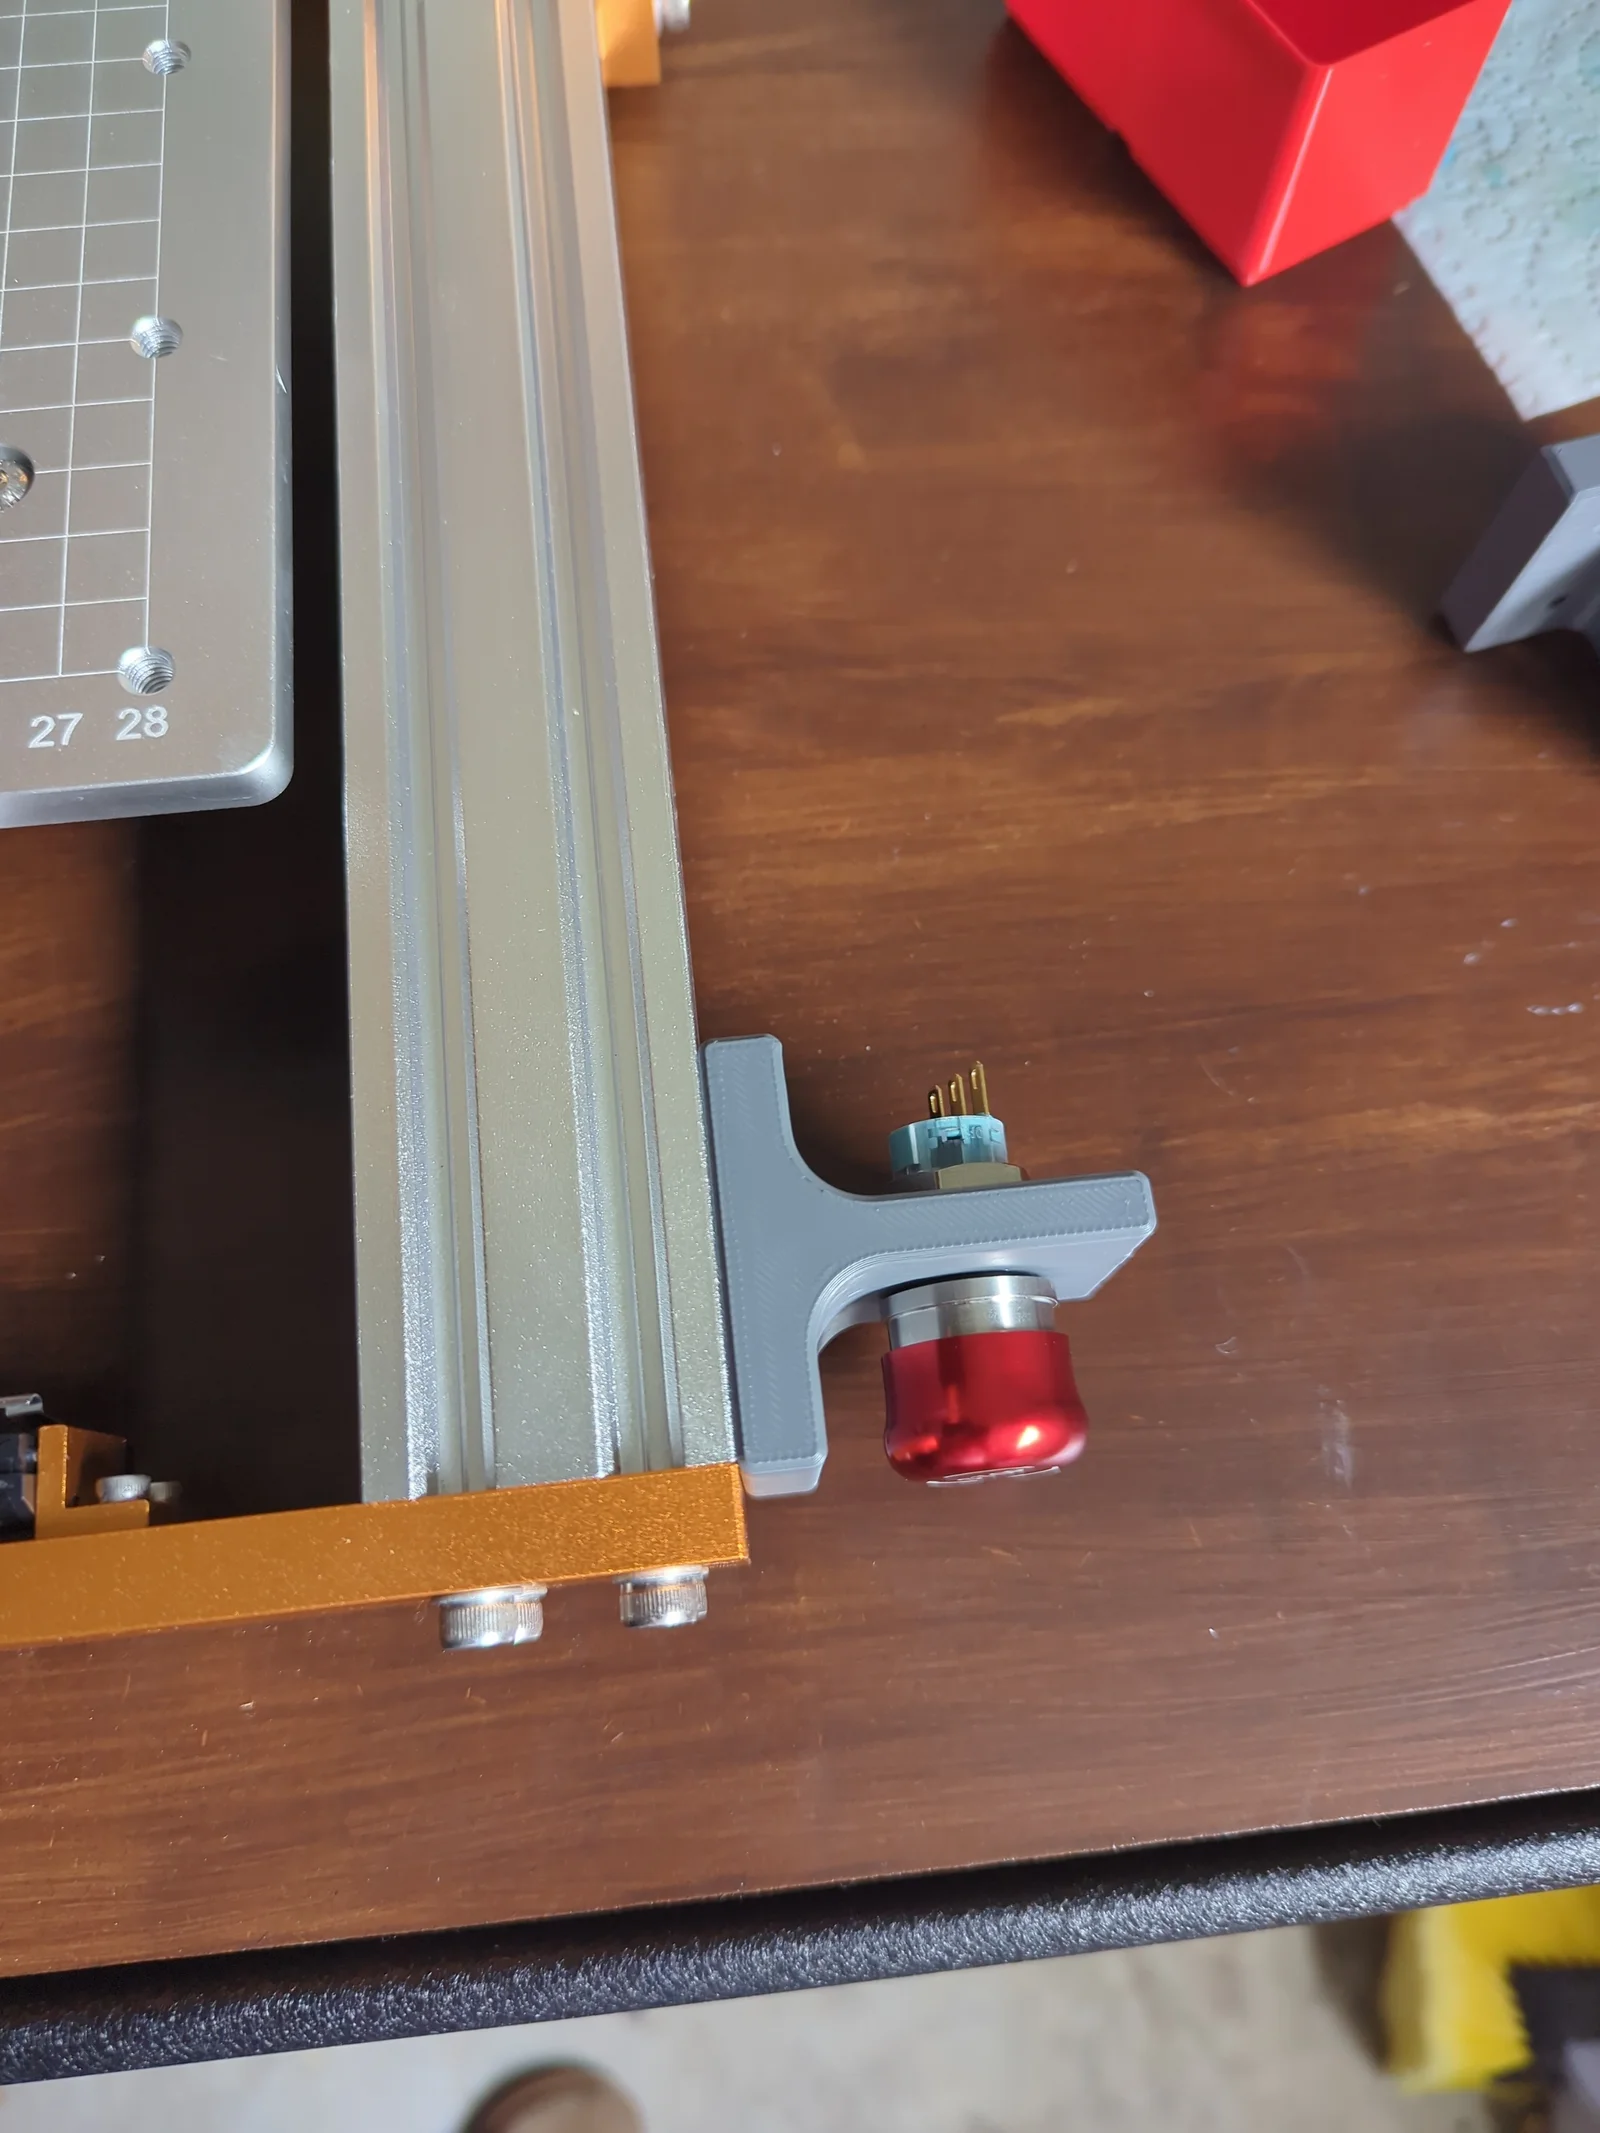
This mod allows repositioning the emergency stop button to the front of the machine, recessed slightly to avoid hitting it by accident. Apart from some fasteners (and whatever you use to lengthen the wires), this requires no special parts. The model prints without supports, in a single piece.
In addition to the printed mounting part, you will need the following:
The original large nut used to mount the emergency stop button (you won't need the square metal spacer).
Four M3 2020 T-nuts (roll-in kind) or hammer nuts. I used hammer nuts.
Four M3 12mm DIN912 screws.
Some way of lengthening the two wires from the emergency stop to reach the connection point. Given that this is not a moving wire, solder and heatshrink will work (and is what I used).
Use the provided images as a mounting reference. I mounted to my right (as I am right-handed), attached the mounting piece to the extrusion using the M3 hardware, then attached the button using the large nut. You could probably mount it on the left as well (the design is symmetrical).
You need the print to be quite rigid, as flexing is bad in this situation. I ended up using PETG-CF. I would use at least 3 perimeters and 30% infill. The print is already oriented correctly: just drop on the plate and print.
To make modifying this part as easy as possible (and as per the requirements of the GPL), I've provided the original FreeCAD source, as well as a STEP file.
Byvc-designLikes0Downloads3.2K

 BySeppoTakaloLikes960Downloads1.9K

 ByleonicLikes0Downloads1.4K

 ByZED4EverLikes313Downloads5.2K

 ByfifindrLikes500Downloads4K

 ByVC_DesignLikes679Downloads3.6K

 ByKNIN_CustomLikes112Downloads440

 ByDan Schwartz SchwartzLikes744Downloads3.4K

 Bythorin-oakenshieldLikes0Downloads530

 ByUpcrid3D_1585693Likes808Downloads2.1K

 ByWilko_SLOLikes935Downloads2K

 ByshoheiyLikes0Downloads428