



Kẹp giữ sợi Filament
 Bytinx_1344834Likes1.2KDownloads6K
Remix of Mod Camera ESP32 cho CORE One By KeepTheBOX
Build another version of this model.
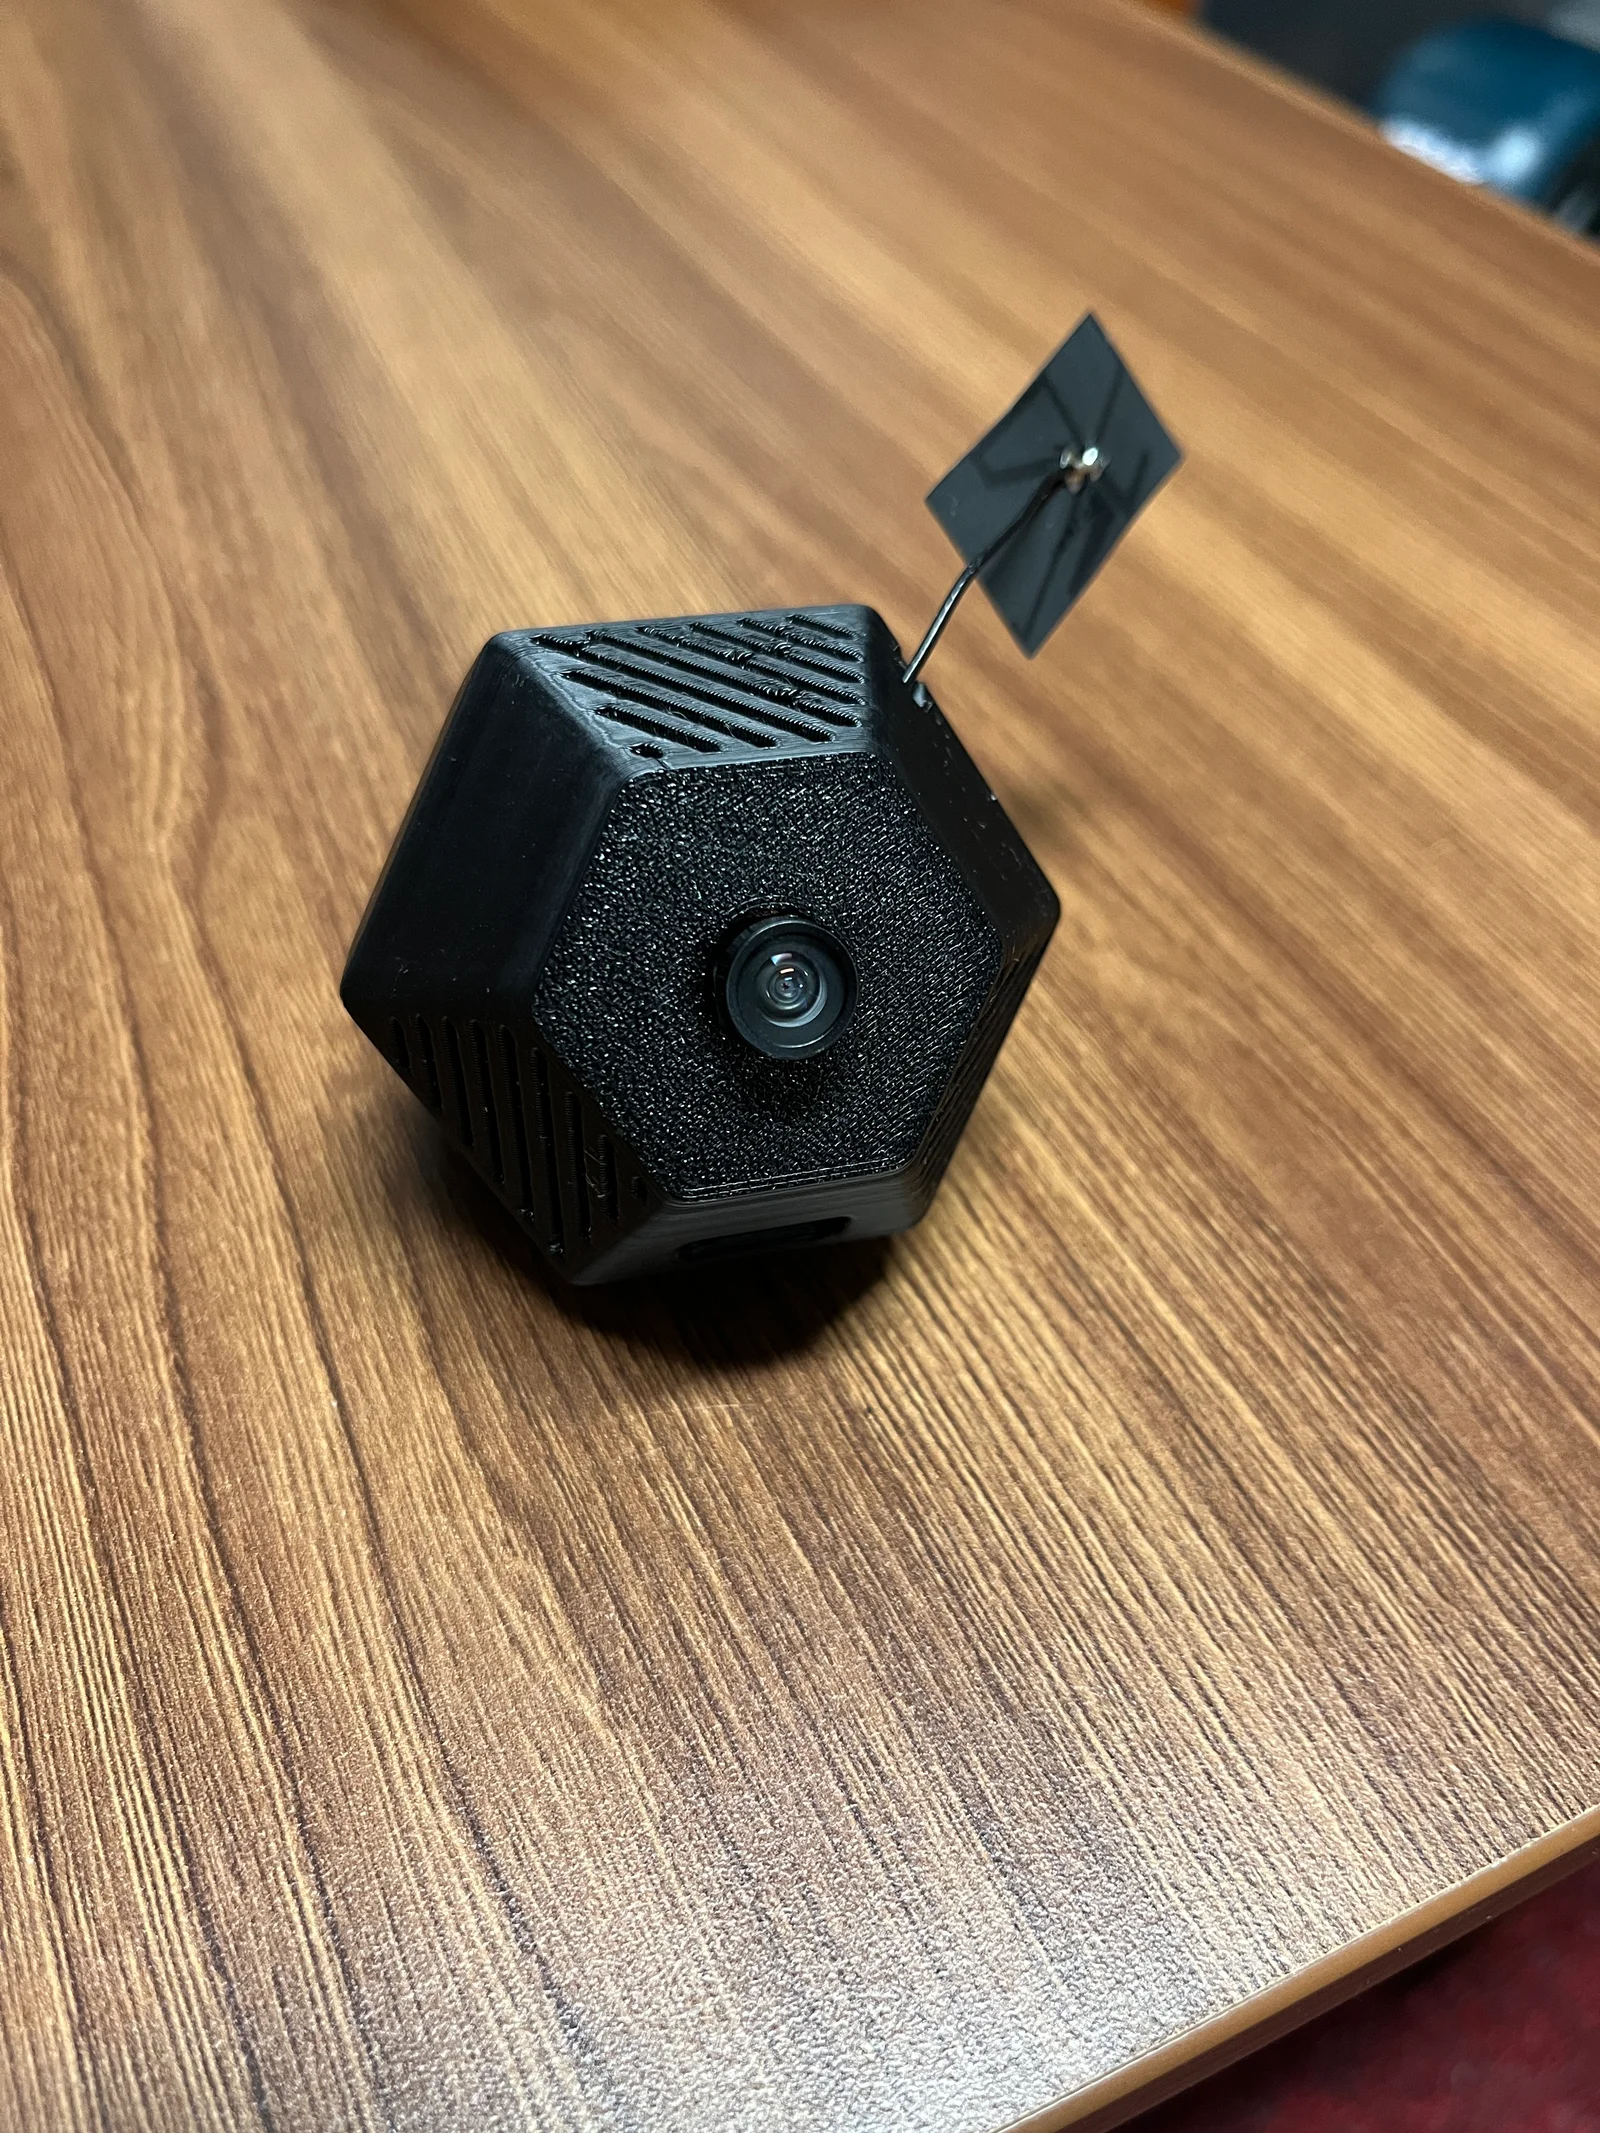
This camera uses an ESP32 XIAO Sense board from SeeedStudio as well as an inexpensive 140 degree wide angle camera module (OV2640). Prusa provides an ESP32 camera firmware to connect your camera to PrusaConnect as well as view a live stream (>0.1 FPS).
Print all parts in ABS, ASA, or PC to sustain the chamber temperatures of the CORE One. You will need 2x of the “ESP32 Retainer” piece.
Parts:
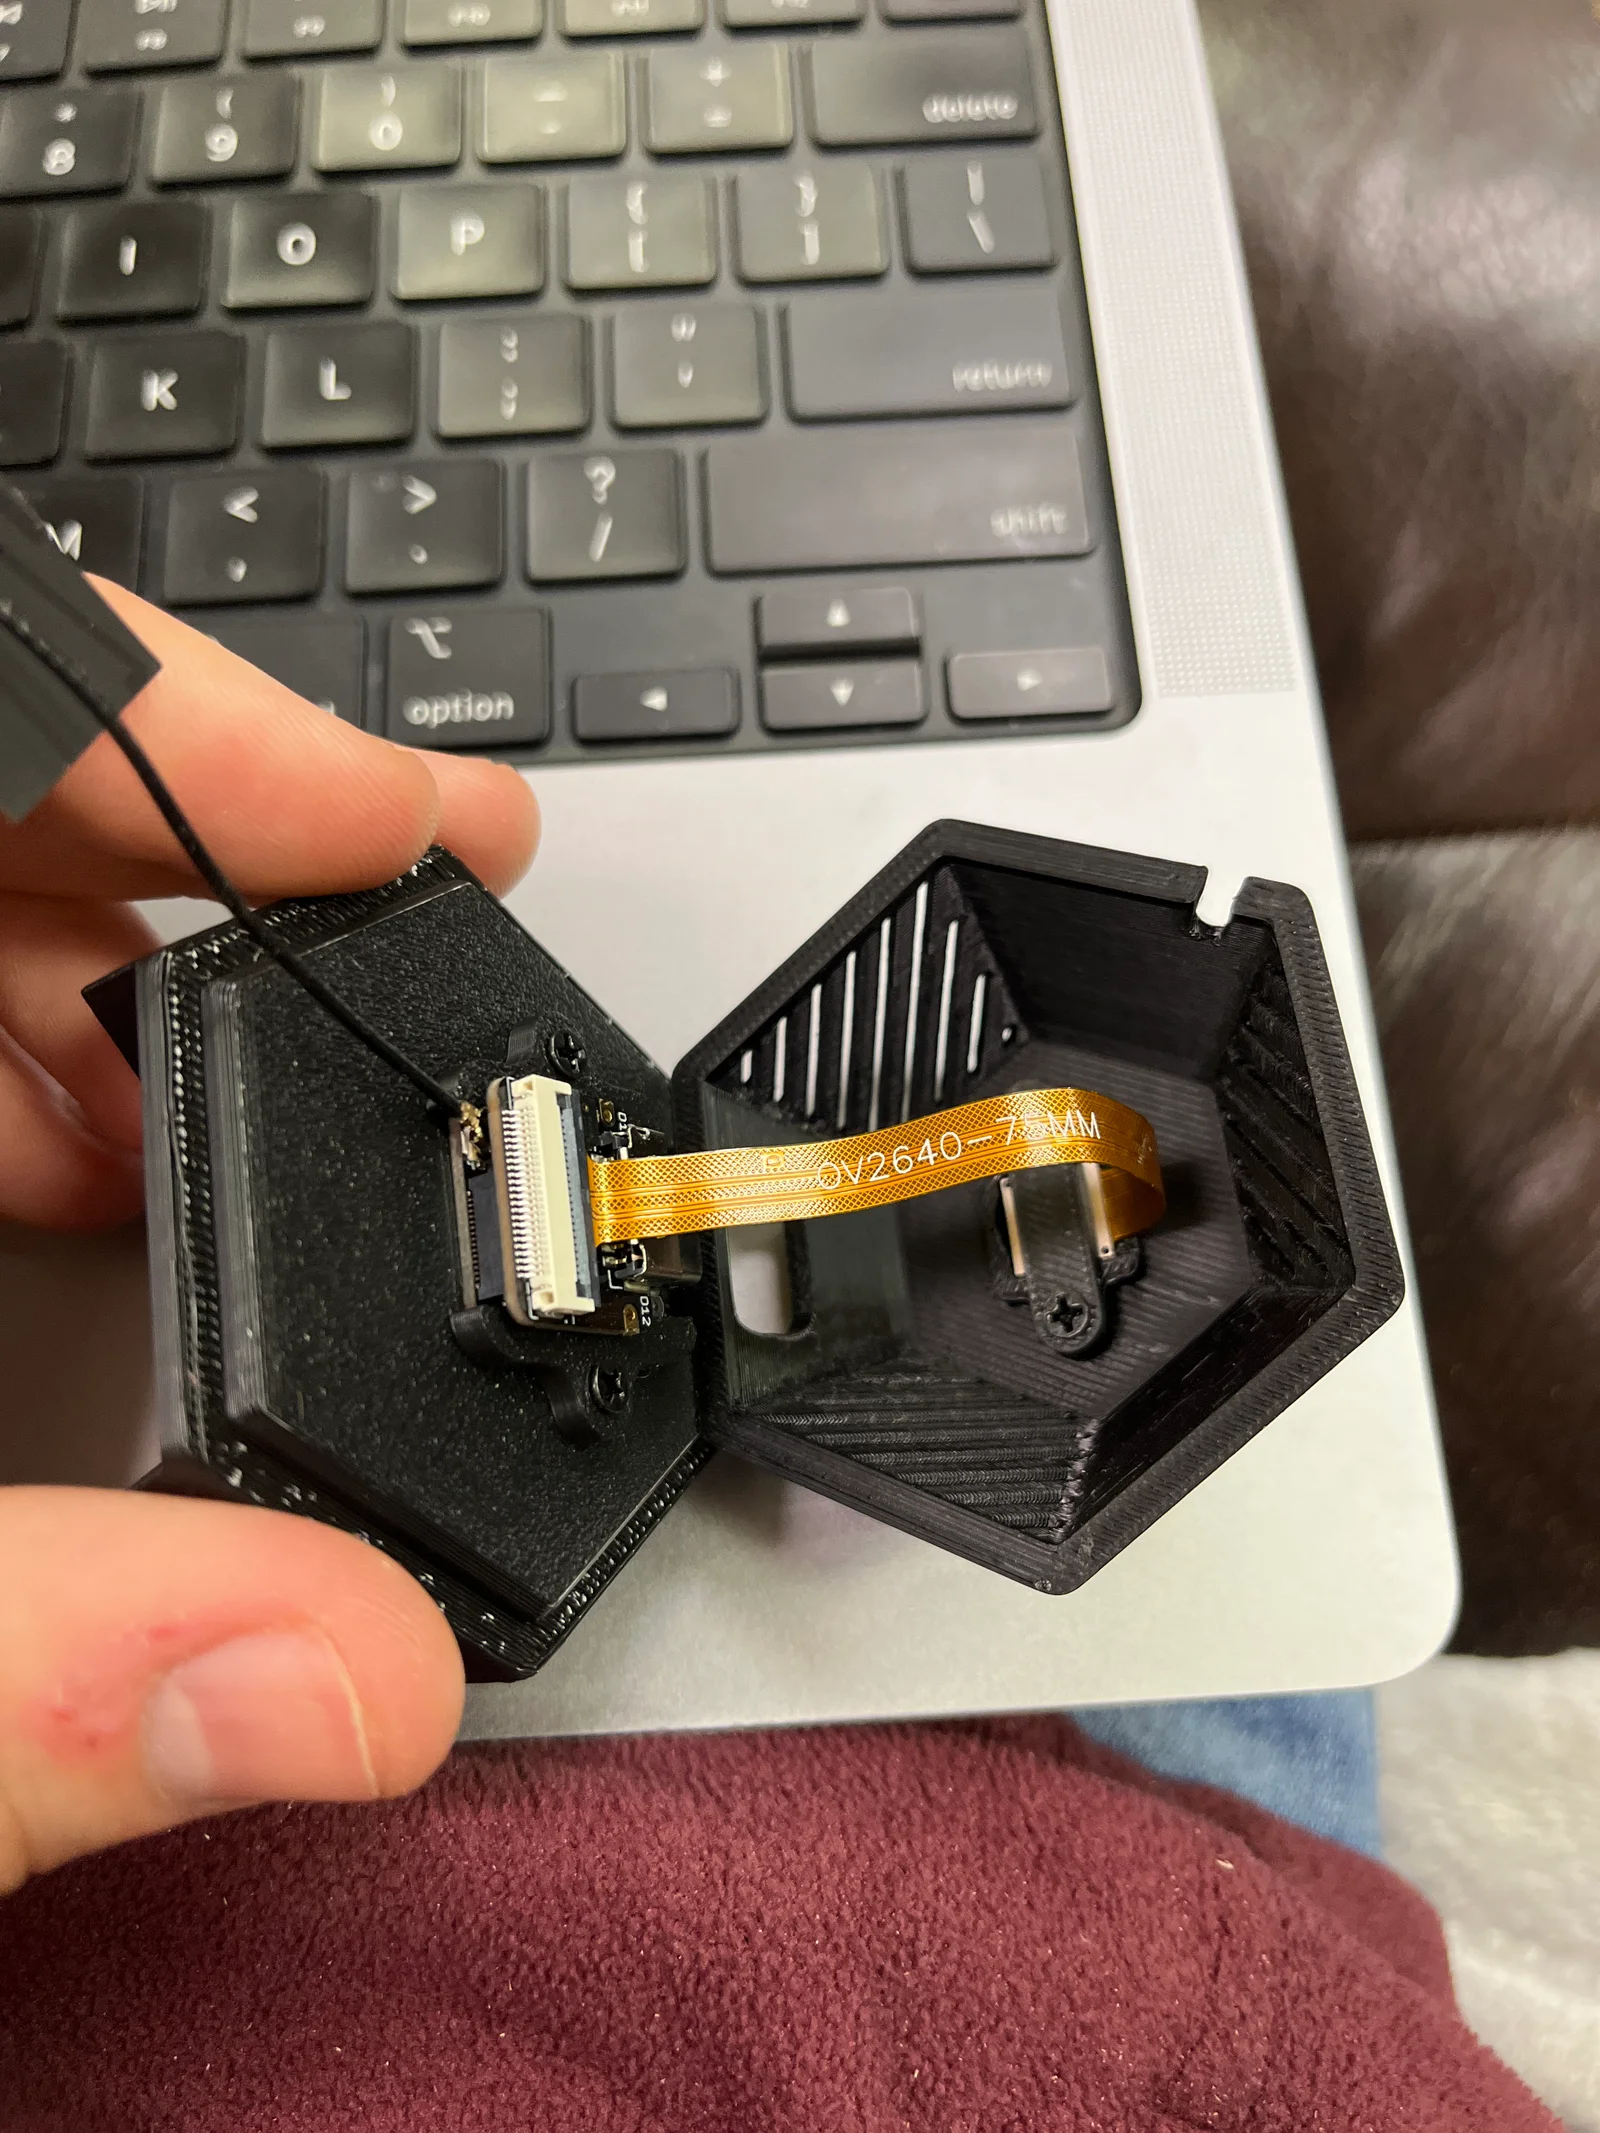
View the second image to see how to assemble the camera. The camera should press fit into the front camera housing and the small retainer bracket should go across the back to hold it in place. The pictured camera housing is: “Camera Housing - Cable out Bottom”.
There is a second model that is provided for the camera mount: “Camera Housing - Cable out Side.stl”. This mount allows for the power cable to come out the side as it is shown in the original buddy camera. The camera ribbon cable will take a small amount of effort to route nicely but this provides another option for cable routing!
For the ESP32, use 2 of the “ESP32 Retainer” parts. These will hold the sides of the ESP32 up against the corner bracket. Make sure the USB-C port is facing in the correct directions (facing the cutout on the bracket).
Wait until the very end to apply the heatsink. Screw all components and mount them properly and then use the hole in the back of the corner bracket to guide your placement of the heatsink.
Bytinx_1344834Likes1.2KDownloads6K

 ByreddLikes216Downloads2.2K

 ByJasonOlliff_519145Likes241Downloads2K

 Byarhi_585078Likes64Downloads537

 ByfilamentalistLikes71Downloads108

 ByHanzo3dLikes155Downloads411

 ByGeek5DLikes147Downloads482

 ByBrokentooth_designsLikes23Downloads403

 By3DSourcererLikes48Downloads374

 ByWyomingWolf_261196Likes52Downloads424

 Bytopronix_2170418Likes41Downloads293

 ByJeffFaer_238746Likes31Downloads78