



Mồi giả câu cá Sardine 120mm
 ByHassanSalehLikes260Downloads2.1K
Build another version of this model.
===============================
Hardware requirements:
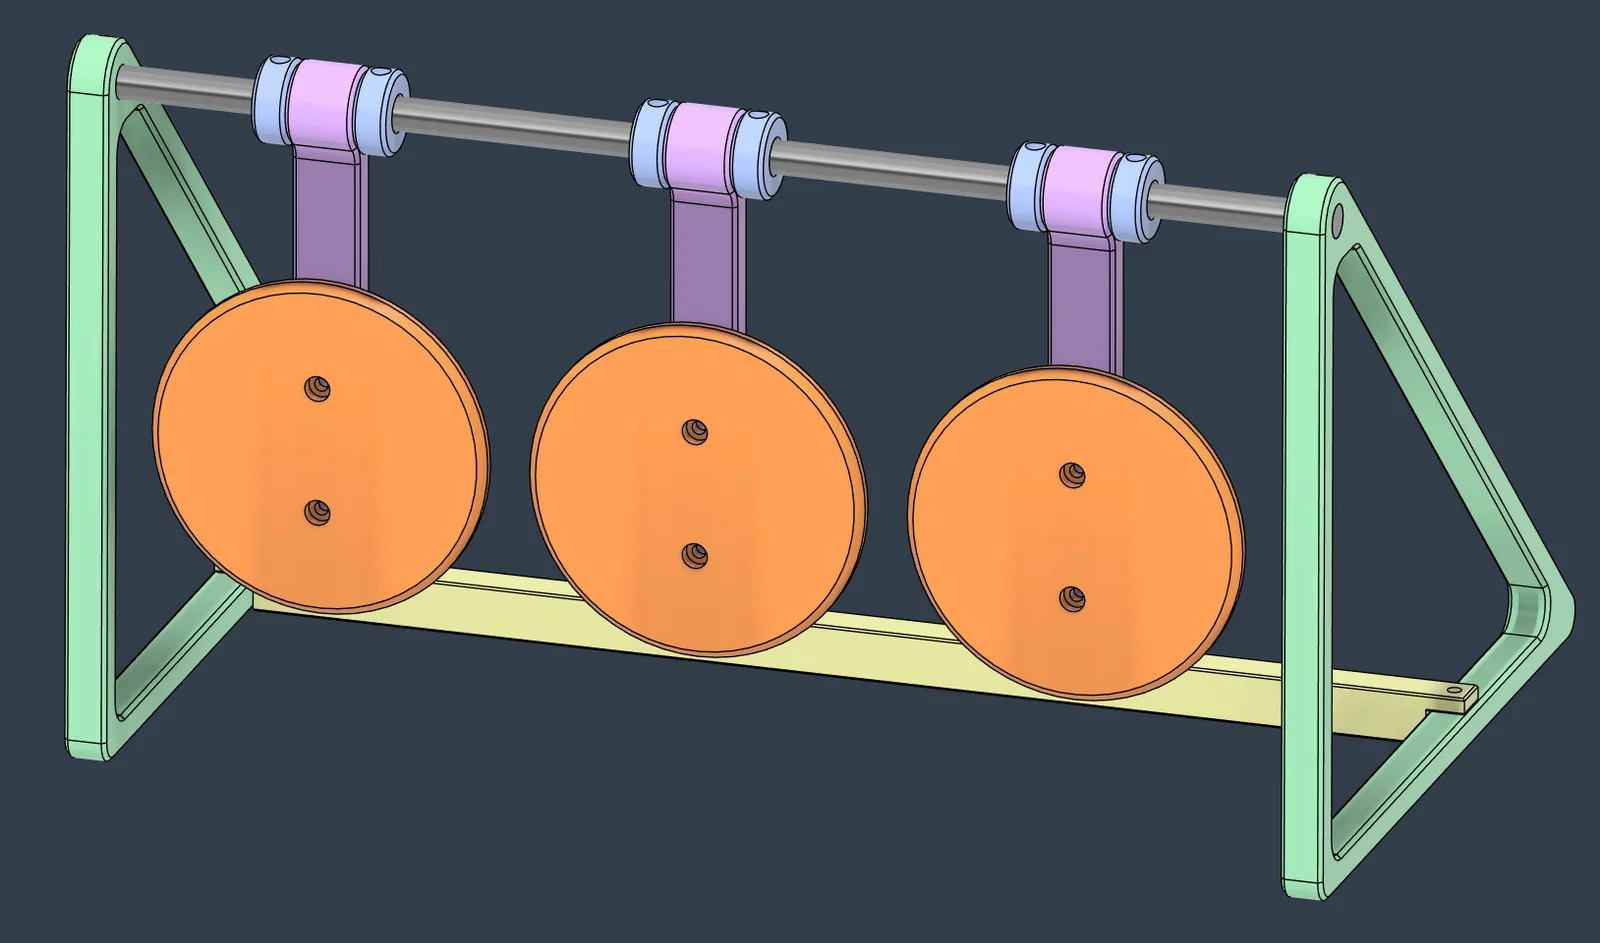
8mm smooth rod, lengths anywhere between 120mm and 300mm (or longer, I suppose)
M3 heatsets (https://www.amazon.com/Printing-M3x4x5mm-Threaded-Embedment-Automotive/dp/B0BTYF2MMD)
4 for the base frame, another 4 per target.
8mm M3 Socket head cap screws: 4 per target, 4 for the base frame.
Print whichever weight bridge best suits the 8mm rod you've got.
================================
Hardware requirements:
16mm barrel - whatever length you want
#4-40 x 3/8" countersunk screw (like you'd get for most 3d printed blasters):
4 for the base frame, another 4 per target
When building the target, screw the HoldingRing prints into the rod snugly (but not too tight, you'll pull out the heatset or strip the plastic), and make sure to leave enough space for the Arm print to spin freely. You only want the HoldingRings to stop the arm sliding around too much.
You'll want some kind of weight to put on the weight bridge. I've used 2.5lb and 5lb plates successfully, but just about anything kinda heavy should work.
ByHassanSalehLikes260Downloads2.1K

 ByCubaLibreee_2869176Likes125Downloads1K

 ByXDr4g0nXLikes198Downloads818

 ByGerhard_48223Likes240Downloads462

 ByBillRichardsLikes32Downloads380

 ByKorriLikes60Downloads609

 ByTarzLikes28Downloads577

 ByMachaki_1134160Likes36Downloads363

 ByMauroVanDerG_4110408Likes378Downloads2.7K

 By3DGearSupplyLikes26Downloads440

 ByMFTuningLikes153Downloads1.8K

 ByMaverick0197Likes161Downloads1.3K