Fine Print
This is still a work in progress, but it should get you a functional enclosure.
The design is tailored to my specific machine, and I’ve noticed that even on my own printer, there are slight dimensional differences between corners—likely due to how it's assembled from multiple parts. You may need to adjust the model by 1–2 mm depending on your printer’s tolerances.
Why You Might Not Want a DIY Enclosure 😅
Acrylic panels can be expensive! Depending on your material source and tool access, the total cost might end up being similar to the factory enclosure kit. If you're looking for simplicity and plug-and-play reliability, the kit may be a better option.
Why You Might Want a DIY Enclosure
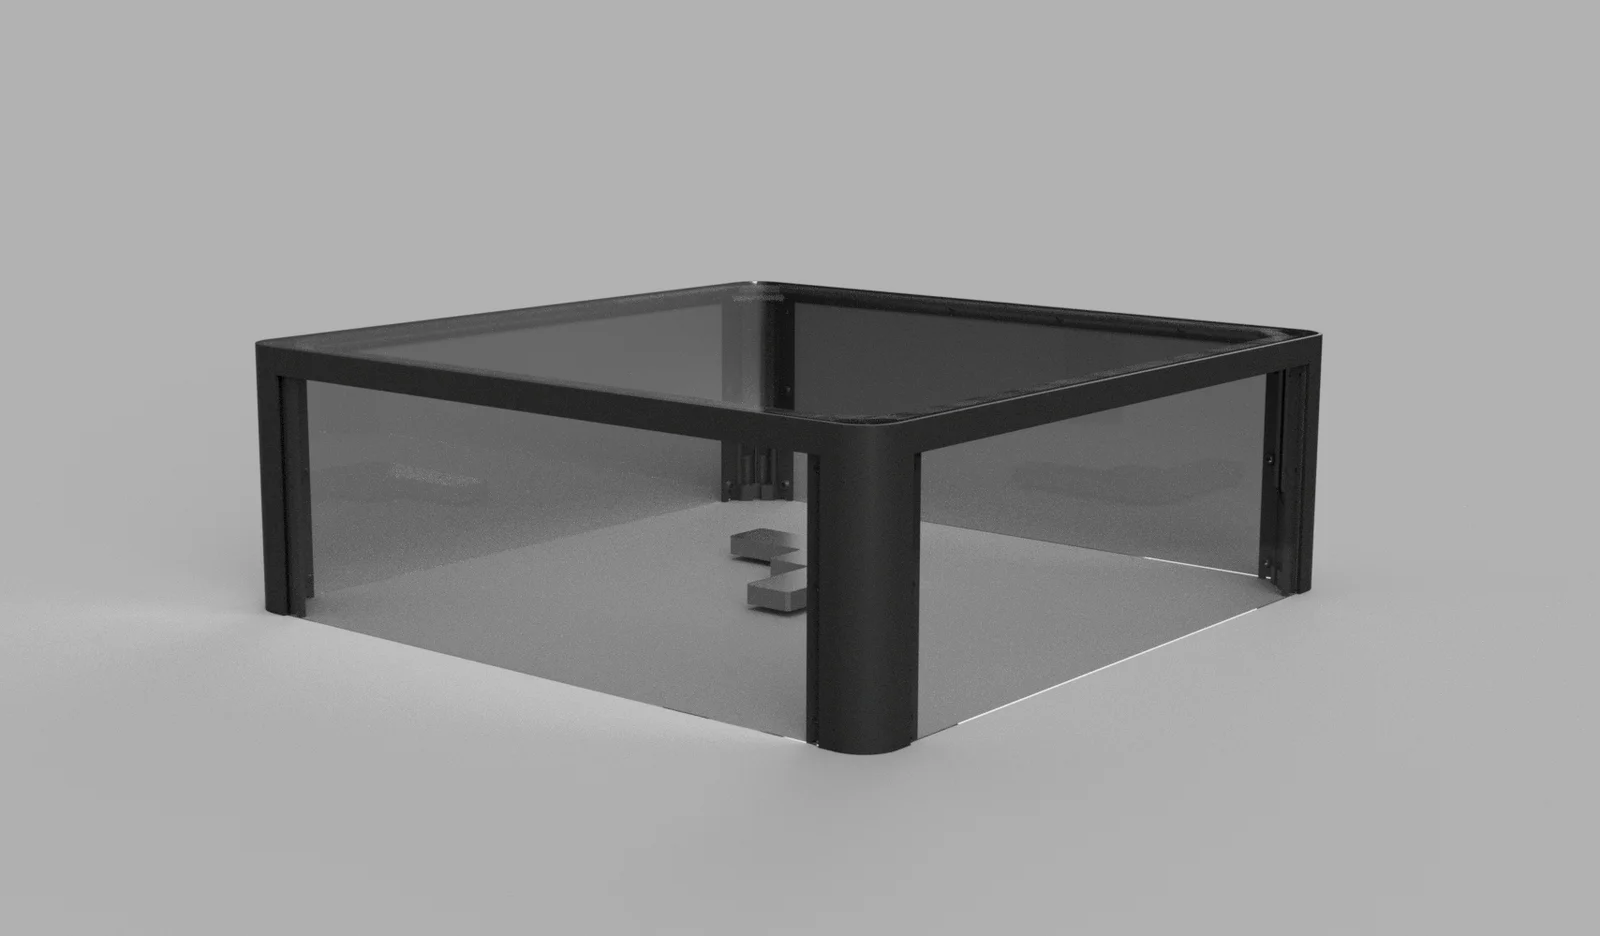
- Visibility: The factory acrylic panels are dark-tinted and hard to see through. A custom enclosure with clear panels provides much better visibility into your prints.
- Clearance: The factory top cover is a bit too short—wires and the Bowden tube from the extruder tend to rub against it. A taller custom version solves that issue.
- Customization: You can easily add features like interior lighting or cable management exactly how you want them.
==========================================================
Model Description
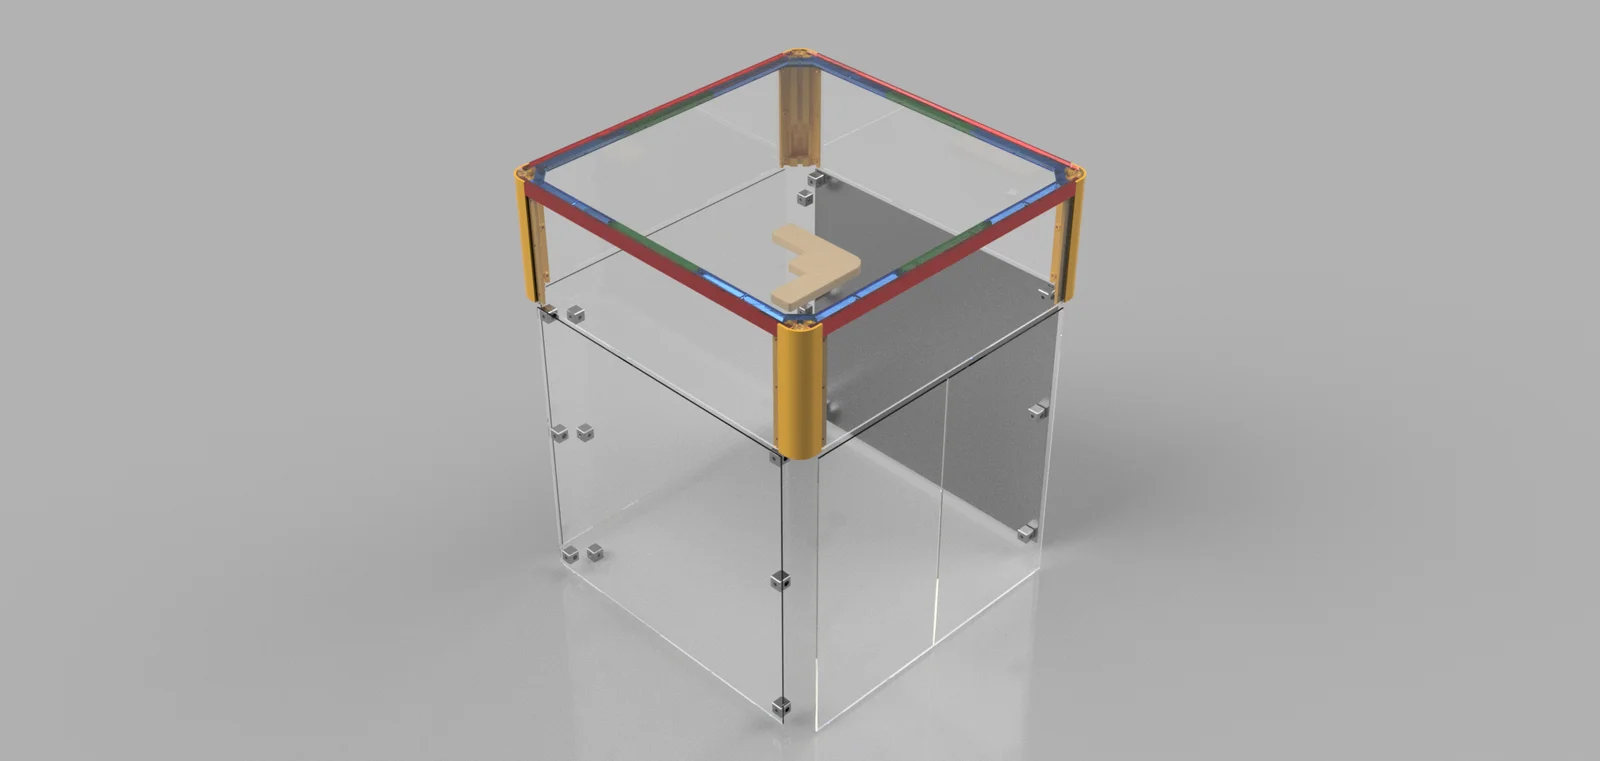
It is made taller than the factory lid, so it clears the cables. Also the top acrylic panel alone is made to be removed, so it is easy to open and get to the printhead when you are feeding filaments. I believe with the factory kit, you have to remove the whole top section which is much bigger to put on and off.
Parts Need to be Printed
For the Top Enclosure, you’ll need to print:
- 4 × Main Post
- 4 × Main Beam
- 4 × Light Support Corners
- 4 × Light Support Middle Sections
Parts Need to be Purchased
- Acrylic Panel 3mm (1/8") for all side panels
- Acrylic Panel 4.5mm (3/16") for the top panel
- 4 x M5 x 95 mm screws (I ordered M5 x 110mm and was too long and ended up using like 6-8 washers as a shim. You use these to mount the posts to the bottom chassis. I only used one bolt per corner. Front corners can actually use two, but I didn't want to lossen the bottom box by doing it )
- 24v COB LEDs if you want to install it. (I wired directly to the power supply at the bottom)
- 3030 T-slot nuts and screws, if you want to mount stuff inside corners (e.g. Nebula camera, or lights)
- Short M5 (10 to 12 mm) screws and threaded inserts (I did not end up doing these for the top enclosure's side panel as the whole thing was pretty sturdy without this part. You will have to figure it out :-). You do need the threaded inserts for the mounting cubes)
==========================================================
Printing Notes
The horizontal beam that connects the four corner posts is quite long. It just barely fits on an Ender 5 Max when placed diagonally. However, my printer struggled with it—at PETG bed temperatures, the print bed tends to dome up slightly in the middle. This led to the nozzle catching previously printed layers near the extreme edges.
If you run into similar issues, consider cutting the beam in half, printing each segment separately (even on a smaller printer), and bonding them back together with epoxy.
Cutting Acrylic Panels
- Use the dimensions in the Side Glass and Top Glass files to cut your panels. Always double-check against your machine’s actual measurements before cutting!
- For the top lid, use the included routing template to shape the corners to match the enclosure frame. Again—double-check your dimensions before committing to a cut.
Bottom Enclosure Parts
- 18 × Acrylic Mounting Points (up to 6 per side)
- 36 x M5 threaded inserts (to press into the cubes printed)
Routing the Feeding Tube
- I cut a hole in a steep angle on the side acrylic panel and installed this Bambu Lab P1P ptfe tube bracket. I believe I ended up printing that at like 102% in size as 100% was too tight for the tube that came with the printer. Look at the attached photo for details.
What's Not Done?
- Front Door(s) - I haven’t finalized the front door yet (hence “work in progress”). I’m leaning toward a two-part door design instead of a single large panel like the factory kit—mainly for easier access and reduced flex.
- Handles for top panel - I've printed a few and don't like any of them. But it looks like I need to have two on the sides, rather than one knob in the front.
- Drag Chain - Holding up the wire/tube. I am experimenting with using drag chain to get those out of the way currently.
- Tolerance - The Beam to a Post connection might be too tight. I probably need to shrink the dove tail joints just a bit there.
- Cube - I made a little part that sticks out so it fits into the 3030 t-slot channel better. While it works I could probably make it bigger so it fits tighter without rotating




 Bytinx_1344834Likes1.2KDownloads6K

 Byprusa-researchLikes0Downloads2.7K

 Bydet-manLikes0Downloads177

 Bygummiegecko8477Likes0Downloads168

 Bychukwufumnanya-arinzechukwuLikes0Downloads154

 BydalleLikes0Downloads152

 BynasikLikes0Downloads123

 Byarhi_585078Likes64Downloads547

 ByHanzo3dLikes155Downloads417

 BydarienLikes0Downloads1K

 ByGeek5DLikes147Downloads491

 ByBrokentooth_designsLikes23Downloads412