

Core ONE INDX Tool dock, M3 Nyloc press fit, magnet extraction
 Bydominik-chuchlikLikes0Downloads120
Build another version of this model.
UK:
Prusa WiFi Stick Mounting – Tool "U.FL connector tool"
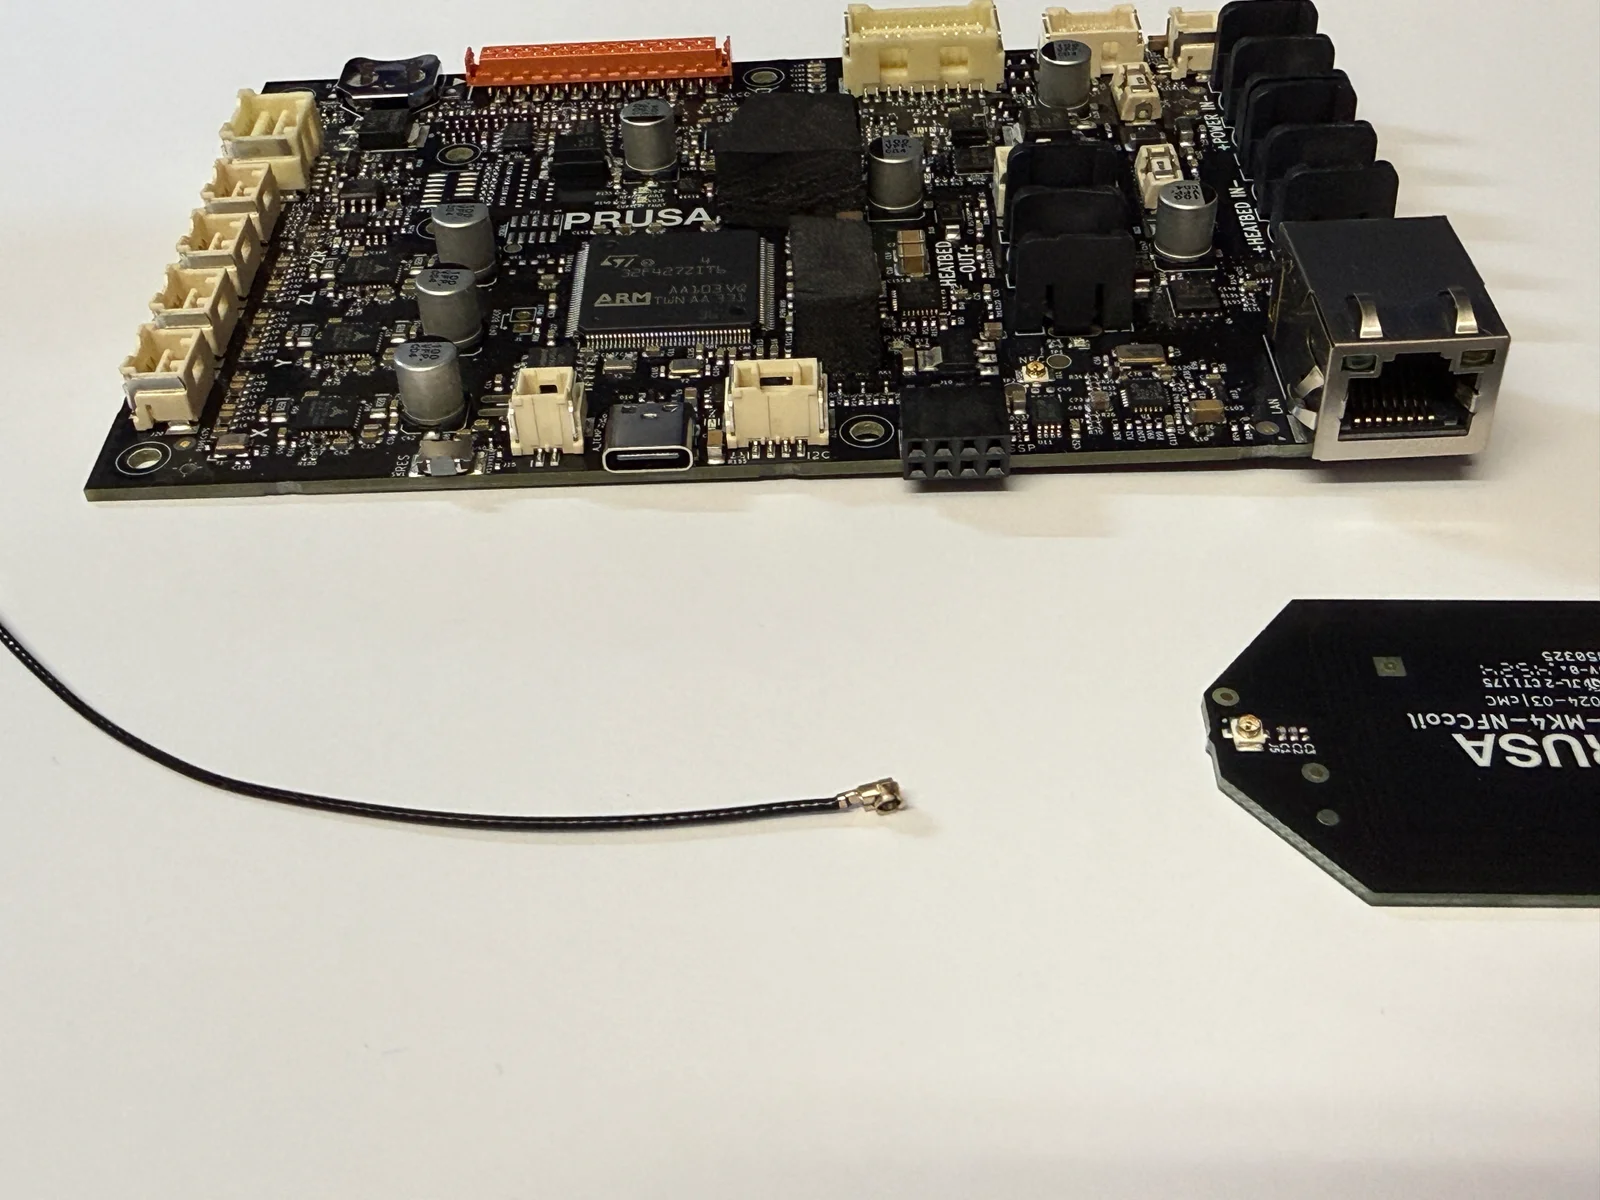
When installing the WiFi antenna on the Prusa electronics board, it can be a bit tricky to connect the antenna cable properly without putting stress on the connector.
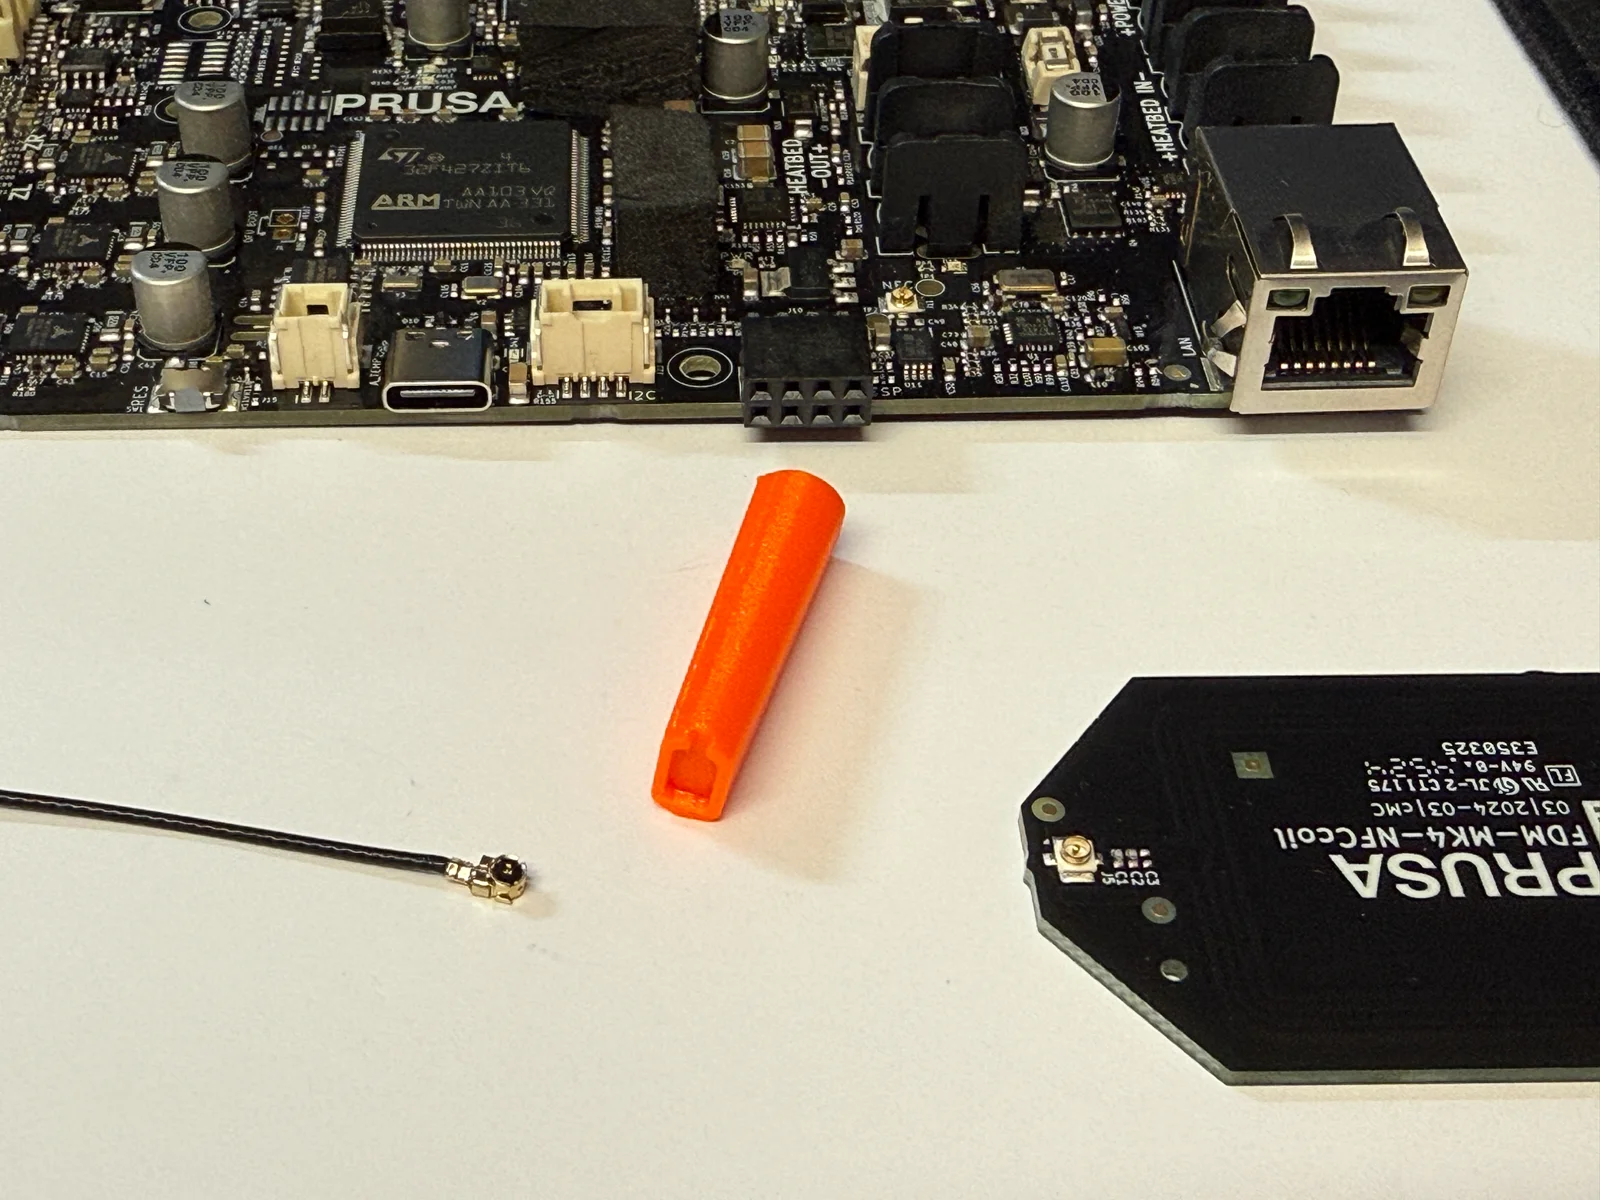
To make this process easier, I have designed this small assembly tool.
Function
The tool helps press the tiny U.FL connector (antenna plug) securely onto the board.
The design ensures that the pressure is applied evenly, preventing damage to the connector or cable end.
Its elongated shape provides good control, and the small recess in the tip fits precisely over the antenna plug.
How to Use
Place the antenna cable above the U.FL port on the board.
Position the tool over the connector so that the recess at the tip aligns with the metal head of the cable.
Gently press down until the connector clicks into place.
Visually check that the connector is seated properly and fully engaged.
Benefits
Prevents uneven pressure and damage to the antenna connector.
Easy and precise mounting without using excessive force.
Can be 3D-printed within minutes (STL file included).
Video Link:
https://www.facebook.com/100000655244863/videos/pcb.4993023140923503/1484110029404385
Best regards
Leif Lumby Henriksen
Odense3D Community: https://facebook.com/groups/2911561982402973
DK:
Prusa WiFi Stick Montering – Tool
Når man skal montere WiFi-antennen på Prusas elektronikboard, kan det være lidt besværligt at få antennekablet korrekt tilsluttet uden at belaste stikket.
For at gøre denne proces nemmere, har jeg designet dette lille monteringsværktøj.
Funktion
Værktøjet hjælper med at trykke det lille U.FL-stik (antennestik) sikkert på plads på printpladen.
Designet sikrer, at trykket bliver jævnt fordelt, så man undgår at beskadige stikket eller kabelenden.
Den aflange form giver god kontrol, og den lille hulning i spidsen passer præcist til antennestikket.
Brug
Placer antennekablet oven på U.FL-porten på printpladen.
Sæt tool’et hen over stikket, så fordybningen i værktøjet rammer selve metalhovedet på kablet.
Tryk forsigtigt ned, indtil stikket klikker på plads.
Kontroller visuelt, at stikket sidder korrekt og helt i bund.
Fordele
Undgår skæve tryk og skader på antennestikket.
Nem og præcis montering uden at bruge for meget kraft.
Kan printes på få minutter på en 3D-printer (STL-fil medfølger).
Video Link:
https://www.facebook.com/100000655244863/videos/pcb.4993023140923503/1484110029404385
Med Venlig Hilsen
Leif Lumby Henriksen
Odense3D Community: https://facebook.com/groups/2911561982402973
Bydominik-chuchlikLikes0Downloads120

 Bytinx_1344834Likes1.2KDownloads6K

 Byprusa-researchLikes0Downloads2.7K

 BydalleLikes0Downloads147

 Bypeter-van-der-waalLikes0Downloads256

 ByltloweLikes26Downloads122

 BykingnothingLikes0Downloads180

 ByPengLordLikes32Downloads112

 Byp3rr1ff3ryLikes0Downloads149

 ByBrokentooth_designsLikes23Downloads410


 By3DSourcererLikes48Downloads377