


The Unveiling Muse — Nàng thơ bước ra từ gió và lụa
 Bythecodedkid_388190Likes219Downloads260
Build another version of this model.
This model is one of the collection Prêt à Faire: Printable Readymade Models
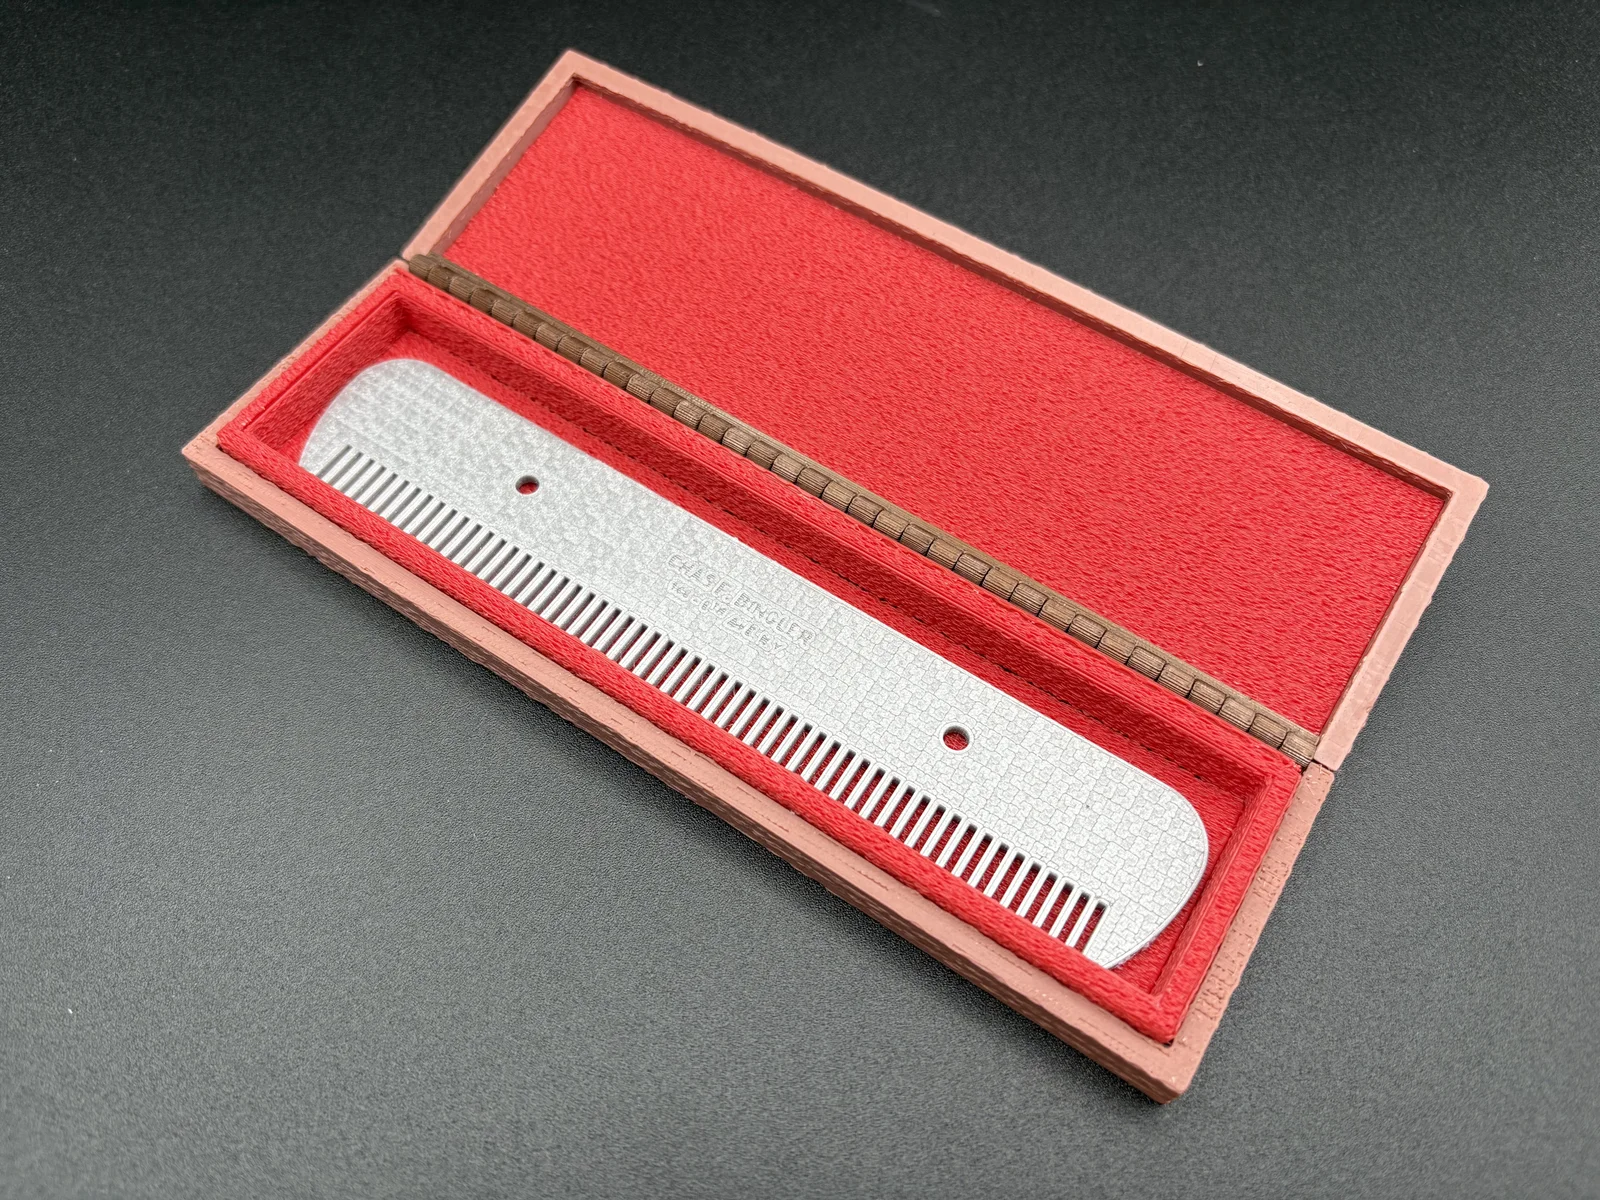
This is a model of Peigne, a so-called “rectified” Readymade sculpture created in 1916 by Marcel Duchamp. Though most original versions of Readymades were lost, we can see the original at the Philadelphia Art Museum. There are also editions created in 1963 and 1964, found in museums and private collections worldwide.
Find out more about this work at:
Sample images of the original and replicas:
Philadelphia Art Museum
1916 original
Hirshorn Museum
1964 edition with box
Moderna Museet
1963 replica
Private collection
1964 edition with box
The model differs from the original wherever necessary to optimize it for multi-material FDM 3D printing. I've included the STL files, as well as a 3MF, since this project presents challenging texture issues, including ulfben's wood grain modifier to suggest wood grain, ironing to emulate metal, and fuzzy skin to replicate felt. The box features a piano hinge, which is particularly difficult to accomplish in 3D printing. I couldn't pass up the challenge of modeling and printing the box!
While many artists have appropriated Marcel Duchamp's work in general, I found no prominent or widely documented instance of an artist appropriating the iconography of Comb in my research. This may be due to its extremely understated nature and the fact that its meaning derives almost entirely from the accompanying text and its conceptual premise (pure readymade, indifference), rather than a resonant visual form that would invite reinterpretation. This work, therefore, may be the first of its kind.
The model is NOT designed for scaling. It should be printed full size, which can be accomplished on most multi-material printers. You have the option of printing the comb alone on a multi-material machine, or you can also include the 1964 edition box.
For the comb:
The 3MF version of the comb contains a merged hidden box added in the slicer. The purpose of this box is to control the depth of the multi-material, which I found interfered with the incised lettering on the top.
For the best rendering of the comb top, print with the incised lettering DOWN, and iron the top layer, which will be the back of the comb.
Select the options for ONE perimeter at the top and bottom. This looks much better.
100% infill works well.
Playing with variable layer height may help with text legibility.
For the box:
Use a darker wood color for the box top and bottom. Use recommended settings for the wood modifier for these pieces. Also set single perimeters for the top and bottom for a better look. The wood grain effect is entirely optional, but you won't regret using it. Trust me, I was skeptical.
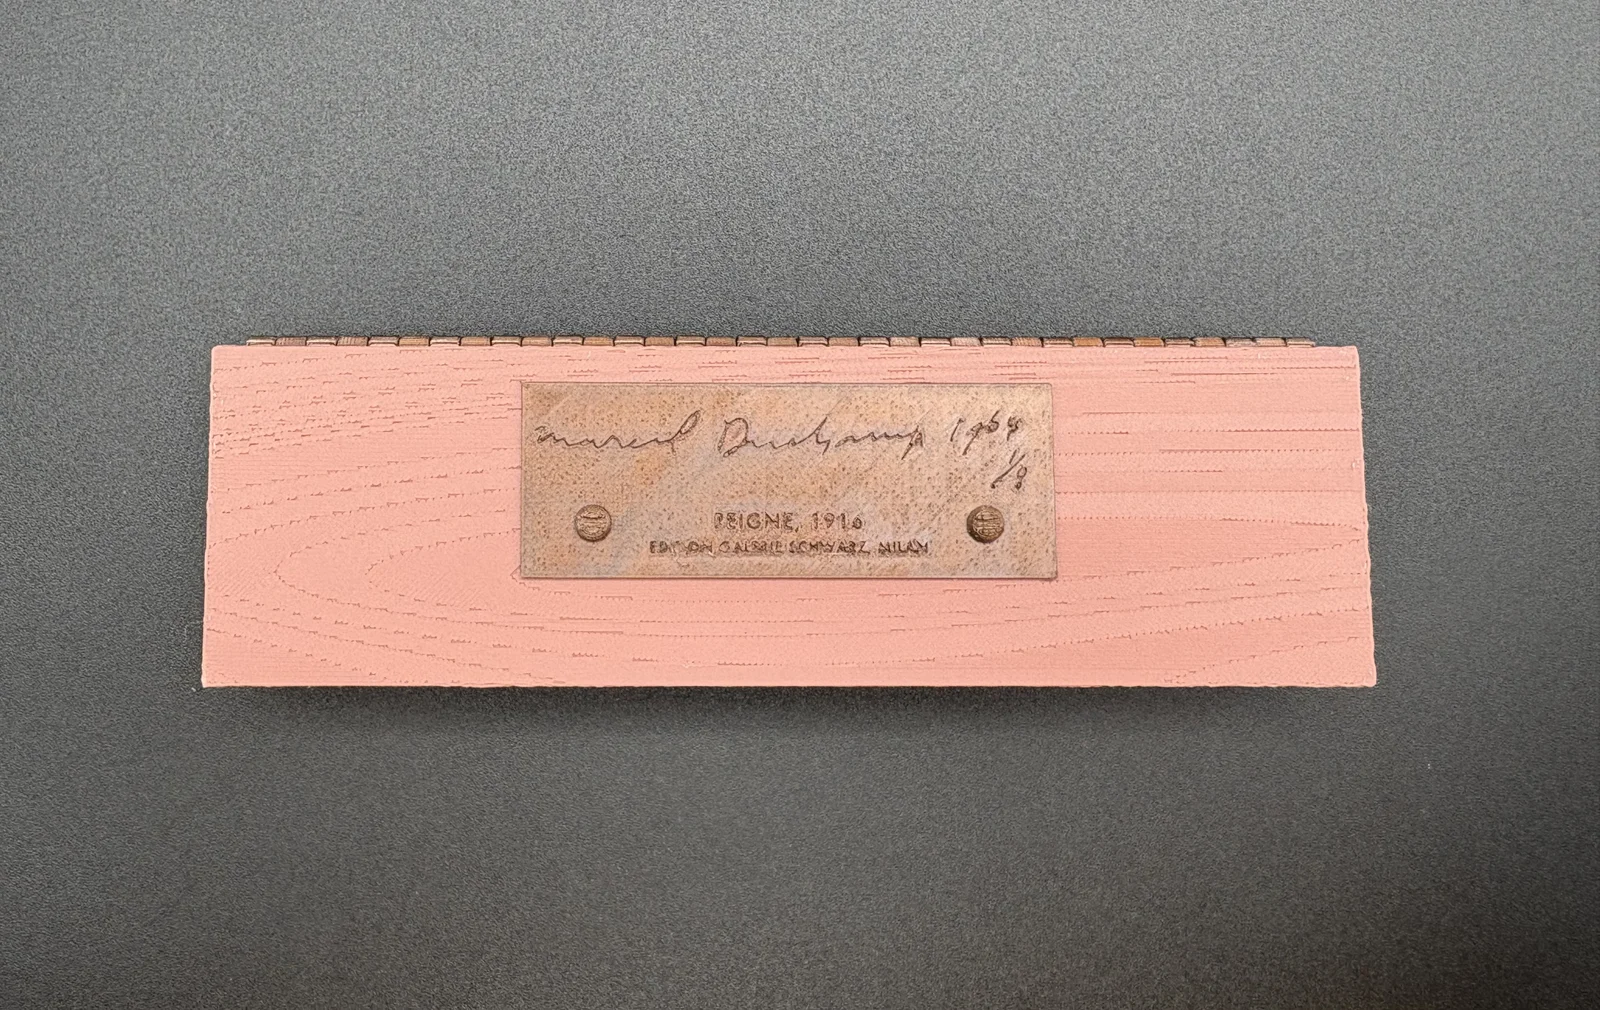
Use a brass color for the plaque, screw heads, and hinge elements. For the plaque, print the top infill with a Hilbert Curve and set ironing for the top layer only, which helps with text legibility. Set single perimeters for the top here.
All felt pieces are a saturated matte red. Set all felt pieces semi-vertically as illustrated in the build plate image. Paint on fuzzy skin on all visible surfaces of the felt pieces. Use 0.5 and 0.5 for fuzzy skin values to increase the texture. Use paint-on support as illustrated.
Support should be Snug and set for the build plate only. EXCEPTION: Specify Organic for the hinges and screw caps. Don't say you haven't been warned.
No brims are necessary, even though you may get a warning.
Print assembly parts in the following quantities:
Box screws: Print 2
All other parts: Print 1 each
Recommended materials I used:
Prusament Galaxy Silver PLA for the comb
Prusament Pearl White PLA blend for the comb lettering
Amolen Silk PLA Aged Brass for the plaque, screws and piano hinge
SUNLU Cherry Wood Fiber PLA for the box
SUNLU Matte Red PLA for the felt liner
My general settings:
Print Settings: 0.15mm Structural for a smooth perimeter finish on the comb, 0.2mm Structural elsewhere
Filament: Prusament PLA or Generic PLA
Printer: Prusa MK3/MMU2
Supports: Paint-on as seen in the 3MF file
Infill: 15%
Brim: None
Advanced settings:
Layers and perimeters: all defaults
Infill: Gyroid fill pattern, Concentric top and bottom fill pattern
Support material: Snug, but see notes above
Stats for the print:
Total material used:
~17 grams silver
~3 grams white
~11 grams aged brass
~57 grams cherry wood
~78 grams matte red (due to the support necessary to achieve fuzzy skin)
Total time: ~20 hours
Total number of build plates: 4 (1 multi-material for the comb, 1 each for box materials)
If you are making the box, use the exploded view rendering as a guide to assemble as follows:
Use super glue or Gloop for assembly. Be careful with the glue quantity here: sloppy gluing will freeze the hinge or glue the box shut.
Insert the hinge axle into the piano hinge BEFORE assembly.
Glue the bottom hinge into its slot. The side felt assembly acts as a guide for this.
Glue the top hinge into its slot.
Place the screws into the plaque BEFORE gluing the plaque to the top, which in turn should be done BEFORE inserting the top felt.
Place the side felt topper into the slot on the side felt. It snaps into place, but I'd add a bit of glue.
Snap the bottom felt into the side felt assembly BEFORE inserting these pieces into the box bottom, then glue in.
The box is a great way to entice the viewer to pick up the work and NOT treat it like a sculpture, which is what Duchamp wanted (I'm certain he's rolling over in his grave at the thought of a work like this encased in glass with a DO NOT TOUCH sign attached!). Place on a pedestal or table that invites such an interaction.
24 NOV: Re-wrote the description for clarity and consistent formatting across the Prêt à Faire collection.
19 NOV: Final proof prints in multi-material (deleted single-color print photos). I changed the box top to separate the plaque from the top after adding a wood grain modifier to the box top and bottom. Added an exploded view illustration to assist with assembly and added a 3MF file for the box that includes all my positioning, fuzzy skin, and ironing settings, as well as the wood grain modifier for the box. The 3MF uses an MK3 with MMU, but this can be changed for any printer since technically there are no longer any multi-printed elements (just single-material prints in lots of different colors). Changed the instructions above to reflect these changes.
1 NOV: After experimenting more with the hinge, I added a printed axle. I found that the curl memory in a long strand of filament was creating a warp in the hinge that was more trouble than it was worth. However, the diameter of this printed hinge is the same as unprinted 1.75 mm filament, so you have a choice. I also rewrote the instructions to reflect the newer content and provided printed prototype images of the box in simple white PLA to test for fit.
26 OCT: Improvements after prototyping the box include:
Redesigned thehinge based on the successful one I created for Fresh Widow. This hinge uses a piece of unprinted 1.75mm filament cut to length to act as the hinge nail, replacing the less reliable print-in-place version.
Spacing of opening recalibrated on box top and base to accommodate new hinge.
Text on plate at box top replaces the font for legibility. While less historically accurate, the sans-serif font is much more readable in a 3D print. Recommend ironing for the top layer only for this piece!
Separated plate screw tops to allow for ironing, and resized 1.5X for printability, though these are slightly larger than those in the actual work.
Thicker top and bottom felt elements for better printability.
Included an image of the prototyping print I used for this version. Note how I've oriented prints to allow fuzzy skin to be printed on horizontal surfaces, and customized supports for the best results for each piece.
19 OCT: The felt-lined box is now included. It has not been print prototyped yet but I will be doing so later this week and will report on this, including preferred print settings (for example, printing all visible felt surfaces with fuzzy skin…).
4 OCT: I've toyed with some settings to improve legibility. I'm finding good results using a top and bottom infill pattern I rarely used in the past: Hilbert Curve. It dramatically increases print time but creates an interesting result. I'm also combining that with ironing, another setting I've had little use for. The results are quite good on this little print!
18 AUG: I've prototyped the work in FDM on a Prusa XL 5T and uploaded photos. The results are good but not as spectacular as I'd like, in part due to the quality of the filament I had on hand. I'll experiment with a few different filaments, top infill patterns, and/or ironing to see what optimizes the quality.
Bythecodedkid_388190Likes219Downloads260

 ByvexanixLikes168Downloads1.3K

 Bymay3dLikes0Downloads598

 Bynonoobybut_3307010Likes364Downloads1K

 ByPeterTrench_1051734Likes18Downloads140

 ByDrewmundLikes833Downloads4.6K

 ByPexPeppers Hot Sauce Hot SauceLikes114Downloads559

 Bybrawl-starsLikes0Downloads143

 ByFotisMintLikes71Downloads415

 Bysculturissimo3dLikes0Downloads219

 ByAryserLikes36Downloads391

 ByxeyosLikes0Downloads105