
F3D
Máy cấp đậu chậm tốc độ biến đổi cho máy xay cà phê DF64... 1

4 images

DIY

Máy cấp đậu chậm tốc độ biến đổi cho máy xay cà phê DF64...

By David

Downloads
176
Likes
25
Views
1,640
Comments
24

Files 10 798.2 KB

  • Slow_Feeder_v01_1765673031.stlSTL · 207.5 KB
  • BeanWheel_1765673032.stlSTL · 99.2 KB
  • DF64_Base_1765673032.stlSTL · 75.3 KB
  • DF64V_Base_1765673033.stlSTL · 105.8 KB

Make a variant with AI

Build another version of this model.

Open Studio

Description

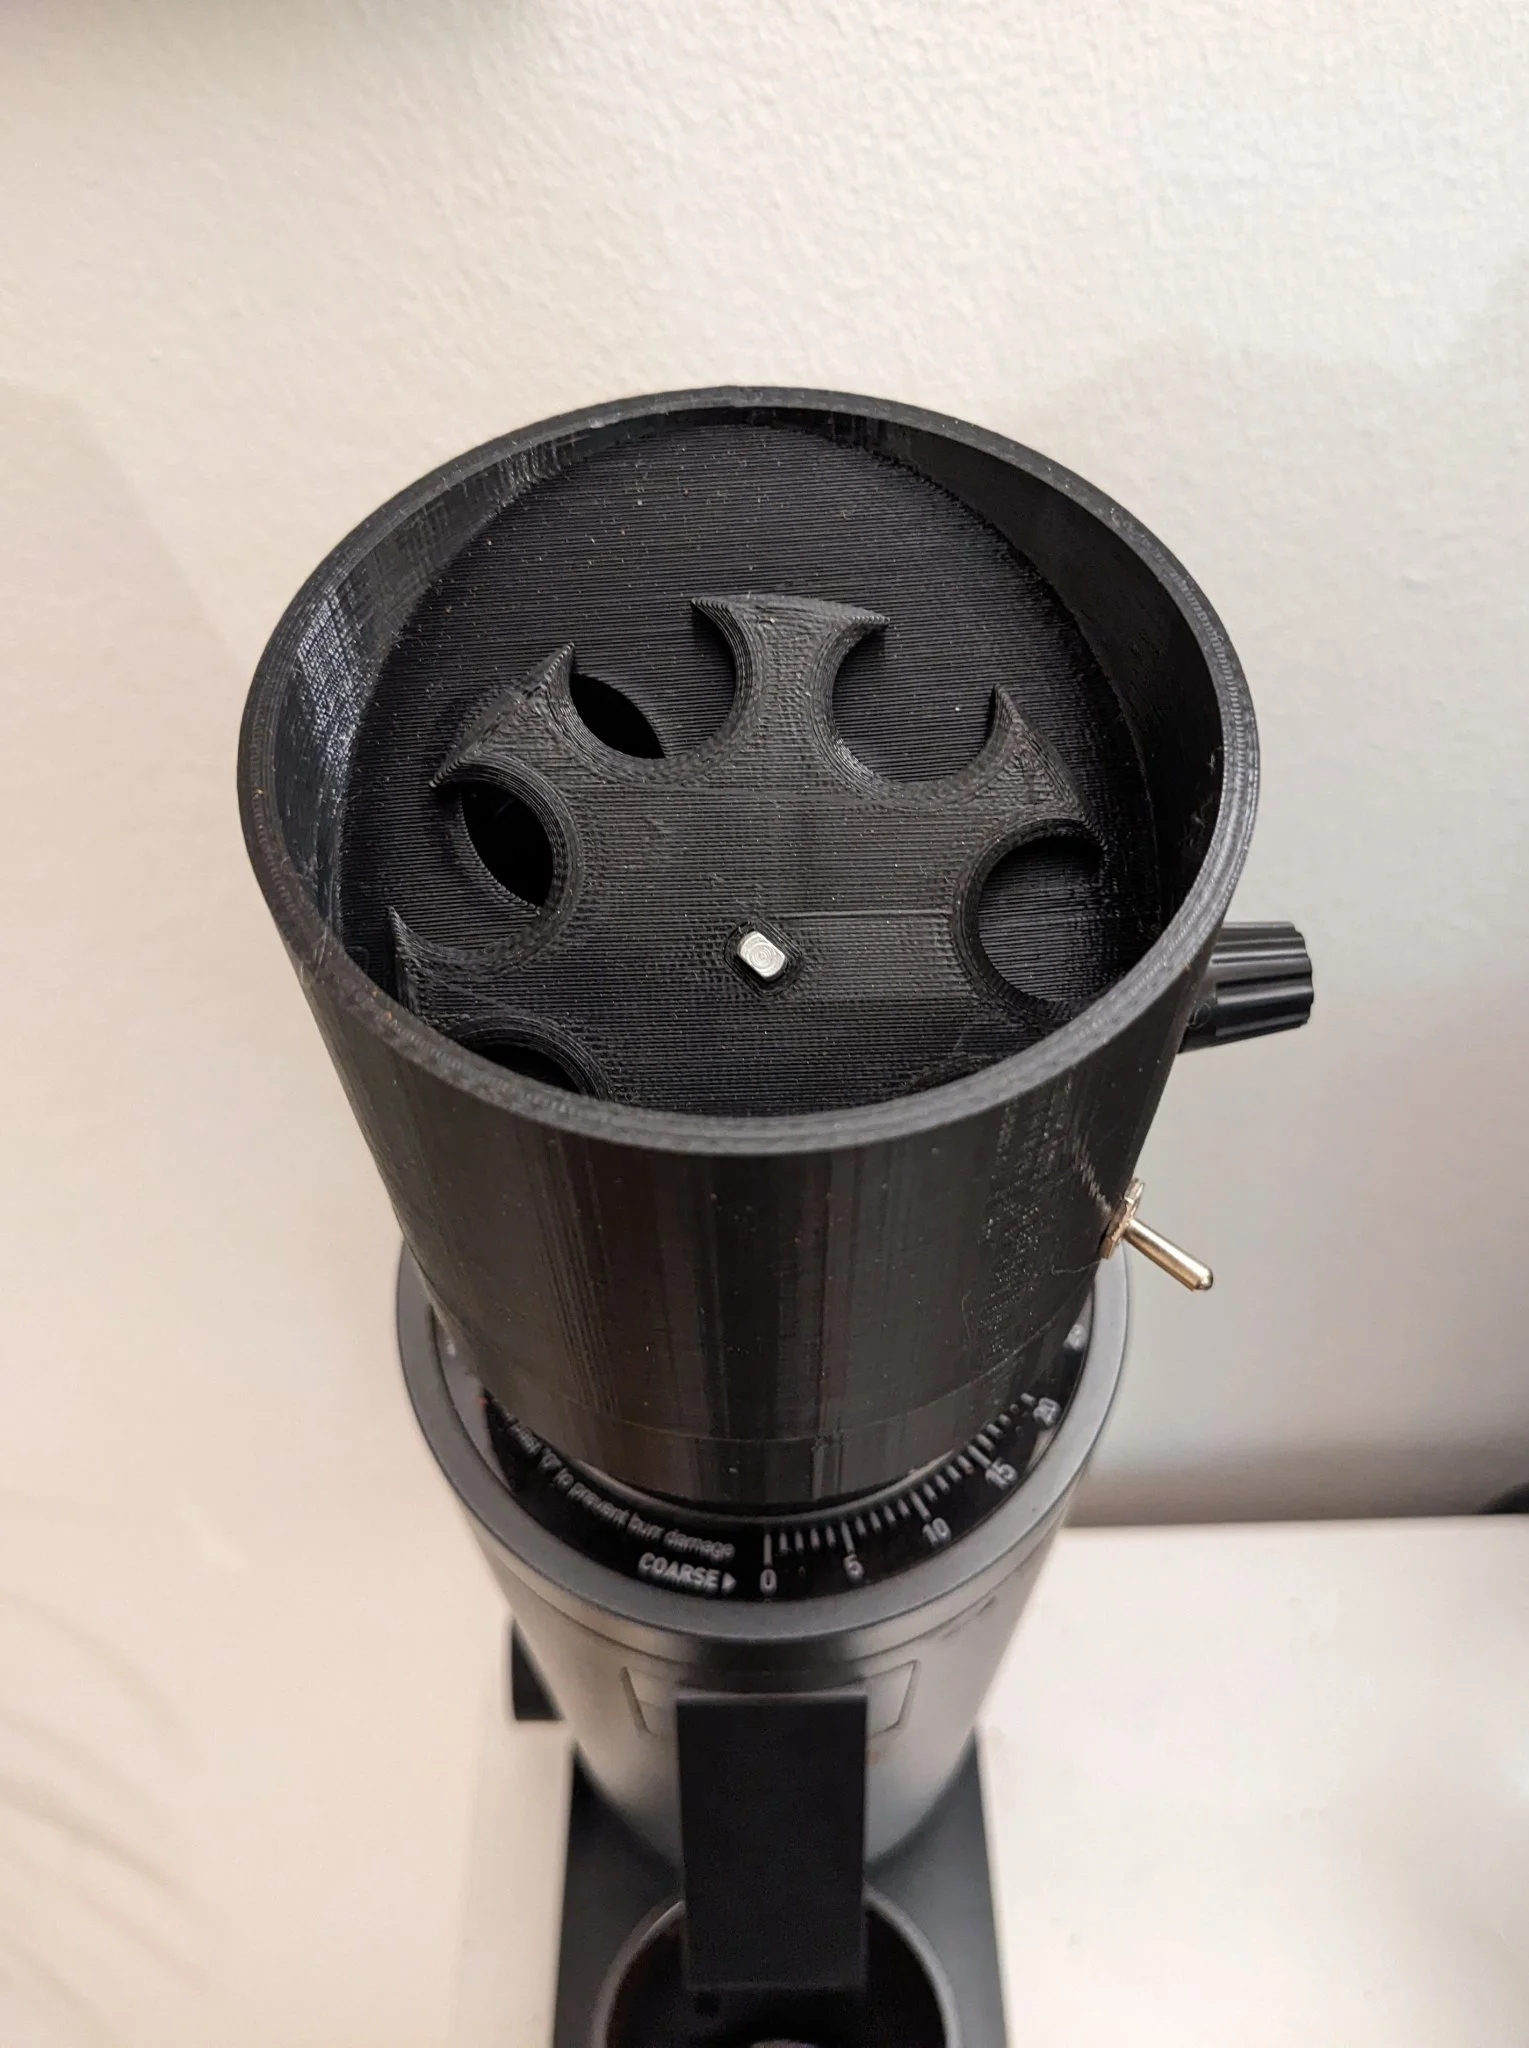
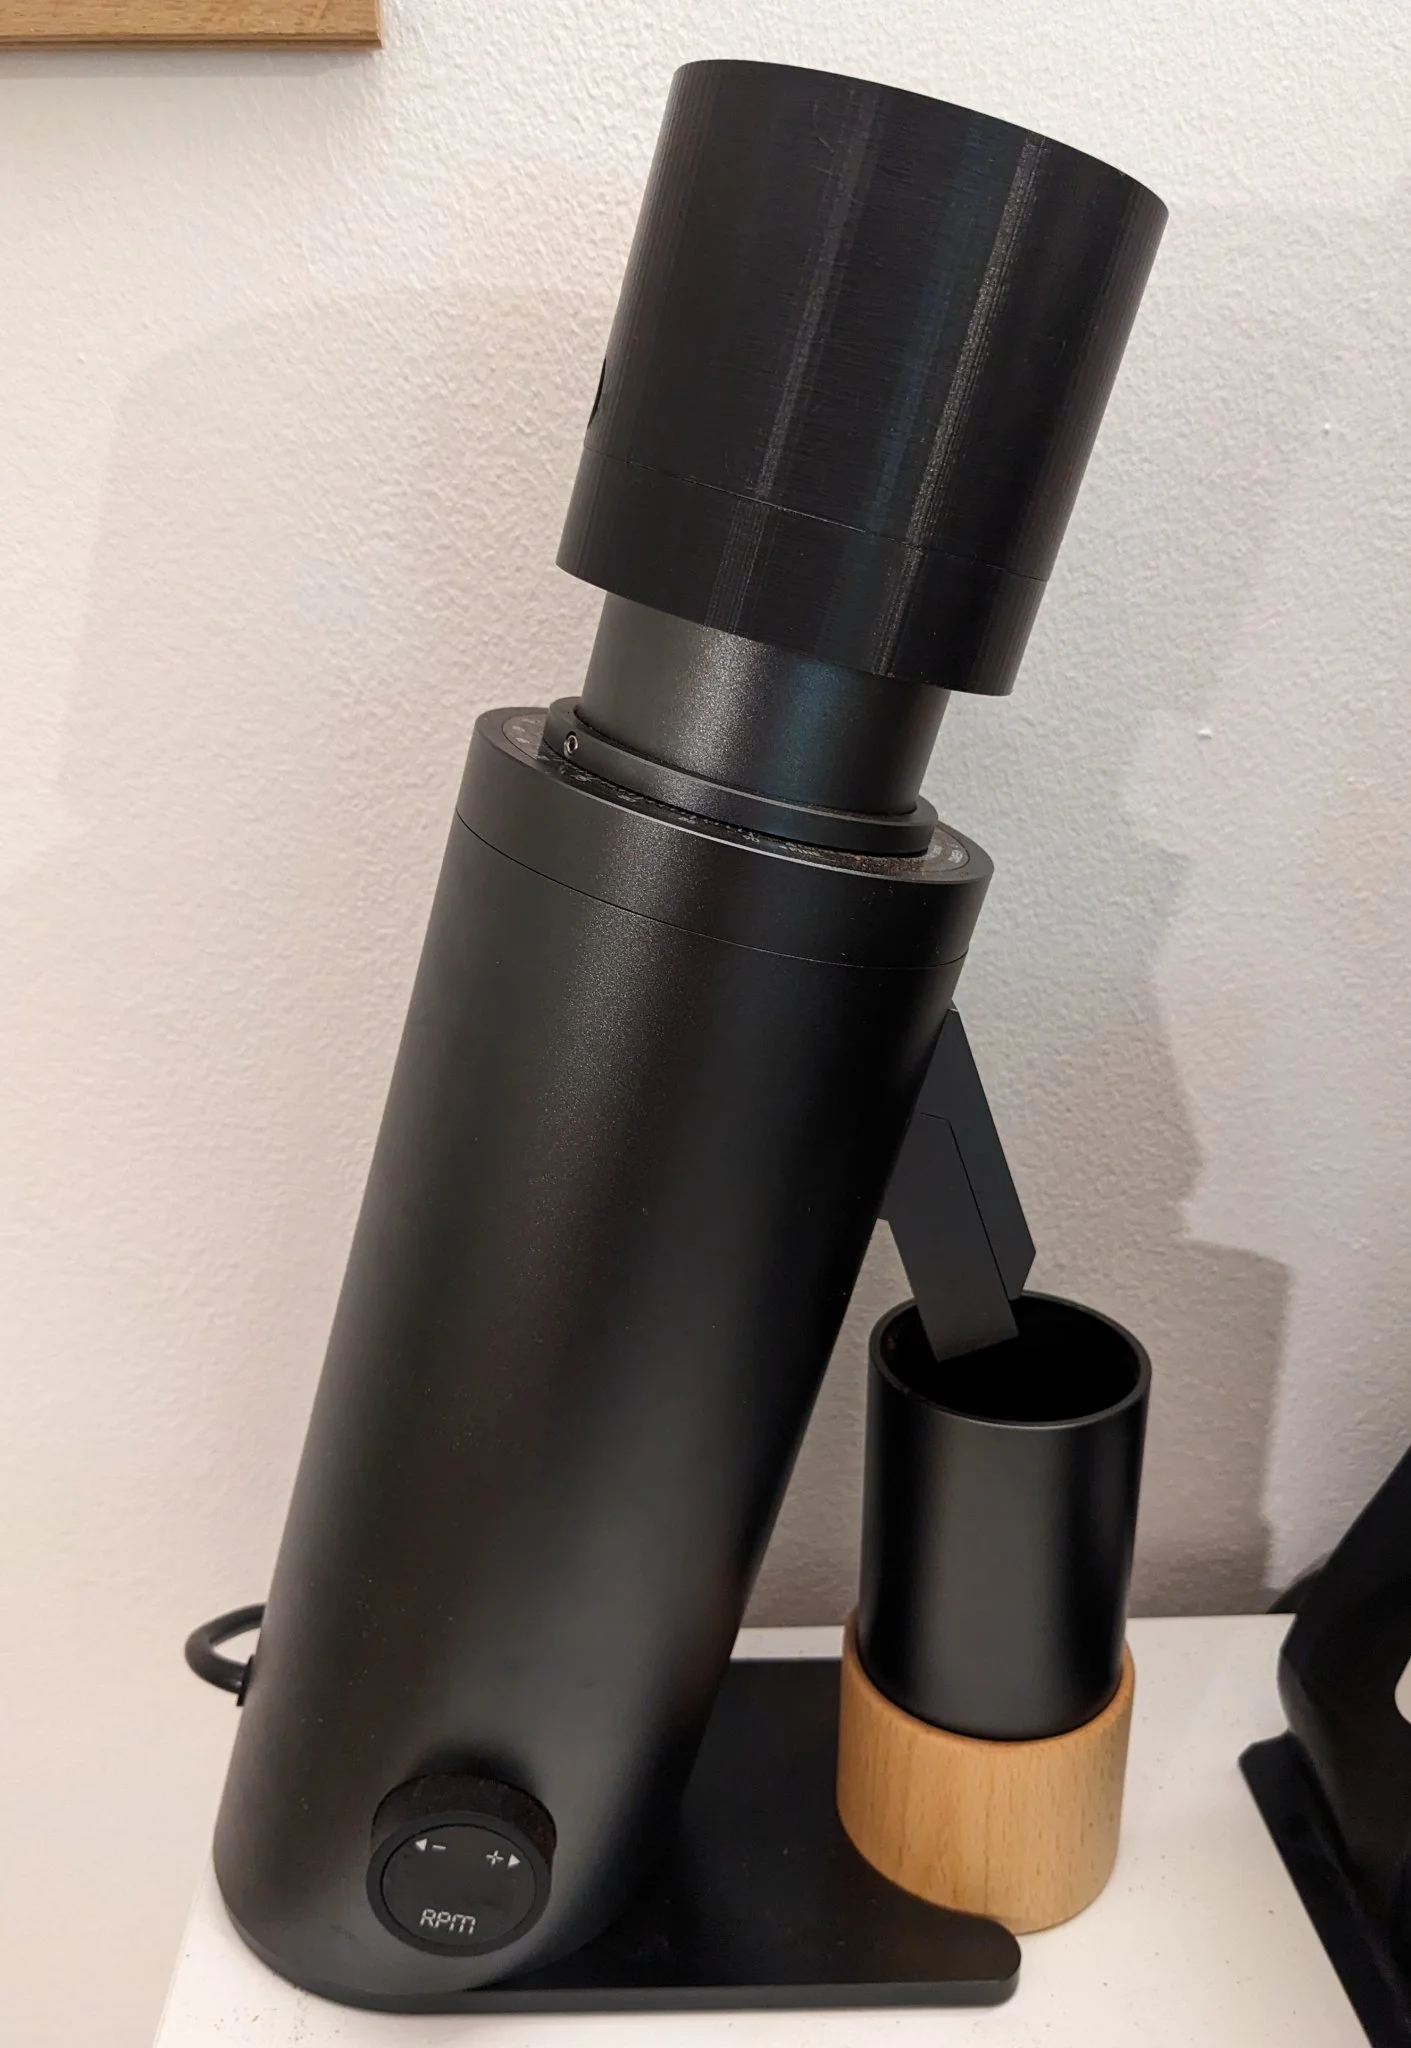
This slow bean feeder provides consistent, controlled feeding of coffee beans into DF64 or DF64V grinders.

Features:

  • Variable Speed via potentiometer
  • USB Powered (5V) with optional LiPo battery support
  • Direction Reverse with push button to clear jamming

Required Components:

  • 28BYJ-48 Stepper Motor (5V)
  • Stepper Motor Driver Board (e.g., ULN2003)
  • Arduino Nano (or compatible board)
  • M6Toggle Switch (to toggle power)
  • Potentiometer with knob (1K recommended)
  • ~10mm Momentary Micro Push Button (to reverse direction)
  • 3 M3x5 Machine Screws (to fasten base to enclosure)

Optional:

  • Small LiPo Battery
  • TP4056 (or similar) Charger + Protection Module

Assembly:

  1. Mount the stepper motor from the bottom using two M3 machine screws and nuts.
  2. Mount the toggle switch, push button and potentiometer and wire them into the arduino.
  3. Attach the cabling between stepper motor, driver board and arduino.
  4. (optional) Connect LiPo to TP4065 and TP4065 to arduino.
  5. Flash the arduino and test the setup. (Arduino sketch is provided under other files).
  6. Push all components into enclosure and attach base with three M3 screws.
  7. Push bean wheel onto stepper motor shaft.
  8. Remove the bellows from the grinder and place the Slow Feeder on top. (You can replace the bellows after the grinding is finished).

Wiring:

Arduino Connections:

Arduino Pin

Connected To

Purpose

A0

ULN2003 IN1

Stepper motor control

A1

ULN2003 IN2

Stepper motor control

A2

ULN2003 IN3

Stepper motor control

A3

ULN2003 IN4

Stepper motor control

A5

Push button (other leg to GND)

Toggle stepper direction

A7

Potentiometer center pin

Control stepper speed

Power and Ground Connections:

Connection

Details

5V Line (Power Input)

Comes from USB or TP4056 module

Switch

In-line on the 5V line — toggles power to Arduino and peripherals

Arduino 5V Pin

Connects to ULN2003 VCC, Potentiometer (right pin)

Arduino GND Pin

Connects to ULN2003 GND, Potentiometer (left pin), Button (one leg)

Read more Show less

Print spec

Formats
inostepstl
Model files
10
Total size
798.2 KB
Largest file
207.5 KB

24 comments

See all