



Dino Snack Clip - Kẹp miệng túi hình khủng long siêu đáng yêu
 ByTommy3DLab_2023125Likes636Downloads2.5K
Build another version of this model.
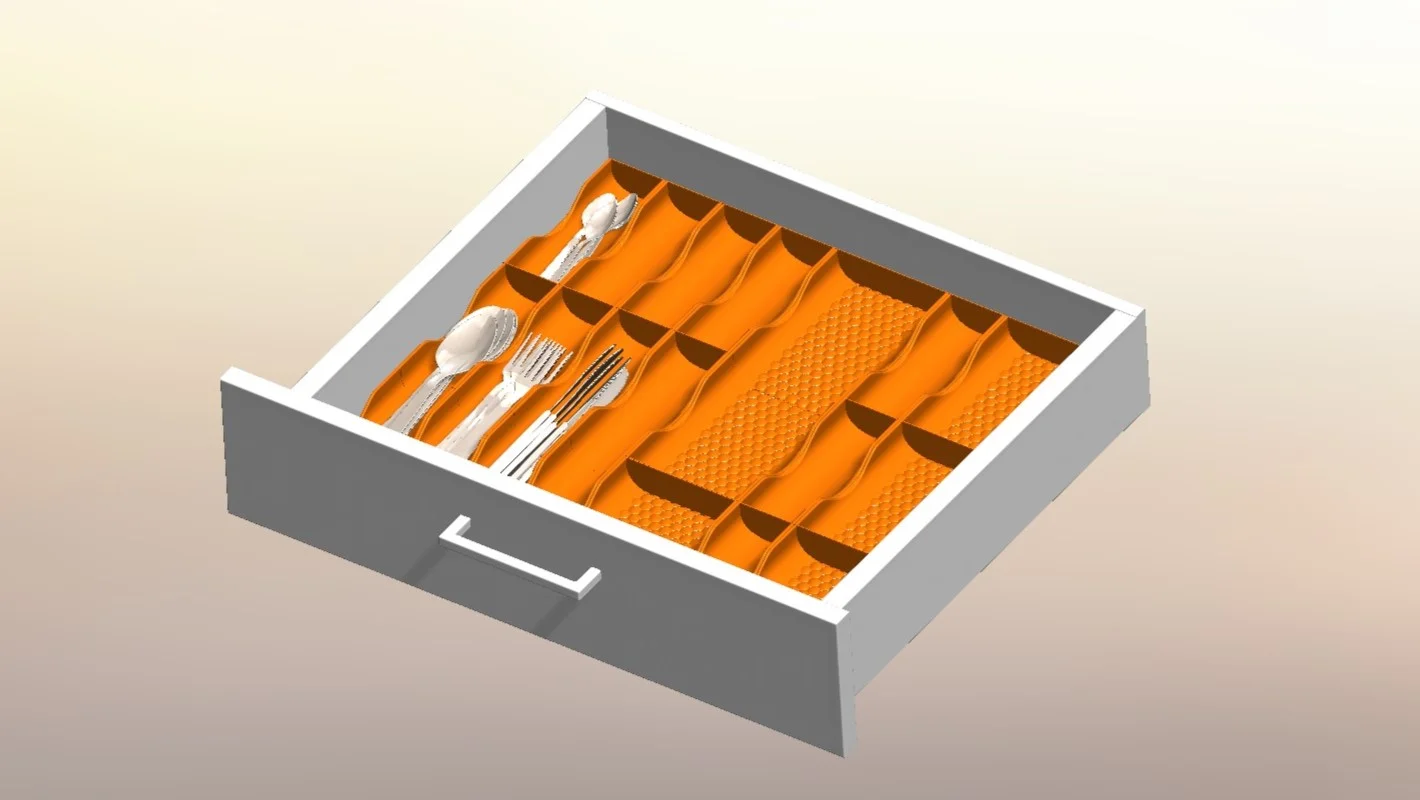
The links can be pushed in the middle of a tray but it is easier to slide them on.
The end pieces are mostly useful when you arrange the trays in a way that leaves it open on one side.
It may be a bit “floppy” when picked up but it does stay together when it lays flat
Print 1 end per row and at least 1 link per tray
-There are no hidden parts in the animation
To print more then one vase mode print at the time:
Keep the X axis gantry in mind when arranging the parts.
The print head moves down and could smash in to the part when it is not arranged properly.
Do not place parts next to each other the X axis gantry will crash into it
here is a example how it should be placed. the red arrows show the sequential order
You can press E to show the order in PrusaSlicer
to make the trays fit perfectly in your drawer. Don't worry you can copy/paste the equations in google.
(A - 0.9 × B - 0.9) / (1.5 × B) = Z
if you don't use the end pieces: (A - 0.9 × B ) / (1.5 × B) = Z
————————————————————————————————————————————————
for example:
(466 - 0.9 × 3 - 0.9) / (1.5 × 3) = 102.75…
So parts need to be partially Scaled along Z with 102.75 % It should be within 90%-110%
Is not needed if don't want to fill the entire drawer across the width
C / 54.6 = N
N rounded is D
N / D × 100 = X
————————————————————————————————————————————————
for example:
380 / 54.6 = 6.95…
6.95… rounded is 7
6.95… / 7 × 100 = 99.42…
So parts need to be scaled along X with 99.42 % It should be within 90%-110%
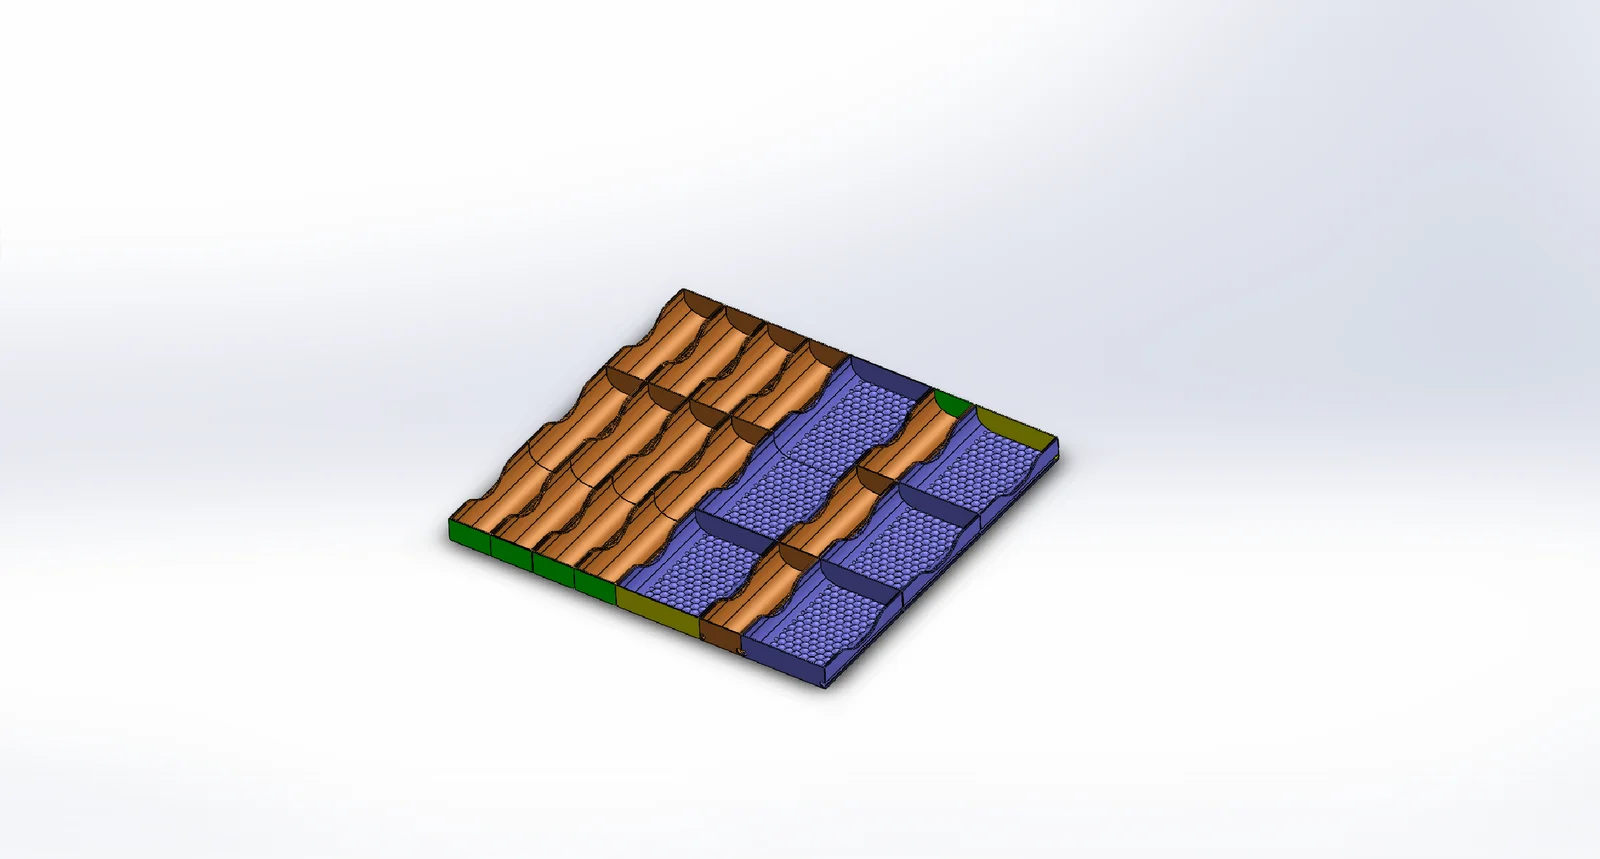
Only the part in green needs to scaled with the previously calculated Z Scale factor
When scaling the green part will cause the it to detach from the walls.
To re-attach the part:
All parts need to be entirely scaled with previously calculated Y Scale factor
ByTommy3DLab_2023125Likes636Downloads2.5K

 BybobmakesLikes2.5KDownloads17.5K

 Byquibeck_3353173Likes1.5KDownloads11.5K

 ByMateuszTokarzLikes46Downloads298

 ByTony Bullard BullardLikes465Downloads682

 ByVinors3DLabLikes393Downloads998

 Bym-collectableLikes0Downloads3.9K

 Byeli_667847Likes171Downloads367

 ByRMJourney_762911Likes140Downloads365

 ByKickin_Prints_525470Likes62Downloads357

 Bymateusz-tokarzLikes0Downloads169

 Bymoleculecrtr_1215658Likes544Downloads2K