


Mô hình boomerang in liền khối cực nhanh
 Byquibeck_3353173Likes1.5KDownloads11.5K
Build another version of this model.
DIY Replacement Handle for Gardena 32 E Lawnmower (now V2)
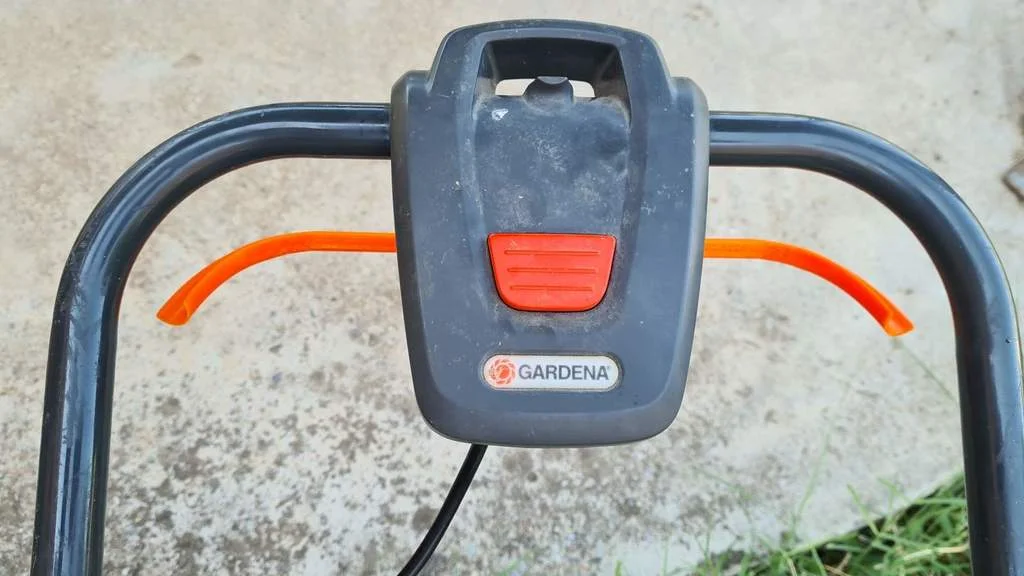
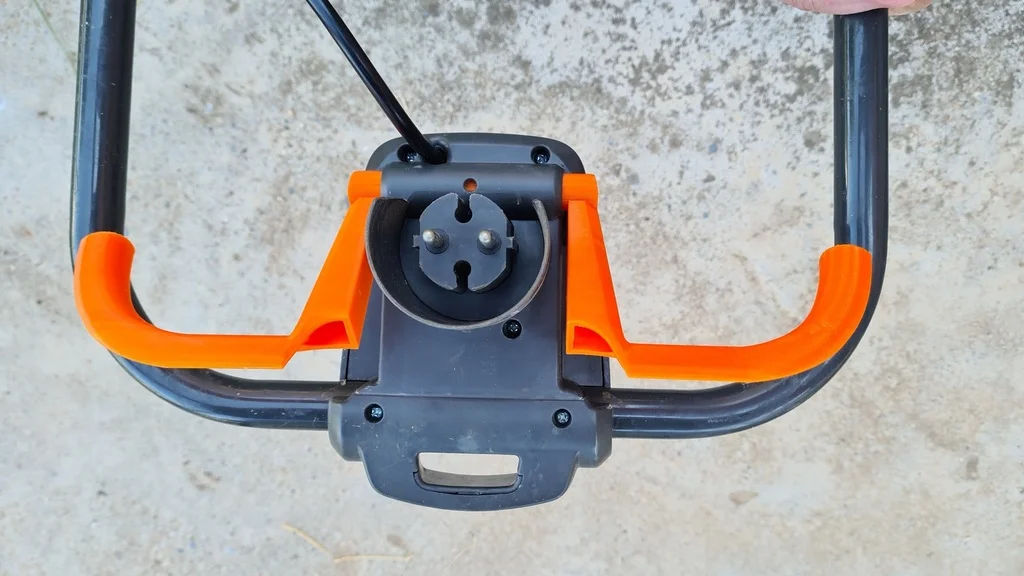
The original handle of my old Gardena 32 E lawnmower likely became brittle and broke due to prolonged UV exposure. Instead of buying the entire switch unit from Gardena, I decided to design and 3D print a replacement handle myself.
Since I couldn’t find the broken pieces, I recreated the part using reference photos. The new Version 2 of the design is – larger and more robust than Version 1 (see the last photo: V1 on top, V2 on the bottom). It fits well and functions reliably.
⚠ Important Safety Notice:
Installing this part involves working with the electrical system of the device and should only be performed by qualified personnel. There is a risk of electric shock. This is not a step-by-step guide. Please ensure the safety switch functions correctly after installation and that all safety regulations are followed.
Printing Info:
Happy printing
Toni :-)
----------------------------------------------------------------------------------------------------------------
Ersatzgriff für Gardena 32 E Rasenmäher (V2) – DIY
Der originale Griff meines alten Gardena 32 E Rasenmähers ist vermutlich durch starke UV-Belastung spröde geworden und gebrochen. Anstatt die komplette Schaltereinheit von Gardena zu kaufen, habe ich den Griff selbst entworfen und 3D-gedruckt.
Da die Bruchstücke nicht mehr auffindbar waren, habe ich den Griff anhand von Fotos neu konstruiert.
Die neue Version 2 ist – größer und stabiler als Version 1 (siehe letztes Bild: V1 oben, V2 unten). Der Griff passt gut und funktioniert zuverlässig.
⚠ Wichtiger Sicherheitshinweis:
Der Einbau greift in die elektrische Einheit des Geräts ein und darf nur von Fachpersonal durchgeführt werden. Es besteht Lebensgefahr durch elektrischen Strom. Dies ist keine Anleitung! Der Sicherheitsschalter muss nach dem Einbau sorgfältig geprüft werden, um eine sichere Abschaltung zu gewährleisten.
Druckeinstellungen:
Viel Spaß beim Drucken
Toni :-)
Byquibeck_3353173Likes1.5KDownloads11.5K

 By43DPRINTLikes295Downloads660

 ByMichael_1442457Likes230Downloads635

 BybobmakesLikes2.5KDownloads17.5K

 ByFergyMcFergusonLikes50Downloads421

 ByStuart800_1278696Likes77Downloads231

 By178222178222_2484344Likes449Downloads1.7K

 ByJackLikes145Downloads762

 ByVinors3DLabLikes393Downloads1K

 Bym-collectableLikes0Downloads3.9K

 ByPlaca_1765482Likes42Downloads404

 ByTommy3DLab_2023125Likes636Downloads2.5K