



Bộ sưu tập 11 nhân vật mô hình Mecca Chameleon in 3D vui nhộn
 ByZED4EverLikes313Downloads5.2K
Build another version of this model.
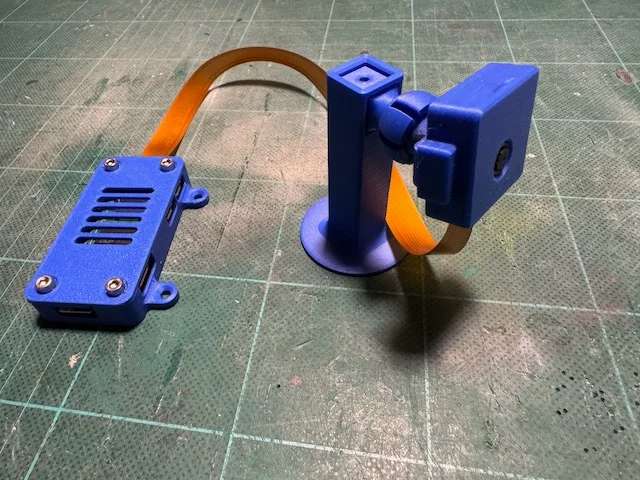
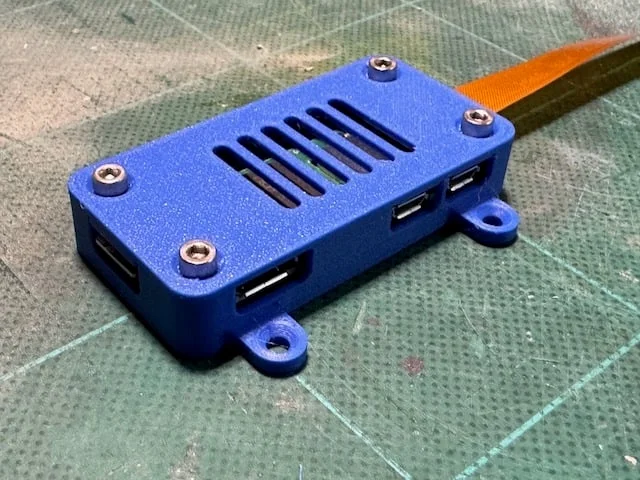
I wanted to attach my Raspi Zero 2W equipped with a camera module to the wooden frame of the enclosure of my printer. So you can find side pads with holes for screws to do so on the Pi case.
You only need four M3x10 screws to attach the top and bottom parts together, with the Pi in the middle; it's like a sandwich. A fifth M3x10 screw will be used to attach the camera case to a ball joint.
Plenty of slits on the Pi case to make sure the board is properly ventilated.
Then there is the camera case: the board simply sits on the little pikes. The cover snaps in the case to hold the whole thing.
And then: the ball joint. The two little arms slide and grip in the rear slots of the camera case.
The jaw has a hole to hold a M3 screw with its head flush in the cavity. The jaw snaps on the ball to enable a limited rotation of the camera, helping orientation.
And then the stand comes in three sizes: 60, 80 and 100mm high. I suggest you attach it to whatever surface you want with double sided tape. You can fit the jaw of the camera case in the square slot, either on top or on the side, depending on the setup you choose.
Printer Brand:
Prusa
Printer:
i3 MK4
Resolution:
0.2
Infill:
15%
Filament: Dailyfil PLA Blue
Notes:
Category: Electronics
ByZED4EverLikes313Downloads5.2K

 ByrjunLikes0Downloads304

 ByAdam Záhořák ZáhořákLikes39Downloads260

 ByleonicLikes0Downloads1.4K

 ByVC_DesignLikes271Downloads757

 ByfifindrLikes500Downloads4K

 Bymrfixit_324954Likes65Downloads478

 Bylab-96Likes0Downloads106

 BymoonyxLikes0Downloads696

 ByDan Schwartz SchwartzLikes744Downloads3.4K

 ByBrokentooth_designsLikes83Downloads453

 Byvc-designLikes0Downloads3.2K