



Kẹp giữ gậy golf cho túi đựng gậy
 ByCubaLibreee_2869176Likes125Downloads1K
Build another version of this model.
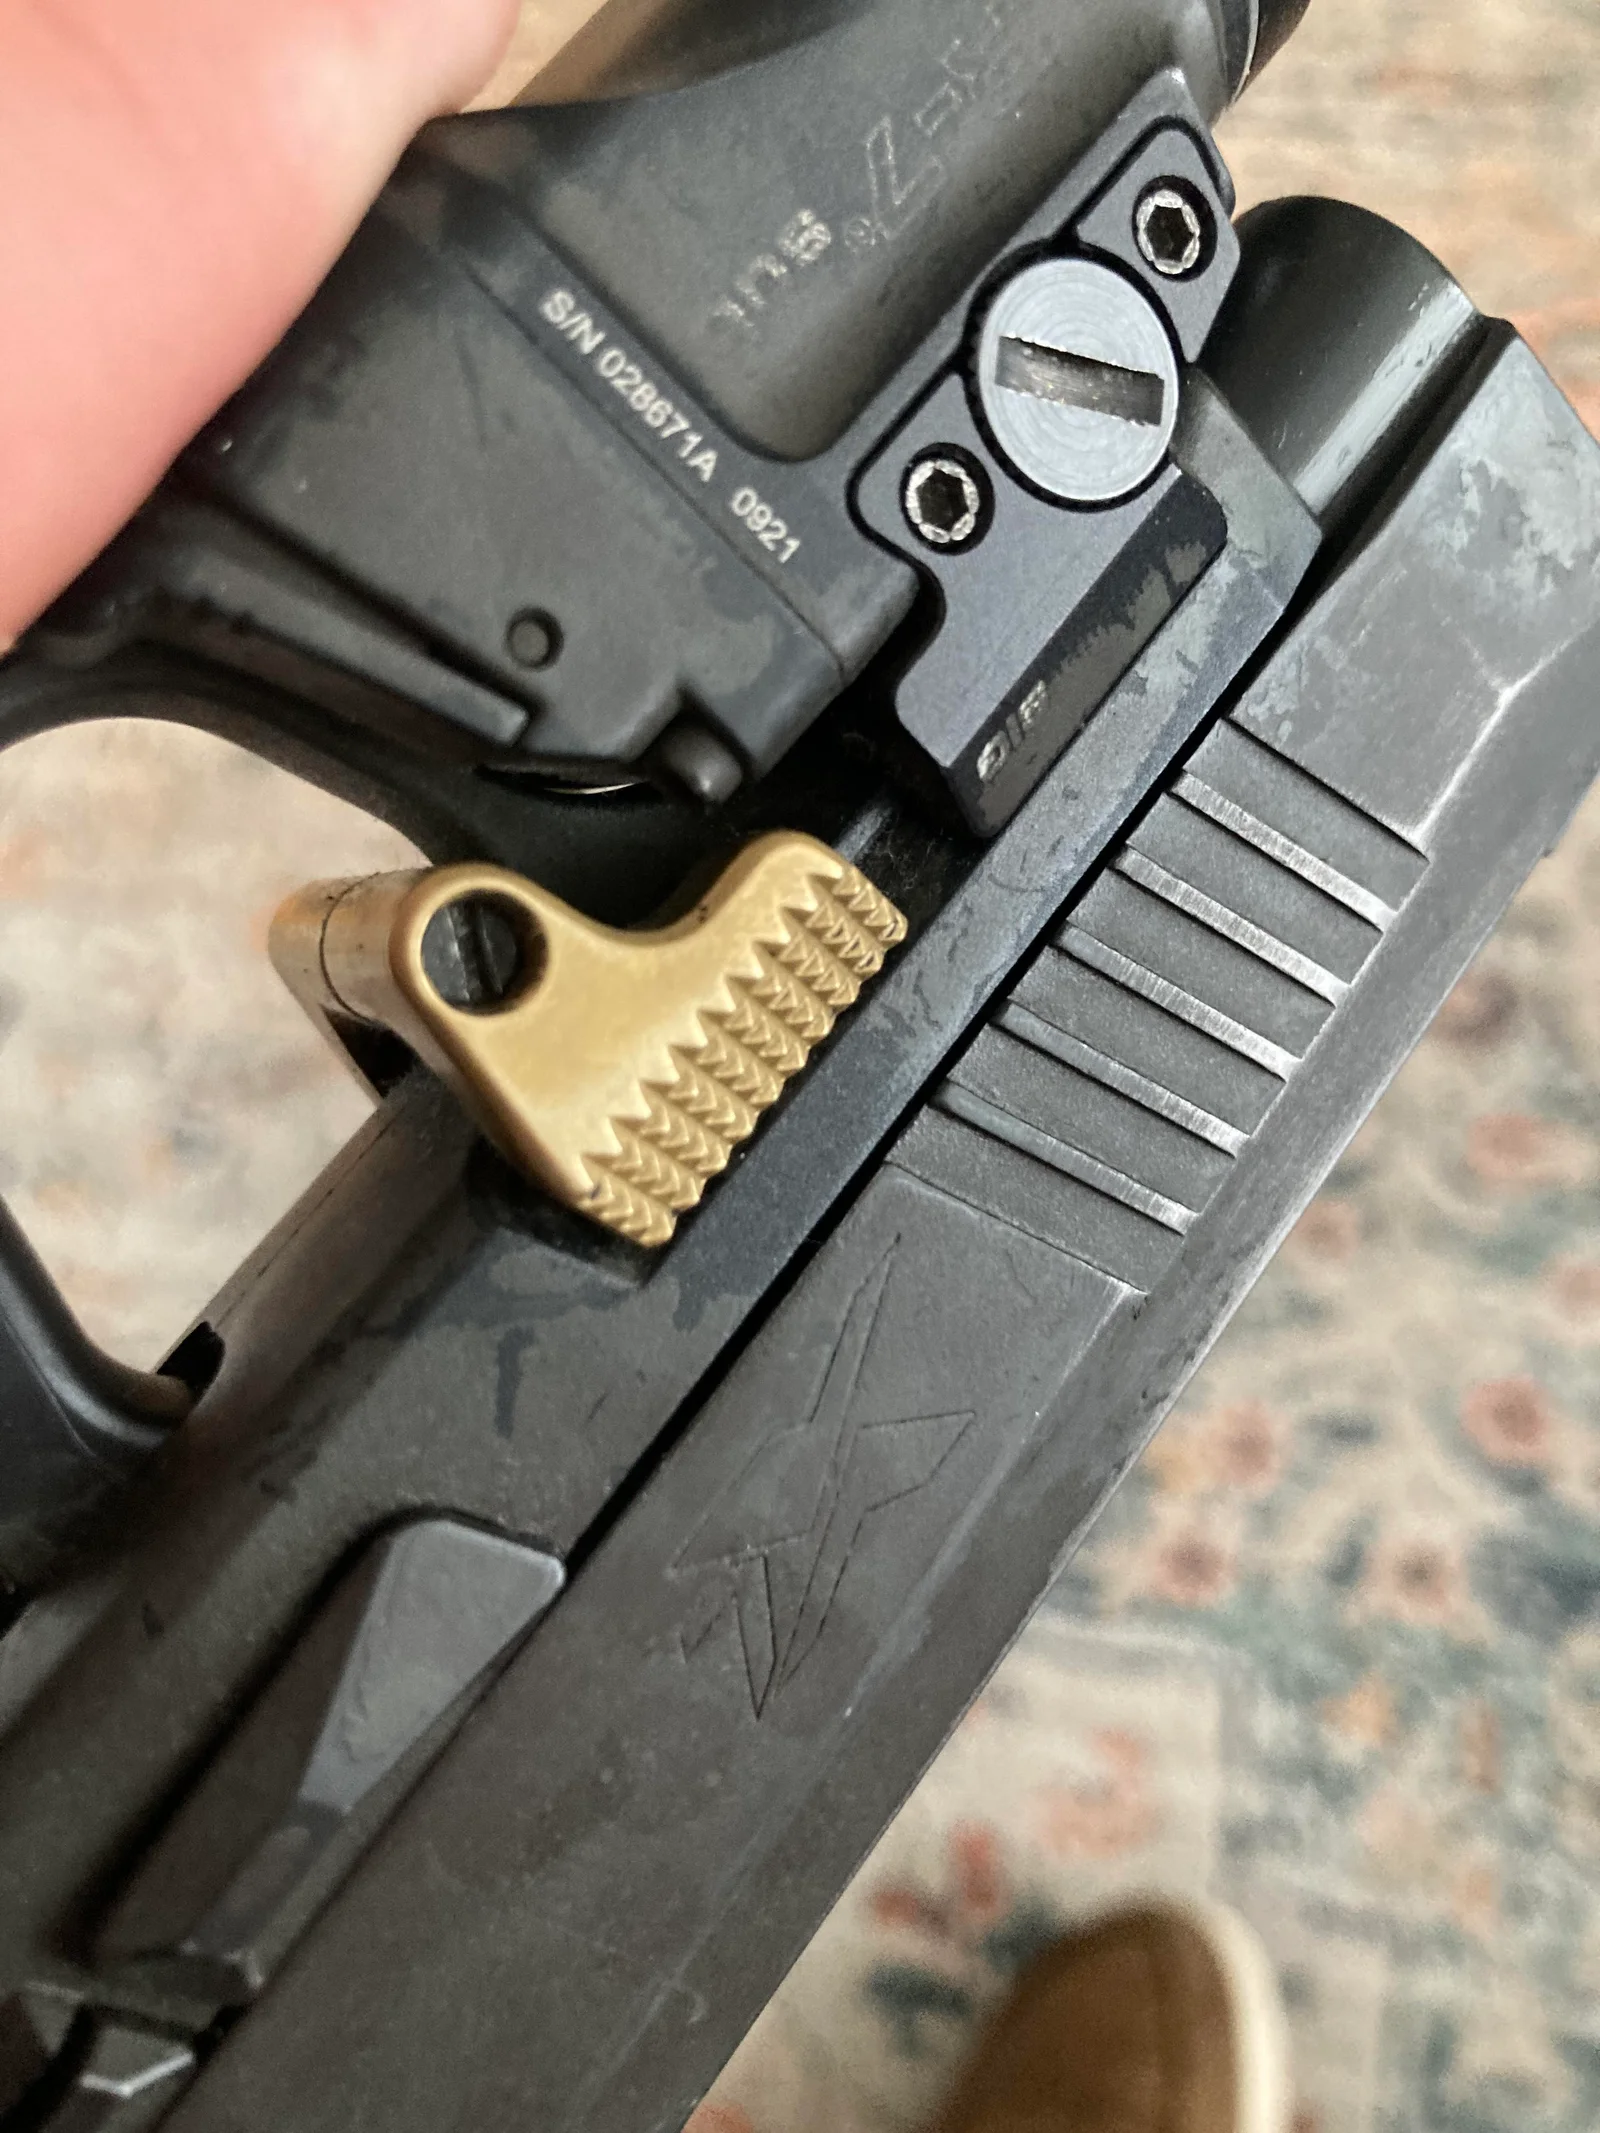
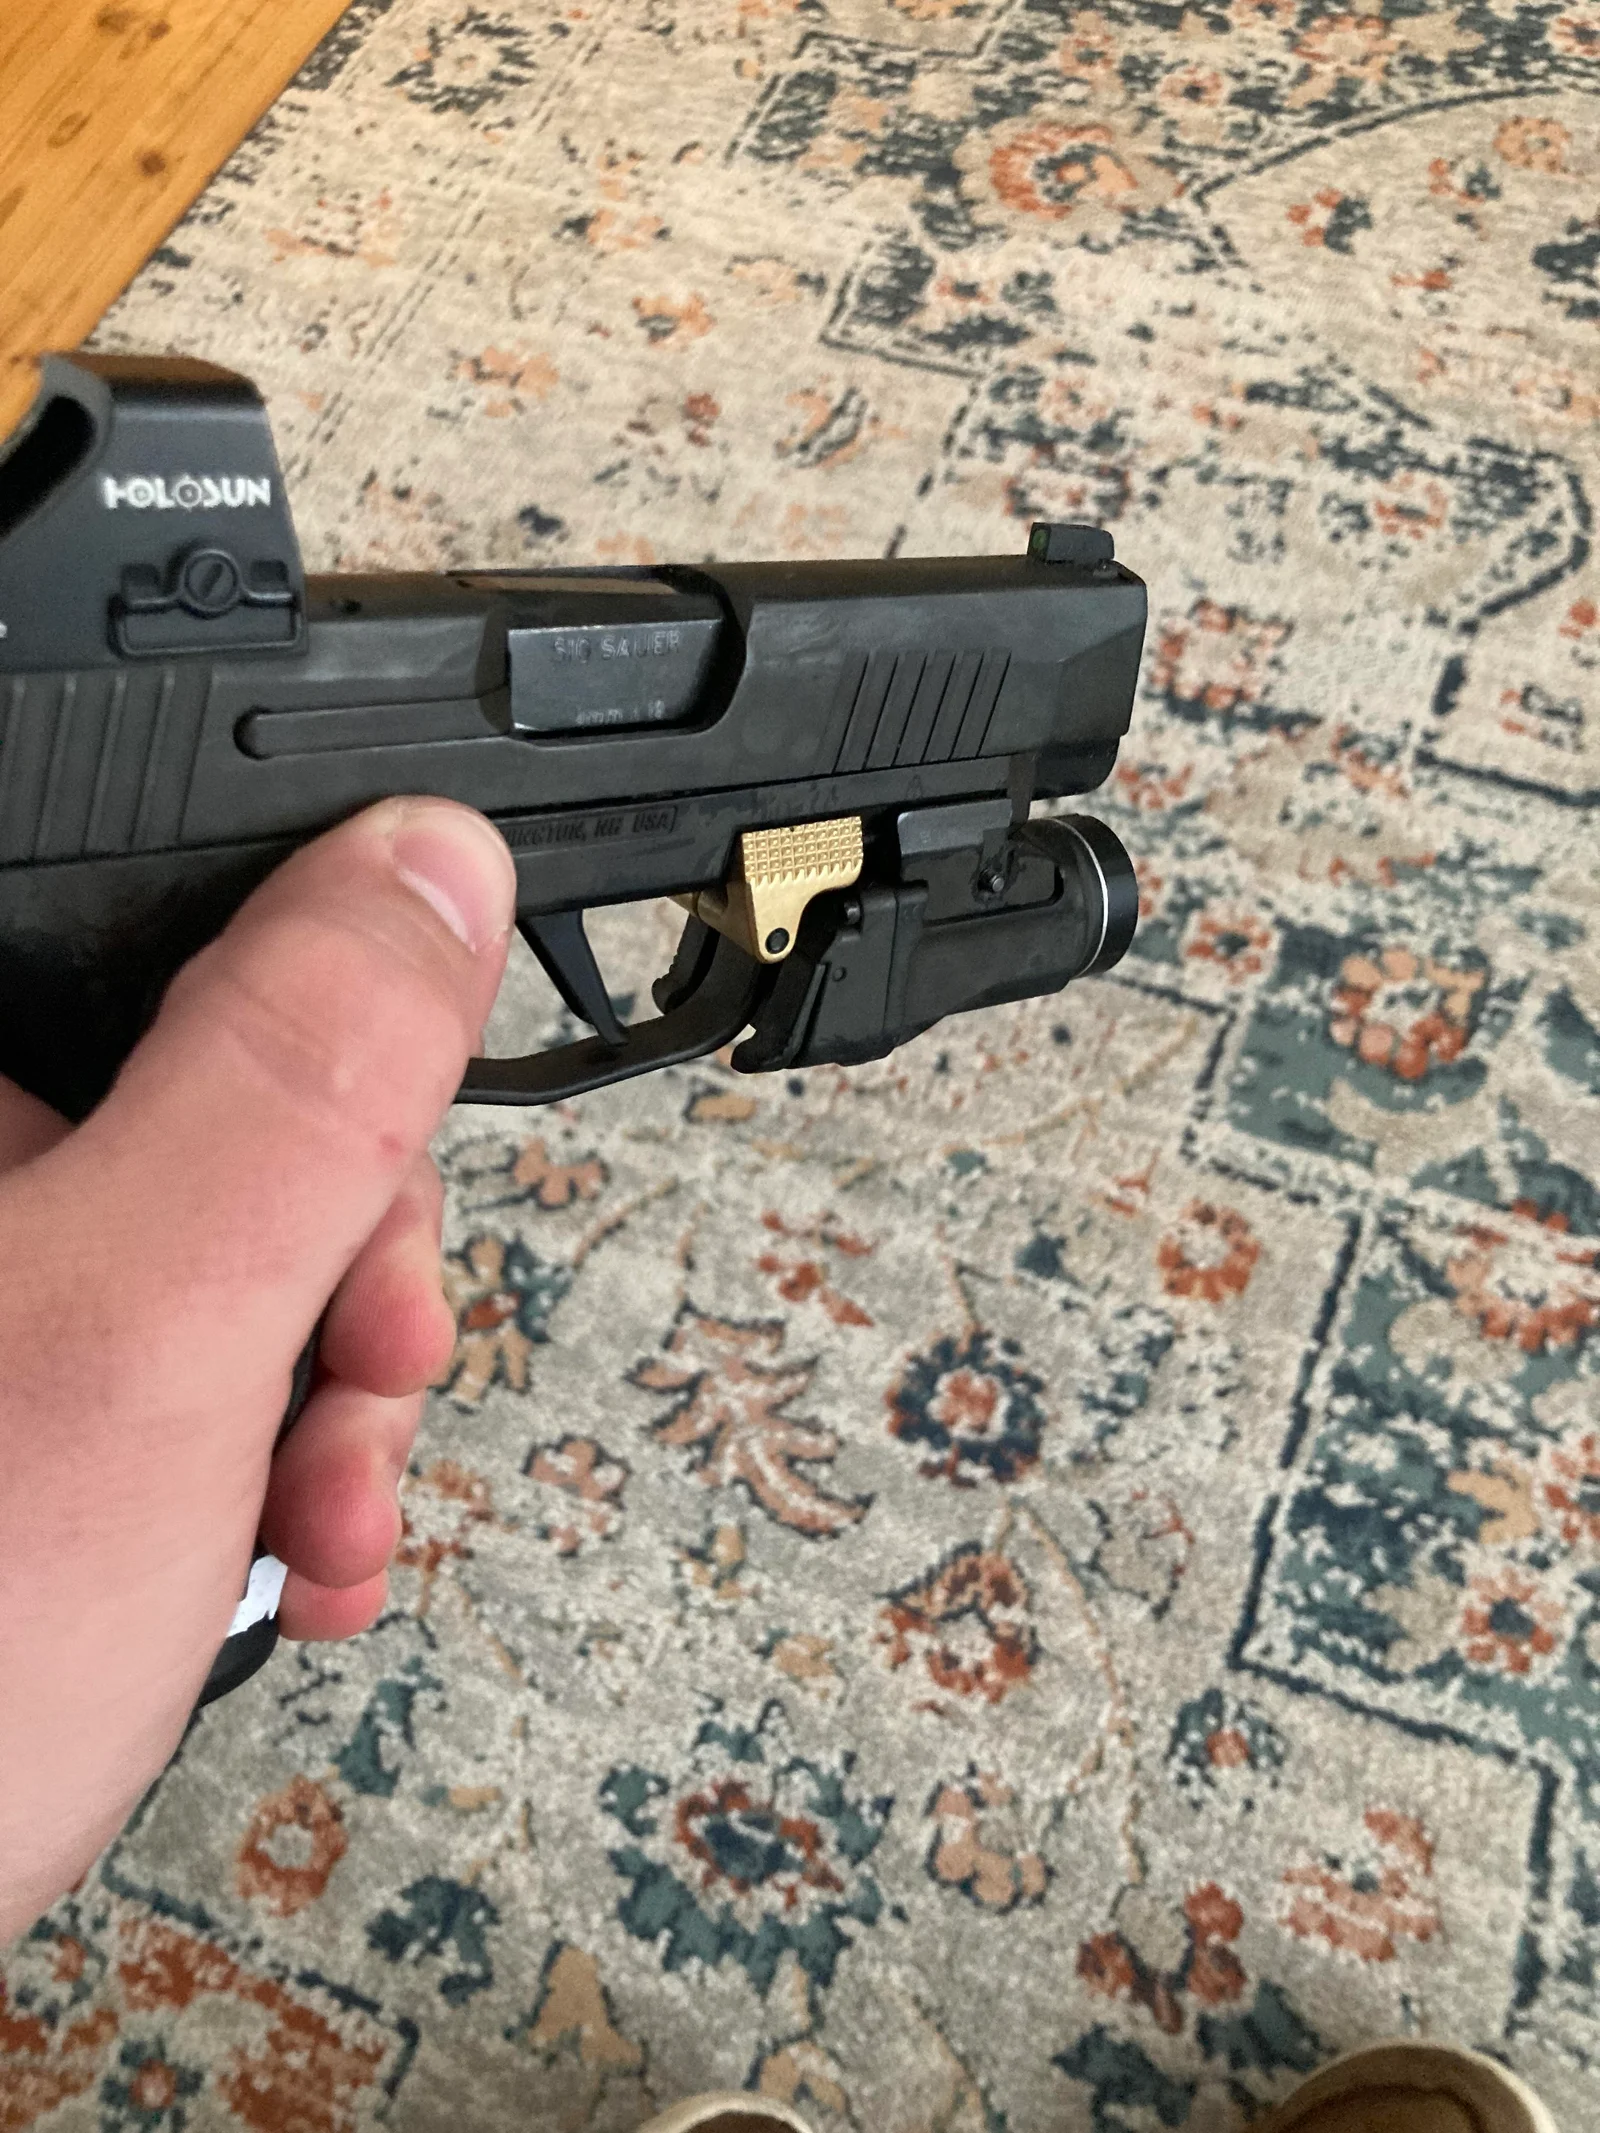
Commonly referred to as a “Gaspedal,” grip enhancements like these are beneficial to recoil control!
* I don't have many holsters to test with (mine is a Werkz M6), but because the "Gaspedal" has the same cross section as the TLR7 sub, I expect that this will work with the majority of holsters cut for this light/gun combo.
WARNING: While I encourage you to print this on your home 3D printer to ensure that it will work for how you hold your gun, and to check if it will work with your holster, I STRONGLY advise against using a plastic version of this in real use as it runs through the trigger guard.
I got mine cast in brass by Sculpteo. I think Craftcloud has better pricing as of late. You can have it done in Aluminum, Stainless Steel (be warned that stainless can be very difficult to tap), and many other materials/colors.
MATERIALS/TOOLS REQUIRED: After you order your parts, you will need a #4 tap and the appropriate drill bit. Additionally, you will need a #4 screw that will fit in the recess on the left side. I got mine from a ACE Hardware in the “gun screw” drawer. Wouldn't shock me if you could use a similar sized metric bolt/tap, but if it's not well suited in its current state the STEP file is attached for remixes!
INSTRUCTIONS:
Please do reach out with any questions or concerns!
Thanks!
ByCubaLibreee_2869176Likes125Downloads1K

 By3d-finesseLikes0Downloads145

 ByXDr4g0nXLikes198Downloads831

 ByGerhard_48223Likes240Downloads471

 ByBillRichardsLikes32Downloads390

 ByKorriLikes60Downloads619

 ByTarzLikes28Downloads583

 ByMachaki_1134160Likes36Downloads371

 ByMauroVanDerG_4110408Likes378Downloads2.7K

 By3DGearSupplyLikes26Downloads449

 ByMFTuningLikes153Downloads1.8K

 ByMaverick0197Likes161Downloads1.3K