CR 10 Max linear motion. IGUS Drylin-W-6
Bộ chuyển đổi chuyển động tuyến tính Drylin-W-6 cho CR 10 Max
Mô tả
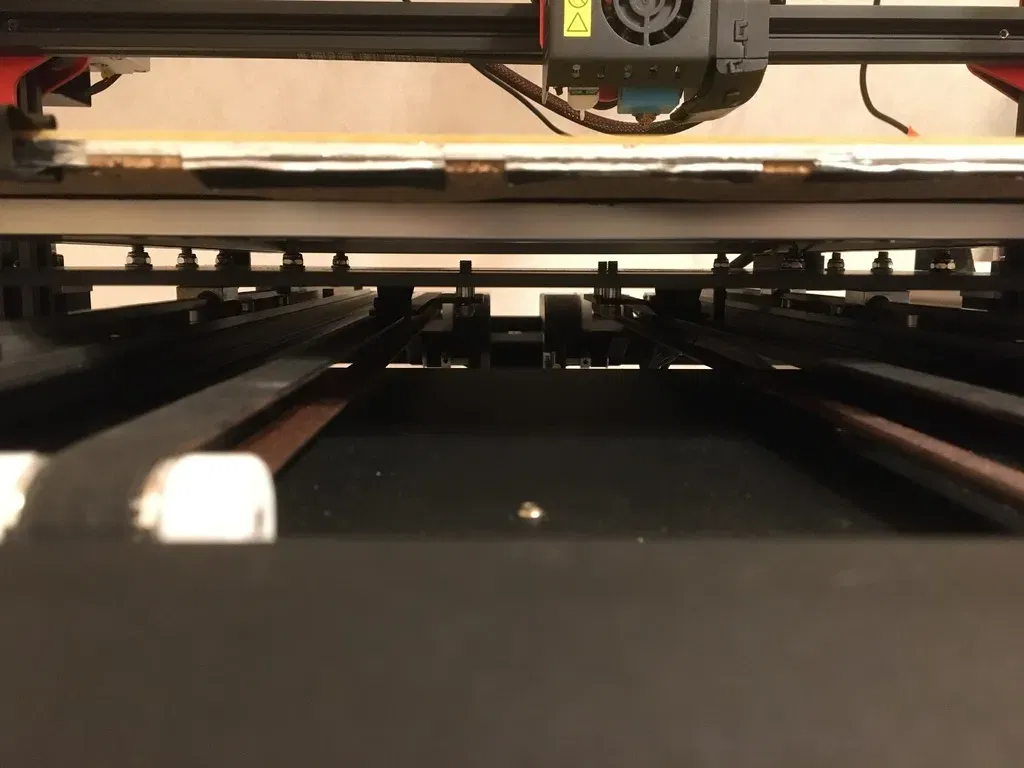
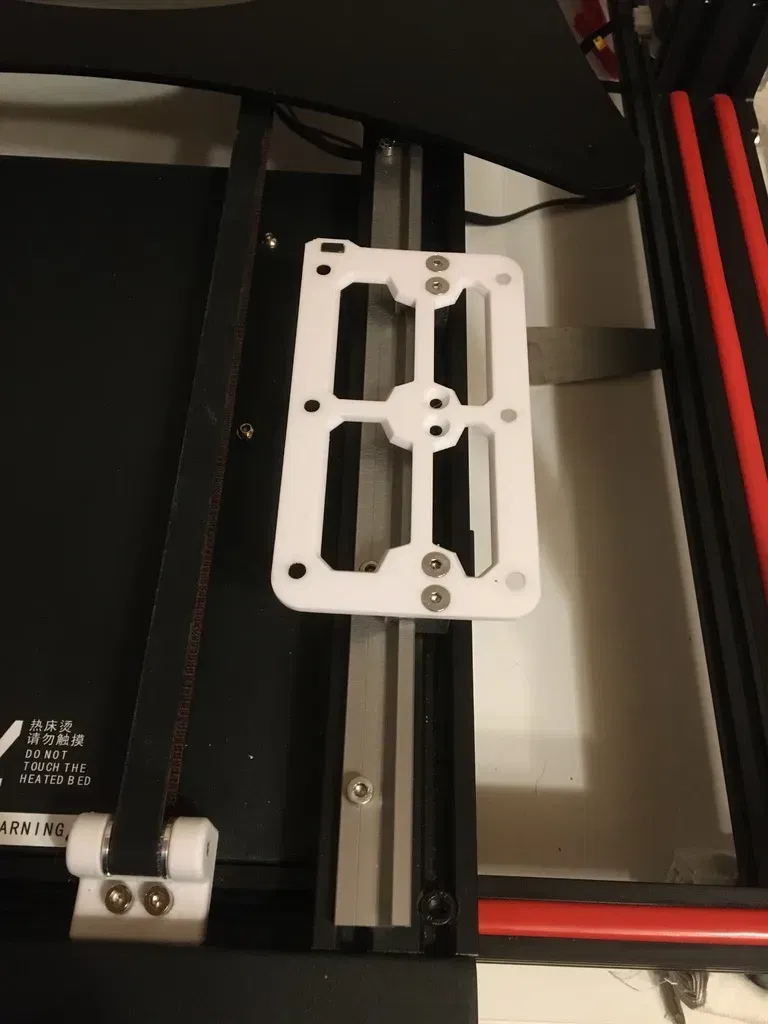
Decided to try linear motion on my CR 10 Max a few months back and after looking into a few options, Igus Drylin got my attention. Being precise enough for 3d printing yet possessing a comparatively low cost. With the added bonus of no need for lubrication, I gave it a try and was satisfied with the results. Note: This version is for the Square W-rail. If you want something similar to a more standard linear system, an UNTESTED version i made for TS-04-12 can be found here ### Provided Files ------------ These 3 are required: D-S-6-Frame D-S-6-Frame-lever D-S-6-lever Note: Each frame can be used with 1-3 carriages. I used 2 for each, but you are free to experiment These are optional: D-S-6-RailDistancer To assist in straightening the rails. Use a file and caliper to get correct measurements (Written on the part). You will need 2. Trench-Pad After installation i noticed the rails sitting on very little material, so i designed these pads as a better base. As of writing I have yet to try them myself. You will need 4. M4-Spacer If your m4-screws are too long or you just want to have a plastic spacer between the rail and screw. M5-Spacer After installing the linear motion system, your timing belts might be pulling at a steep angle. I used the aluminium spacers for the wheels to lower the two plates holding the belts. But if that is not enough or too much, a few of these spacers might help. ### Required Hardware ------------ Tools Digital calipers File Carriages 1-3 WJ200QM-01-06 https://www.igus.eu/product/1162?artNr=WJ200QM-01-06 1-3 WJ200QM-01-06-LLZ https://www.igus.eu/product/1162?artNr=WJ200QM-01-06-LLZ Note: I recommend a matching number of LLZ to non-LLZ carriages. 2 per Carriage. M4. flathead. 5-10mm Carriage frame 12 M5. flathead. 12mm 12 M5. Locknut. Belt holder 4 M5. Button or Socket. 12mm Rails 2 WSQ-06. 600mm https://www.igus.eu/product/735?artNr=WSQ-06 10+ M4. Button or Socket. 9mm 10+ M4. T-nut. Rails - Computer (Recommended Optional) 4 M4. Button or Socket. 29mm ### Installation instructions ------------ Preparations Make sure you have printed all the 3 required parts. As well as any optional parts you might want. Remove build plate. Loosen and unhook the timing belts, or just unscrew the 4 central M5 nuts on the hotplate carrier. Then Unscrew the 12 M5 nuts holding the hotplate carriage to the aluminium extrusions. The hotplate carriage should now be free. Installing the rails We will be using the two trenches that the computer screws into. If you want the computer detachable after you install the rails, unscrew it now. The central black M5 screws in the front needed their heads slightly filed down for a good flat fit in my case. Also clean the aluminium extrusions if necessary Put in all t-nuts and trench pads (2 pads per rail) you intend to use, then place rails on top. Loosely screw in all t-nuts to see if the rails are able to lay flat, then align the rails with the computers screw holes. If any screws below the rails interfere, try tightening them down. Now, with the rails slightly loose, get them as as straight to the extrusions and one another as possible. 5mm from inner edge of extrusion, 230mm between rails. You can use the provided distancers for assistance. Installing carriages Slide your carriages onto the rails, recommend using LLZ on the Left. Making sure the right frame has the lever slot at the back to hit the end-switch correctly, screw the two frames loosely onto the carriages using the flathead M4s. Feel how well they slide and tighten the screws. Then put the lever in its slot. screw the Printed frames, using the 3 smaller holes for each side first, onto hotplate carriage using the M5 Flatheads. Feel how the assembly slides. Putting back Timing belts Check the angles of the timing belts. If needed, add washers or aluminium spacers to lower the two plates holding the timing belts until the belts are flat. For me, the aluminium spacers previously used with the wheels worked well. ### Happy with the model? If you have any questions or suggestions, feel free to leave a comment. If you are happy with the model, consider donating. https://ko-fi.com/cyklo Category: 3D Printer Accessories
Giấy phép

File mô hình


Chưa có bản in nào được khoe. Hãy là người đầu tiên!

Chưa có bình luận nào. Hãy là người đầu tiên!