Tiêu đề SiCK-68 với vi điều khiển Waveshare RP2040-Zero Tóm tắt

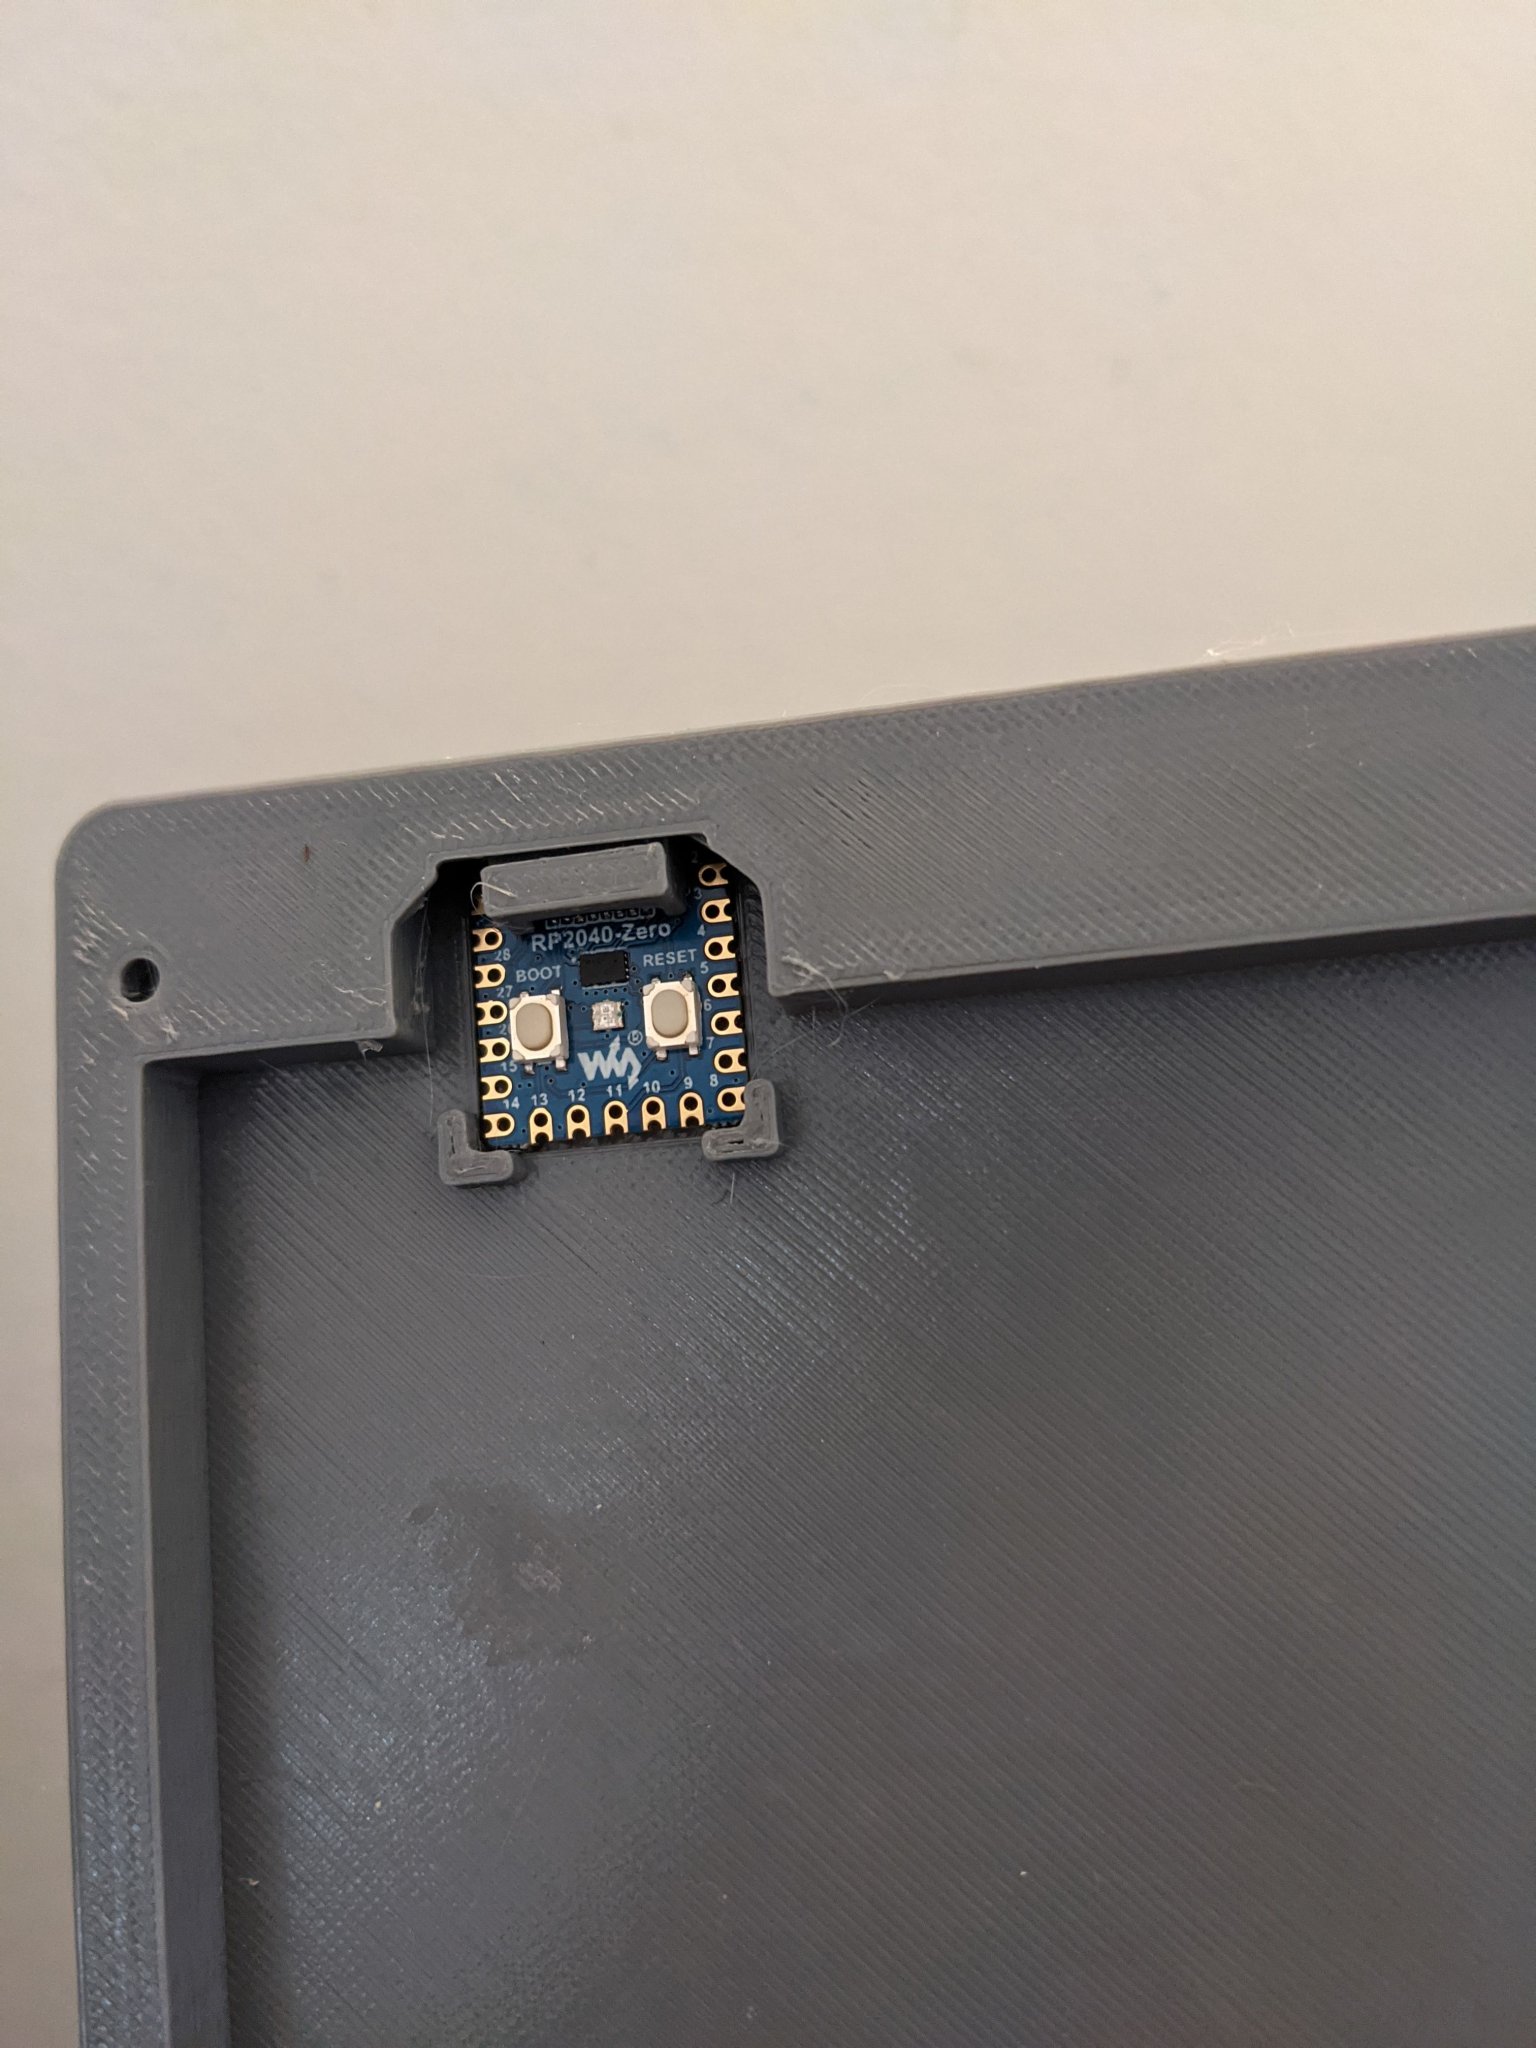
Phần dưới cùng bên trái của bàn phím Sick-68 được sửa đổi để chấp nhận bộ vi điều khiển Waveshare RP2040-Zero


Mô tả
The bottom-left part of SiCK-68 keyboard modified to accept a Waveshare RP2040-Zero microcontroller. Has a snug opening for the USB-C port and the controller is fully constrained – you won't be able to wiggle it loose using a USB-C cable.
The RP2040-Zero is a pretty good fit here – has exactly the 20 needed GPIOs on the easily-soldered castelated pads, is small, cheap, has a USB-C connector and runs the very convenient KMK firmware.
Physical Construction
Warning: Do not try to use the original bottom-left model with a RP2040-Zero. It will seem to go in but you are likely to break the board by shearing off components on the bottom of the board.
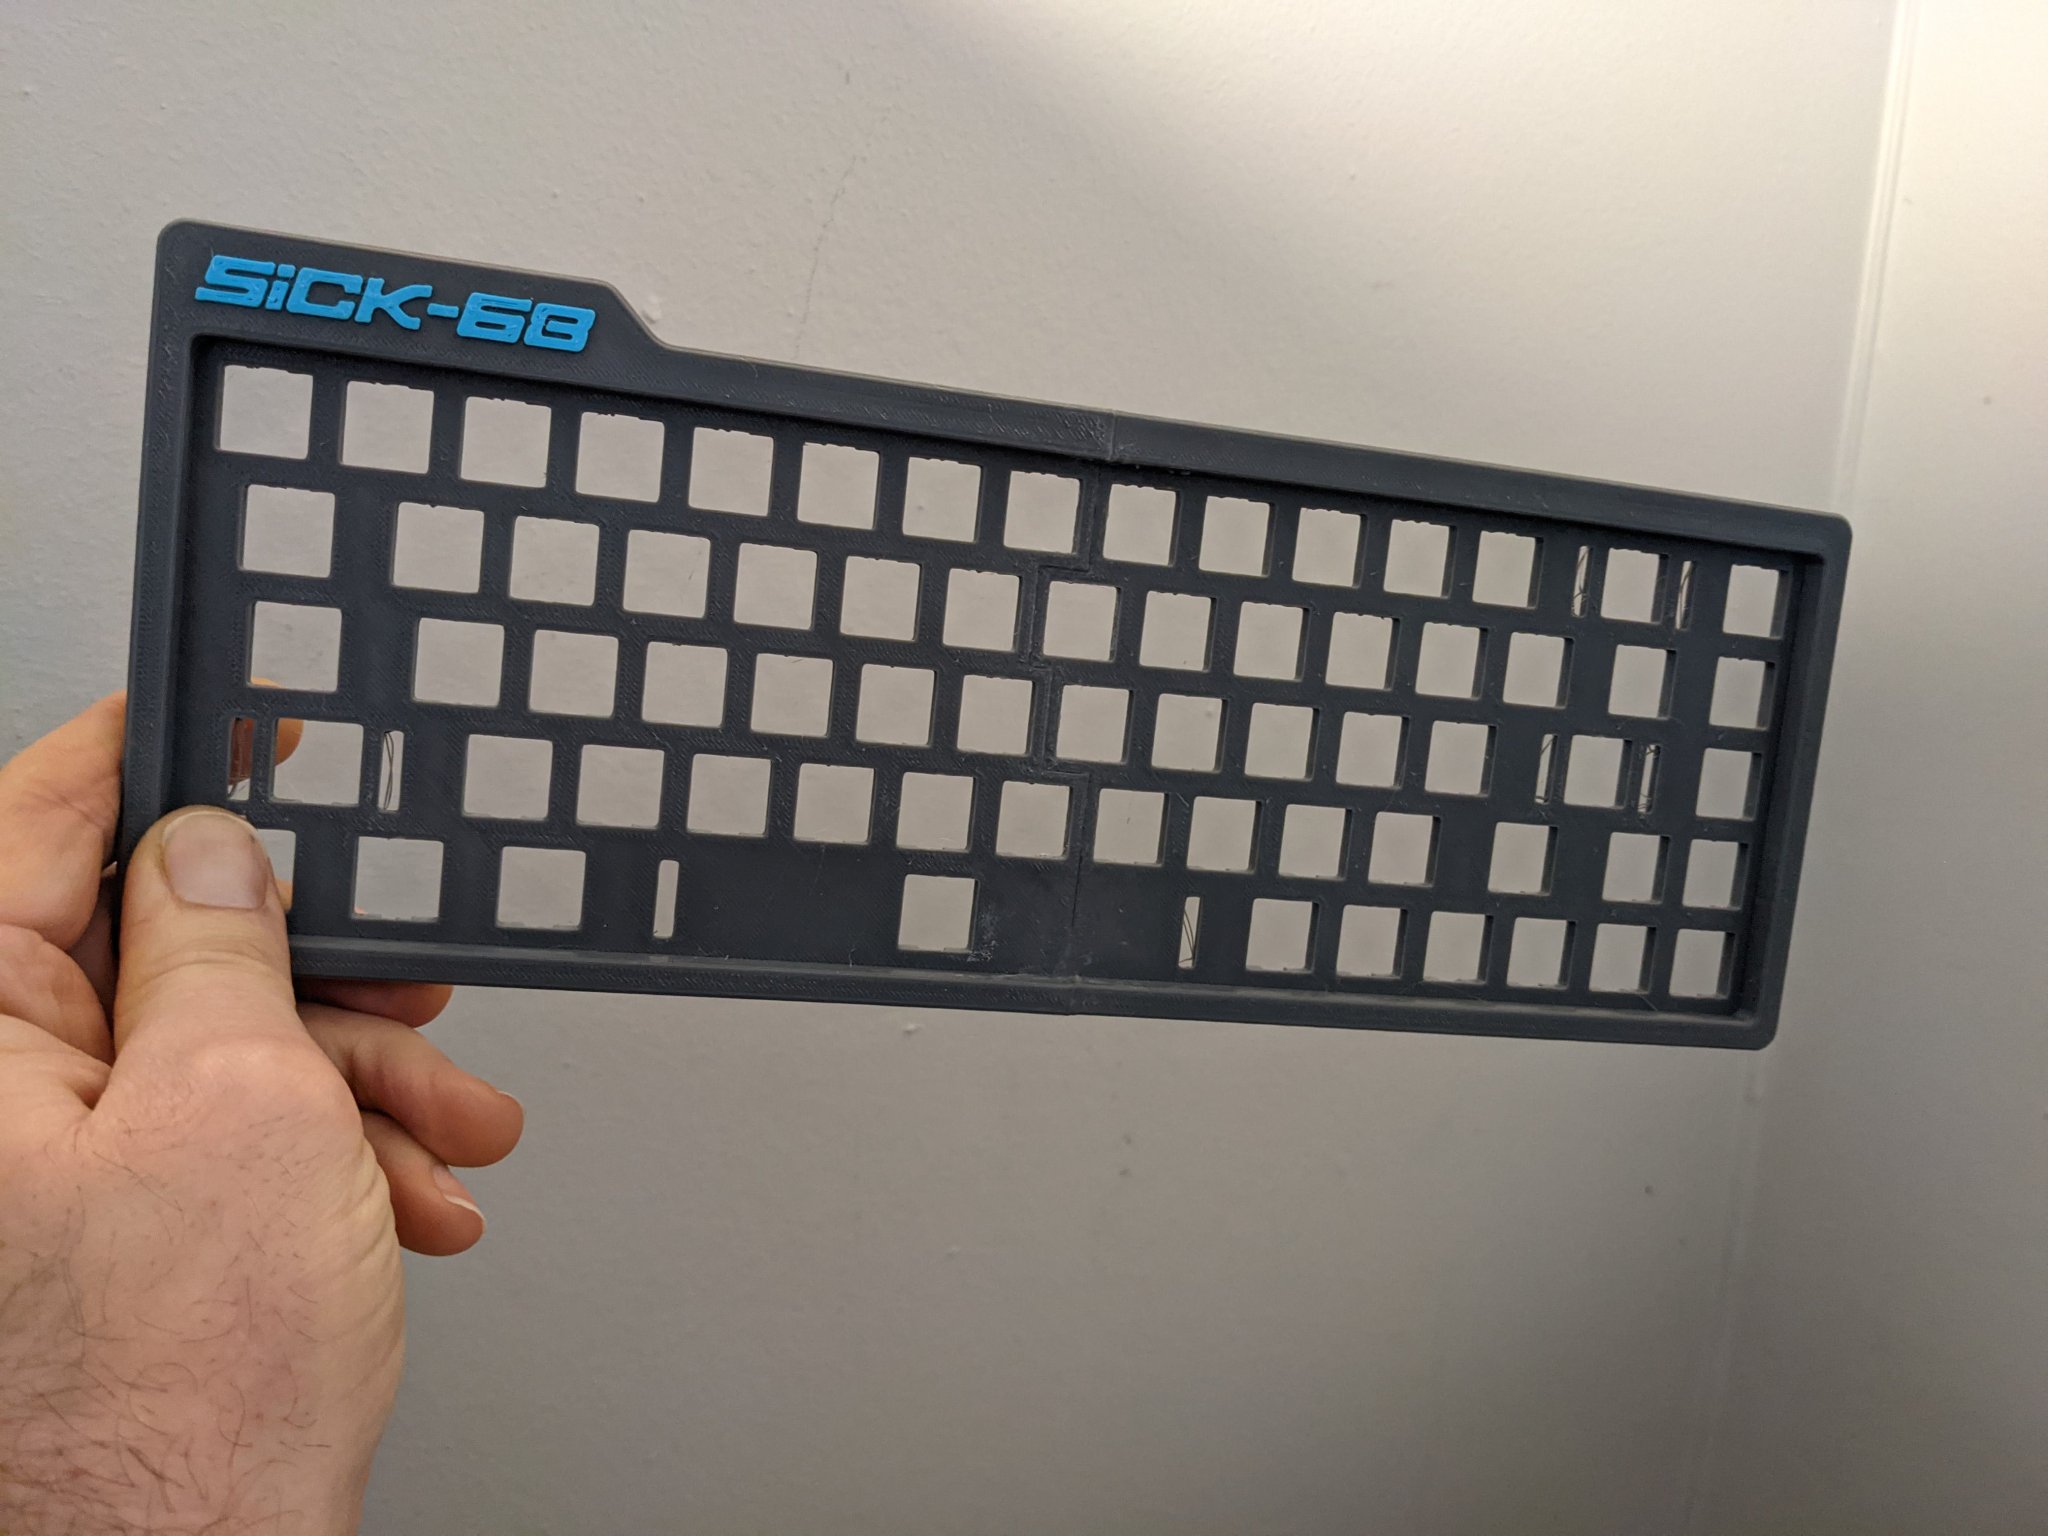
Print the Lower_Left_RP2040Zero.stl and board_constrainer.stl models, then follow physical constructions instructions and print all the parts from the SiCK-68 model except for the Lower_-_Left.stl file.
For the wiring I started with the top most row at pin GP0 and just worked my way around the board such that the last row was on GP4, the right most column (with back of switches facing up like in the wiring diagram in the PDF file in SiCK-68 model) starting at pin GP5 and the last column consuming the last castelated IO pin (GP29). Note, there is a gap in the board's pin numbering which is why the numbering does not end on pin GP19 :)
Once the wires are soldered, insert the controller board (try folding the wires so it does not interfere with the mount). Then insert the constrainer piece to fully constrain the board. Without the constrainer piece you can wiggle the controller board out if you pull up while holding the USB cable.
Firmware Setup
Ignore the software instructions from the SiCK-68 model and instead install the latest stable version of Circuit Python for the RP2040-Zero by following the RP2040 Circuit Python Installation Instructions. Then follow the KMK installation instructions and copy the code.py file into the same CIRCUITPY location as the boot.py file and kmk directory.
You can modify your layout by editing the code.py file in the CIRCUITPY directory – as soon as you save it your keyboard will reboot and use the new mapping. Probably a good idea to make a backup copy before you do that. Or keep your master config in a git repo and always edit in the git repo and then copy it to the keyboard.
Enjoy!
Giấy phép
Tác phẩm này được cấp phép theo
Creative Commons Attribution-NonCommercial-ShareAlike 4.0 InternationalAttribution-NonCommercial-ShareAlike
