TRIX Minimalist Wallet

Trix Wallet Trix là ví tối giản có thể tùy chỉnh phù hợp để giữ thẻ tín dụng của bạn. Sử dụng màu yêu thích của bạn…


Mô tả
TRIX Wallet
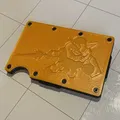
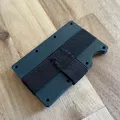
TRIX is customizable minimalist wallet suitable for holding your credit cards. Use your favourite colour for the side plates. Use all the colours!
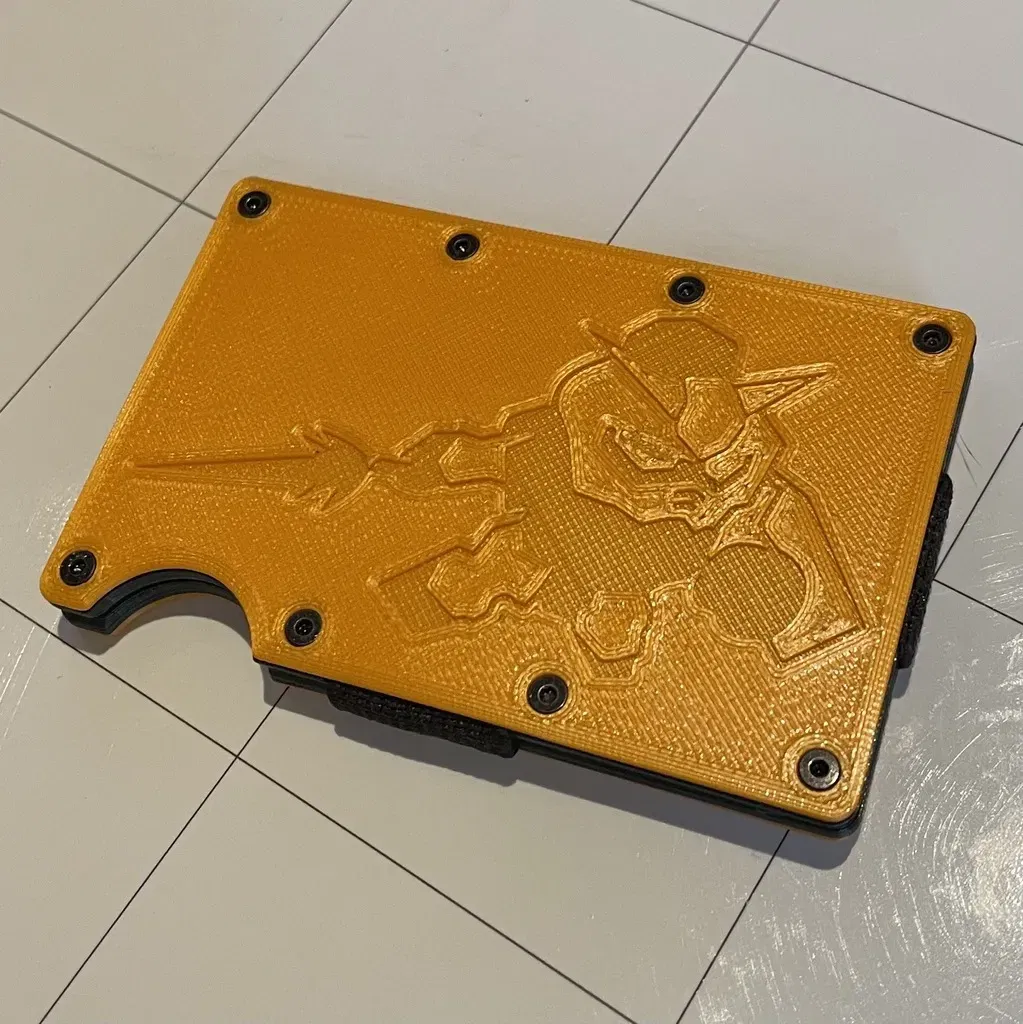
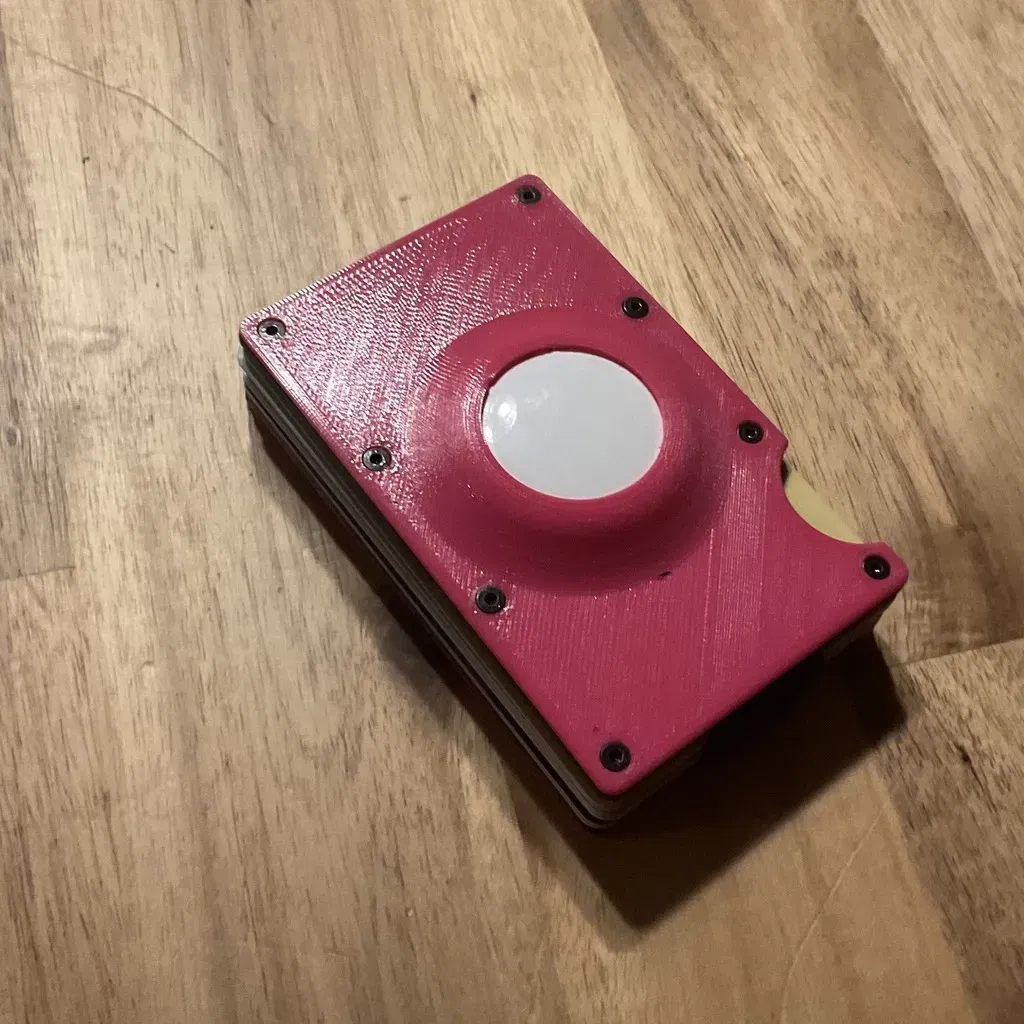
There are four types of exterior plates included. A plain one, one with the TRIX monogram, one that holds an apple airtag, and finally two versions with a robot loosely based on gundam. The colour one I haven't printed (I don't have a multi-filament printer), but should be good to go once you assign colours to all the bodies. If you get a warning about 'looks like this model is in inches, should measurements be re-calibrated', say no. Fusion360 is confused.
Best of all, including the screws, inserts and elastic, the total cost for this wallet should be less than $5. The plates are screwed into brass inserts and meant to be replaced as desired.
Additional Parts Required
- ~25 cm (12in) of 19mm (3/4in) flat elastic, cut into two pieces, ~17 cm (6 5/8in) and ~8cm
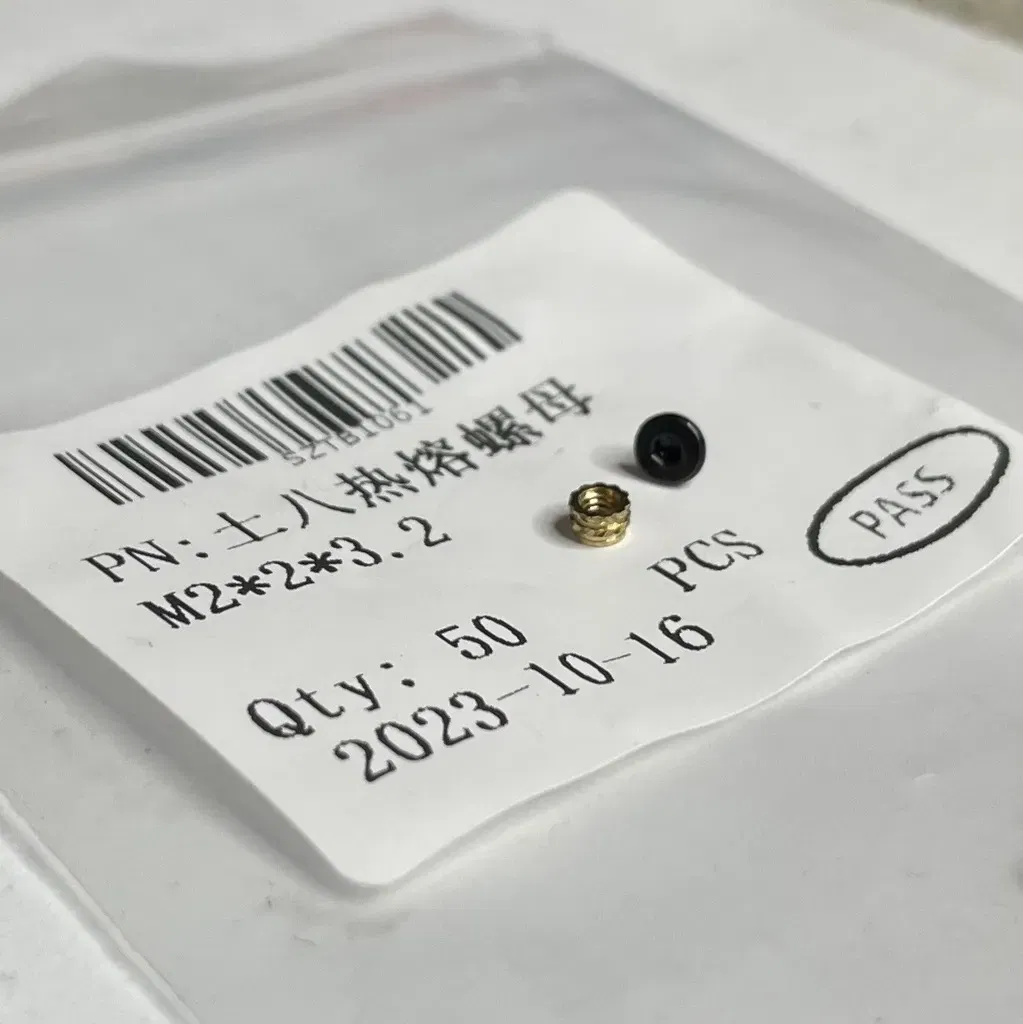
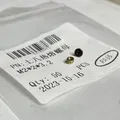
- 16 M2x3mm screws
- 16 M2 x 2 x 3.2 brass inserts (see picture)
Instructions
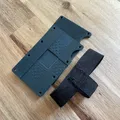
- There is one shape file for the body and the top. To print the full wallet, print one copy as is, and print the second using the mirror function in the slicer to get the opposite side (otherwise the thumb divots will not align correctly).
- Print the tray if you want a space for coins, folding money, or a key.
- Cut the elastic so that you have a loop that goes the long way around the card. The sizes are approximate and depend on how stretchy your elastic is and how many cards you want to hold. Make sure it isn't loose though. Cut a second piece of elastic long enough to go from the top of the groove on one side, under the bottom, and back to the top of the groove on the other side.
- Sew the long elastic piece perpendicular to and half way across the end of the short piece.
- Sew the other end of the long piece to the other side, butted up against the already sewn side. You should now have a loop that fits over the long side of the body pieces.
- Sew the free end of the short piece to the other side of the loop. It has to be in the middle so that the joint sits in the center of the body. You should now have something that looks like a minimalist jock strap (sorry!). See the pictures above.
- Sink 16 inserts into the holes in the body pieces. I used a soldering iron for this. If you don't know how, check out youtube for details.
- Fit the elastic over the two body parts so that it fits in the grooves and the joints sit in the centre.
- Screw on the cover plates.
That's it! Enjoy your new wallet.
Category: Accessories
Giấy phép
Tác phẩm này được cấp phép theo
Creative Commons — Attribution — Noncommercial — Share AlikeCC-BY-NC-SA

File mô hình


Chưa có bản in nào được khoe. Hãy là người đầu tiên!

Chưa có bình luận nào. Hãy là người đầu tiên!