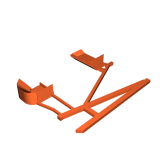
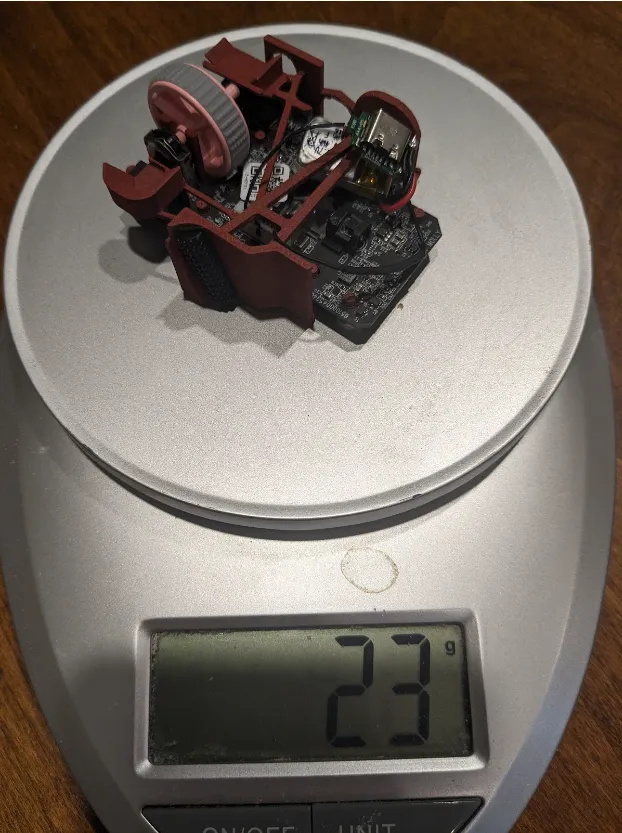
Tiêu đề Skeletonized Fingertip Orochi V2 Tóm tắt Vỏ 23 gram cho Oroc
Một vỏ 23 gram cho Orochi V2 của Razer
Mô tả
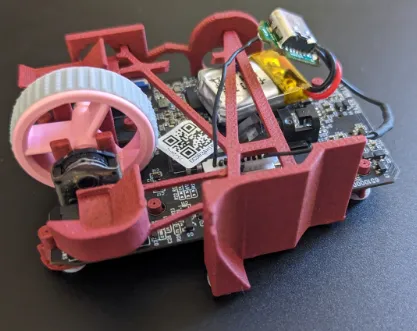
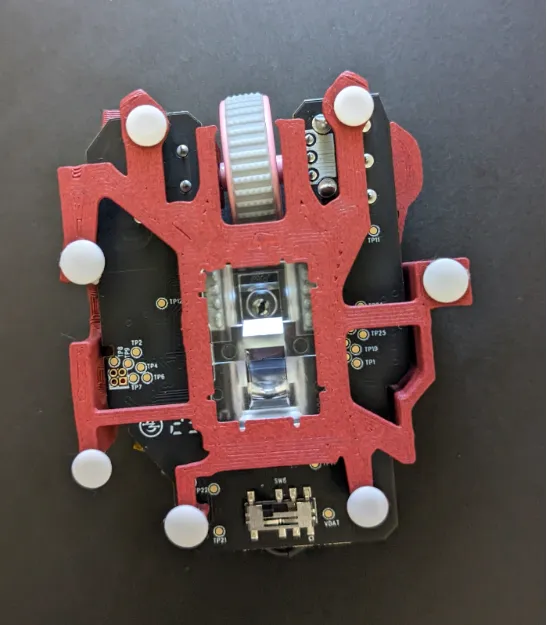
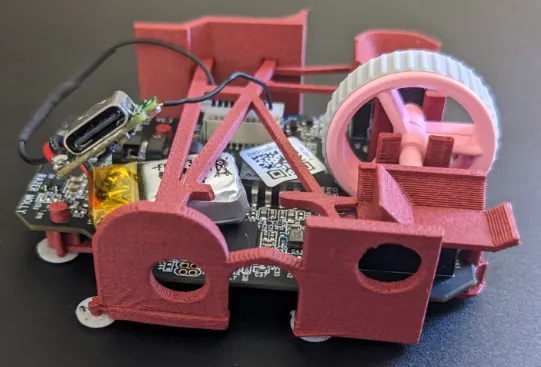
I saw Optimum Tech’s video on making his own lightweight wireless fingertip mouse (linked below) and decided to do the same. Before I made my own, I tried @crbn_559839's fingertip Orochi (linked below), which showed me this was something worth doing. This mouse uses the internals of the Razer Orochi V2. I followed @Joshuanate_574917’s guide from their own fingerless Orochi V2 (linked below) to make the mouse rechargeable. My understanding is that you need to swap the battery of the mouse to make it work in this shell. The pegs that keep the pcb in place are the exact same ones from @Cel_963244’s Orochi V2 base. I used Esport Tiger’s Ice skates for the mice feet (linked below). The size of the mice feet doesn’t matter from my experience (I use a glass mousepad), but I use the smallest. You don’t need to put as many as I did on, but I find it’s a lot smoother with that many. I made this mouse under @RocketJumpNinja on YouTube’s ideal mouse theory, where you want the triggers to be as low as possible, and the mouse to be as narrow as possible. I also positioned the holes on the ring and pinky wall to be positioned for my hands, which are pretty small
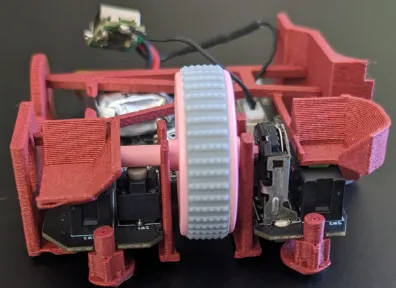
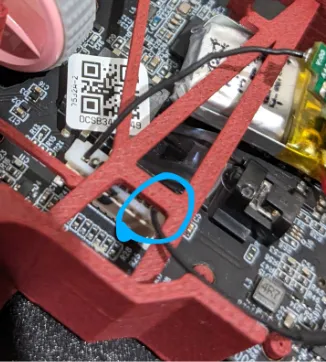
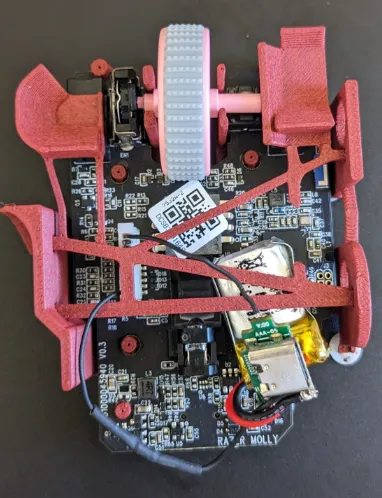
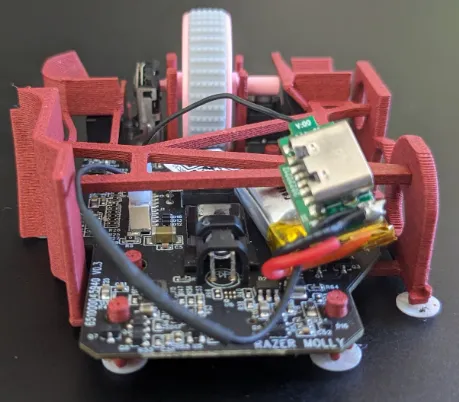
When installing the support beam in the mouse, I’d recommend having the wire (circled in one of the pictures) pass between the two pegs that keep the bar in place. I tucked the battery under the bar, to the pinky-finger side of the light emitting part of the sensor. This prevents it from moving around when making big flicks. You do have to bend the walls of the mouse outward to fit the bar into the recesses that keep it in place
If you decide to edit the mouse yourself in Fusion360 using the f3d file, you will need to repair the file in either Fusion360 itself, or the slicer. The way I’m aware of for repairing it in Fusion360 is by converting the whole thing into a mesh, then repairing the mesh. You only need to this for the part that holds the mouse, the support beam doesn’t need to be repaired
Note: you can easily remove the mice feet by sliding a knife beneath them. You can stick them and unstick them countless times this way
Optimum Tech’s video https://www.youtube.com/watch?v=xvz8KjCpdLE&t=616s
It’s a great video - I recommend watching it
@Joshuanate_574917’s mouse:
https://www.printables.com/model/480568-finger-tip-gaming-mouse-with-orochi-v2-internals
I used the base plate from this design in earlier versions and followed their guide to make the mouse rechargable
@Joshuanate_574917's pcb
https://www.printables.com/model/387351-orochi-v2
I used their pcb as a reference for positioning
@Cel_963244's holding pegs
https://www.printables.com/model/507724-razer-orochi-base
I used the scroll wheel and pcb holding parts from their design
@crbn_559839's mouse
https://www.printables.com/model/518957-fingertip-lightweight-razer-orochi-v2-pcb-23g-wire
The mouse I used before making my own
Strength: 5 Wall Loops, 4 Top layers, 4 Bottom Layers
-This avoids any infill and makes the mouse shell solid
0.2mm layer height (default) is fine with a 0.4mm nozzle
No supports
Giấy phép