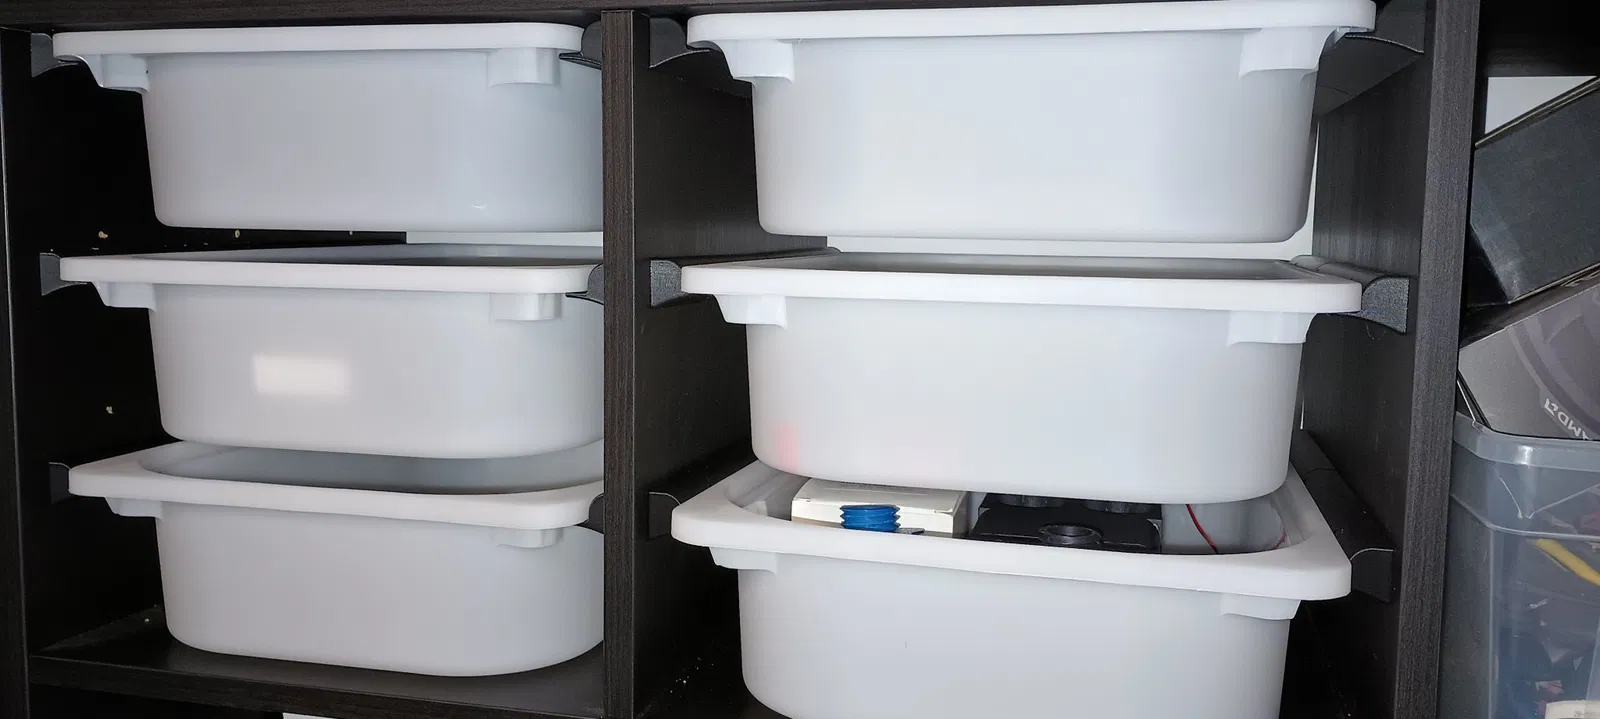
Trượt ngăn kéo Trofast cho tủ Kallax của IKEA

Cho phép cài đặt các thùng trofast cao 10 cm trong các đơn vị lưu trữ kallax

Mô tả
Sized to fit on my printer and with a dovetail join.
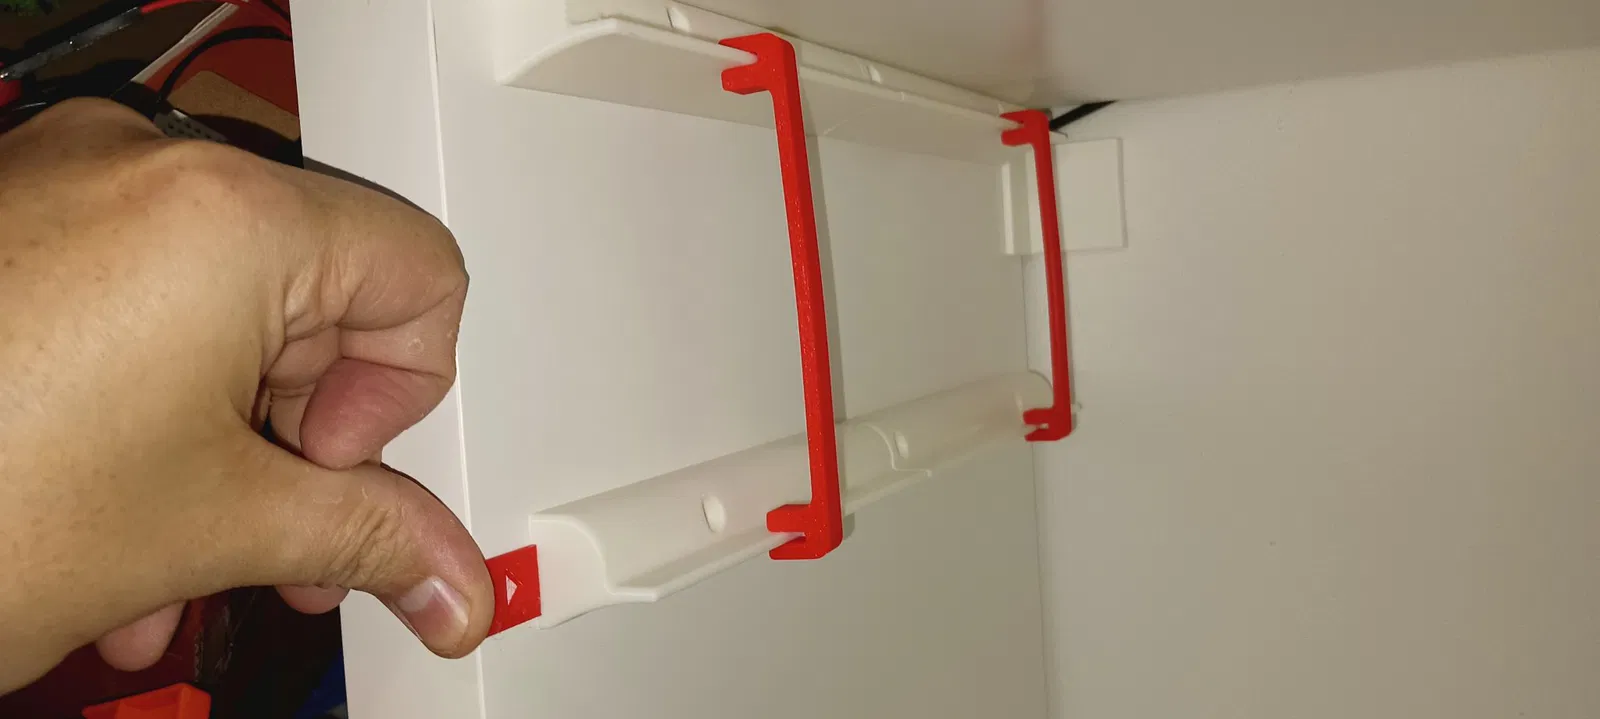
To install a full set of slides in a Kallax cube, print 6x of each slide, 2x of vertical alignment guide, and 1x of front alignment guide.
Requires #6-¾ screws or equivalent and use MDF coarse screws if possible. I used very pointed screws to self drill. Otherwise you might need to pilot drill. Length is pretty critical as it will not poke through the thin inside walls. (Actual screw I use: https://www.amazon.com/gp/product/B08QW8JYFJ)
Front alignment is important as if slides are vertically aligned and on each side of a thin wall, the screws need to miss. The slides have screw holes offset to make this happen, as long as the front alignment is used.
In ấn
I use 0.6mm nozzle with 2 walls, 6% grid infill on 45, 3 top and bottom walls. This has been really strong and 117g of filament per slide pair.
The original Female Slide requires support for the dovetail portion. If you use the new Female slide with included support, nothing need support in slicer. This has an included support that can easily be removed by grabbing with pliers on the portion sticking out and giving a tug. Much faster than removing the slicer generated support. I did this redesign as I was printing a ton of these and the support removal was annoying.
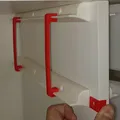
Cài đặt
Installed slides press fit to the top, and they are shorter than the opening to allow mounting with the wall supports in place.
When tightening, turn until the slide closes the gap with the wall and ¼ turn further. These DO NOT need to be really tight as the bins push against the side. However, they do need to be strong in the vertical and stripping them out hurts this.
Once the top slide is in place, press the vertical alignment guides on to this and a new slide for positioning. Shift to align with front and screw in. Repeat one more time for the bottom.
Lưu ý: Nếu bạn muốn sử dụng thùng cao hơn cùng với thùng 10cm, chỉ cần lắp đặt thanh trượt trên cùng và chỉ cần đặt thùng vào Kallax bên dưới. IKEA không thiết kế những cái này để vừa vặn hoàn toàn.
Giấy phép

File mô hình


Chưa có bản in nào được khoe. Hãy là người đầu tiên!

Chưa có bình luận nào. Hãy là người đầu tiên!