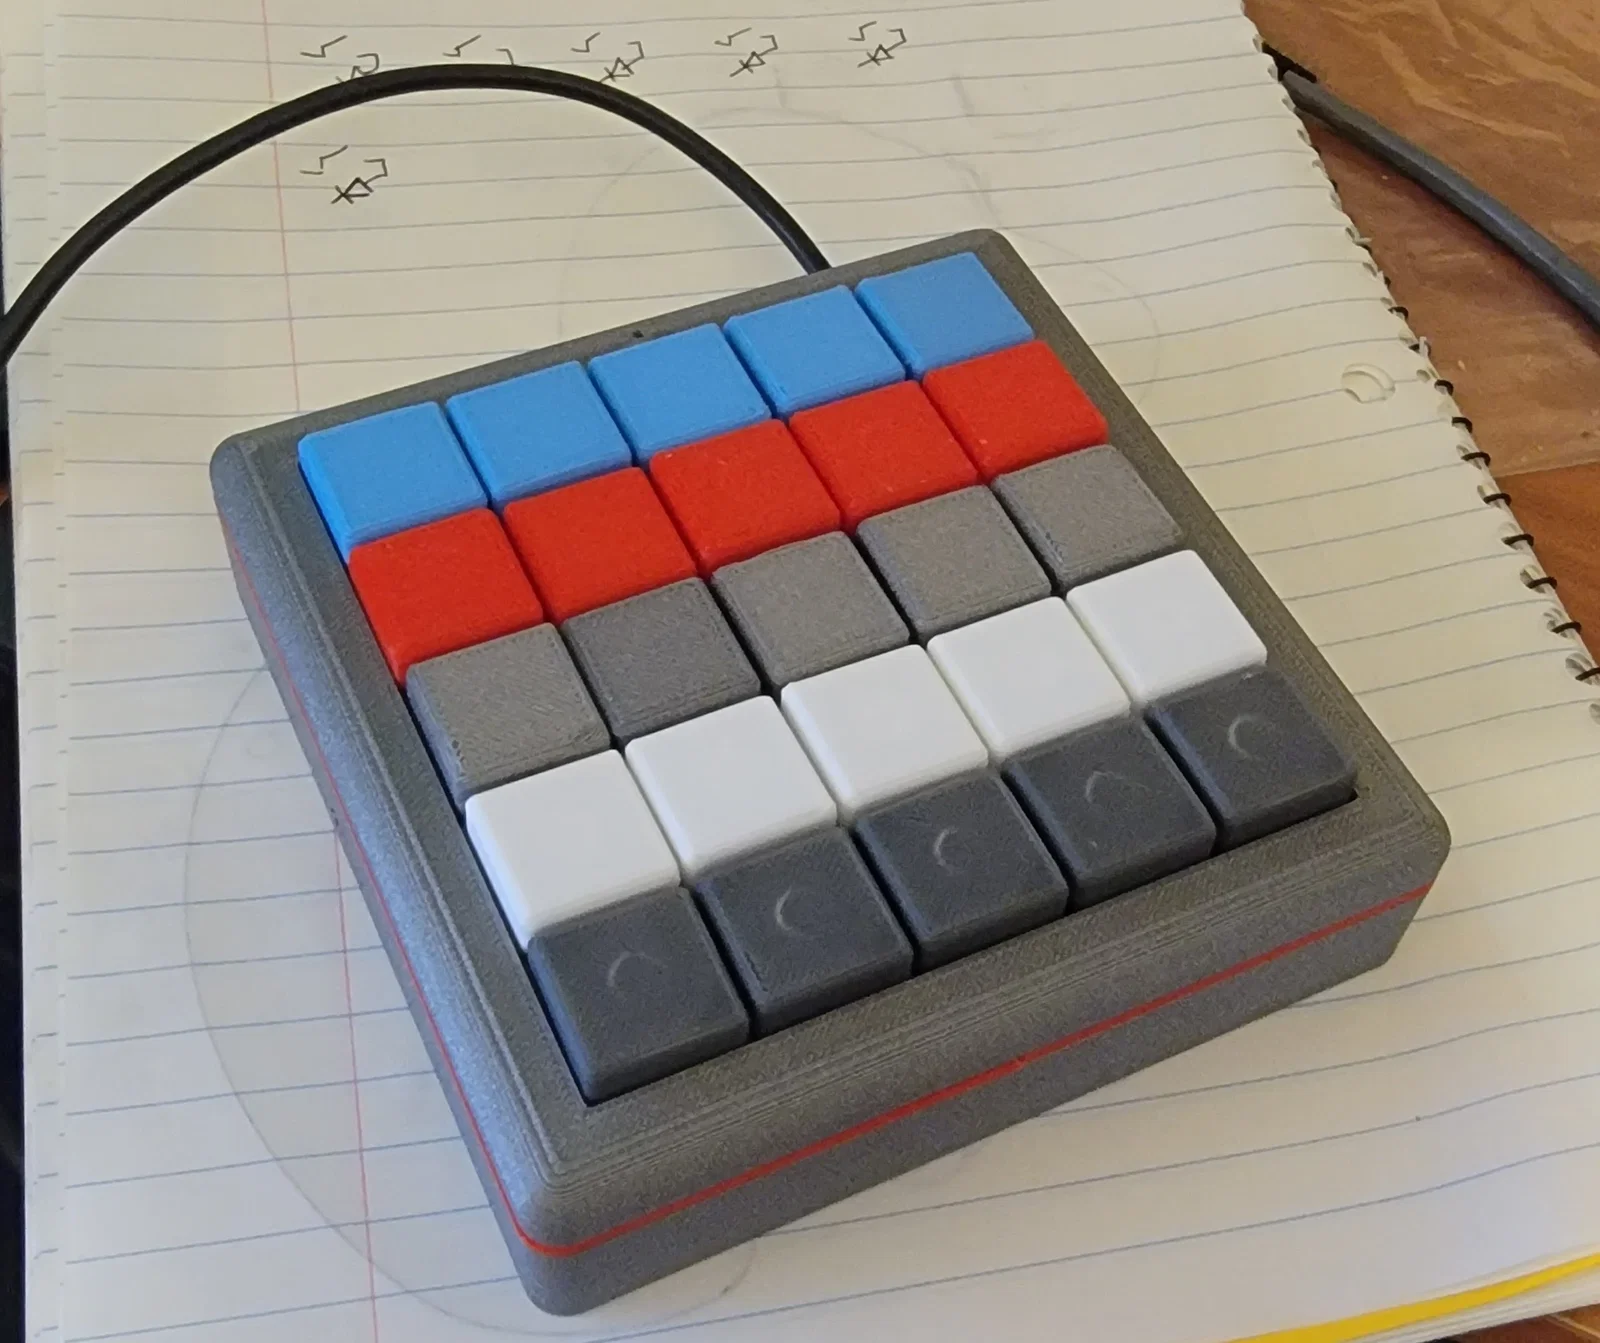
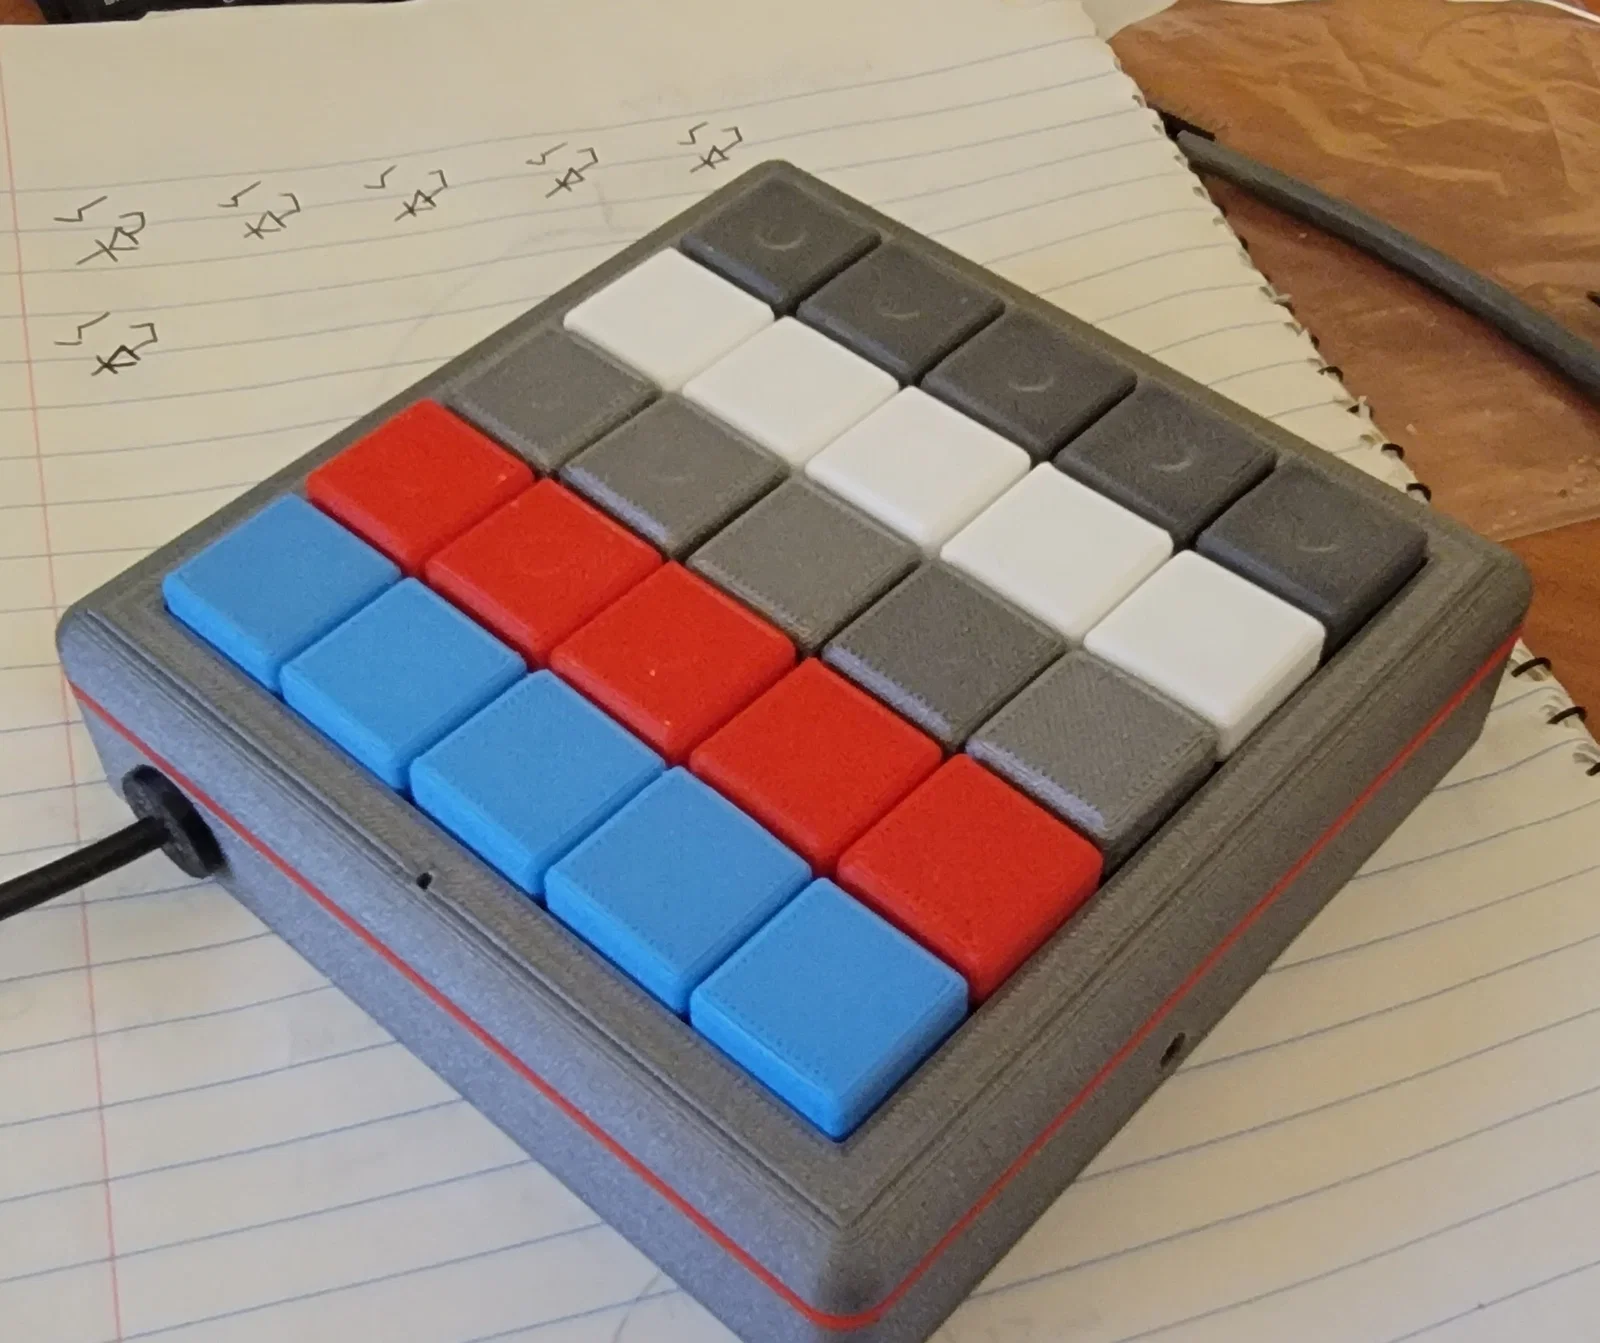
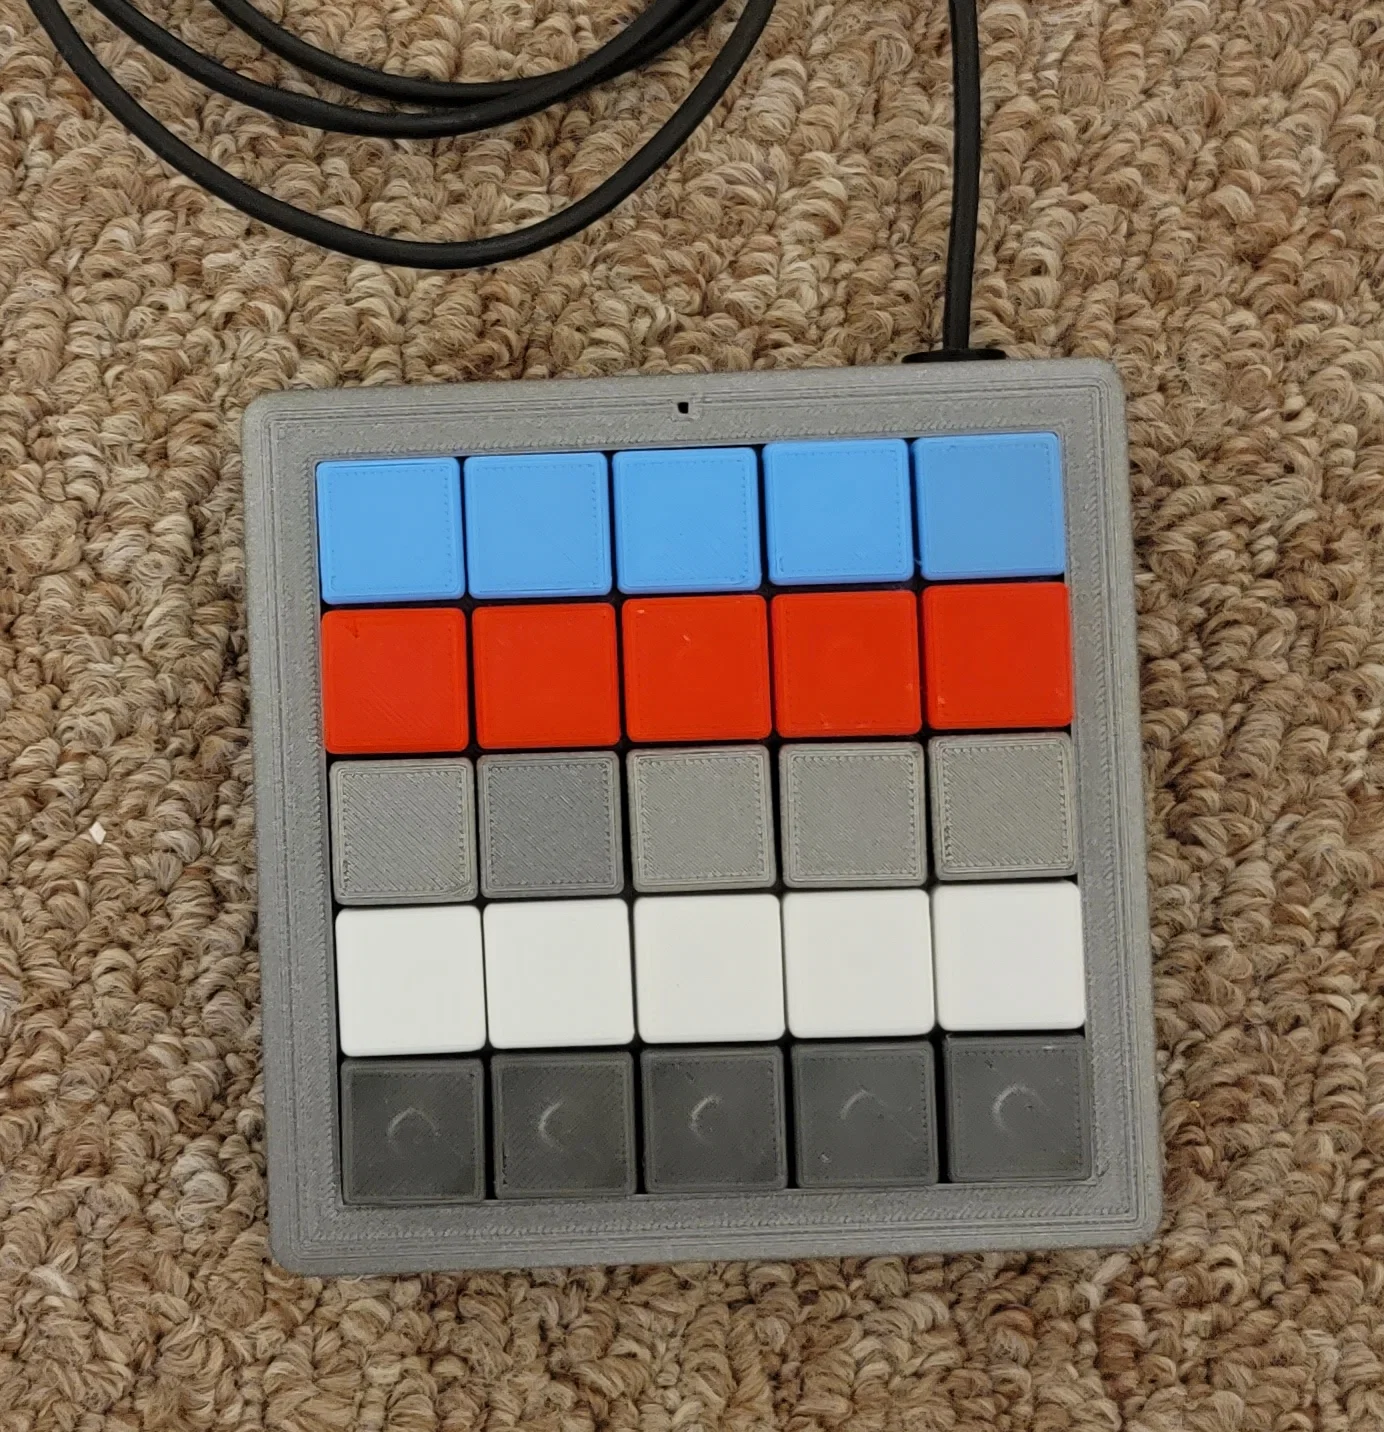
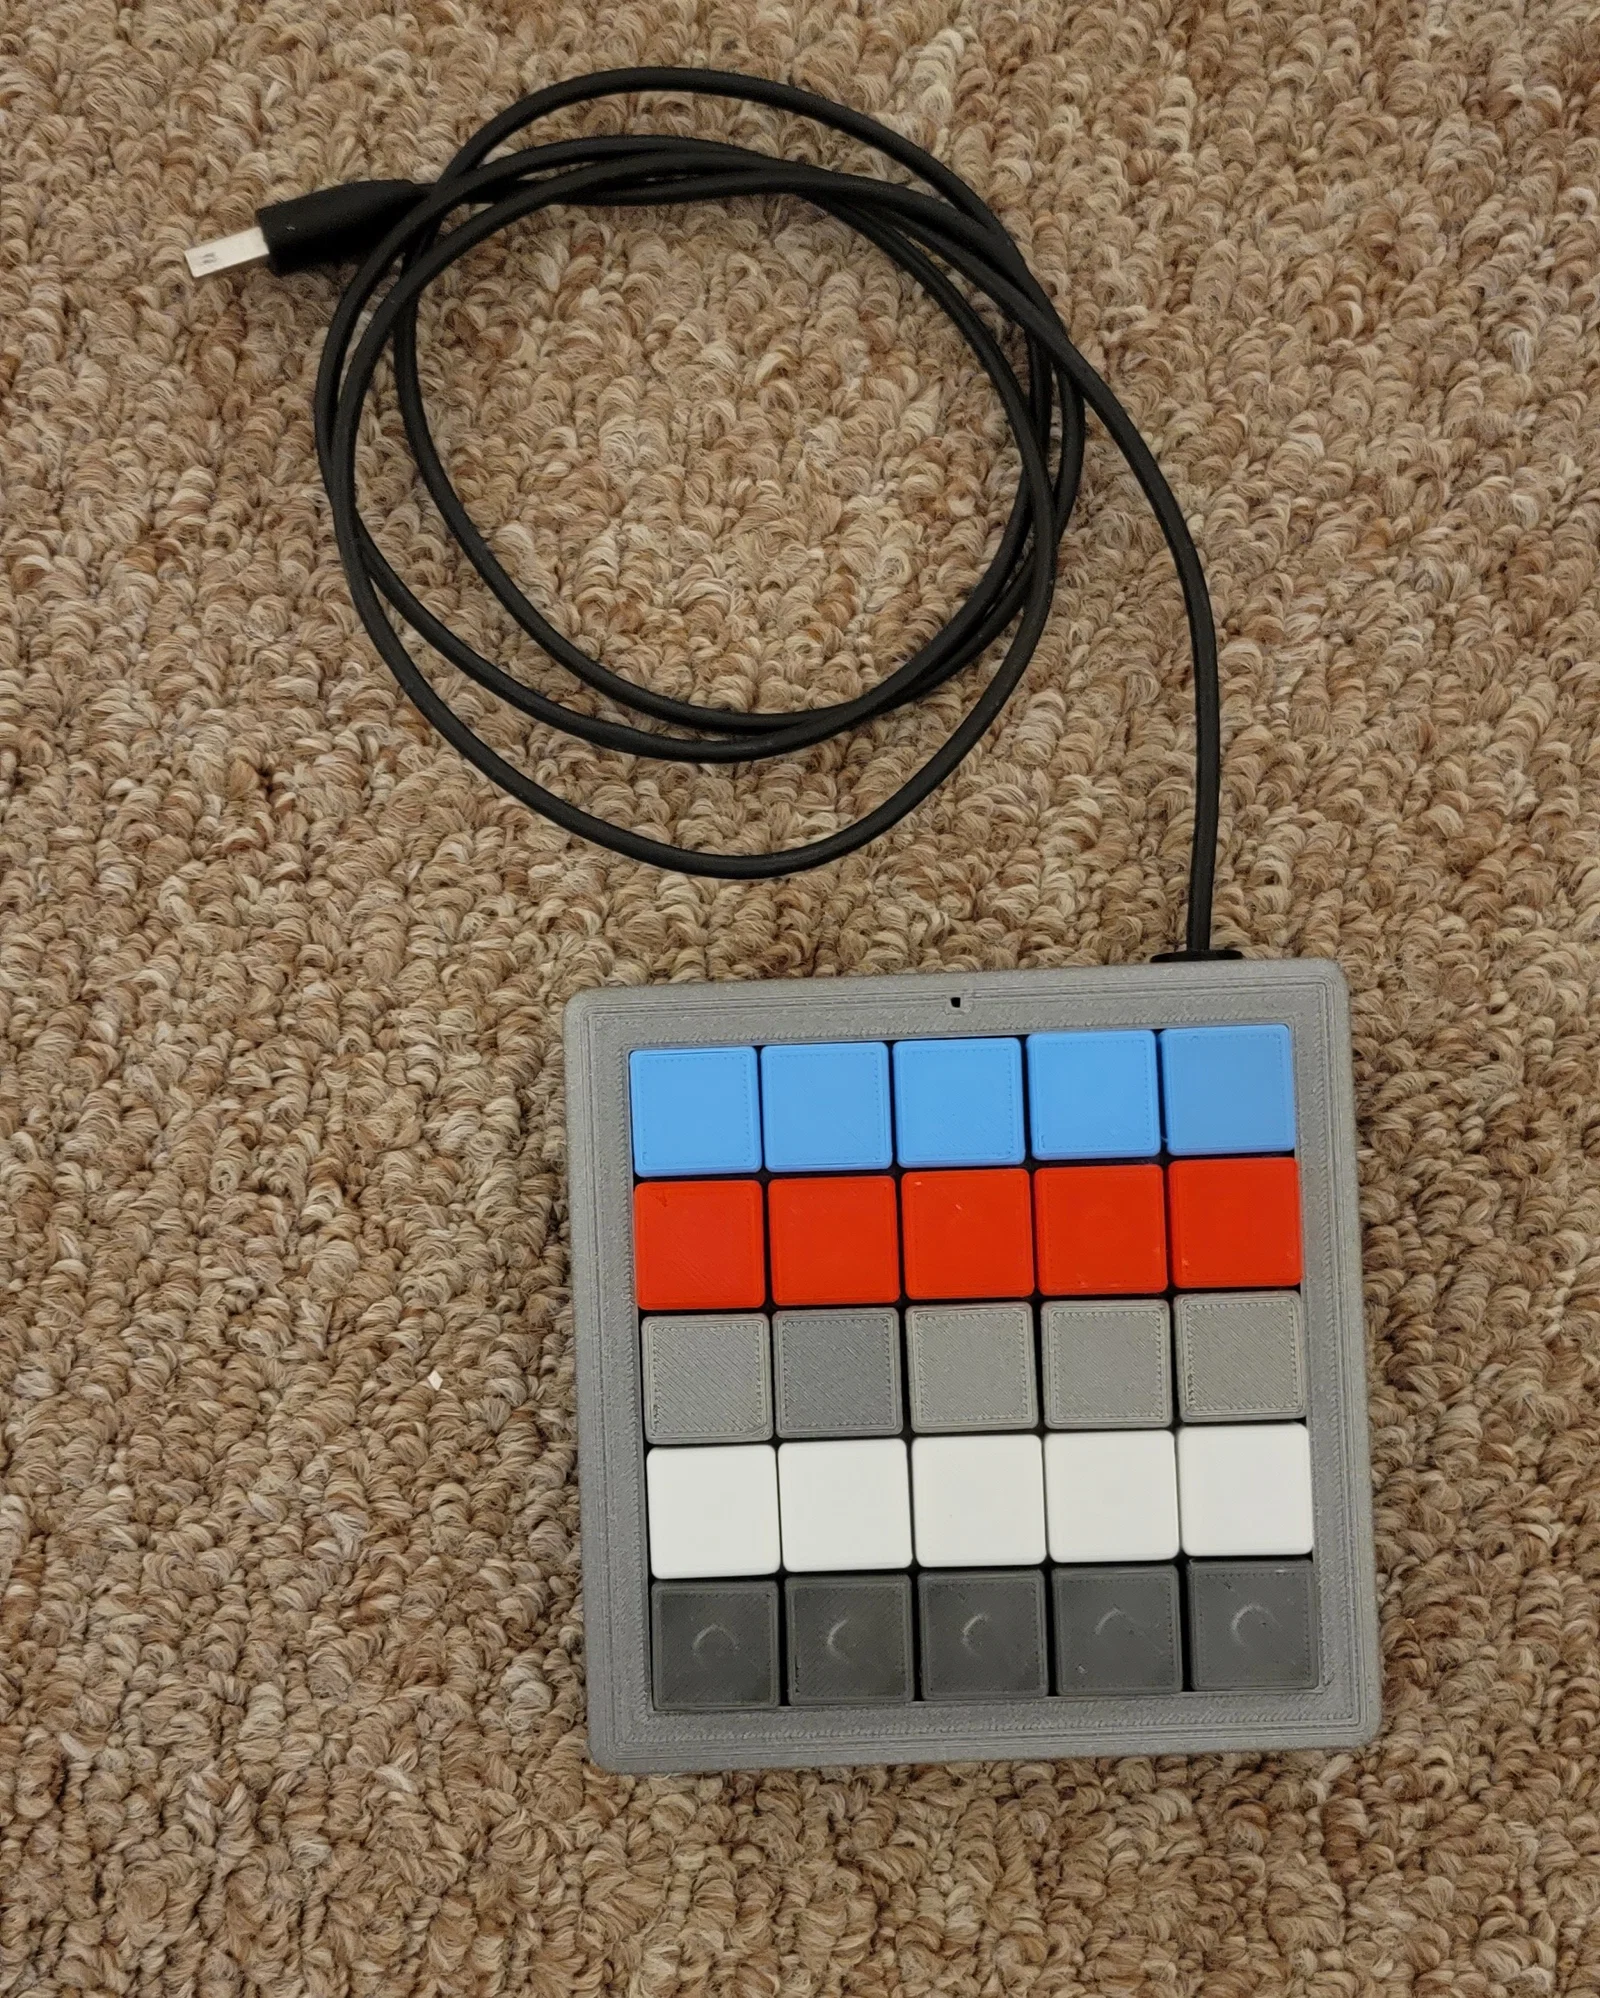
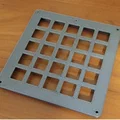
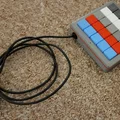
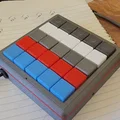
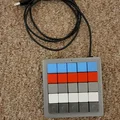
Bàn phím MACRO 25 nút (25 Button MACRO Keypad)

Model bàn phím MACRO 25 nút dùng Arduino Pro Micro, đi dây ma trận 5x5. Dùng keyswitch, diode, nút reset và LED; in PLA/TPU. Có kèm script Arduino test Serial/Keyboard và bản Joystick để gán phím tắt.


Mô tả
25 Button MACRO Keypad - bộ điều khiển dùng Arduino Pro Micro. Dùng keyboard switches, một nút reset và một LED.

Summary:
Mình thiết kế cái này để gán phím tắt (keyboard shortcuts) cho nhiều phần mềm mà mình xài thường xuyên. Cái MACRO keypad này, kết hợp với JoyToKey sẽ mở ra rất nhiều lựa chọn cho các phần mềm khác nhau, batchfiles, shortcuts, v.v. Hiện tại mình dùng nó chủ yếu cho Fusion 360.
Danh sách cho Macro Keyboard V2 – tính tới 11/19/2022
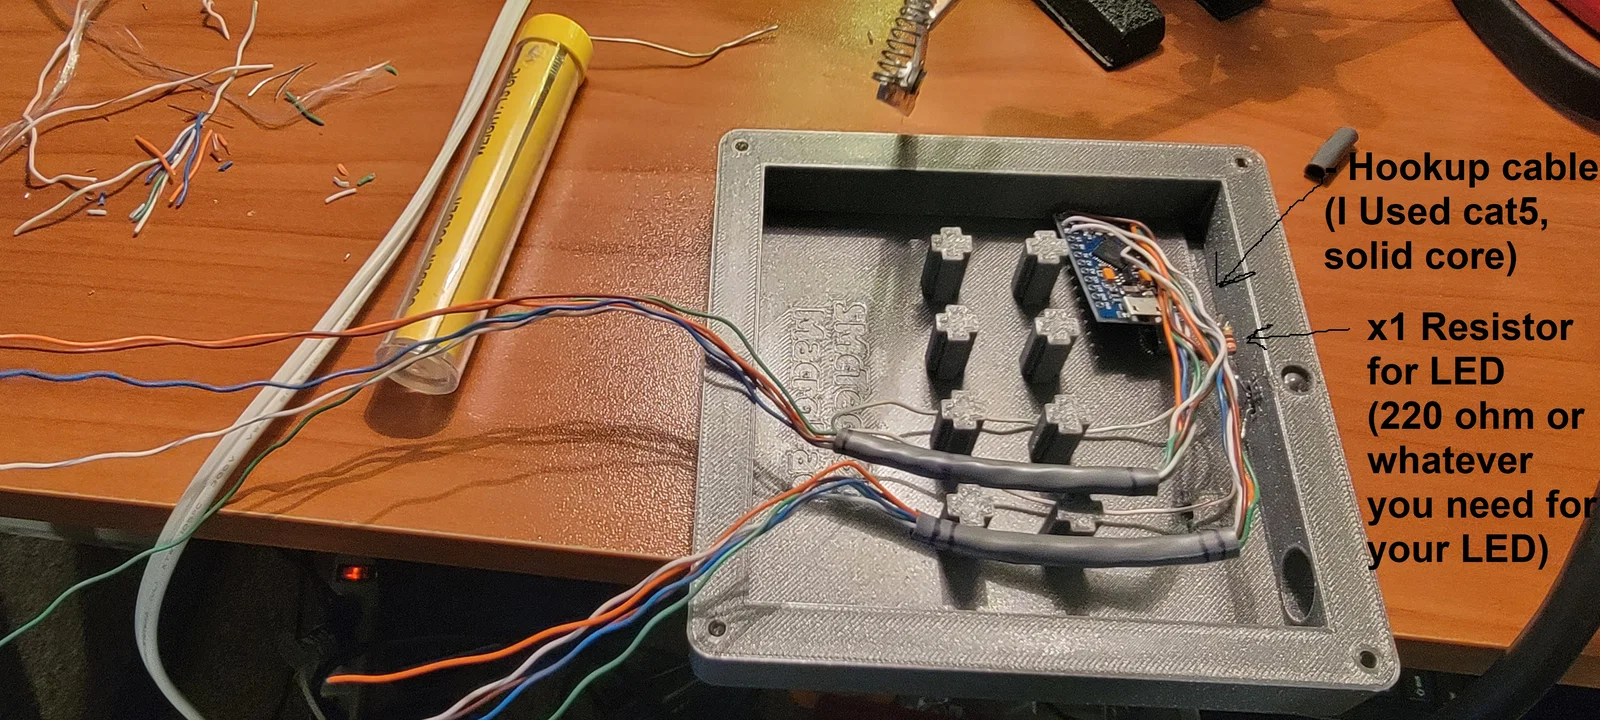
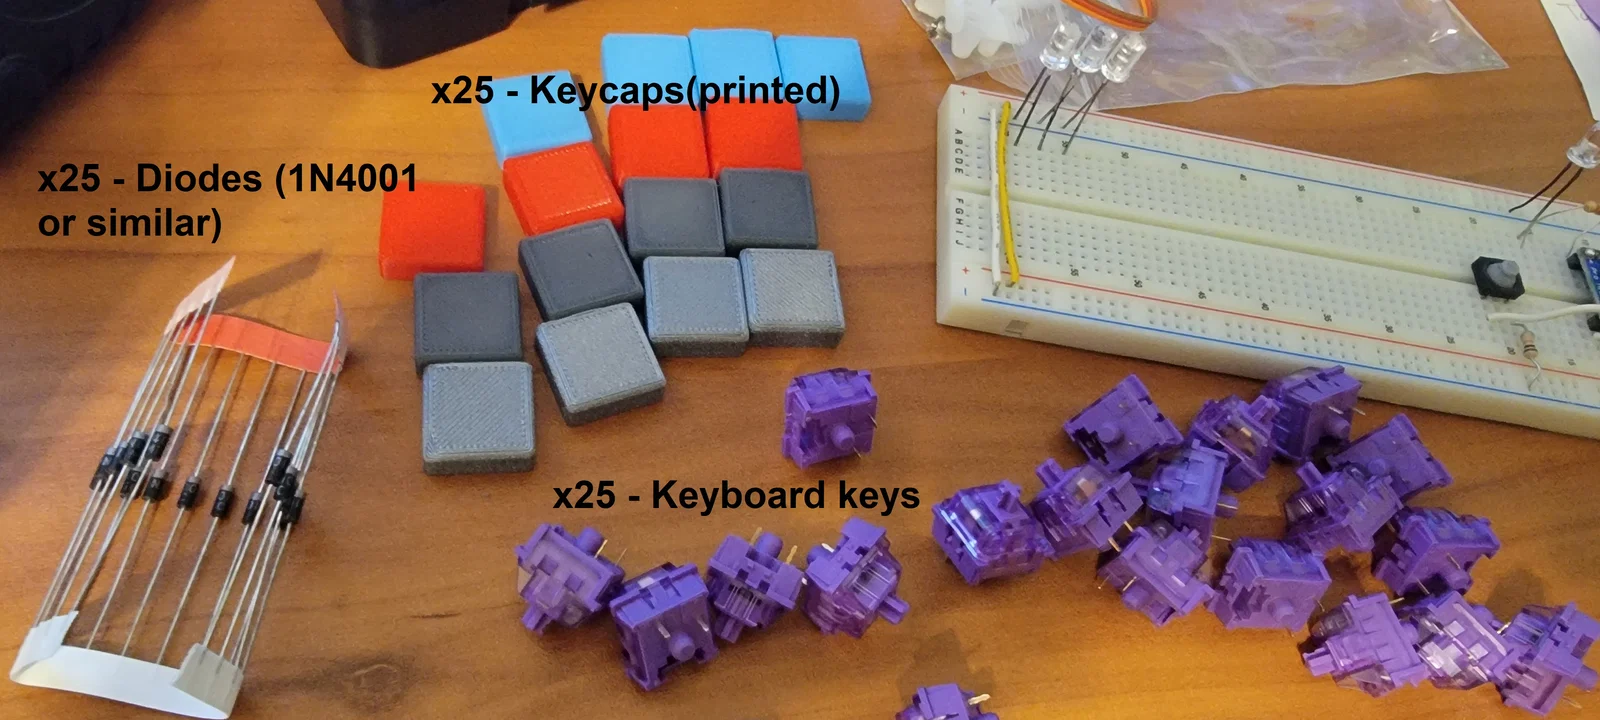
Materials List:
- PLA filament
- TPU filament
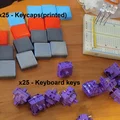
- 25 Keyswitches (mình dùng switch Akko)
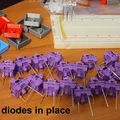
- 25 diode (1N4001 hoặc tương đương)
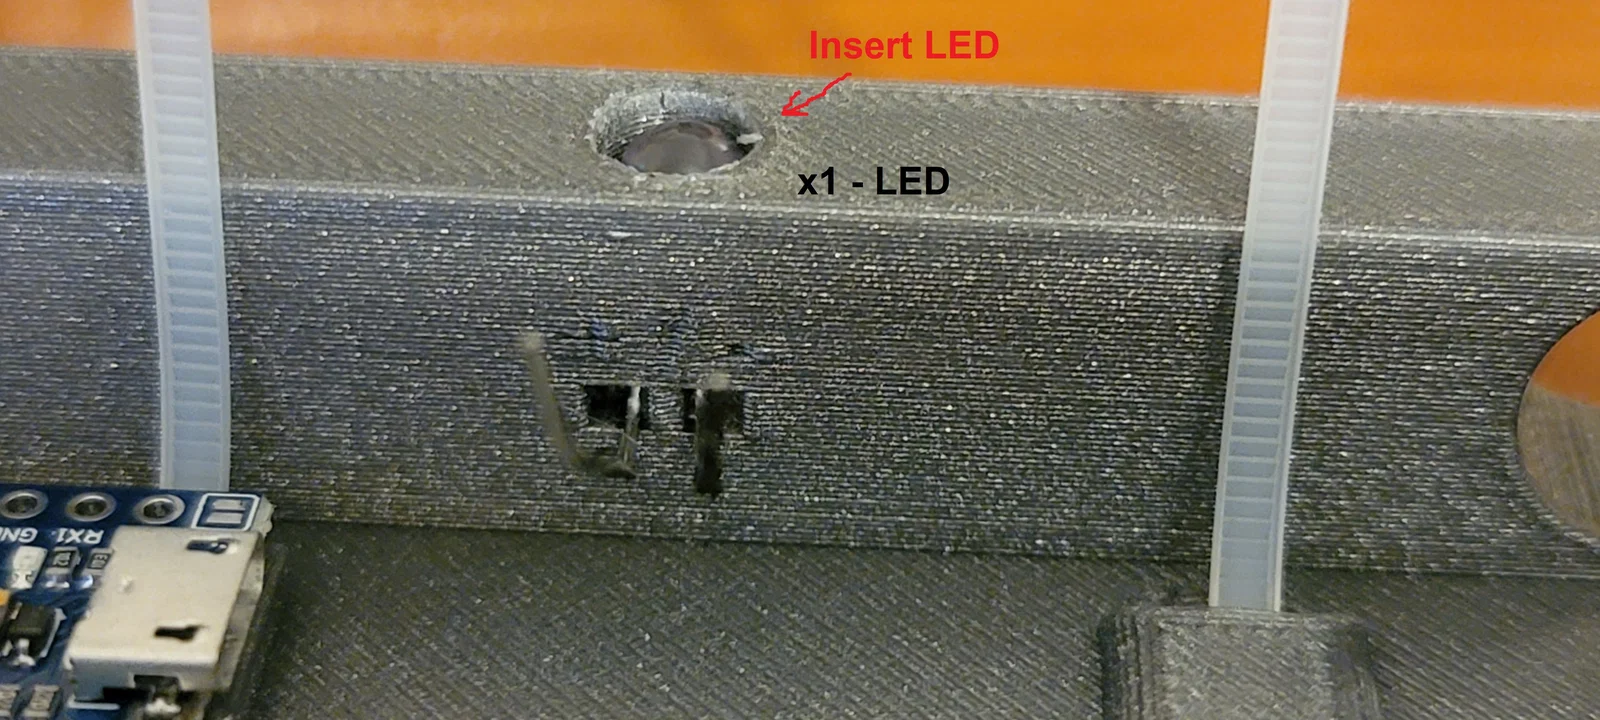
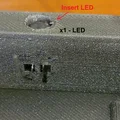
- 1 LED (LED thường 5x9mm - màu nào cũng được)
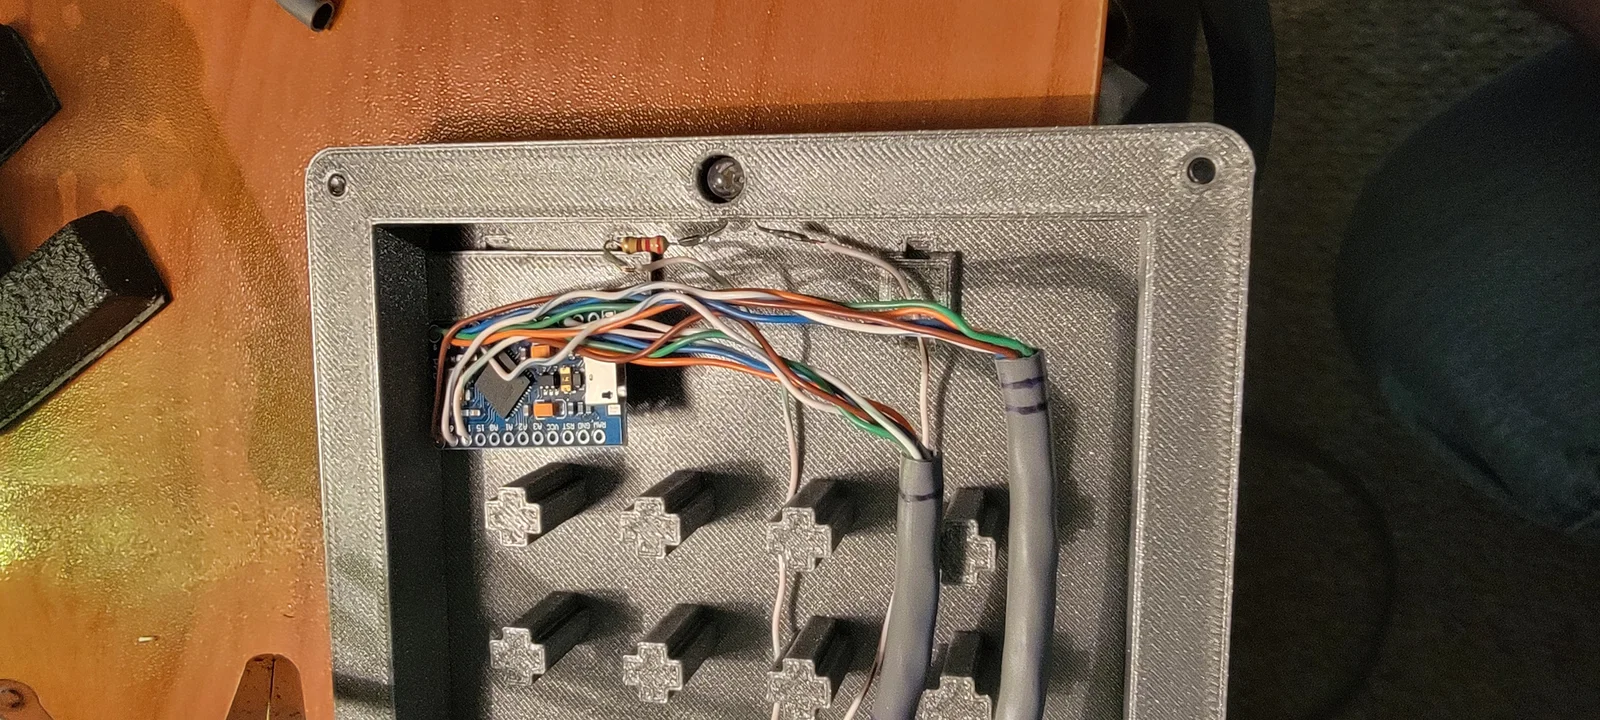
- điện trở 220 ohm (hoặc giá trị phù hợp với LED của bạn)
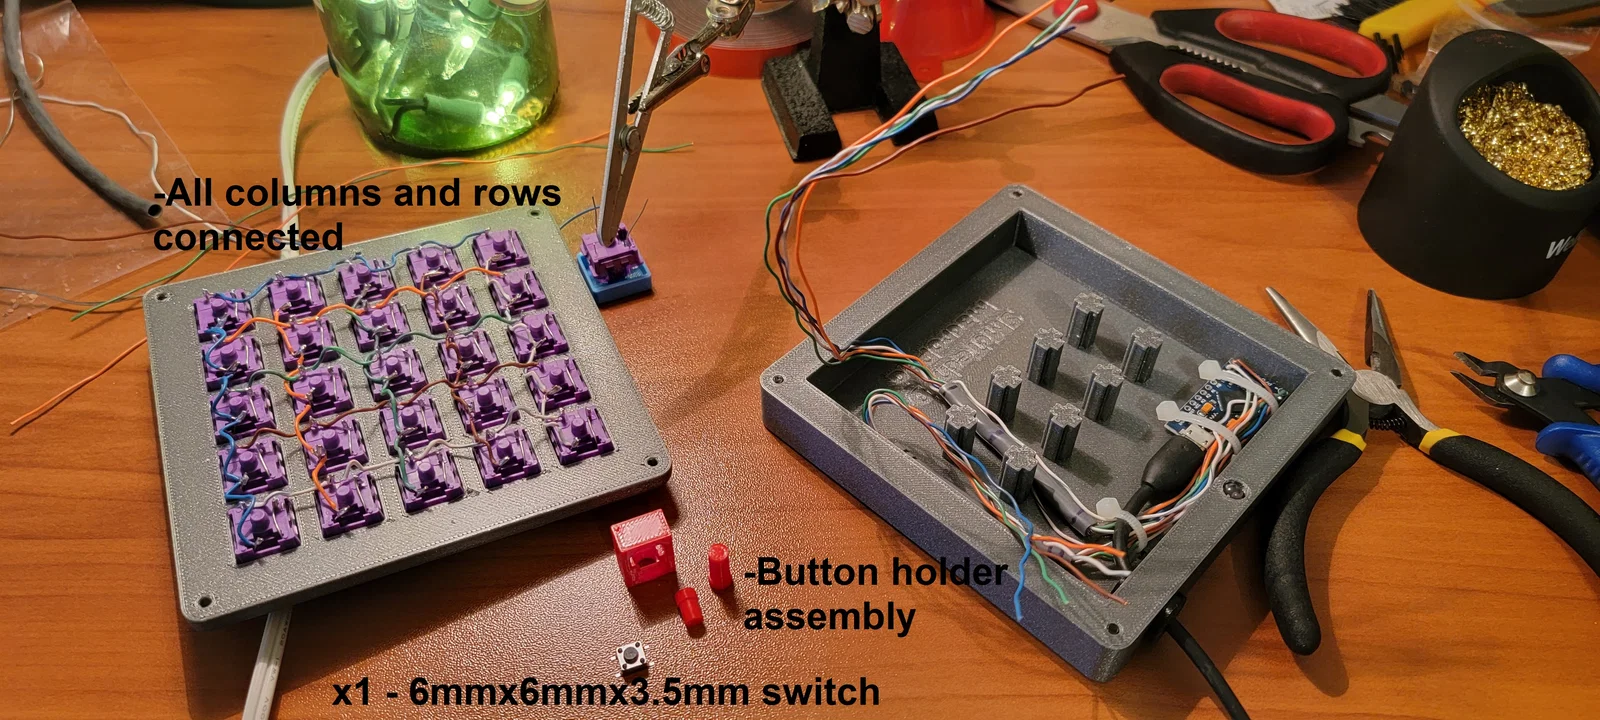
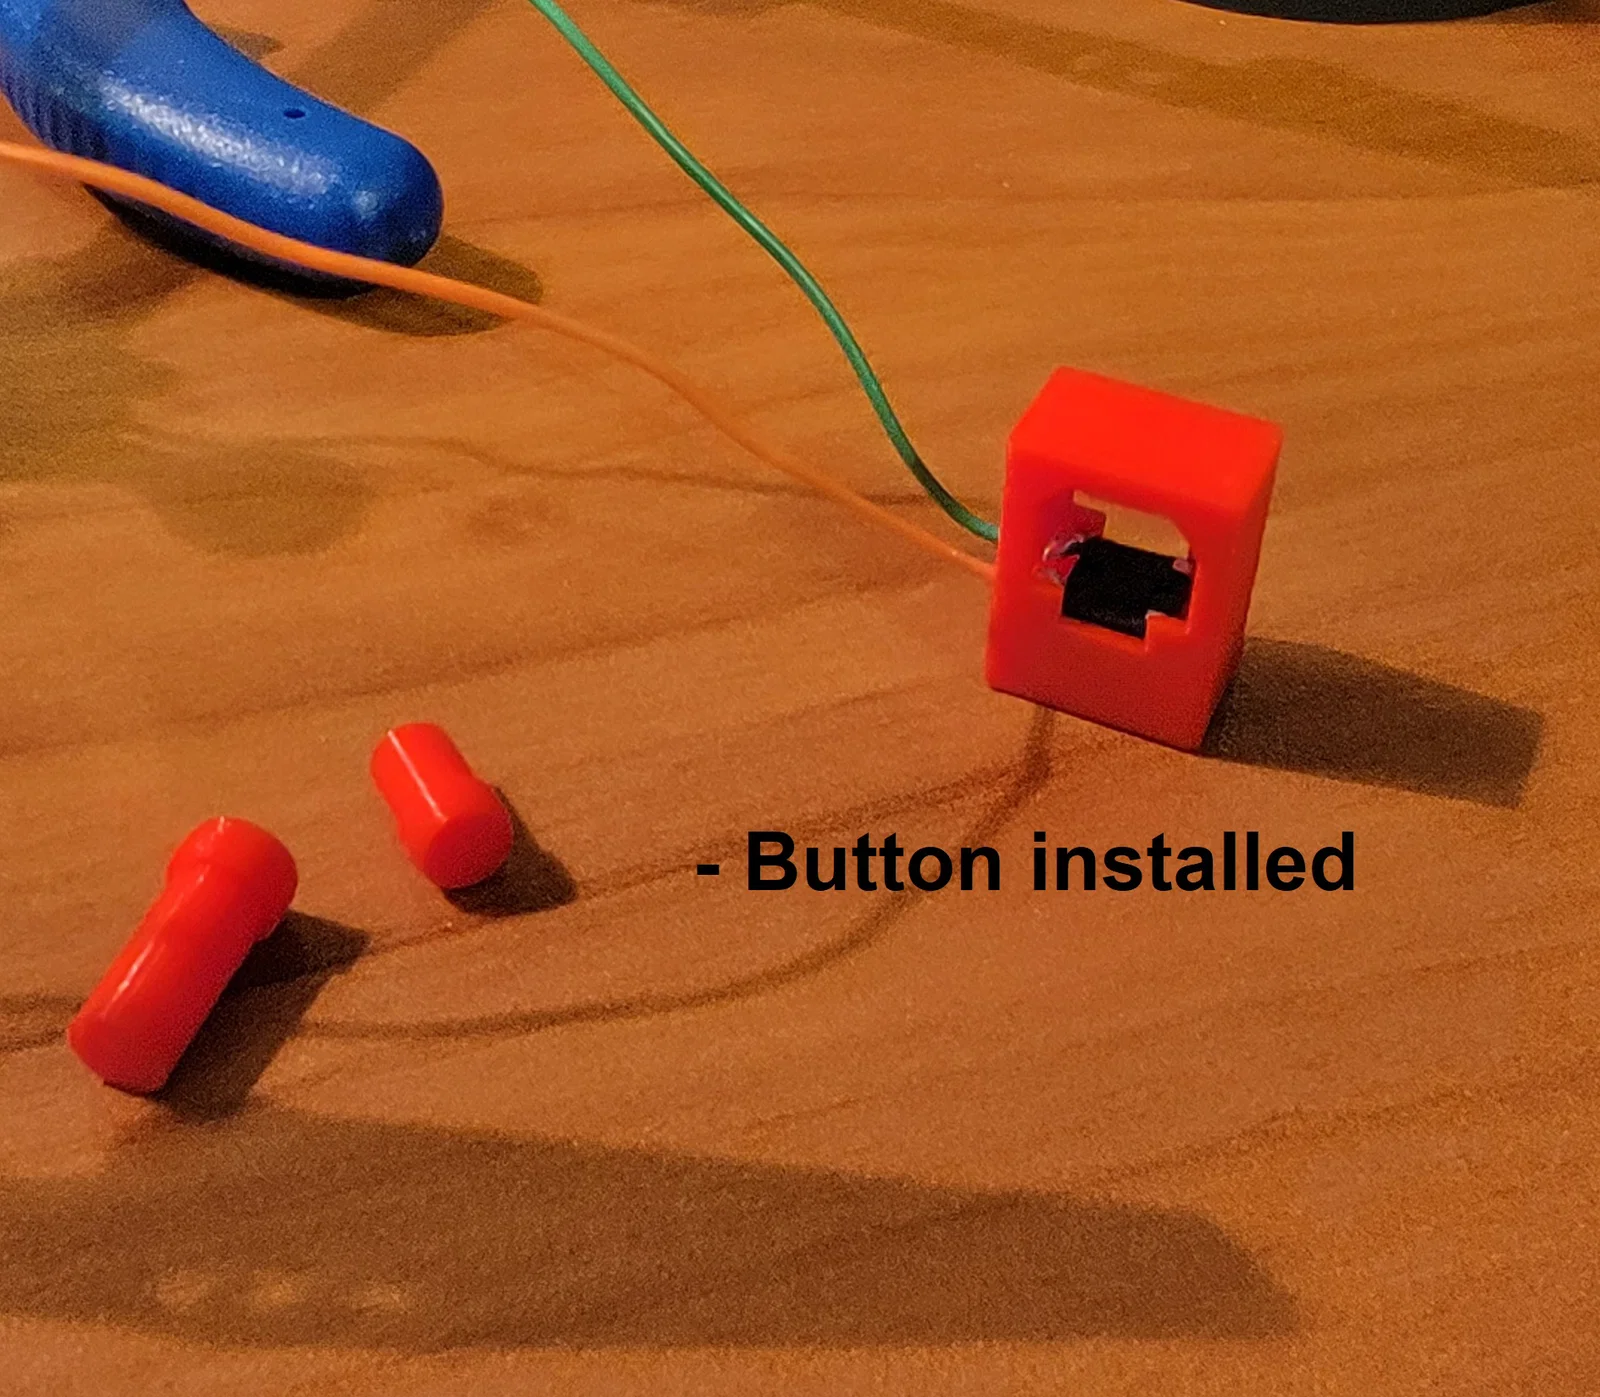
- nút tactile 6x6x3.5 (chiều cao nút 1mm)
- dây hookup wire (hoặc dây CAT5 lõi cứng)
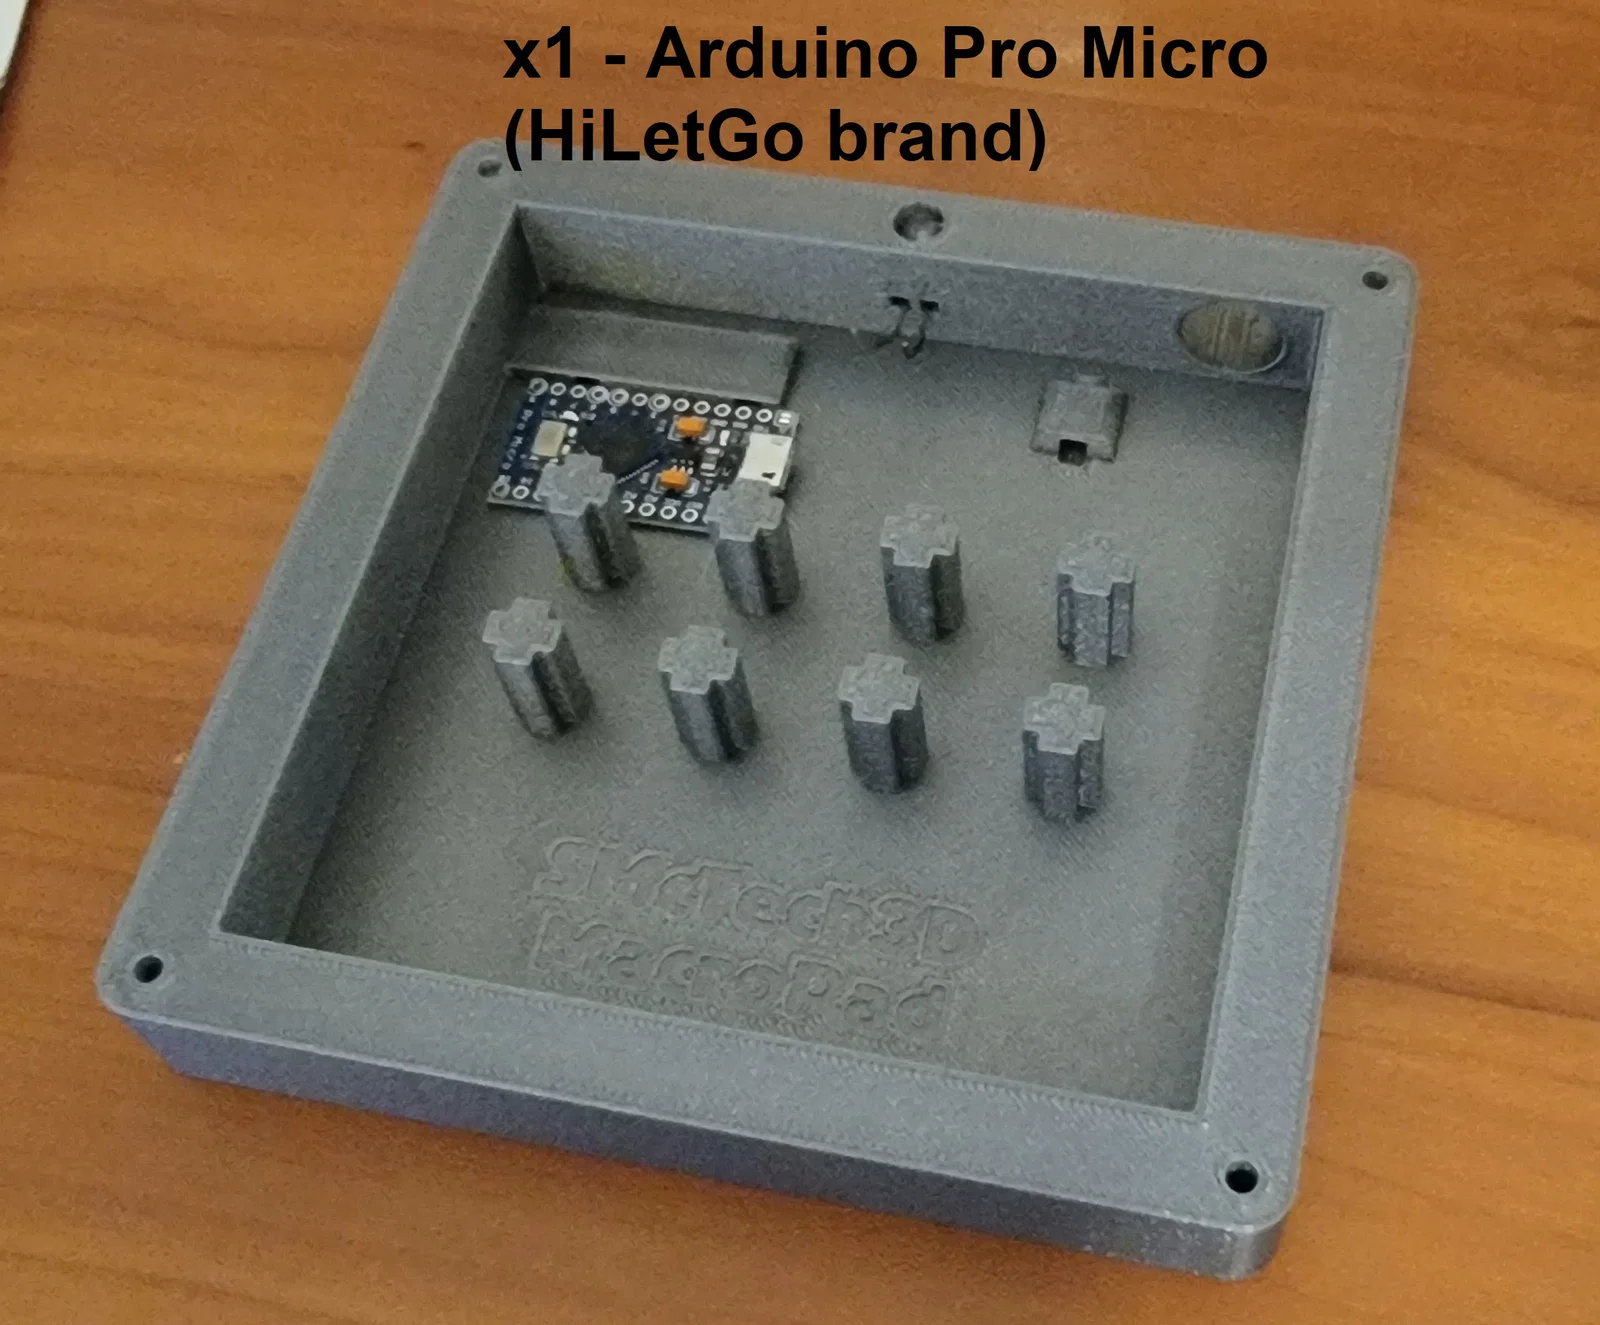
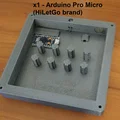
- HiLetGo Arudino Pro Micro
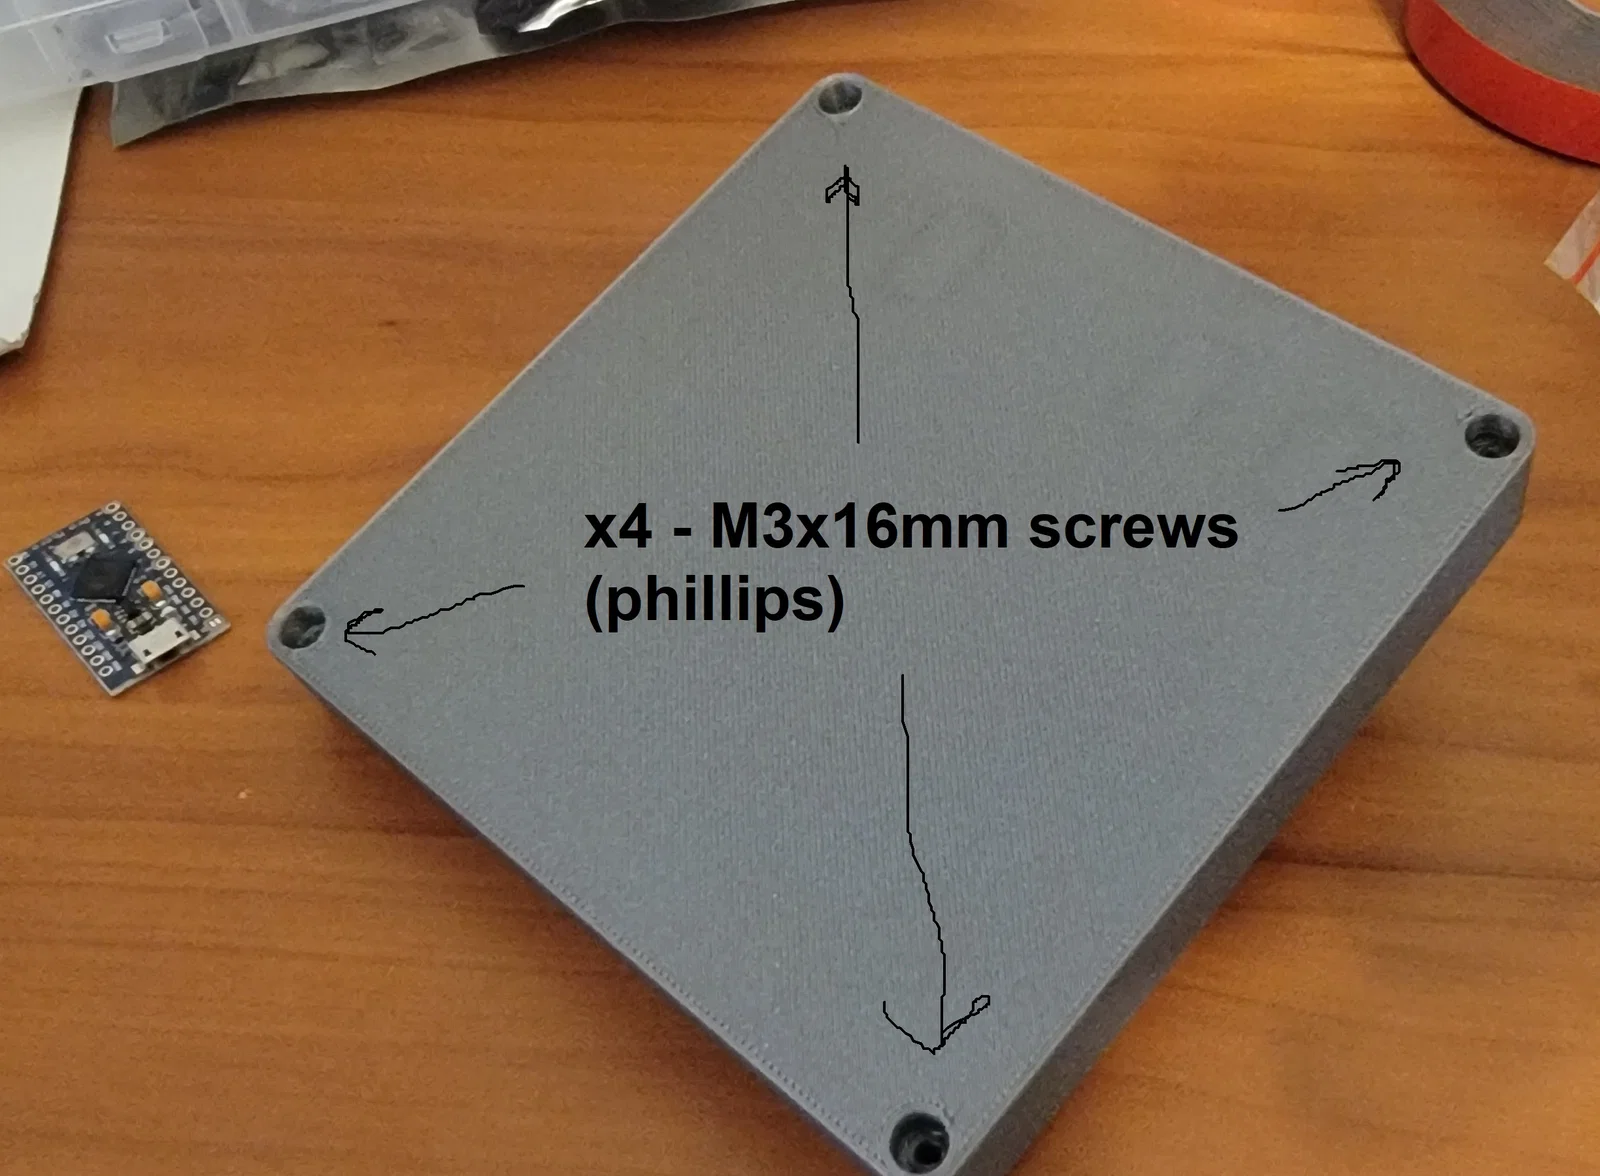
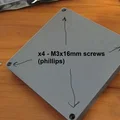
- X4 – vít M3 x 16mm (mình dùng đầu Phillips)
- mỏ hàn
- thiếc hàn
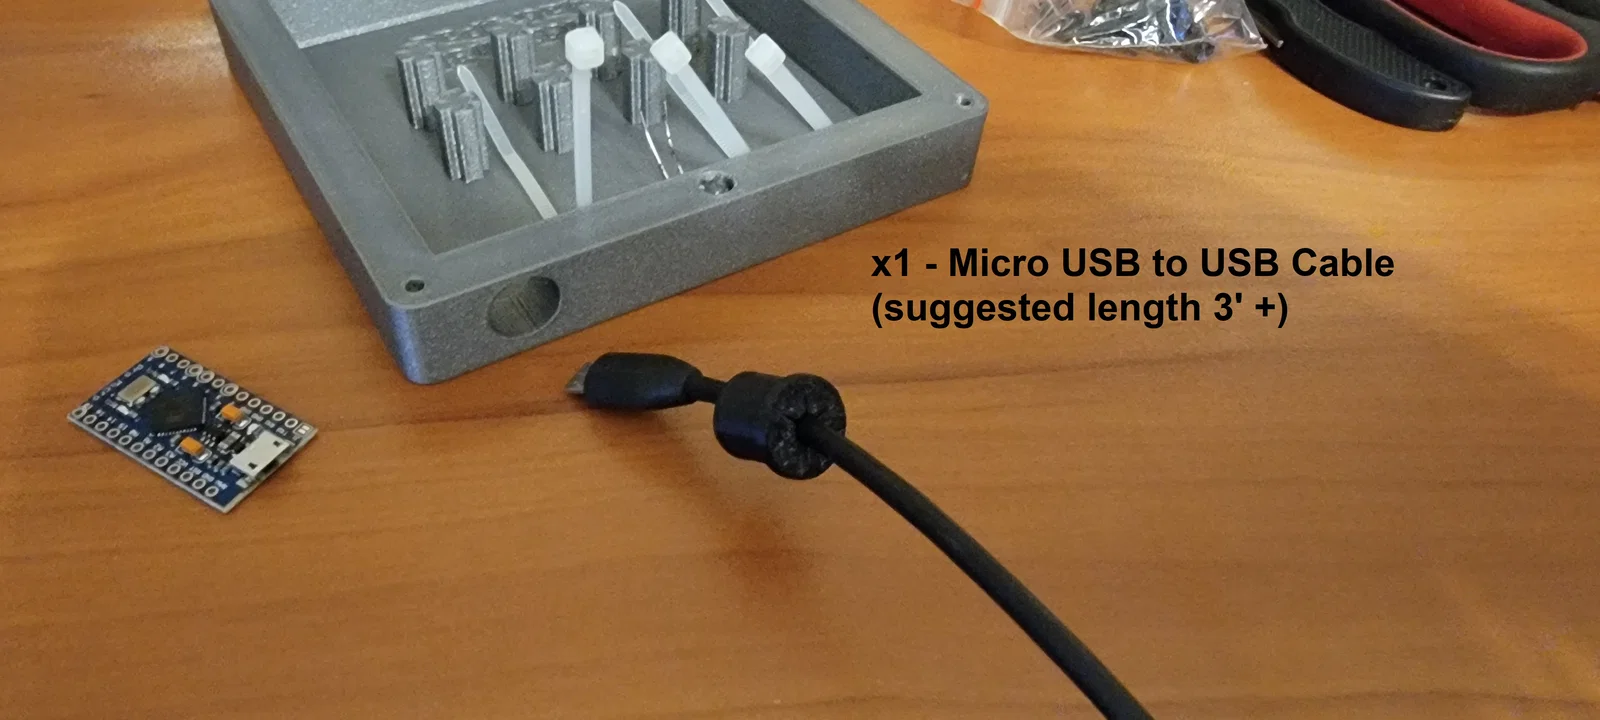
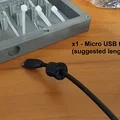
- cáp Micro USB sang USB (khuyên dùng dài ít nhất 3’)
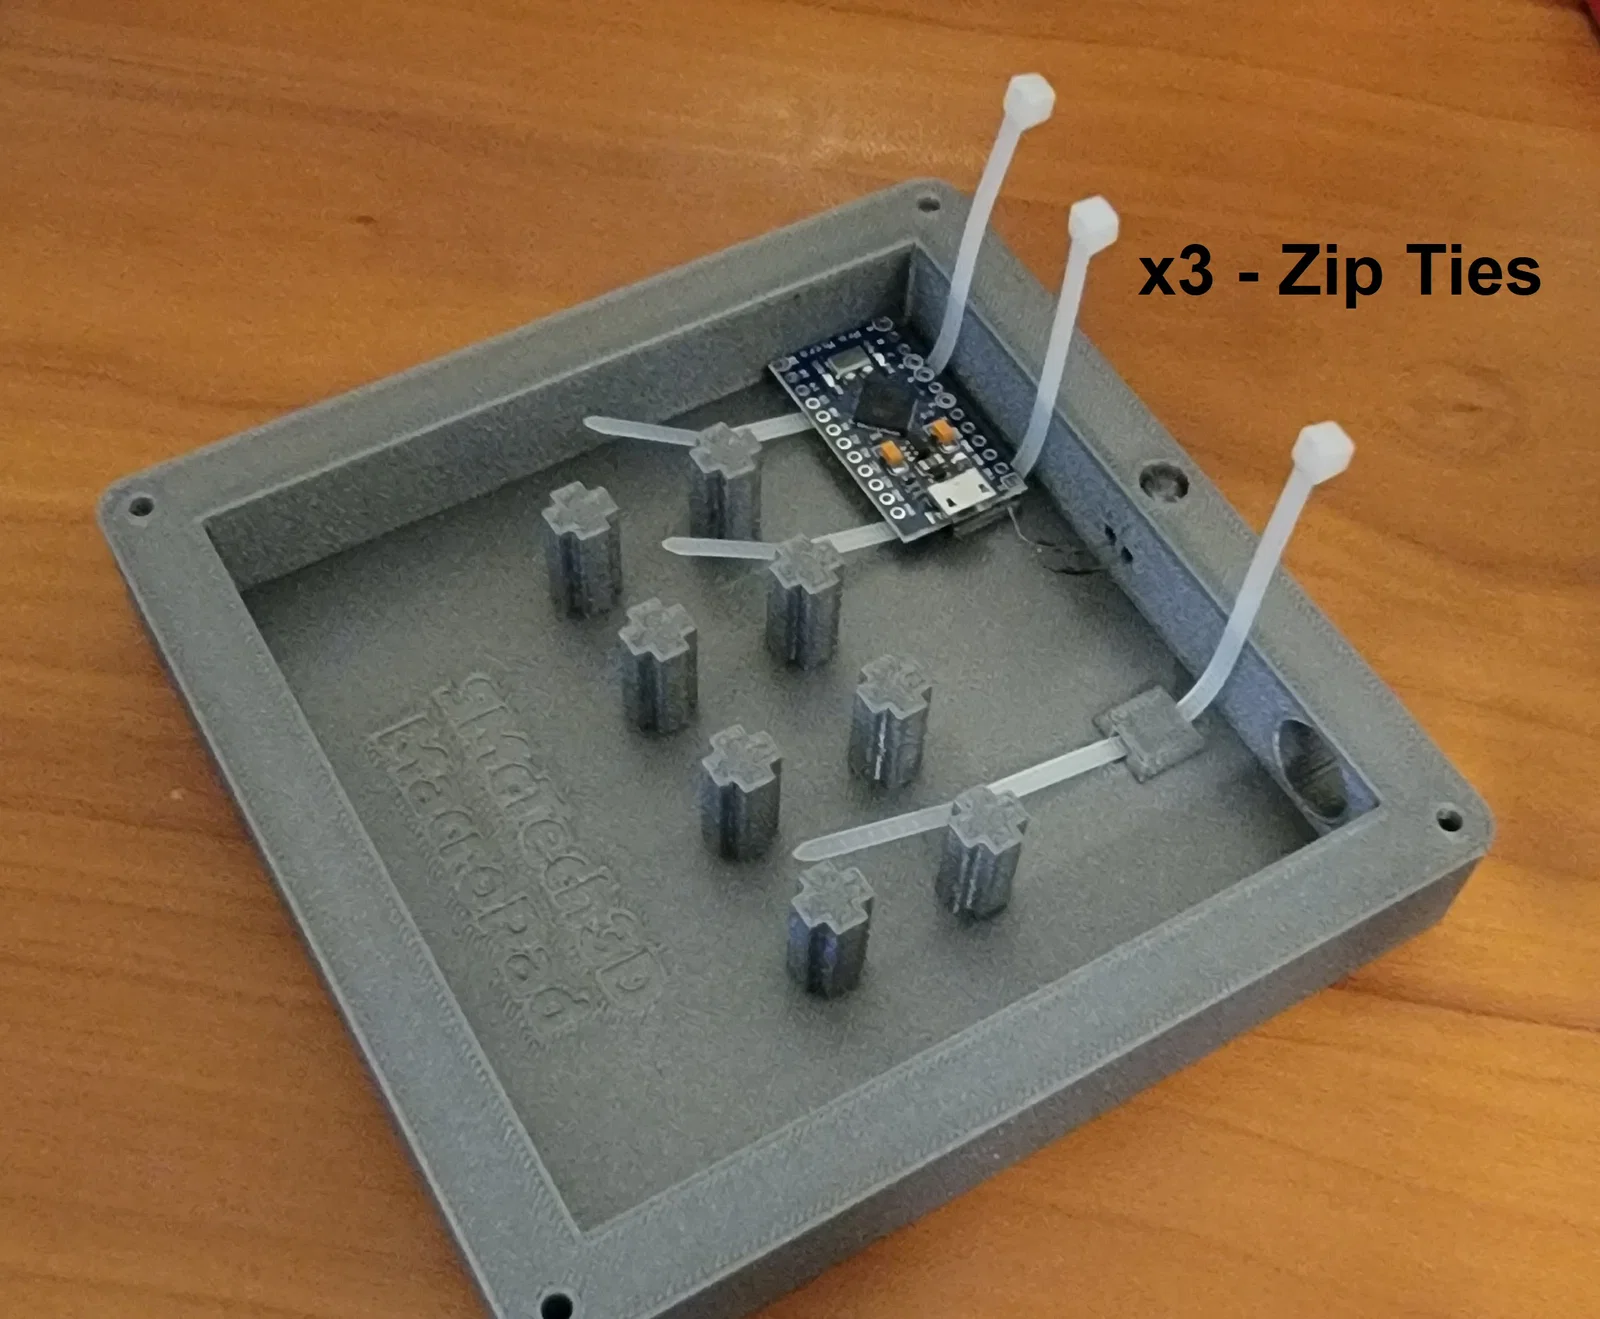
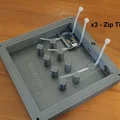
- dây rút nhỏ (zip ties)
*** Một số mẫu có thể cần xoay hướng (orient) trước khi slice.
PLA Print List:
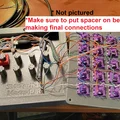
- X1 - Spacer 2mm (có thể chọn màu khác với base và top cho đẹp)
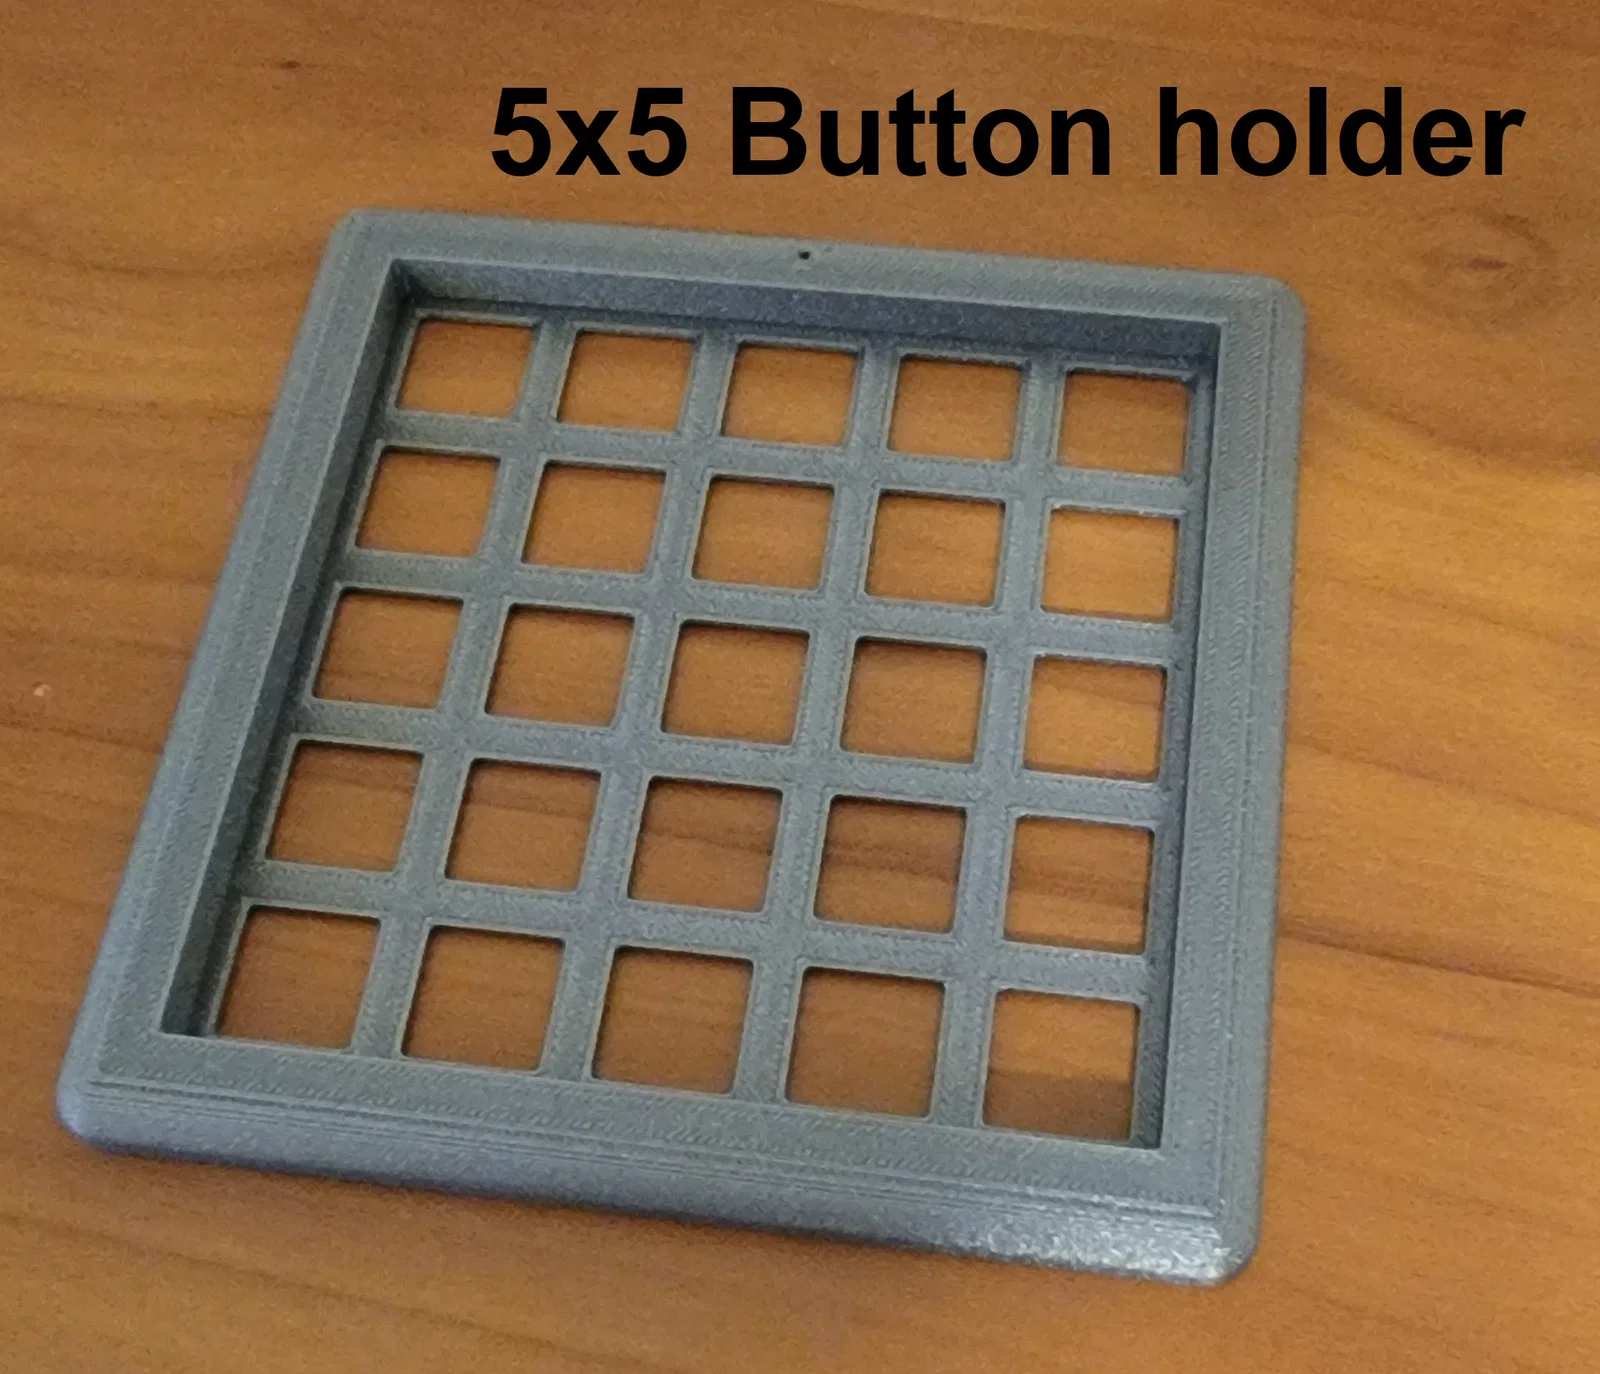
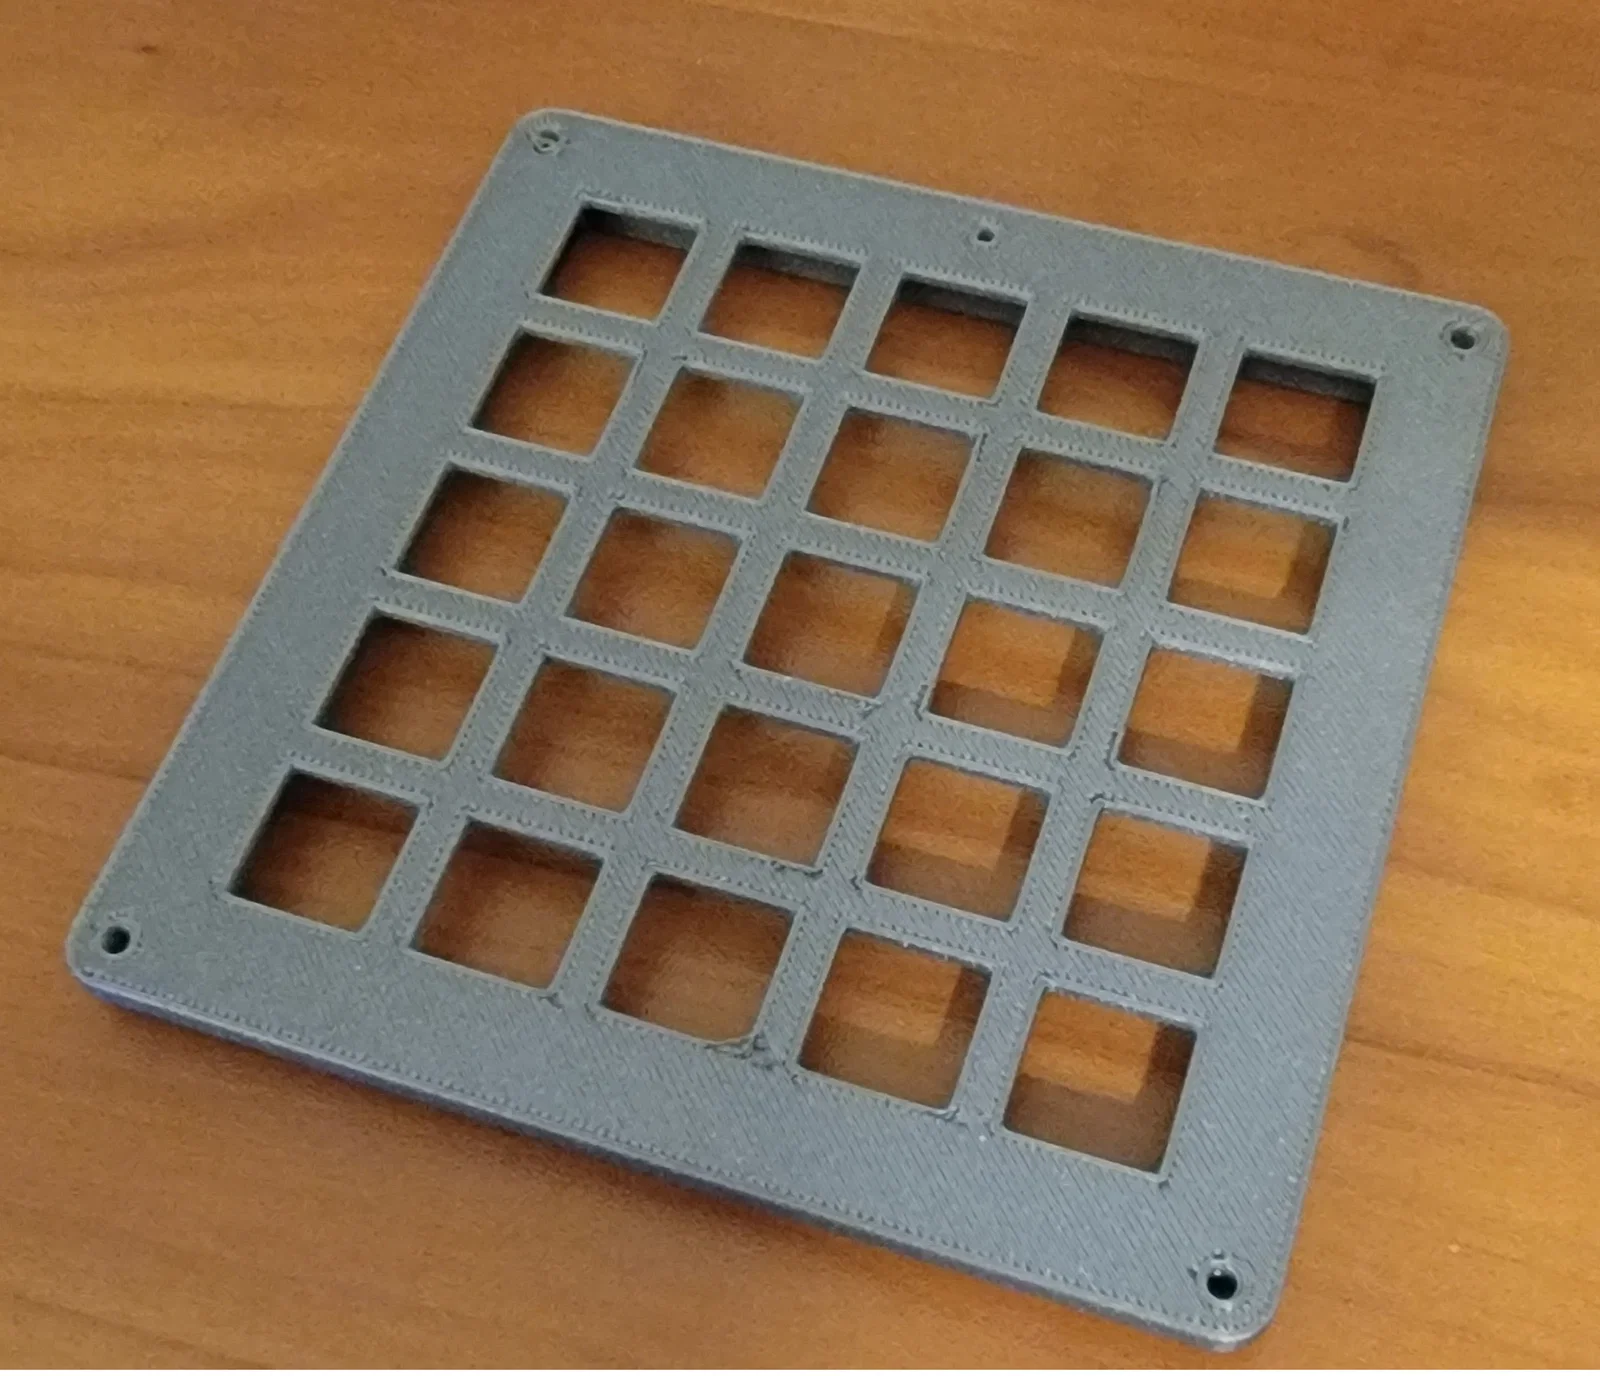
- X1 – MacroPadBase
- X1 – MacroPadTop
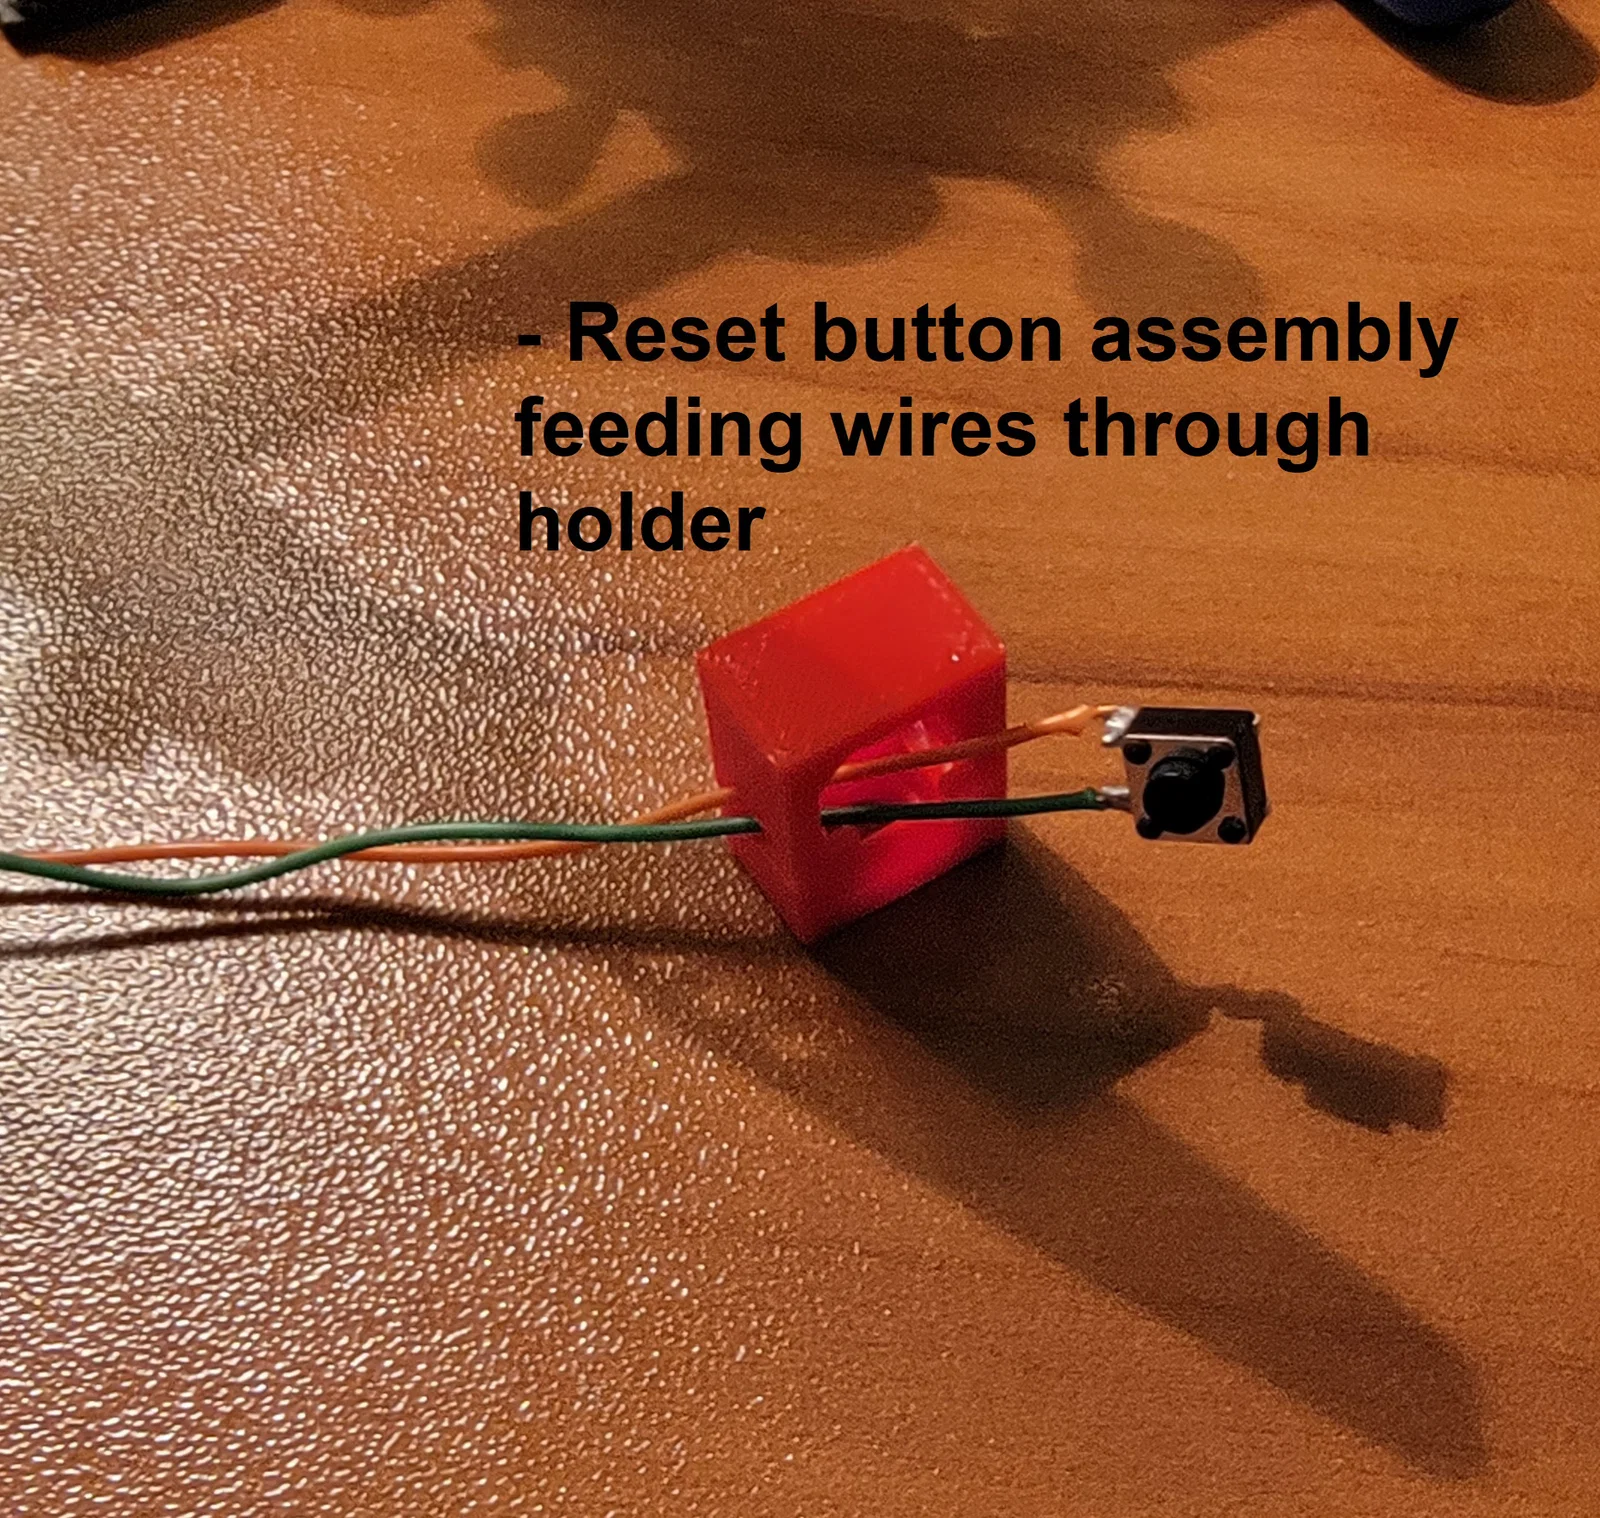
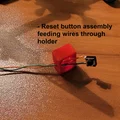
- X1 – Reset Button (sẽ nhìn thấy, có thể chọn màu khác với base để nổi bật)
- X1 – Reset Button2 (không nhìn thấy) *Update 07-06-23 - shoutout tới @iComputerFreak
- X1 – Reset Holder SlipOn (không nhìn thấy)
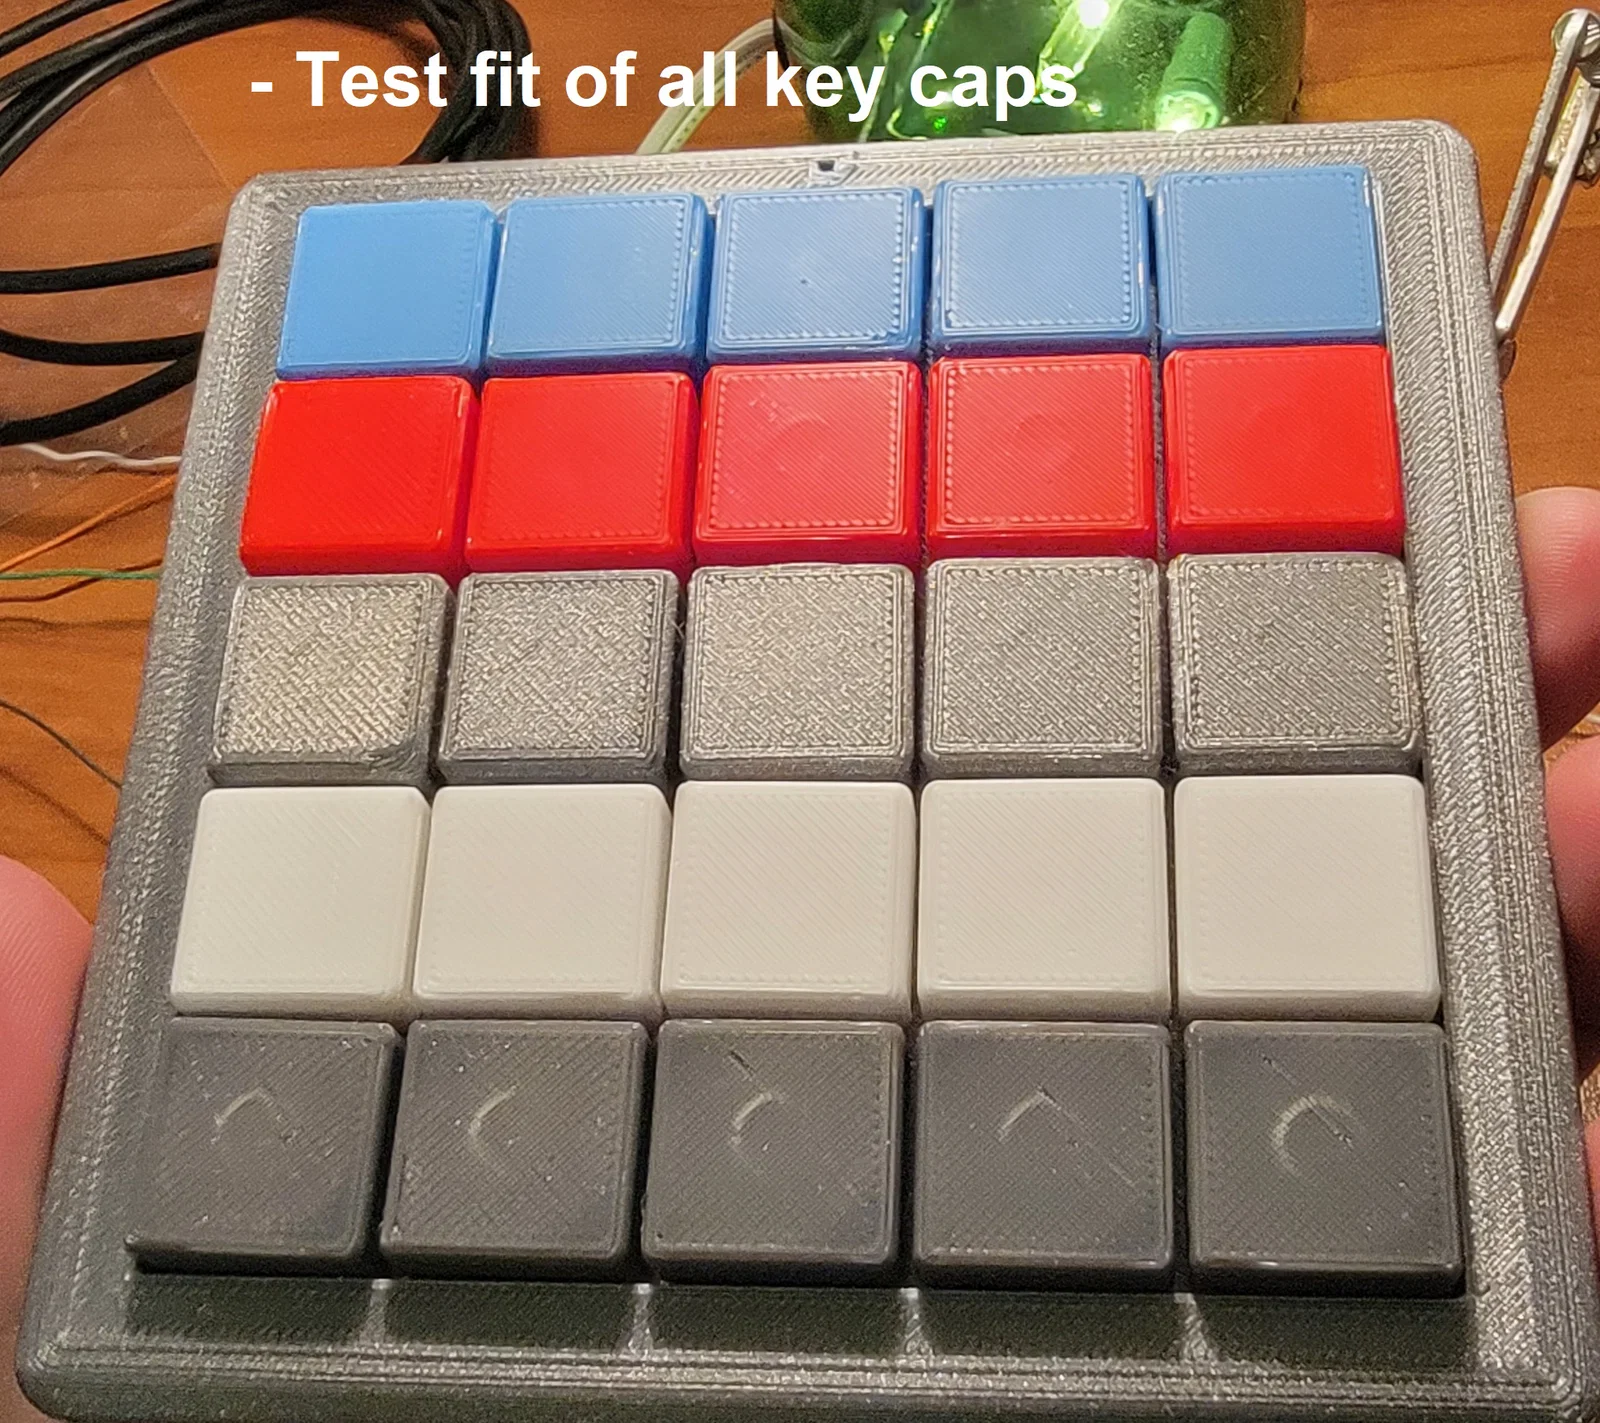
- X25 – KeyCap1 (có thể chọn nhiều màu khác nhau)
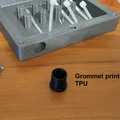
TPU Print List:
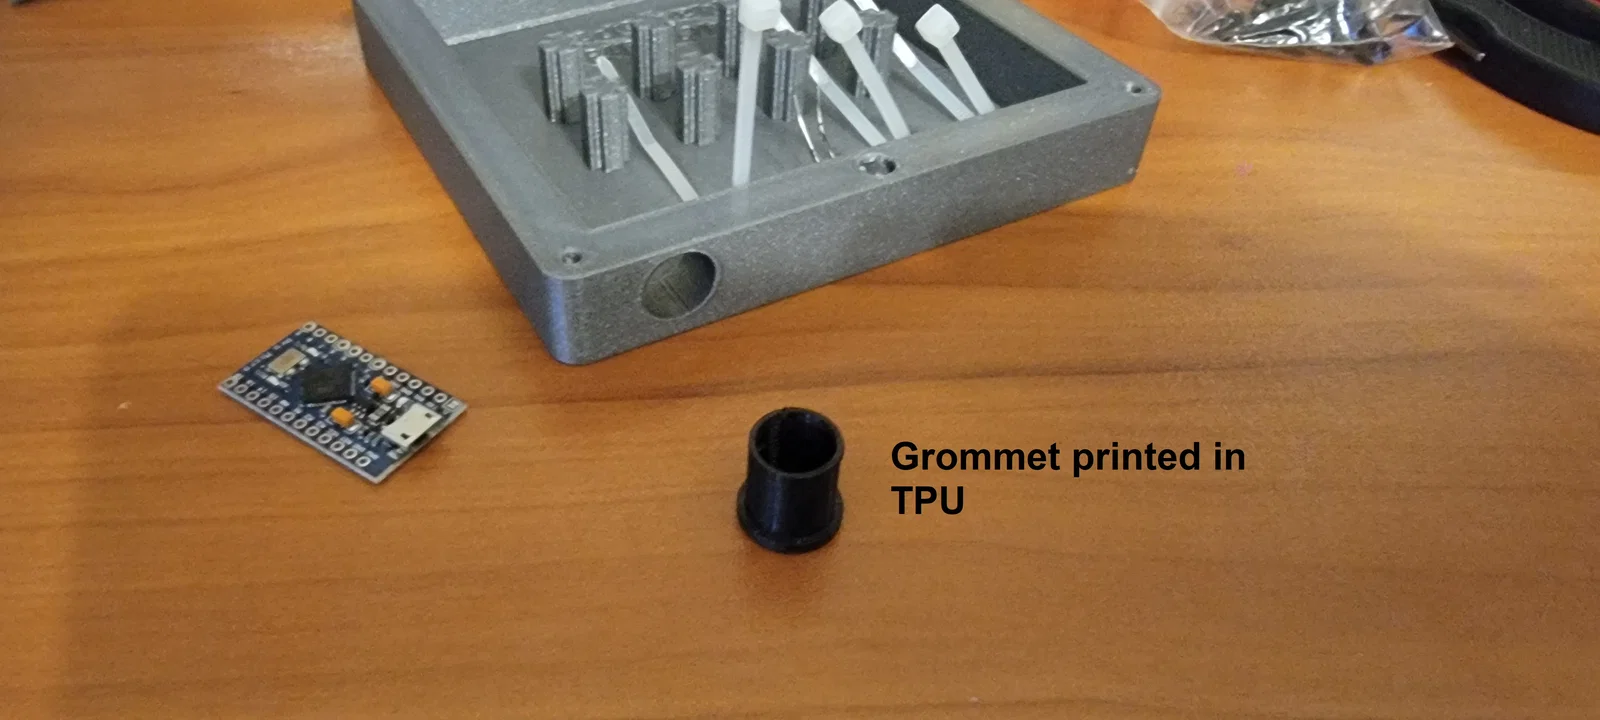
- x1 - Grommet
Optional TEST PLA Print:
- X1 – KeyCapPlate TEST1_TEST (để test độ khóa của keycap và khoảng cách)
PLA Print Settings (Prusa Slicer):
- 0.20 mm Quality - Layer Height
- 2 Perimeters
- Generic PLA
- Supports: None
- Infill 15% - Gyriod
- First layer speed 15mm/s
TPU Print Settings (Prusa Slicer):
- 0.20 mm Quality - Layer Height
- Generic FLEX settings
KeyCapPlate in rất nhanh và sẽ cho bạn biết switch có vừa không (14mmx14mm)
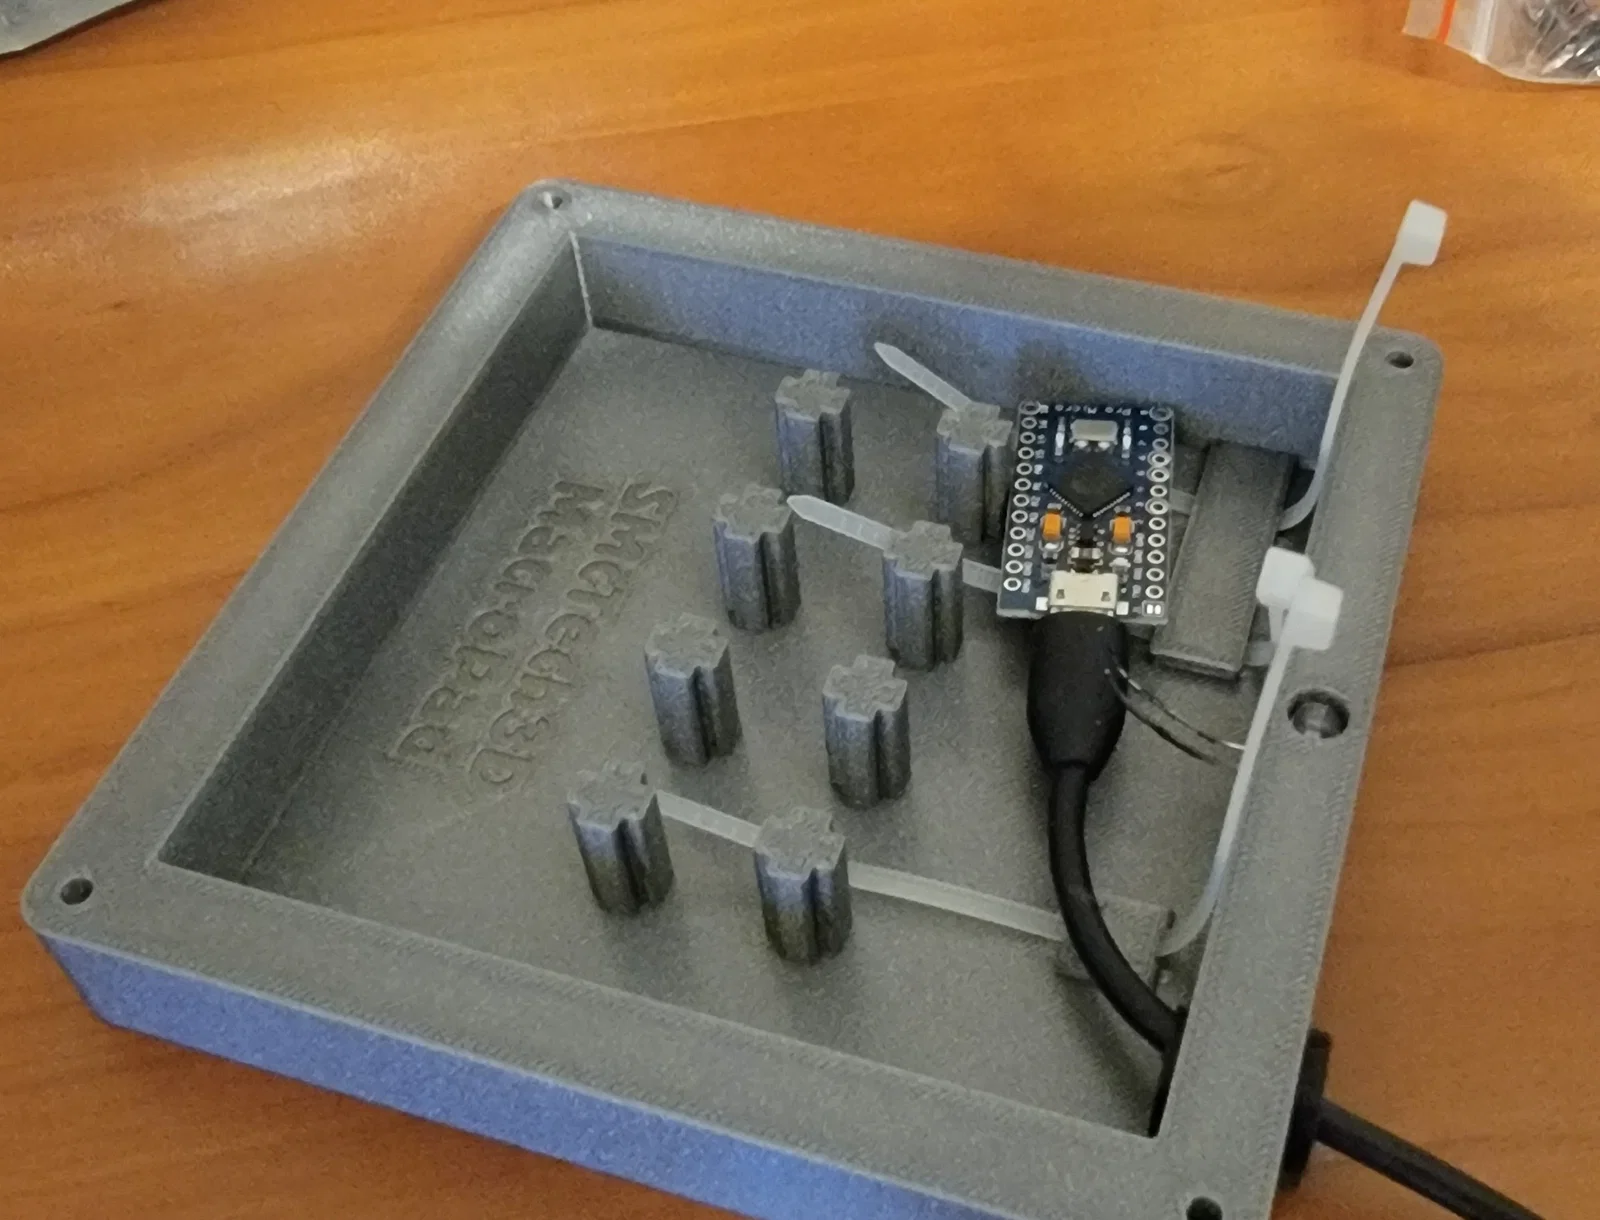
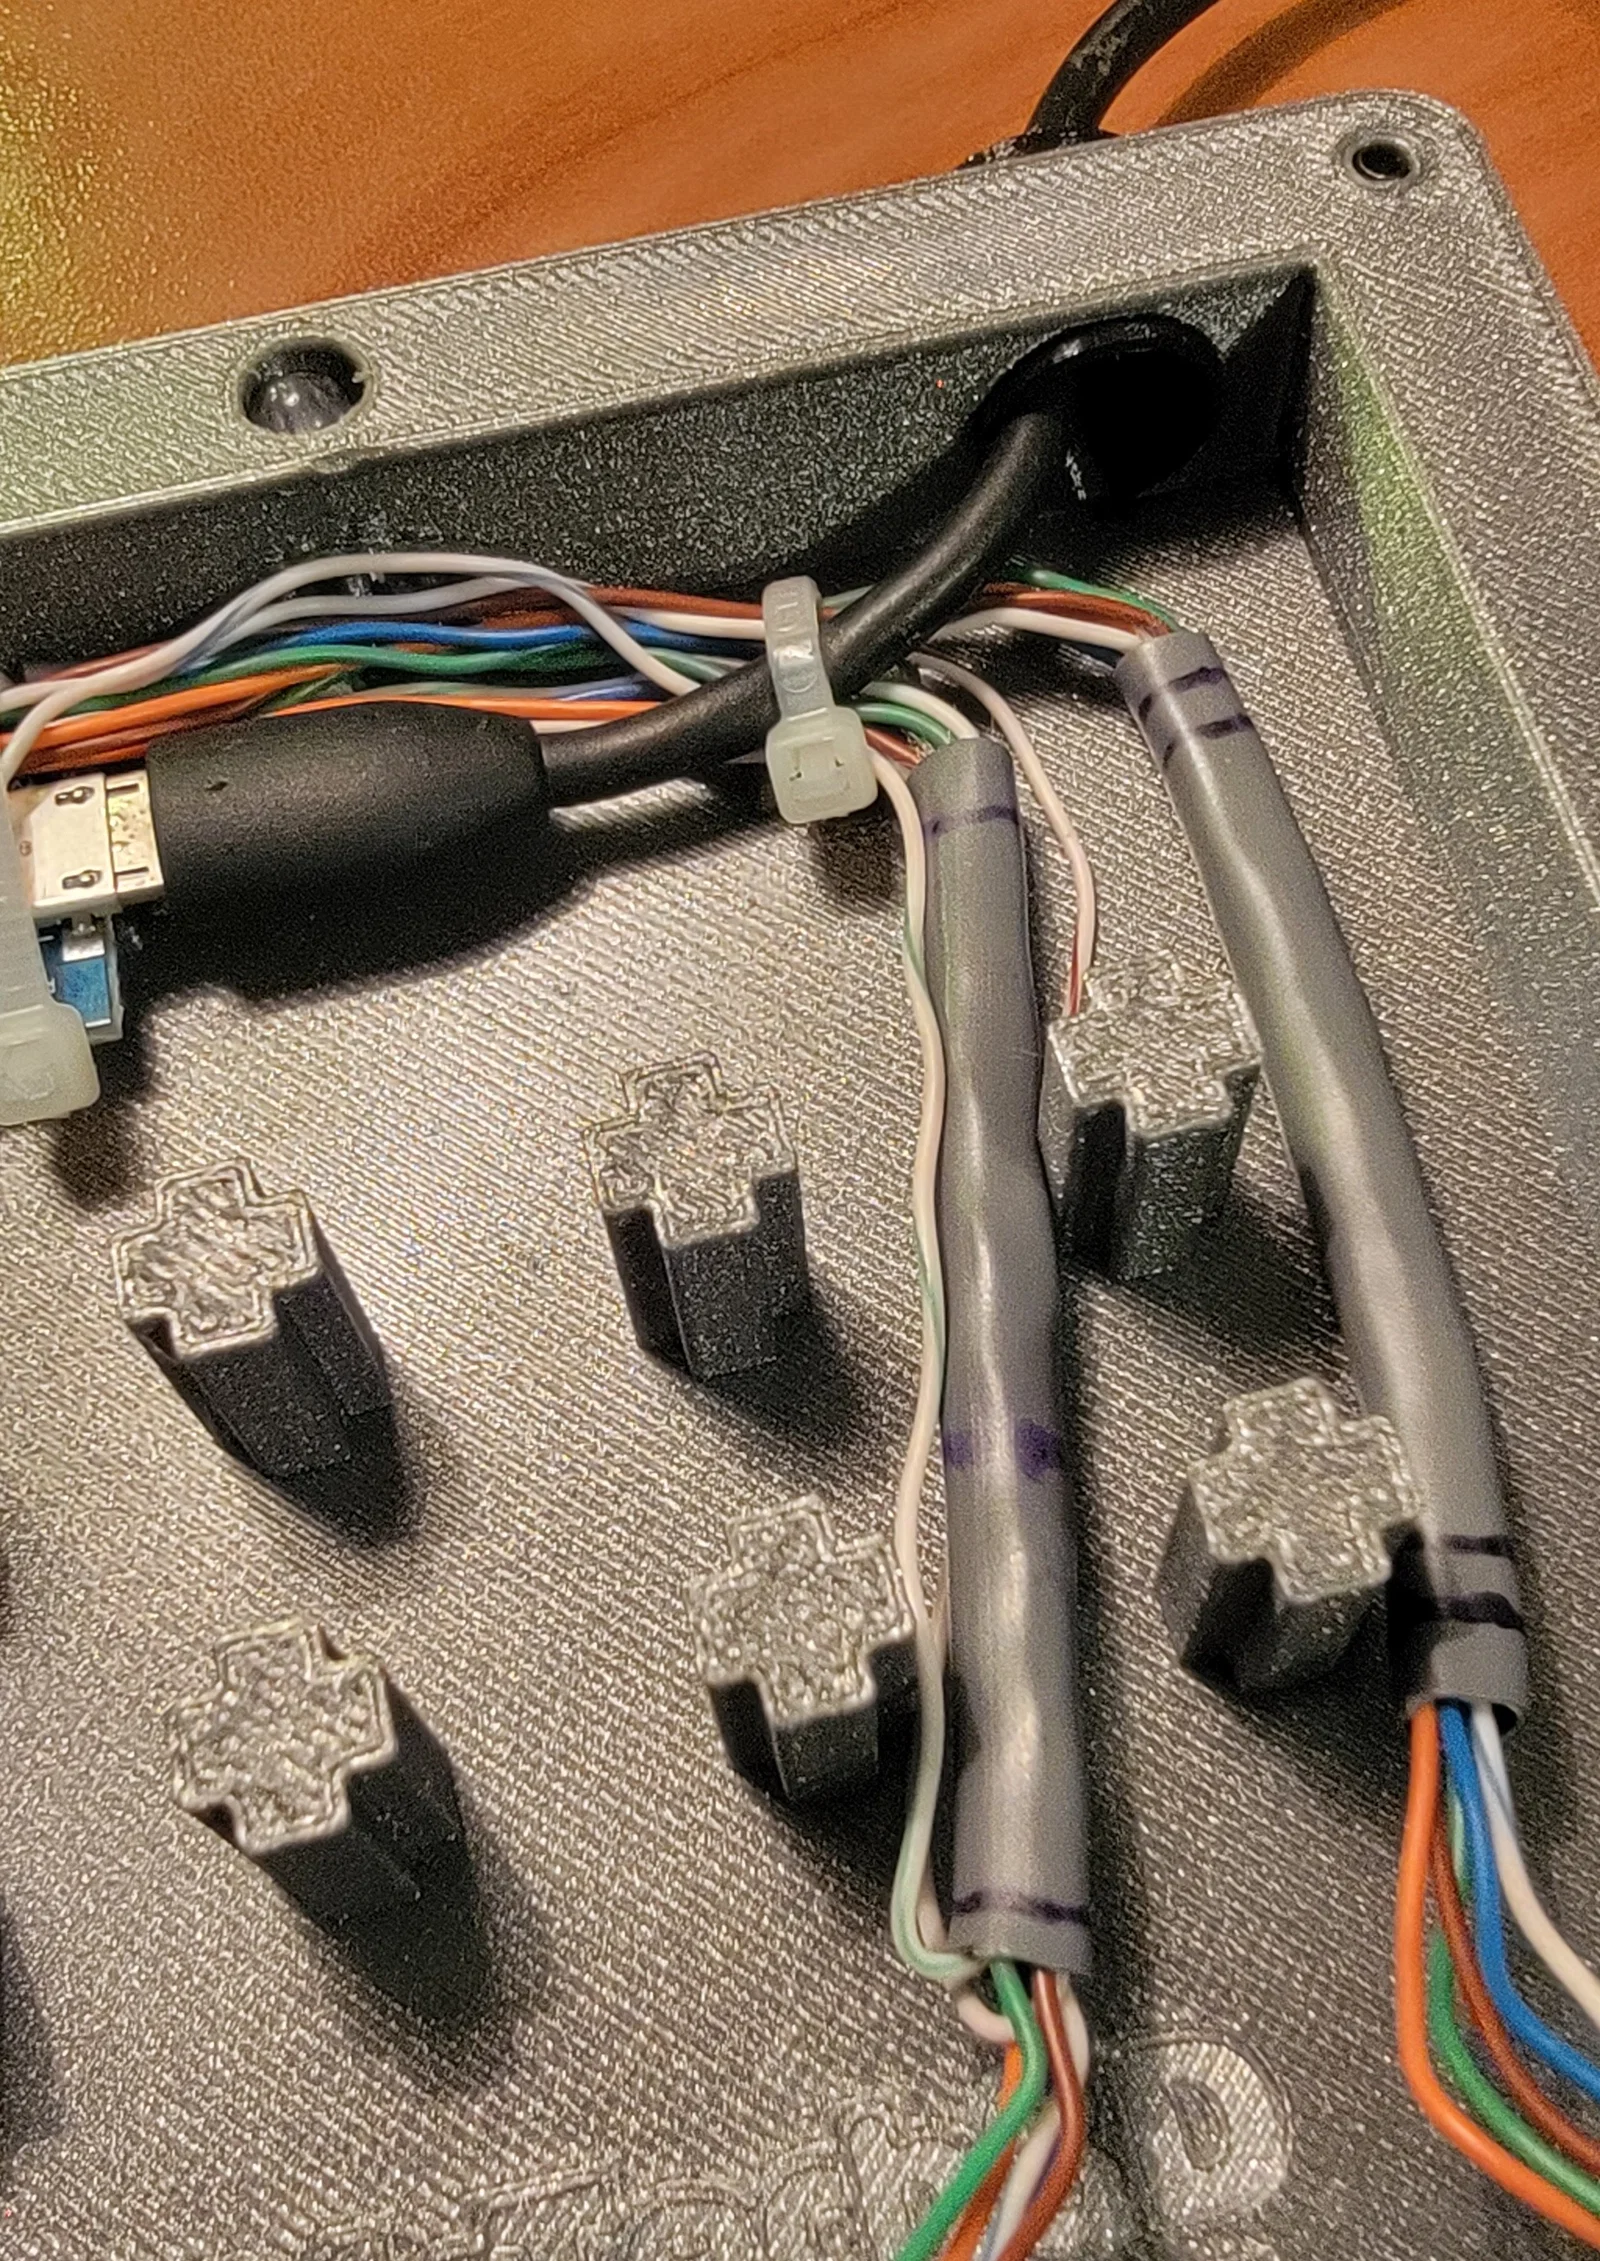
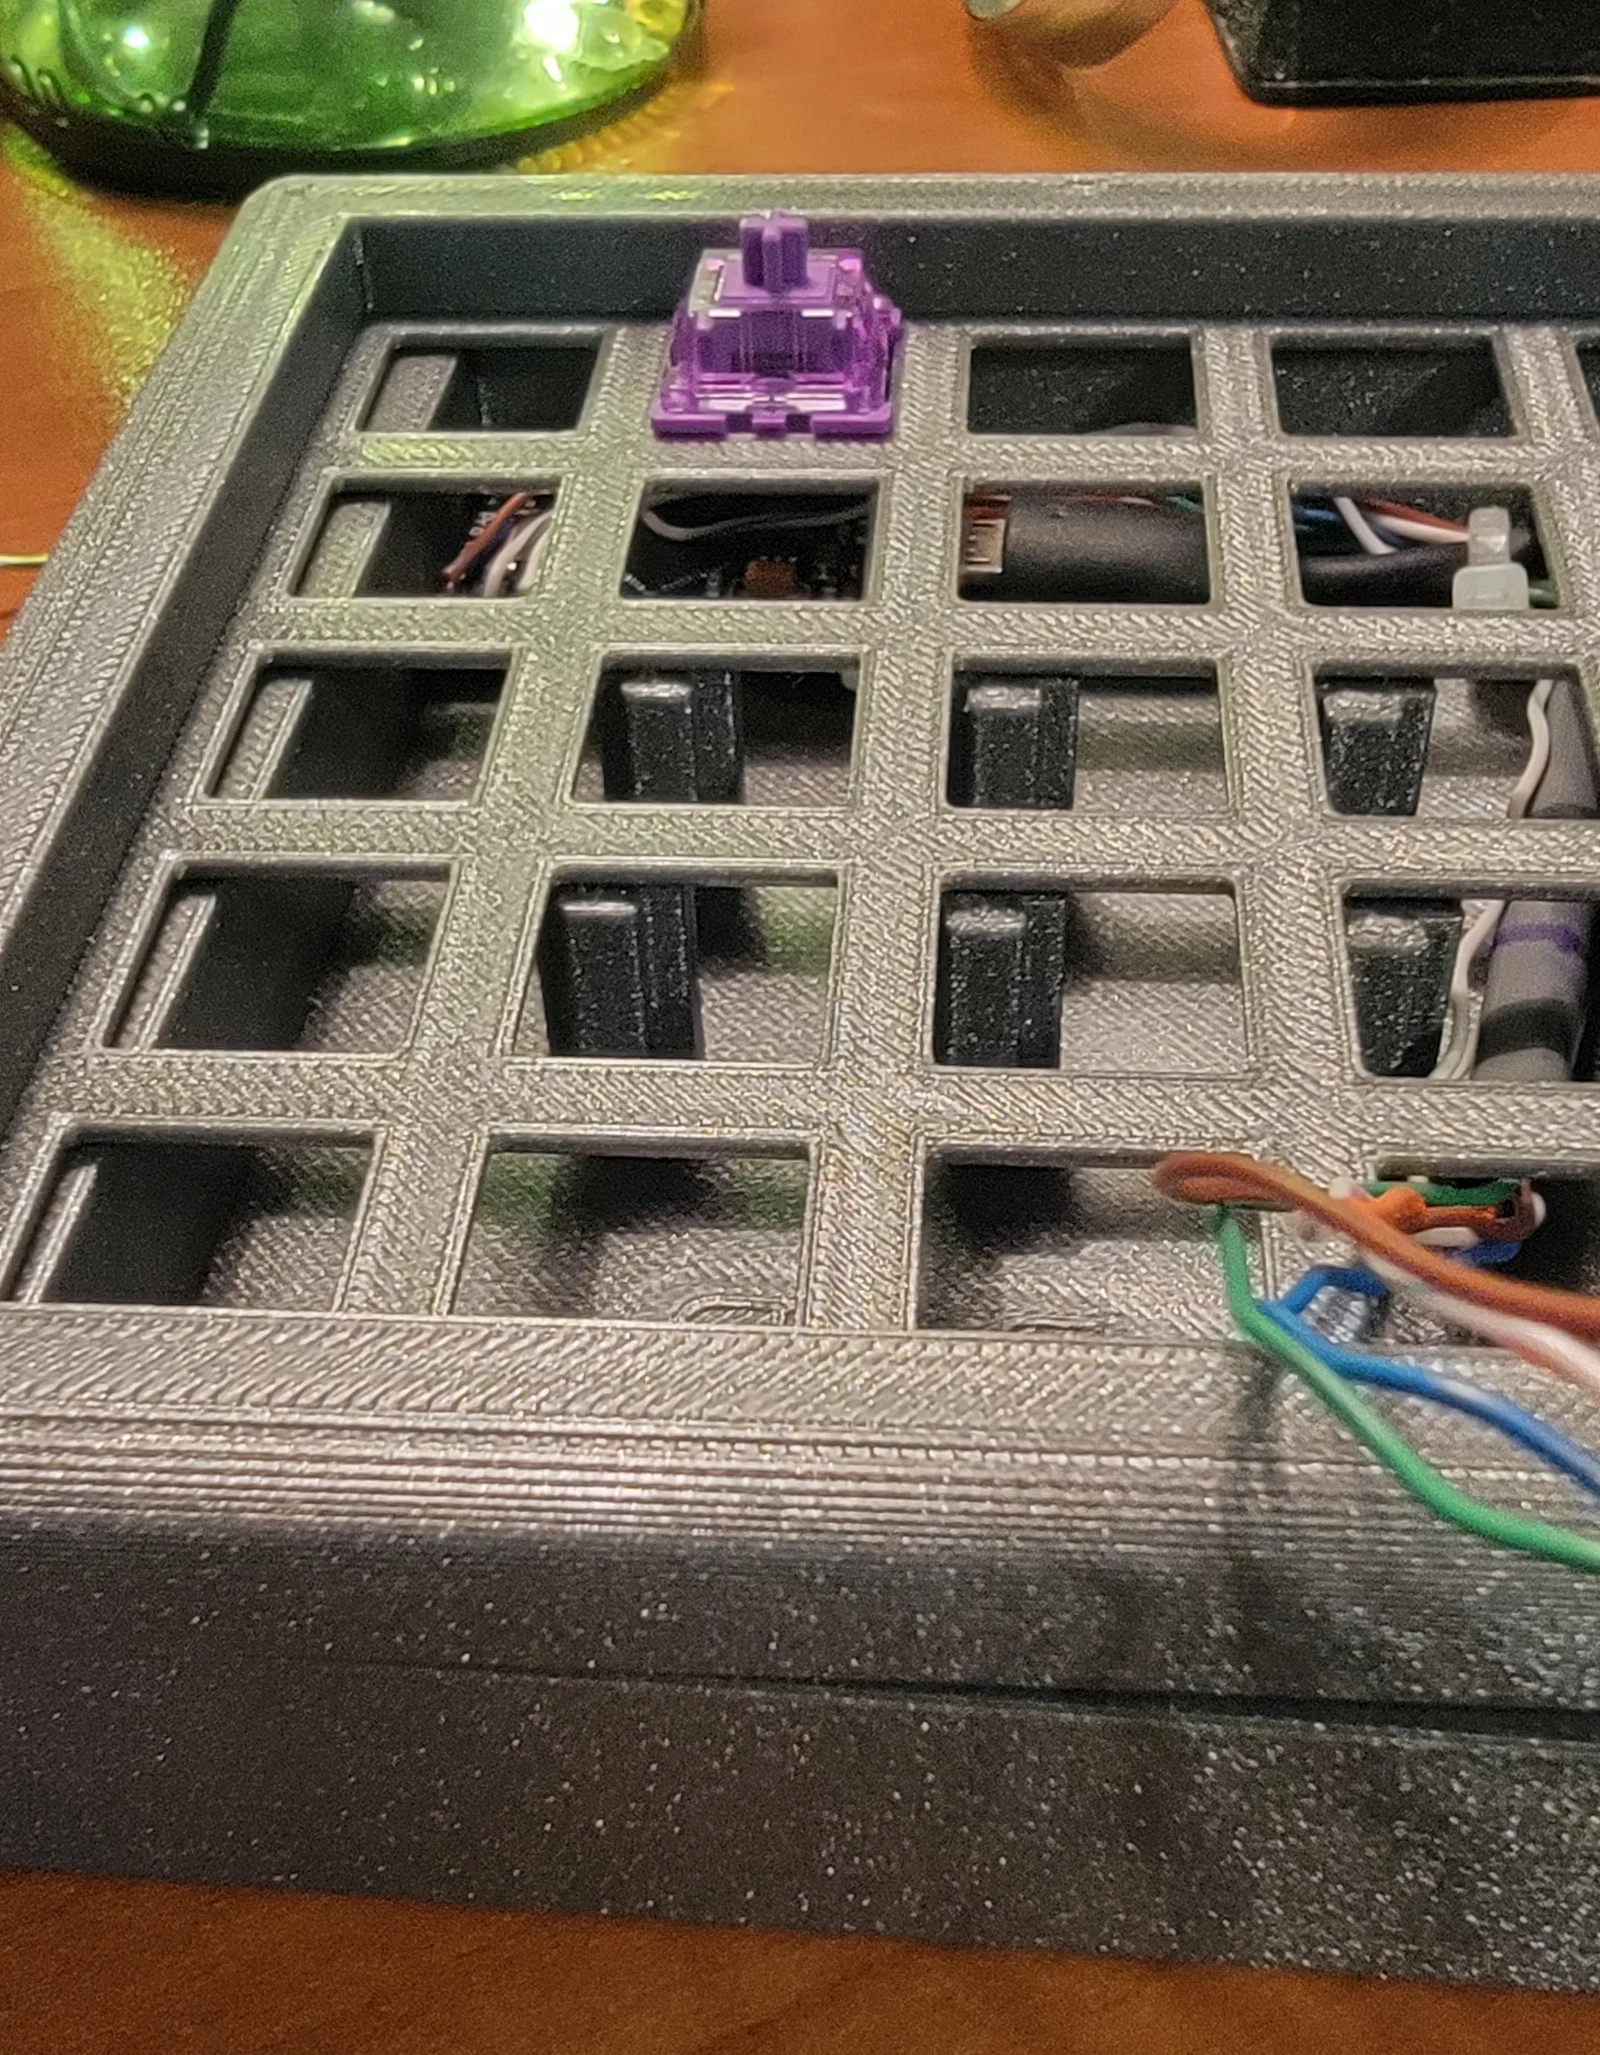
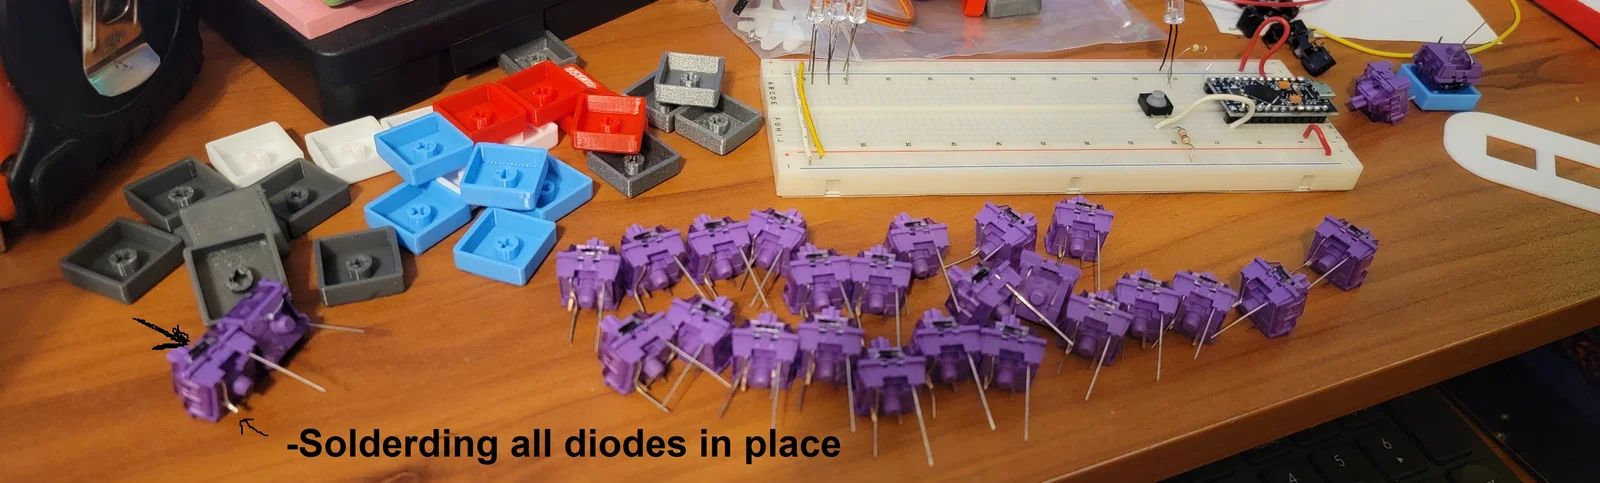
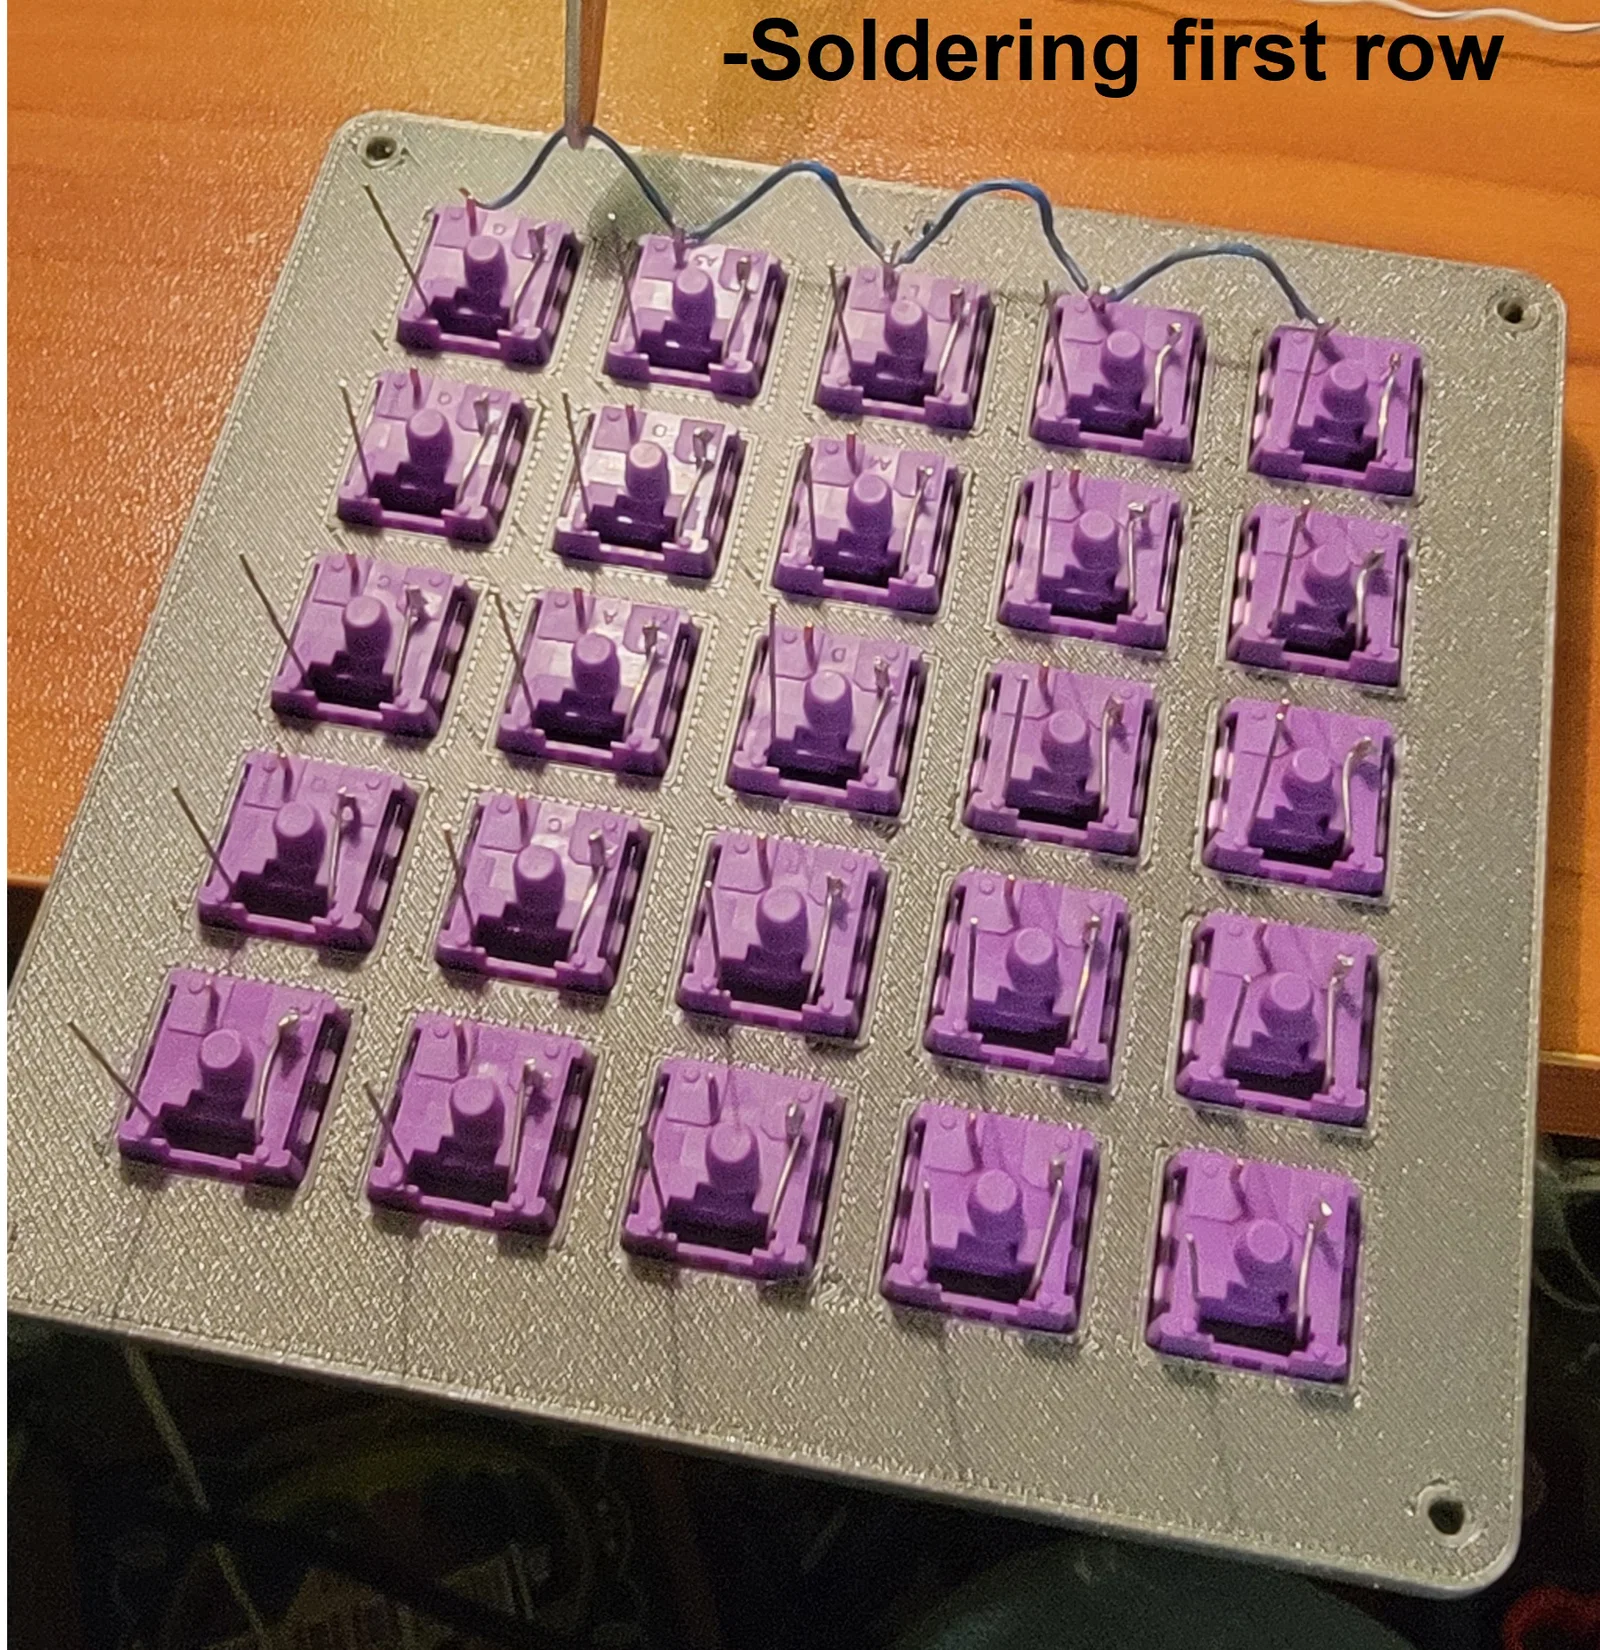
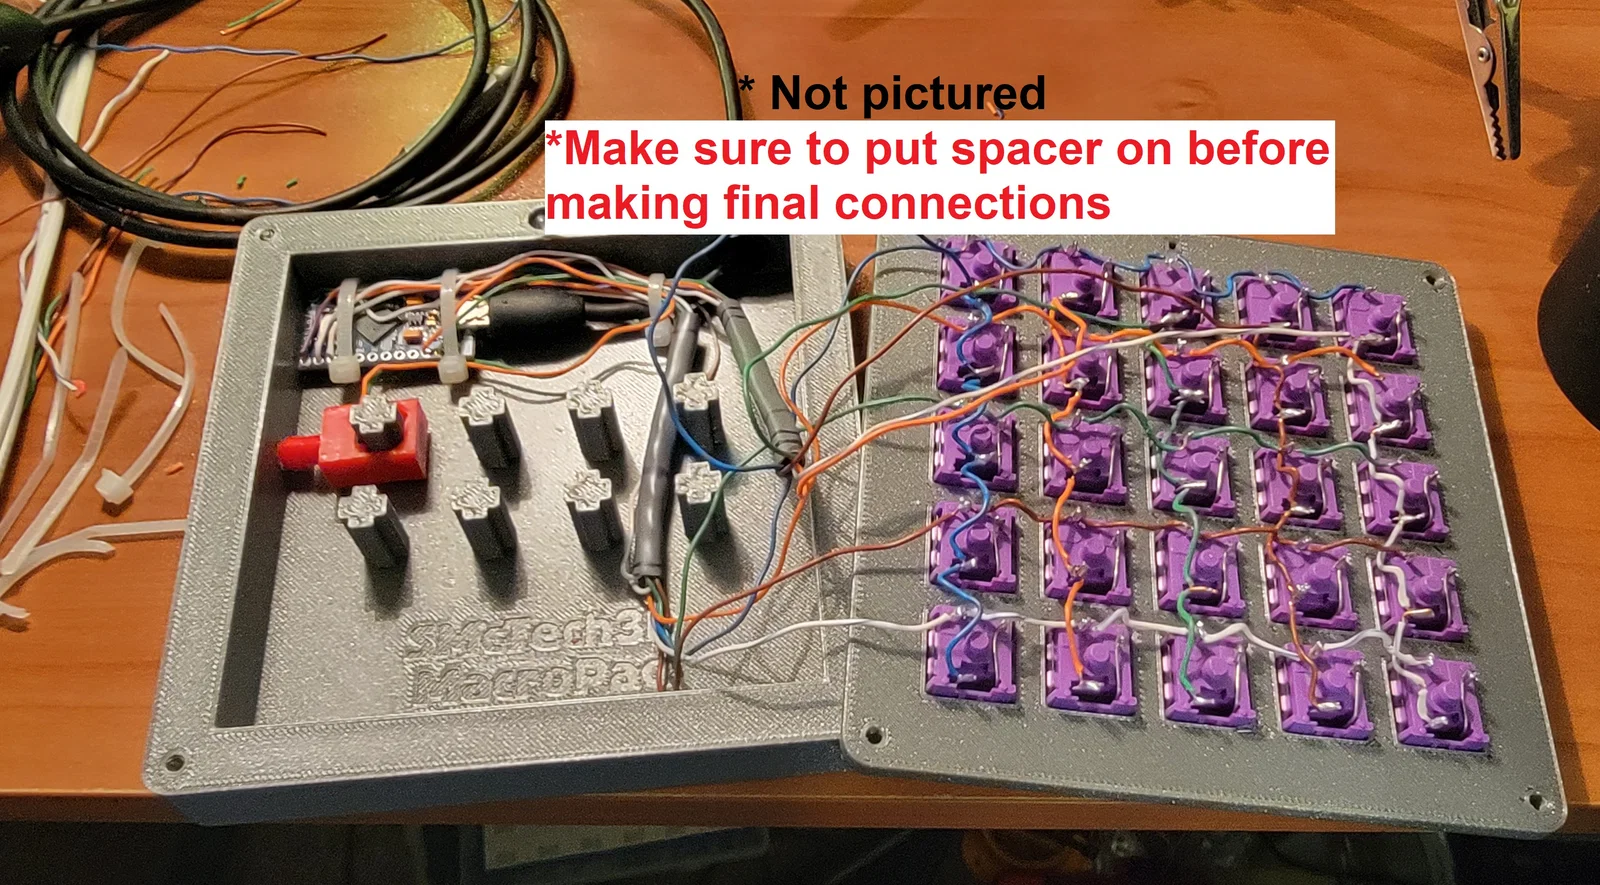
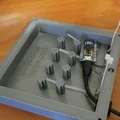
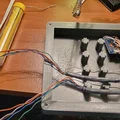
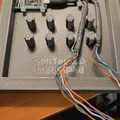
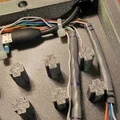
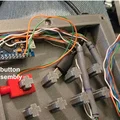
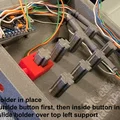
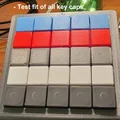
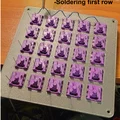
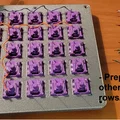
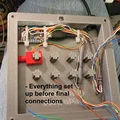
Build:
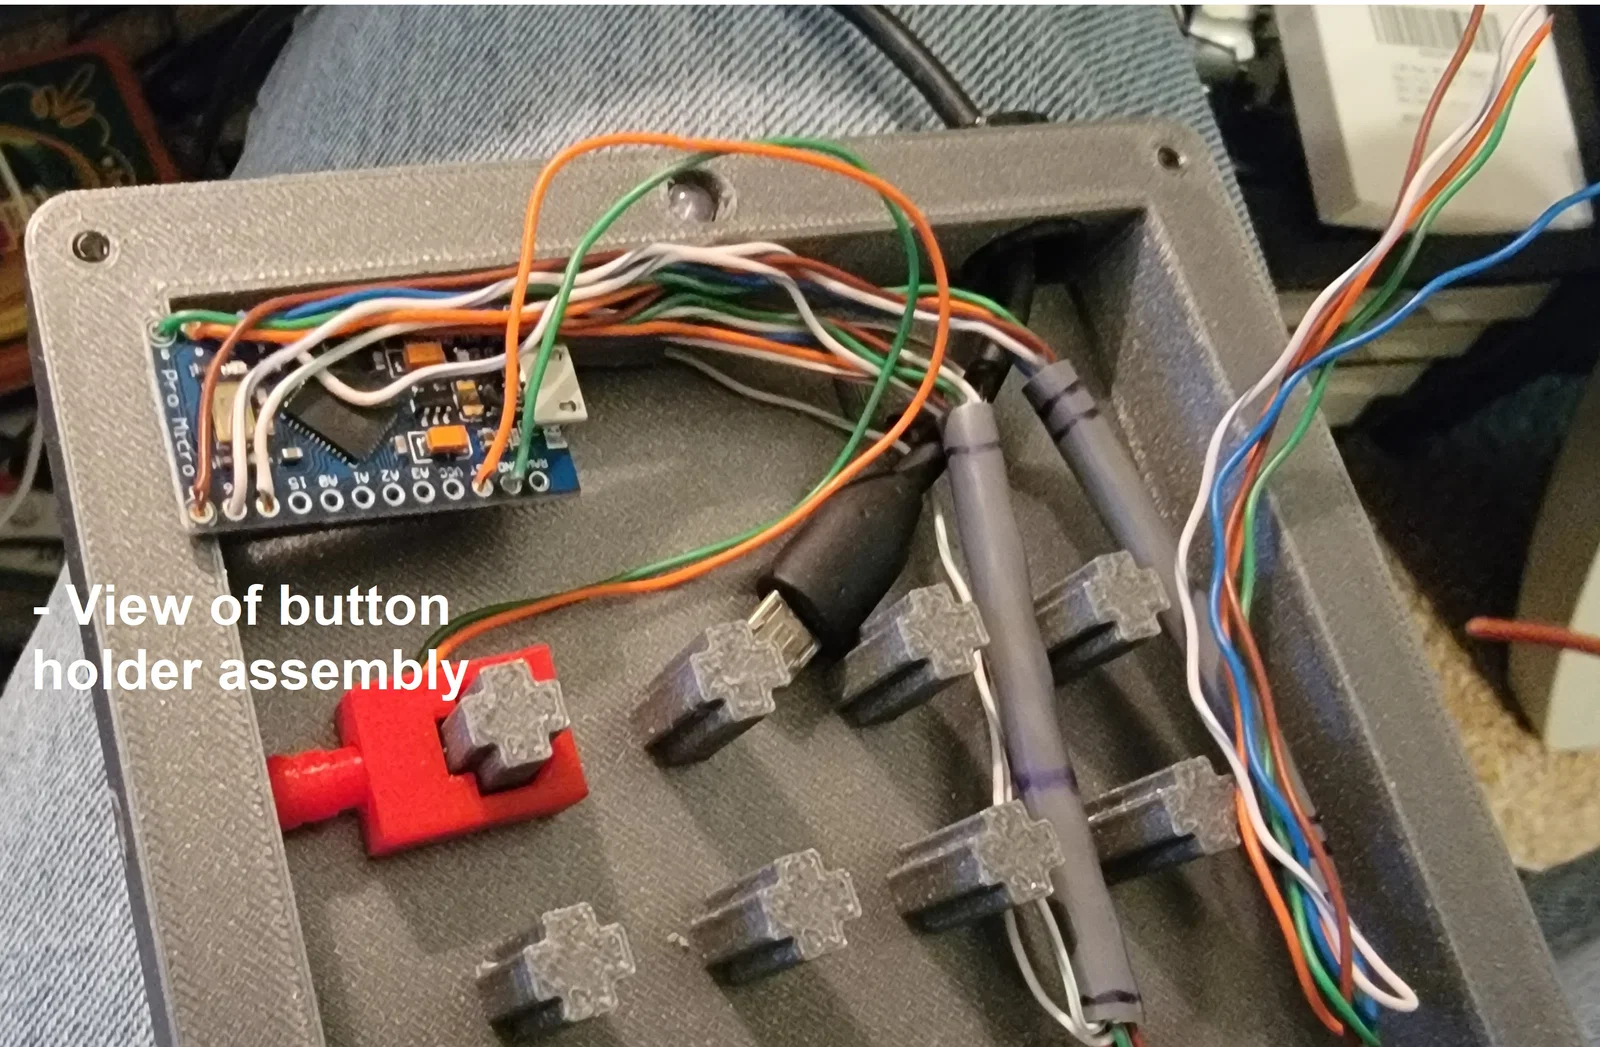
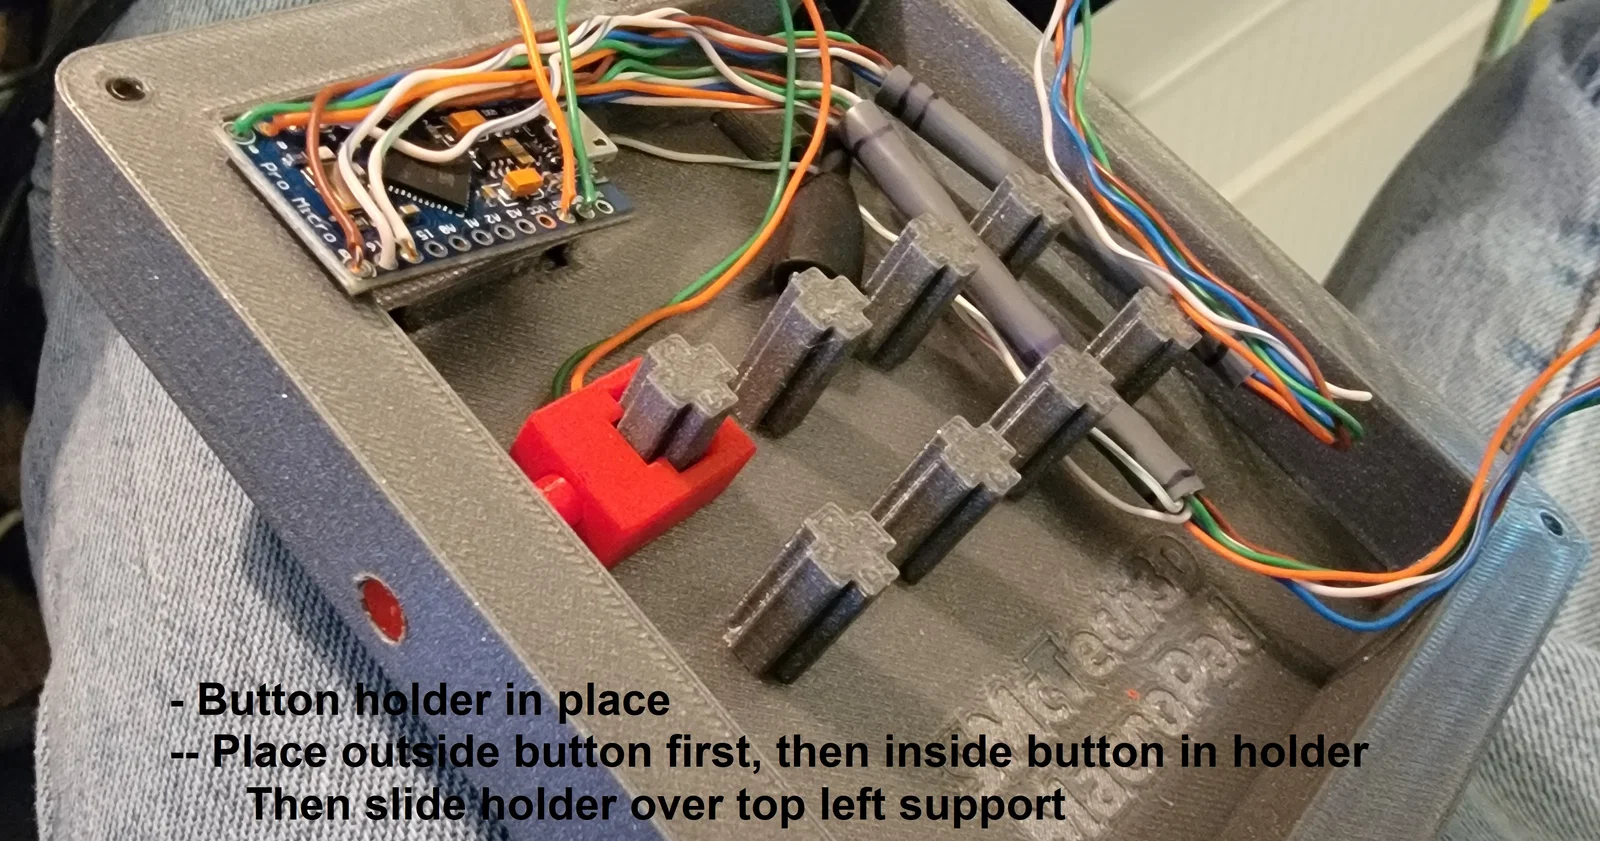
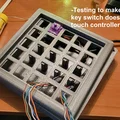
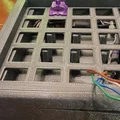
Hiện tại mình chưa viết hướng dẫn đầy đủ, nhưng dự tính khi rảnh sẽ làm. Tạm thời cứ xem hình là đủ để làm theo.
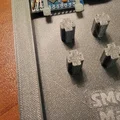
Khi bấm Keycaps in 3D lên switch, trên switch có một cái notch tương ứng với “chấm” trên keycap in 3D; canh cho đúng rồi nhấn mạnh tay. Tất cả keycap sẽ press-fit vào đúng vị trí. Bạn có thể tháo ra lắp lại vài lần mà không lo bị lỏng quá nhiều.
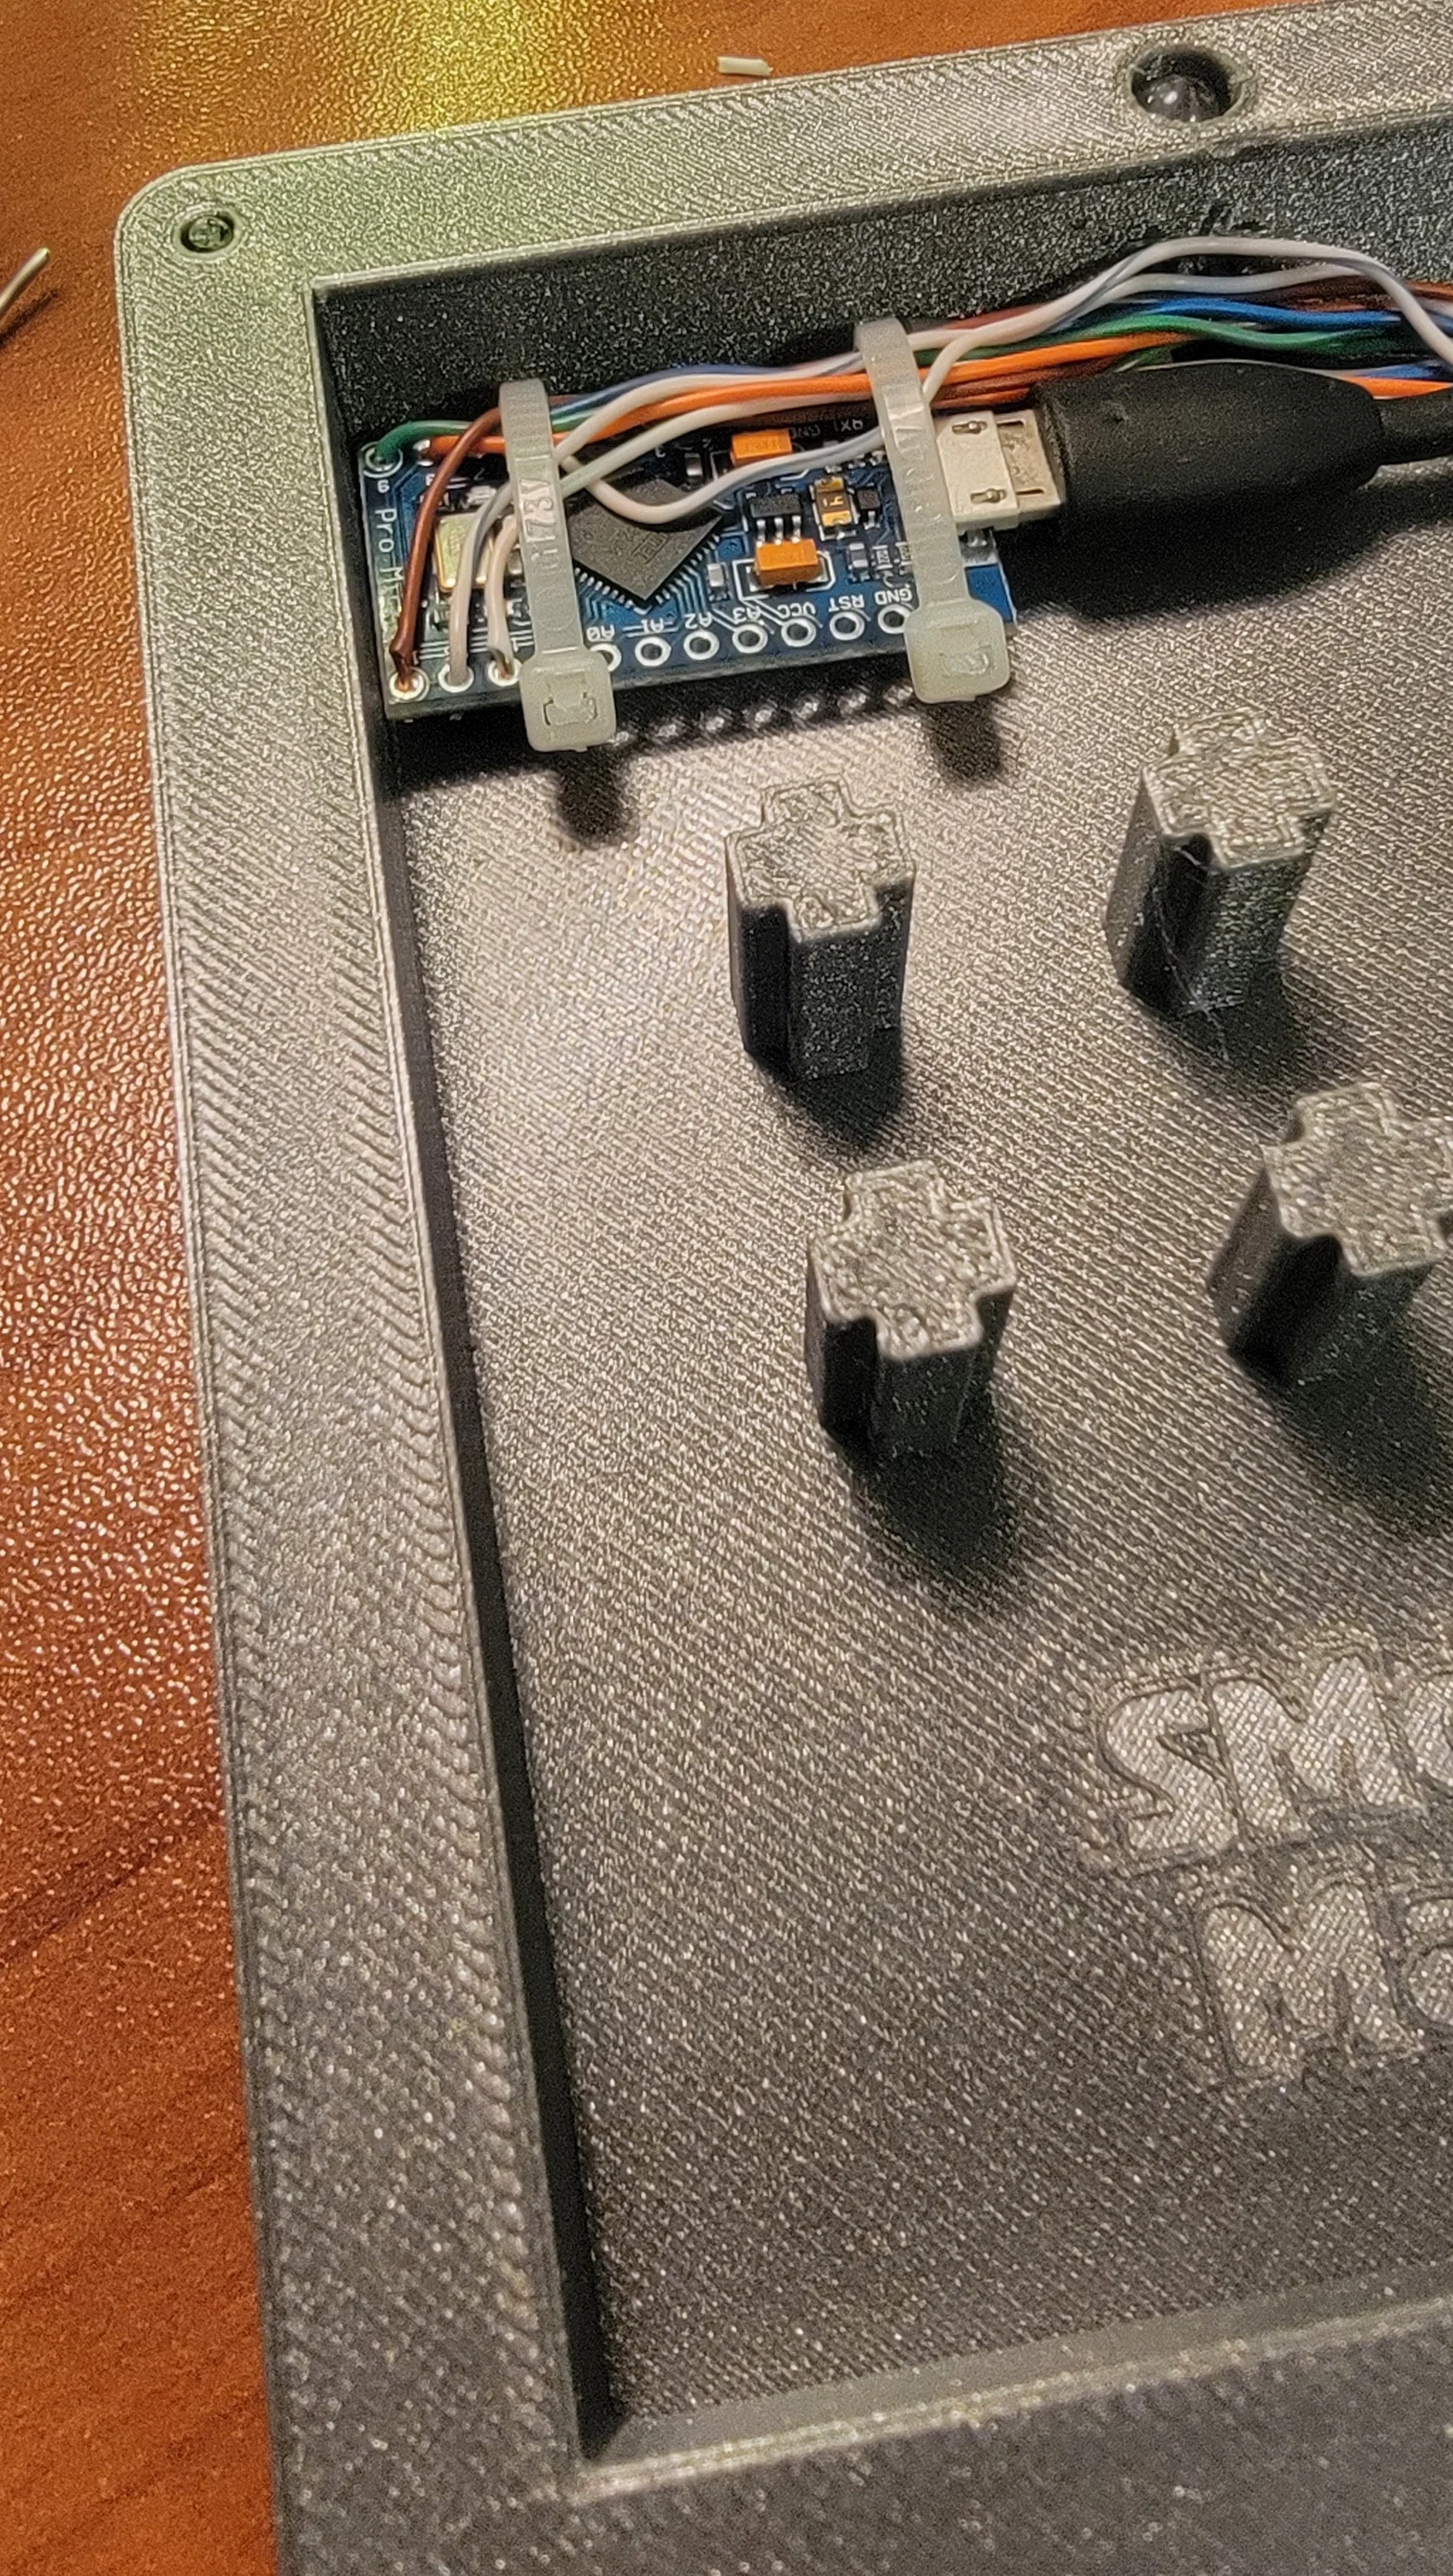
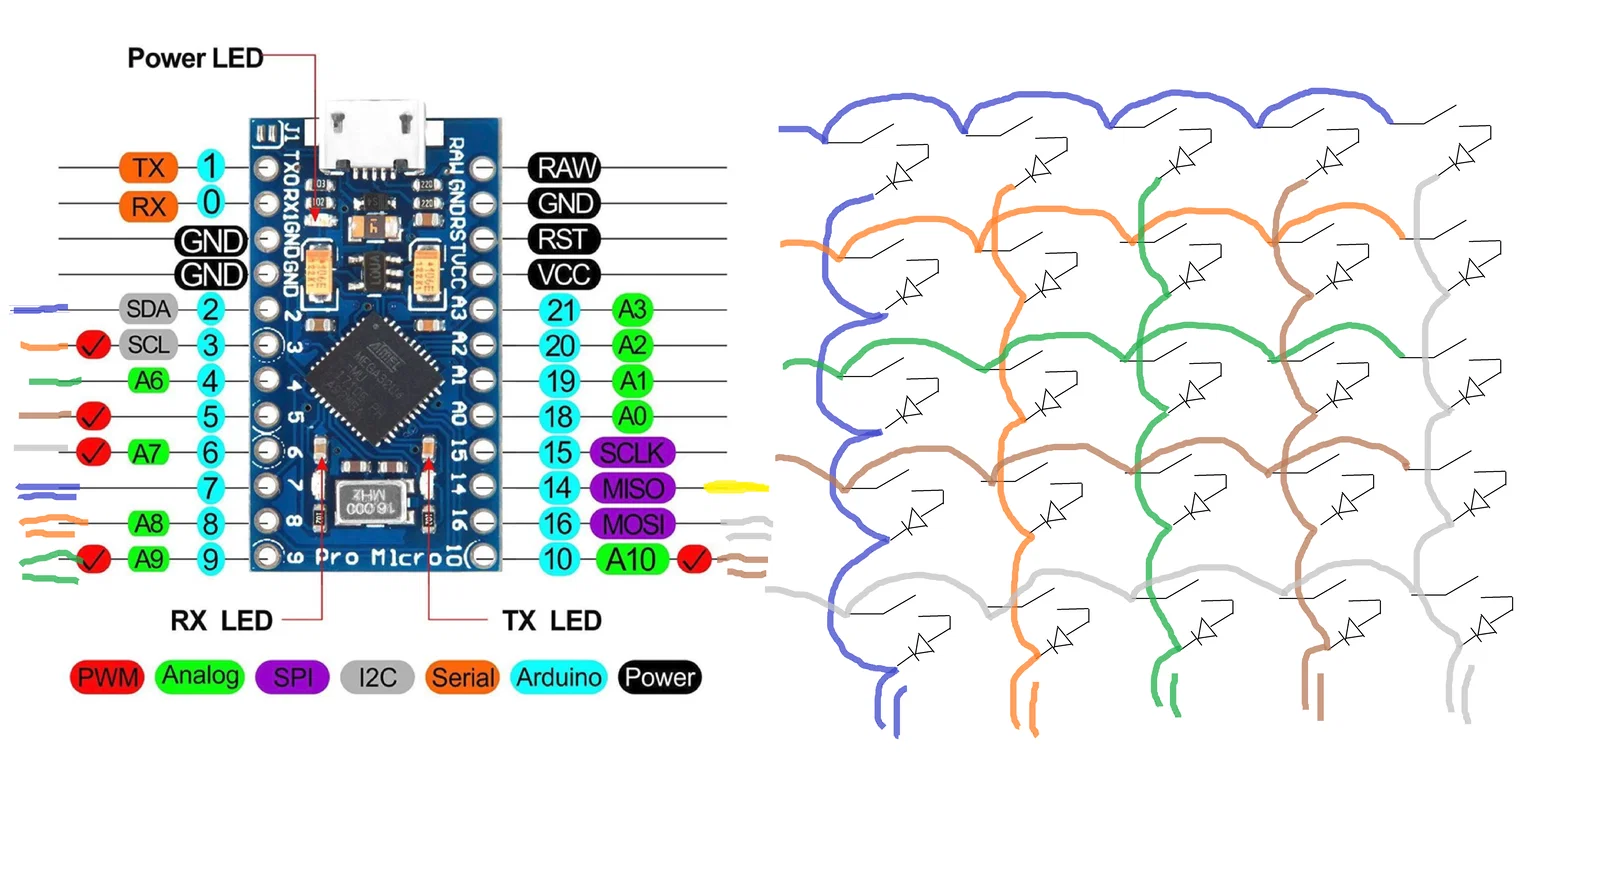
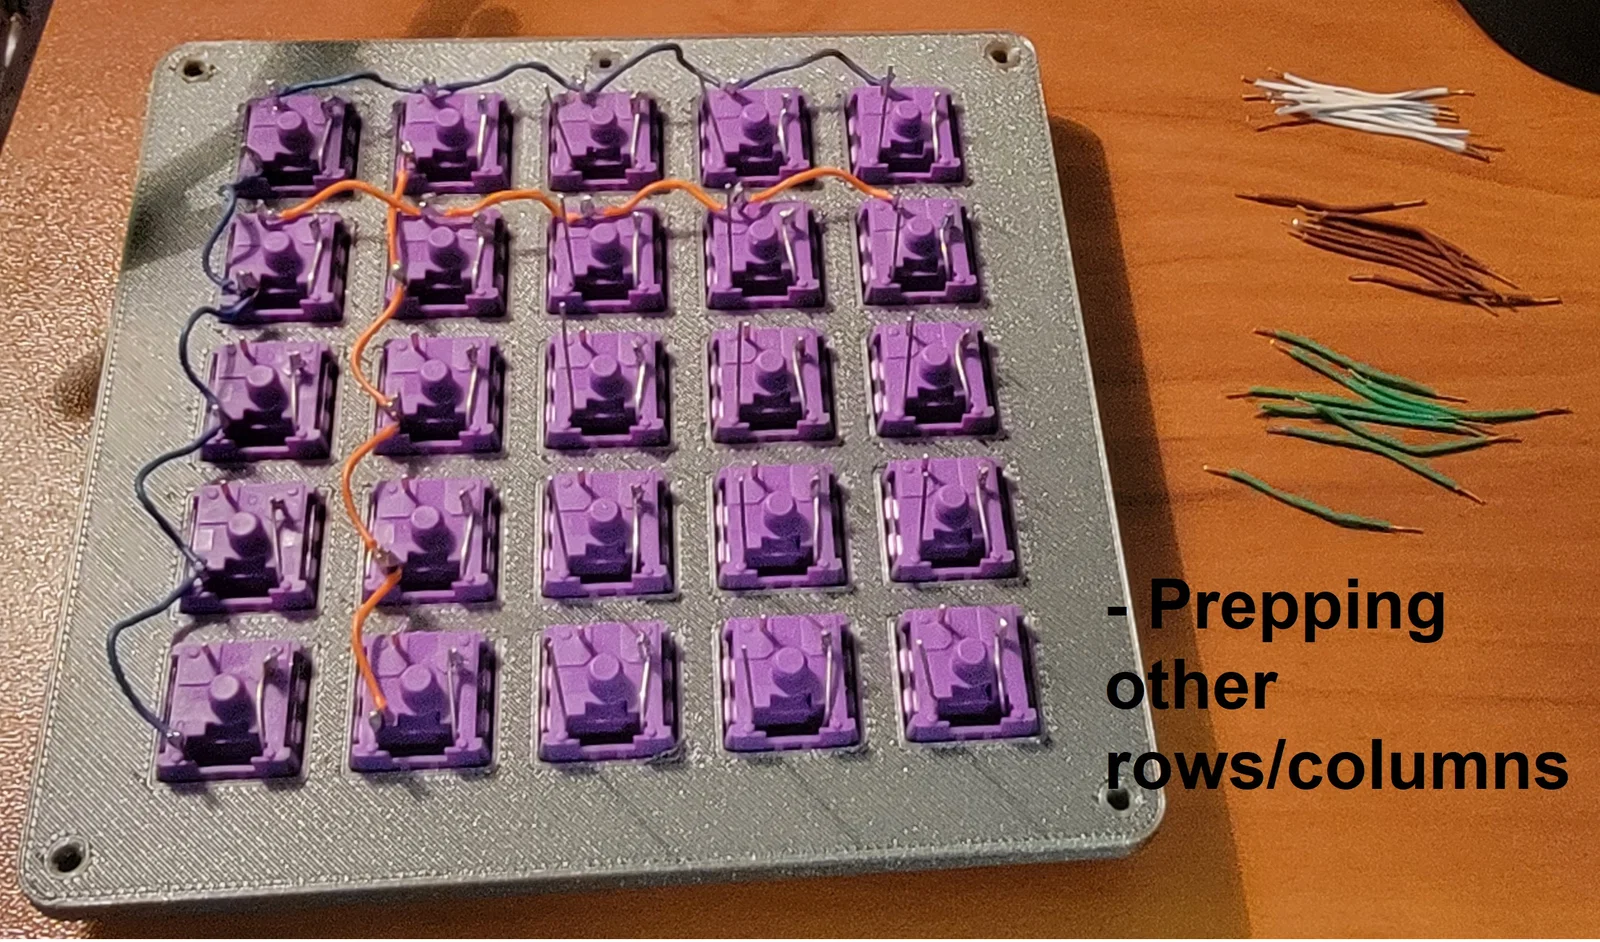
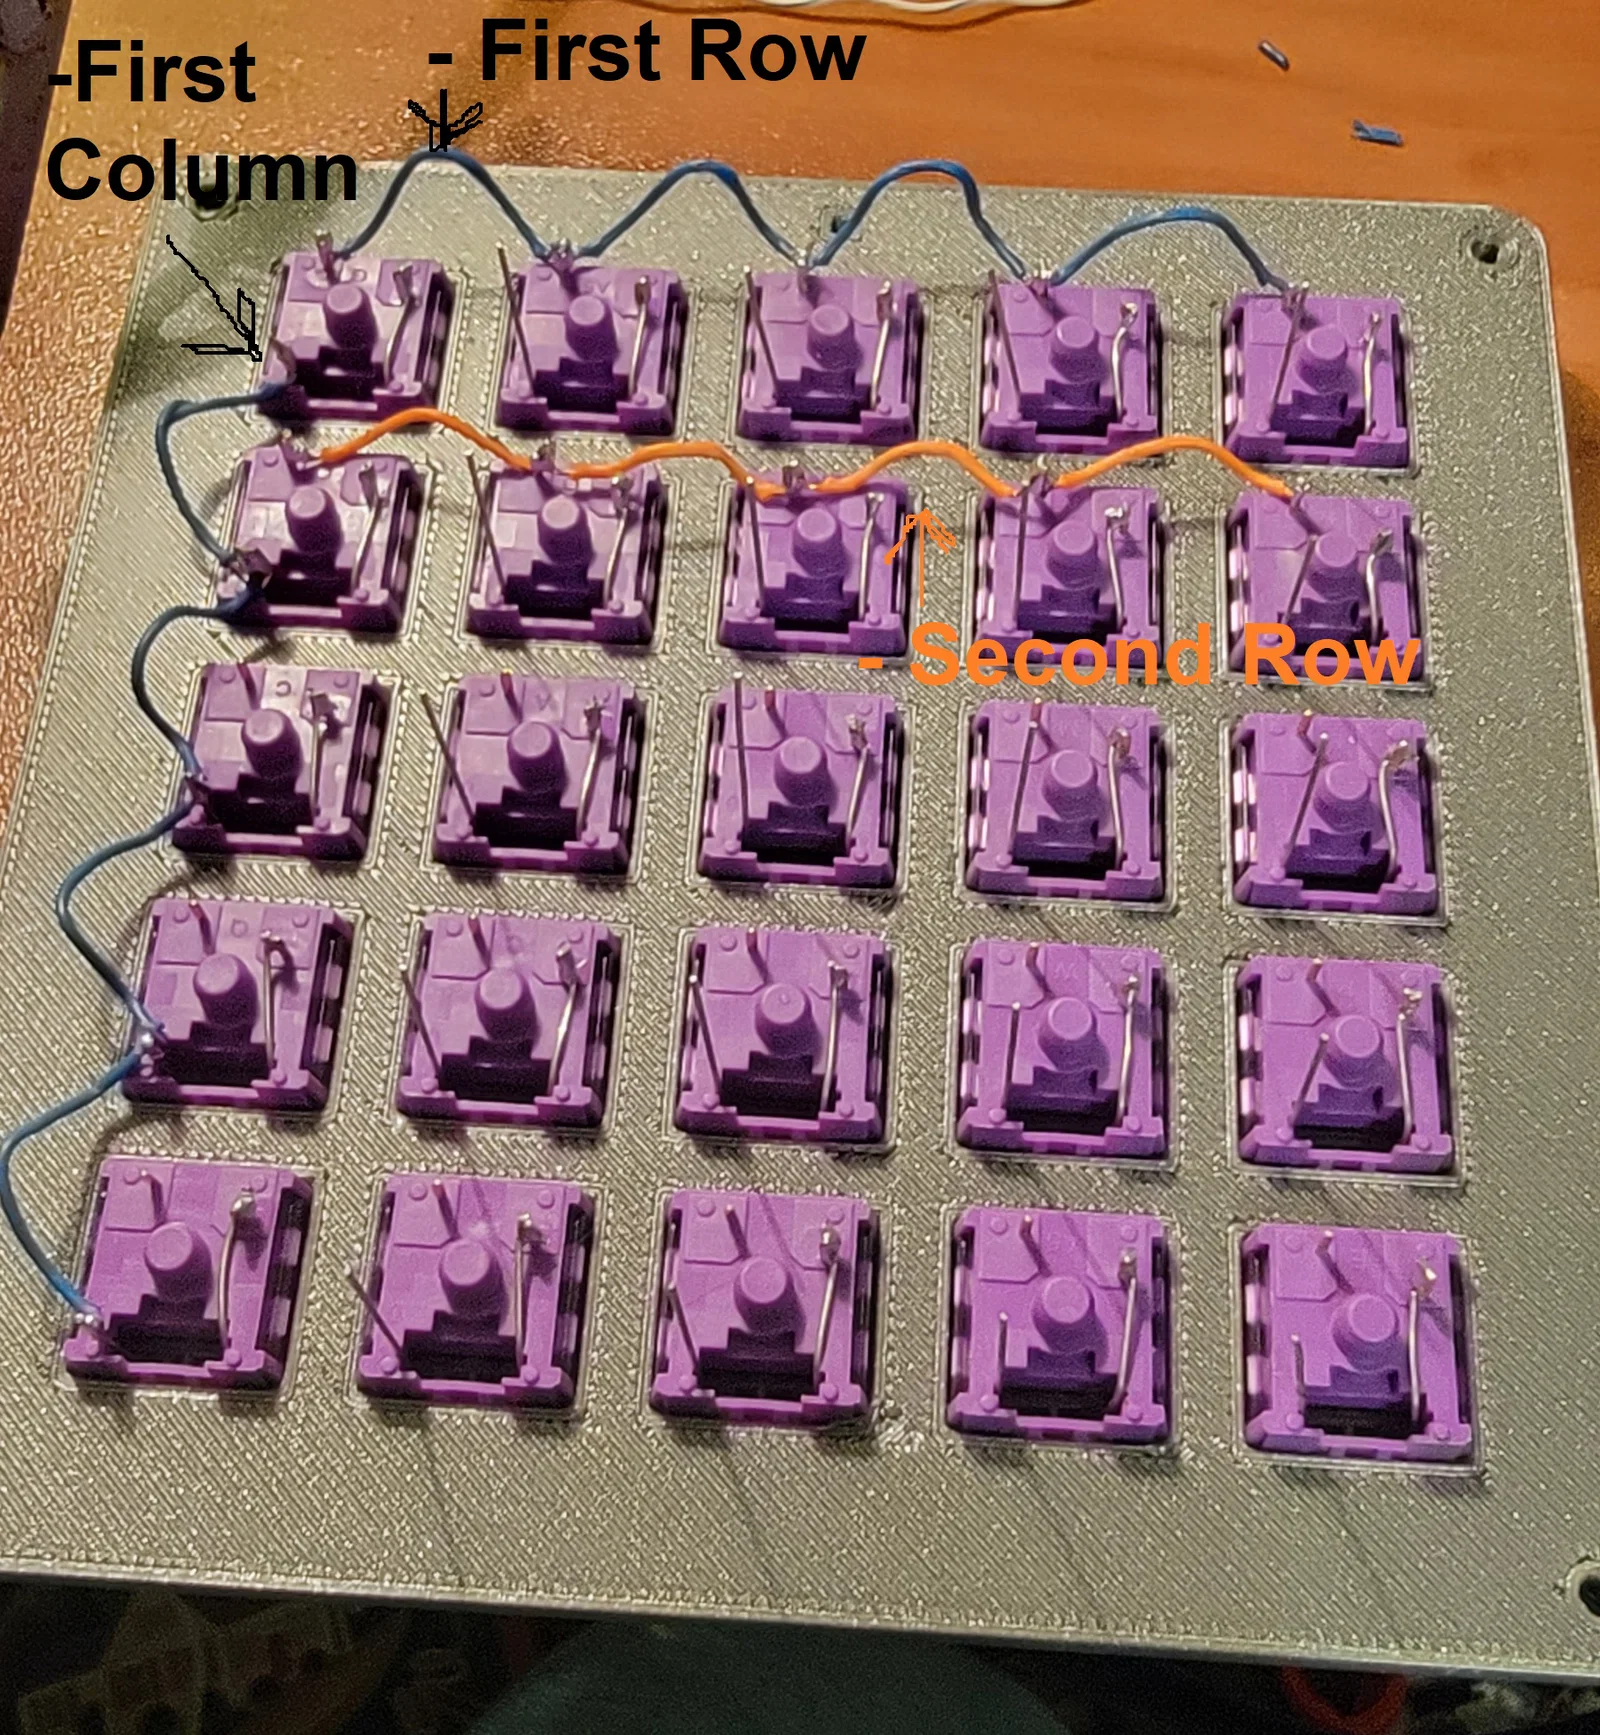
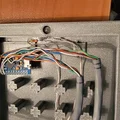
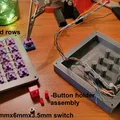
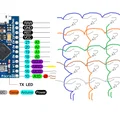
Wiring:
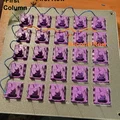
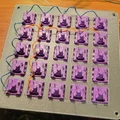
Các key switch được đi dây theo ma trận 5x5.
Các đường 1 màu là hàng (rows): Blue, Orange, Green, Brown, Grey
Các đường 2 màu là cột (columns): 2Blue, 2Orange, 2Green, 2Brown, 2Grey
Đường màu Yellow là LED Output.
Ở phần đi dây cuối cùng, mình đã đấu các cột bị ngược lại - nên nếu bạn làm theo thì các script bên dưới sẽ chạy được vì mình đã phải chỉnh cho phù hợp… Còn không thì bạn có thể cần đảo lại phím cho hai script test. (Trong script cuối, mình đã đổi lại colpins để nhìn “thuận” hơn trong code.)

Scripts:
Dưới đây là x2 script test (.ino) và script cuối cùng đang dùng.
* Serial Test Arduino Script:
Script test chỉ xuất ra Serial Monitor
#include <Keyboard.h>
#include <KeyboardLayout.h>
#include <Keyboard_da_DK.h>
#include <Keyboard_de_DE.h>
#include <Keyboard_es_ES.h>
#include <Keyboard_fr_FR.h>
#include <Keyboard_it_IT.h>
#include <Keyboard_sv_SE.h>

#include <Keypad.h>


const int ledPin = 14;// led Pin#
const byte rows = 5; //five rows
const byte cols = 5; //five columns
char keys[rows][cols] = {
  {'E','D','C','B','A'},
  {'J','I','H','G','F'},
  {'O','N','M','L','K'},
  {'T','S','R','Q','P'},
  {'Y','X','W','V','U'}
};
byte rowPins[rows] = {2, 3, 4, 5, 6}; //connect to the row pinouts of the keypad
byte colPins[cols] = {7, 8, 9, 10, 16}; //connect to the column pinouts of the keypad
Keypad keypad = Keypad( makeKeymap(keys), rowPins, colPins, rows, cols );


void setup() {
  // put your setup code here, to run once:
  Serial.begin(9600);
  pinMode(ledPin, OUTPUT);
  Keyboard.begin();
}

void loop() {
  // put your main code here, to run repeatedly:
  char key = keypad.getKey();

  if(key != NO_KEY){
    Serial.println(key);
    Keyboard.write(key);
    digitalWrite(ledPin, HIGH);
    delay(100);
    digitalWrite(ledPin, LOW);
  }
}
** Serial and Keyboard Strokes Test Arduino Script:
Script test vừa xuất ra Serial Monitor vừa nhập keystroke. Test trong Notepad.
#include <Keyboard.h>
#include <KeyboardLayout.h>
#include <Keyboard_da_DK.h>
#include <Keyboard_de_DE.h>
#include <Keyboard_es_ES.h>
#include <Keyboard_fr_FR.h>
#include <Keyboard_it_IT.h>
#include <Keyboard_sv_SE.h>
#include <Keypad.h>
//-Below is where we will define the keys
//-Variables are defined as following:
//-[keyA] [keyB] [keyC] [keyD] [keyE]
//-[keyF] [keyG] [keyH] [keyI] [keyJ]
//-[keyK] [keyL] [keyM] [keyN] [keyO]
//-[keyP] [keyQ] [keyR] [keyS] [keyT]
//-[keyU] [keyV] [keyW] [keyX] [keyY]

//------------Define 1st Row------------
//Ex: [keyA] [keyB] [keyC] [keyD] [keyE]
//--------------------------------------
char keyA = 'A';
char keyB = 'B';
char keyC = 'C';
char keyD = 'D';
char keyE = 'E';
//-Define 2nd Row-----------------------
//Ex: [keyF] [keyG] [keyH] [keyI] [keyJ]
//--------------------------------------
char keyF = 'F';
char keyG = 'G';
char keyH = 'H';
char keyI = 'I';
char keyJ = 'J';
//-Define 3rd Row-----------------------
//Ex: [keyK] [keyL] [keyM] [keyN] [keyO]
//--------------------------------------
char keyK = 'K';
char keyL = 'L';
char keyM = 'M';
char keyN = 'N';
char keyO = 'O';
//-Define 4th Row-----------------------
//Ex: [keyP] [keyQ] [keyR] [keyS] [keyT]
//--------------------------------------
char keyP = 'P';
char keyQ = 'Q';
char keyR = 'R';
char keyS = 'S';
char keyT = 'T';
//-Define 5th Row-----------------------
//Ex: [keyU] [keyV] [keyW] [keyX] [keyY]
//--------------------------------------
char keyU = 'U';
char keyV = 'V';
char keyW = 'W';
char keyX = 'X';
char keyY = 'Y';
//--------------------------------------
//-End of Defining Keys-----------------
//--------------------------------------

const int ledPin = 14;// led Pin#
const byte rows = 5; //five rows
const byte cols = 5; //five columns
char keys[rows][cols] = {
  {keyE,keyD,keyC,keyB,keyA},
  {keyJ,keyI,keyH,keyG,keyF},
  {keyO,keyN,keyM,keyL,keyK},
  {keyT,keyS,keyR,keyQ,keyP},
  {keyY,keyX,keyW,keyV,keyU}
};
byte rowPins[rows] = {2, 3, 4, 5, 6}; //connect to the row pinouts of the keypad
byte colPins[cols] = {7, 8, 9, 10, 16}; //connect to the column pinouts of the keypad
Keypad keypad = Keypad( makeKeymap(keys), rowPins, colPins, rows, cols );


void setup() {
  // put your setup code here, to run once:
  Serial.begin(9600);
  pinMode(ledPin, OUTPUT);
  Keyboard.begin();
  keypad.setDebounceTime(50);
}

void loop() {
  // put your main code here, to run repeatedly:
  char key = keypad.getKey();

  if(key != NO_KEY){
    Serial.println(key);
    Keyboard.write(key);
    digitalWrite(ledPin, HIGH);
    delay(100);
    digitalWrite(ledPin, LOW);
  }
}
*** MACRO KeyPad_Keypad-Joystick Script:
Script CUỐI cùng như bản mình lắp, đang chạy OK.
Bấm phím Win > gõ “Set up USB game controllers” > chọn controller > Properties > Test. Nó sẽ hiện trang để bạn test các input kiểu Joystick.
#include <Joystick.h>
#include <Keypad.h>

#define NUMBUTTONS 25
#define NUMROWS 5
#define NUMCOLS 5
#define statLED 14


//-Define the buttons for the macropad
byte buttons[NUMROWS][NUMCOLS] = {
  {0,1,2,3,4},
  {5,6,7,8,9},
  {10,11,12,13,14},
  {15,16,17,18,19},
  {20,21,22,23,24},
};

byte rowPins[NUMROWS] = {2,3,4,5,6}; //-Connect to the row pinouts of the macropad
byte colPins[NUMCOLS] = {16,10,9,8,7}; //-Connect to the column pinouts of the macropad

//-Initialize an instance of class NewKeypad
Keypad macroPad = Keypad( makeKeymap(buttons),rowPins, colPins, NUMROWS, NUMCOLS);


Joystick_ Joystick(JOYSTICK_DEFAULT_REPORT_ID,JOYSTICK_TYPE_GAMEPAD,
  25, 0,                  // Button Count, Hat Switch Count
  false, false, false,     // no X and Y, no Z Axis
  false, false, false,   // No Rx, Ry, or Rz
  false, false,          // No rudder or throttle
  false, false, false);  // No accelerator, brake, or steering

void setup() {

  // put your setup code here, to run once:

  // Initialize Joystick Library
  Joystick.begin();
  pinMode(statLED, OUTPUT);

}

void loop() {
  // put your main code here, to run repeatedly:
  CheckAllButtons();
  delay(0);
}

void CheckAllButtons(void) {
      if (macroPad.getKeys())
    {
        for (int i=0; i<LIST_MAX; i++)
          {
            if (macroPad.key[i].stateChanged)
              {
                switch (macroPad.key[i].kstate) {
                        case PRESSED:
                        case HOLD:
                                  Joystick.setButton(macroPad.key[i].kchar, 1);
                                  digitalWrite(statLED, HIGH);
                                  break;
                        case RELEASED:
                        case IDLE:
                                  Joystick.setButton(macroPad.key[i].kchar, 0);
                                  digitalWrite(statLED, LOW);
                                  break;
                }
              }

          }
    }

}
***Lưu ý: Hình chụp là bản prototype nên các file model up lên có thể sẽ hơi khác chút về ngoại hình.
Giấy phép

File mô hình


Chưa có bản in nào được khoe. Hãy là người đầu tiên!

Chưa có bình luận nào. Hãy là người đầu tiên!