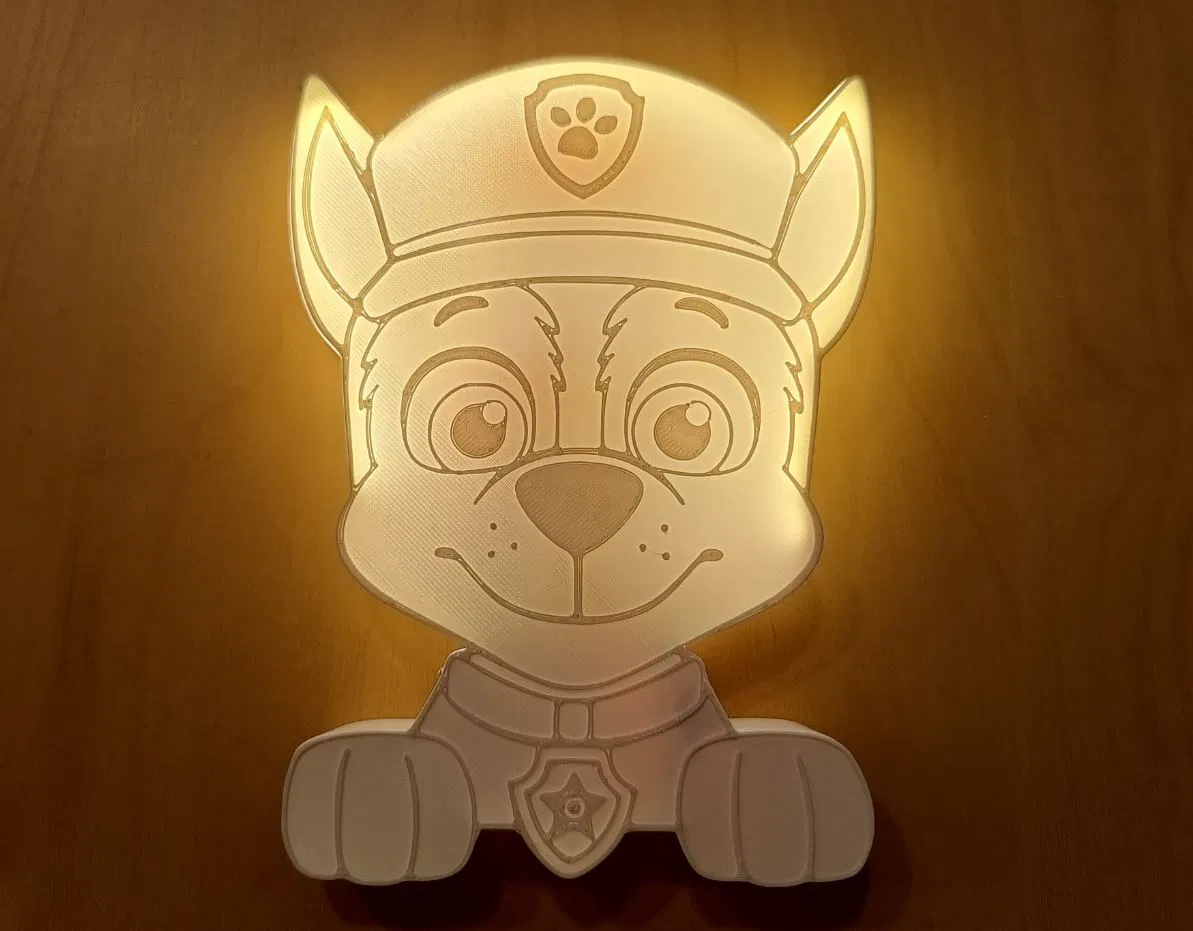
Đèn Paw Patrol – mặt Chase (bật/tắt bằng nút cảm ứng)

Mẫu đèn ngủ Paw Patrol với mặt Chase, bật/tắt bằng nút cảm ứng điện dung. Dùng pin Li-Pol, có module sạc USB-C và mạch boost 5V cho dải COB LED. Có 2 file base theo dung sai để dễ lắp.

Mô tả
Đèn ngủ mặt Chase trong Paw Patrol dùng làm đèn cho phòng em bé.
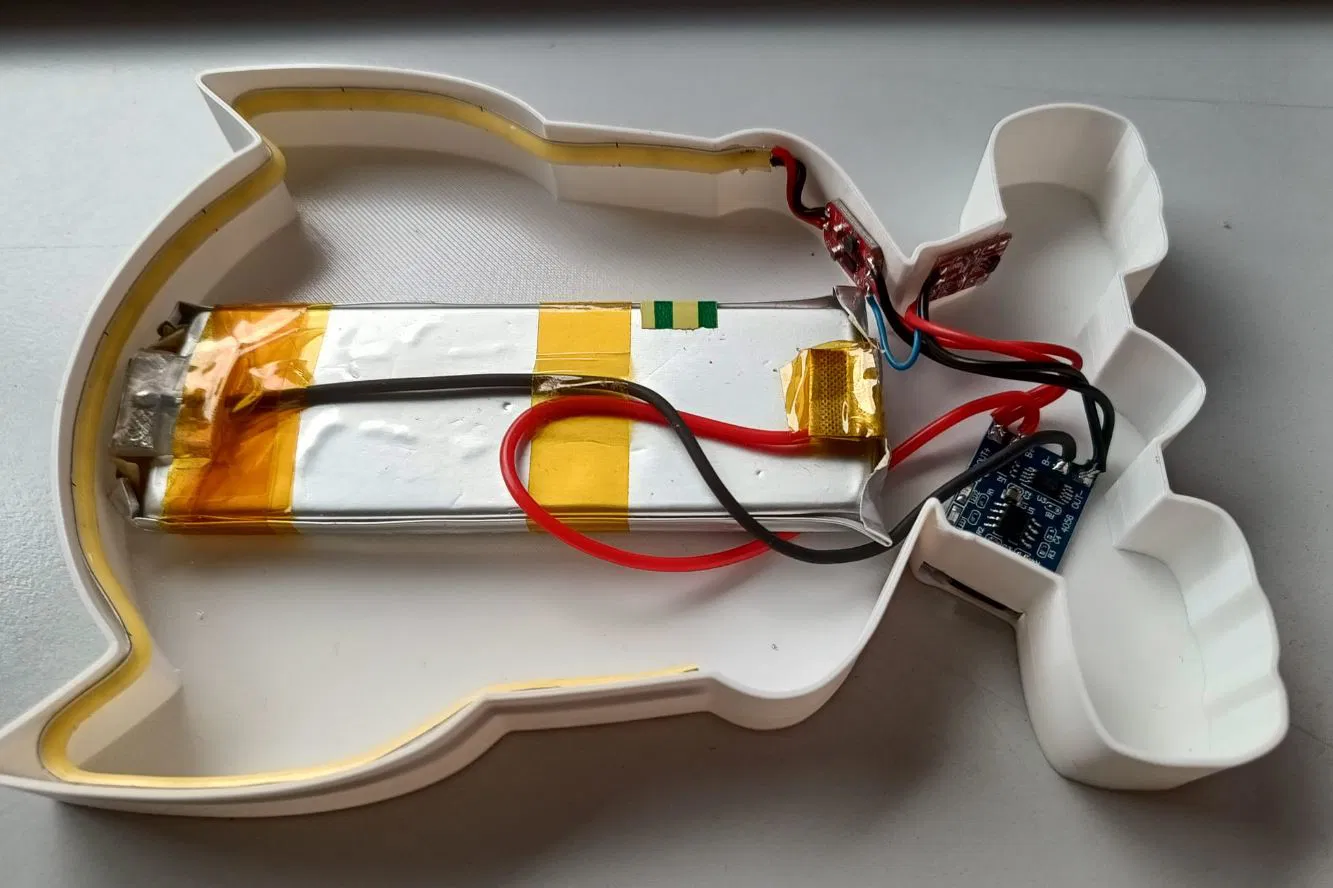
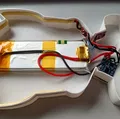
Đèn được điều khiển bằng nút cảm ứng điện dung (capacitive button), nút này sẽ điều khiển mạch tăng áp (step-up/boost converter) cho dải LED. Trong đèn còn có module sạc pin Li-Pol USB-C để sạc pin mà không cần tháo/mở đèn — lỗ USB-C nằm phía trên chân trước bên trái.
3D in:
Lamp paw patrol - chase face.stl
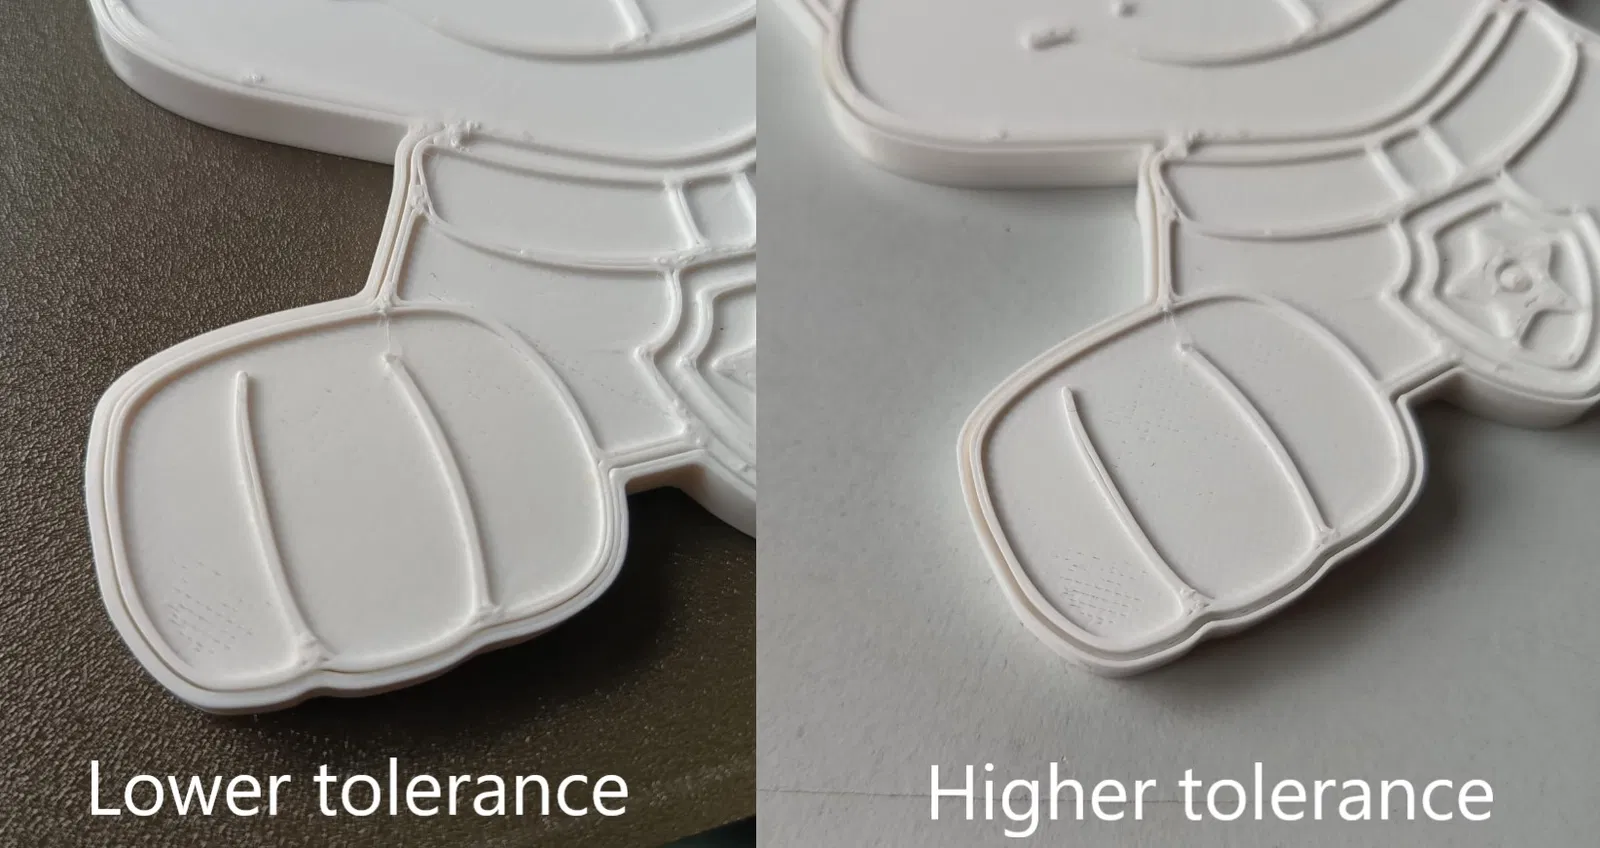
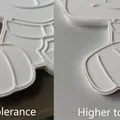
Lamp paw patrol - base - lower tolerance.stl - dung sai/khe hở nhỏ hơn, lắp vừa khít chính xác.
Lamp paw patrol - base - higher tolerance.stl - dung sai/khe hở lớn hơn, dành cho máy in 3D ít được tinh chỉnh, in không được chính xác bằng.
Hardware:
Pin Li-Pol bất kỳ, ví dụ: https://www.laskakit.cz/baterie-li-po-3-7v-2000mah-lipo/
Module sạc pin có USB-C: https://www.laskakit.cz/nabijecka-li-ion-clanku-tp4056-s-ochranou-usb-c/
Nút cảm ứng điện dung: https://www.laskakit.cz/arduino-kapacitni-dotykove-tlacitko-ttp223/
Mạch boost (step-up) cho dải LED: https://www.laskakit.cz/laskakit-bat-boost-menic-5v-0-6a-dio6605b/
Dải LED COB 5V (mình chọn loại 5mm): https://www.aliexpress.us/item/3256805774235876.html
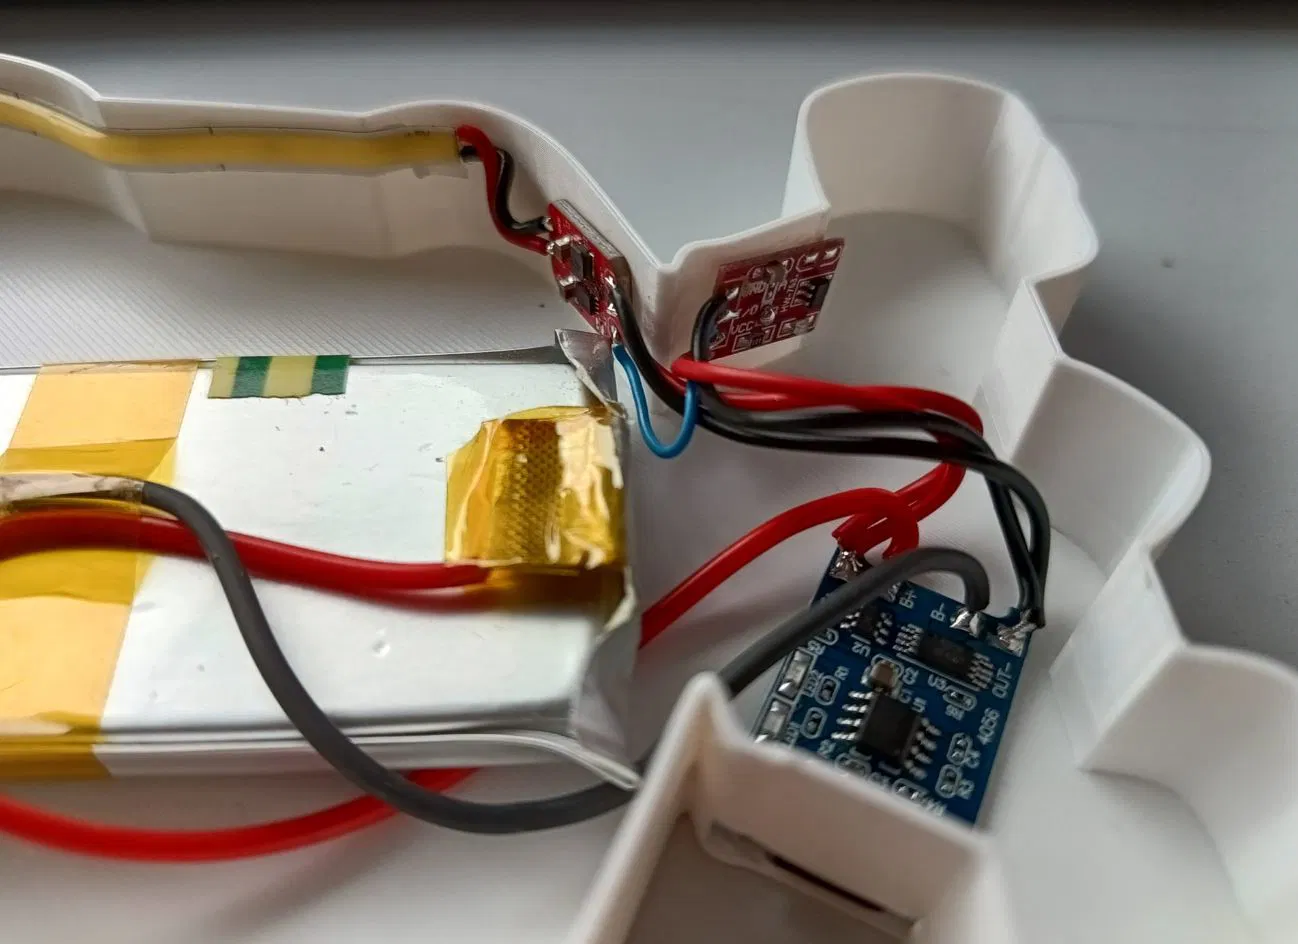
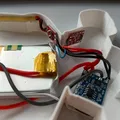
Đấu nối:
Trên mạch boost, cắt/cạo đứt cầu hàn (solder bridge) có ký hiệu EN. Như vậy mạch sẽ được điều khiển từ nút.
Trên nút cảm ứng điện dung, chập/hàn cầu hàn ký hiệu B, để cầu hàn A hở (không nối). Nút sẽ hoạt động kiểu “có nhớ” (memory).
Hàn pin vào module sạc pin — cực dương vào B+, cực âm vào B-
Từ OUT+ của module sạc, hàn dây sang VCC của nút cảm ứng và đồng thời sang IN của mạch boost cho dải LED
Từ OUT- của module sạc, hàn dây sang GND của nút cảm ứng và đồng thời sang GND của mạch boost cho dải LED
Từ chân I/O của nút cảm ứng, hàn dây sang EN của mạch boost
Hàn 5+ của dải LED vào OUT của mạch boost
Hàn GND của dải LED vào GND của mạch boost
Chức năng:
Khi đưa tay lại gần nút cảm ứng điện dung, LED đỏ trên nút sẽ sáng, mạch boost sẽ nâng điện áp pin (từ 3.7–4.2V) lên 5V cho dải LED và dải LED sẽ sáng.
Đưa tay lại gần nút lần nữa, LED đỏ trên nút sẽ tắt và dải LED cũng tắt theo.
Ghi chú:
Dòng tối đa từ mạch là 600mA, tương ứng chiều dài dải LED khoảng 36cm. Nếu vượt quá dòng, mạch boost sẽ tự động ngắt.
Bạn cũng có thể dùng dải LED khác, nhưng nhớ đúng điện áp cấp 5V và mức tiêu thụ tối đa 600mA.
Bản tiếng Anh (English version):
The lamp with the face of Chase from Paw Patrol serves as a lamp for the children's room.
It is controlled by a capacitive button that controls the step-up inverter for the LED strip. The lamp also includes a USB-C Li-Pol battery charger to charge the battery without having to disassemble the lamp - the hole for USB-C is located above the left paw.
3D printing:
Lamp paw patrol - chase face.stl
Lamp paw patrol - base - lower tolerance.stl - lower tolerance/will, fits exactly.
Lamp paw patrol - base - higher tolerance.stl - higher tolerance/will, designed for less tuned 3D printers that don't print as accurately.
Hardware:
Any Li-Pol battery, for example https://www.laskakit.cz/baterie-li-po-3-7v-2000mah-lipo/
Battery charging module with USB-C https://www.laskakit.cz/nabijecka-li-ion-clanku-tp4056-s-ochranou-usb-c/
Capacitive button https://www.laskakit.cz/arduino-kapacitni-dotykove-tlacitko-ttp223/
Boost converter for LED ribbon https://www.laskakit.cz/laskakit-bat-boost-menic-5v-0-6a-dio6605b/
5V COB LED strip (I chose 5mm). https://www.aliexpress.us/item/3256805774235876.html
Wiring:
On the boost converter, cut the solder bridge marked EN. It will be controlled from the button.
On the capacitive button, short/solder the solder bridge marked B, leave solder bridge A disconnected. It will become a memory button.
Solder the battery to the battery charging module - Plus to B+, Minus to B-
From the OUT+ of the battery charger module, connect the wire to the VCC of the capacitive button and also the IN of the voltage boost module for the LED strip
From the OUT- module of the battery charger, connect the wire to the GND of the capacitive button and at the same time to the GND of the voltage boost module for the LED strip.
From the I/O of the capacitive button, solder the wire to the EN of the voltage boost module.
Solder 5+ from the LED strip to the OUT of the voltage boost module
Solder GND from the LED strip to GND of the voltage boost module
Function:
When approaching the capacitive button, the red LED on the button will light up, the boost converter will increase the battery voltage (from 3.7 - 4.2) to 5V for the LED strip and it will light up.
By repeatedly approaching the capacitive button, the red LED on the button will turn off and so will the LED strip.
Notes:
The maximum current from the inverter is 600mA, this corresponds to an LED strip length of approximately 36cm.If the current is exceeded, the boost inverter will automatically switch off.
You can also use other LED strips, but please observe the supply voltage of 5V and the maximum consumption of 600mA.
Giấy phép
Tác phẩm này được cấp phép theo
Creative Commons — Attribution — Noncommercial — Share AlikeCC-BY-NC-SA

File mô hình


Chưa có bản in nào được khoe. Hãy là người đầu tiên!

Chưa có bình luận nào. Hãy là người đầu tiên!