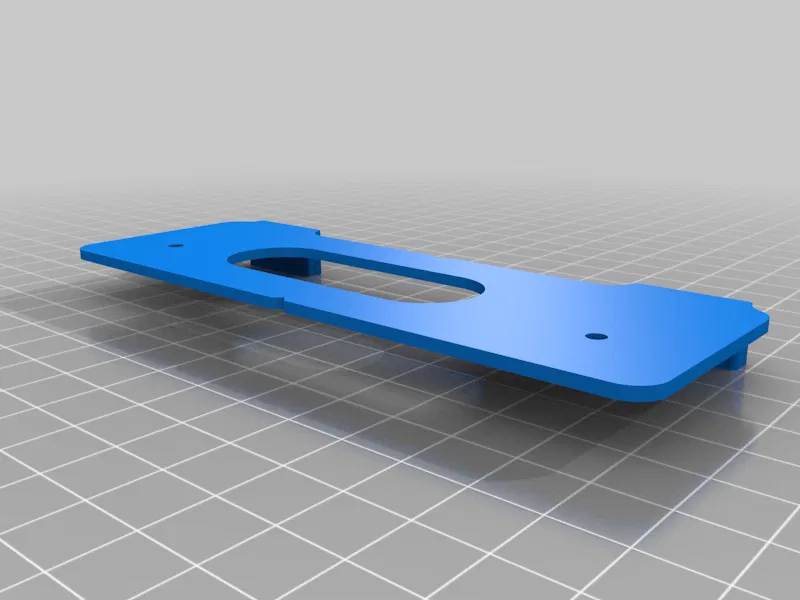
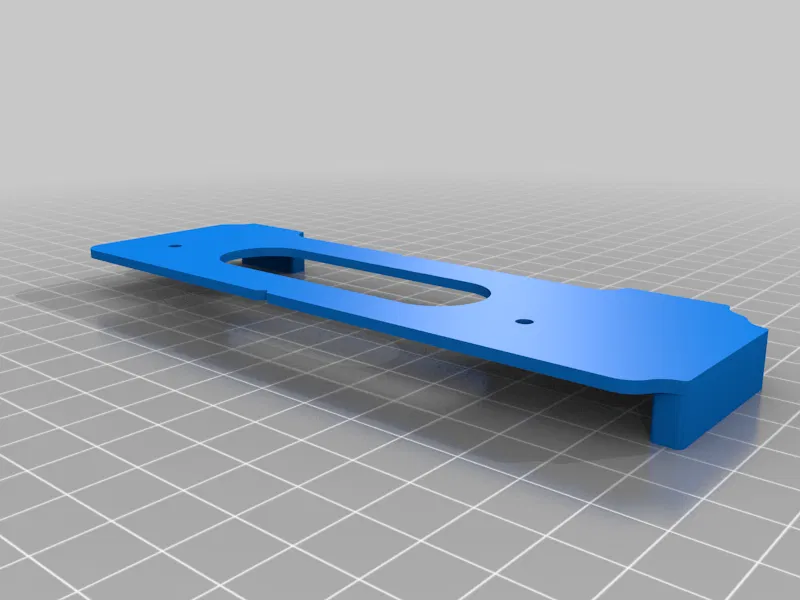
Khuôn mẫu khoan lỗ tay nắm ENERYDA cho tủ IKEA LERHYTTAN

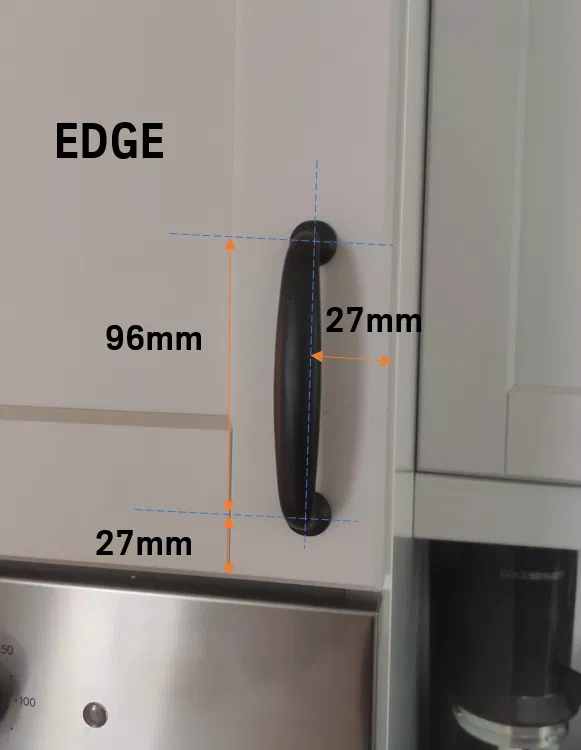
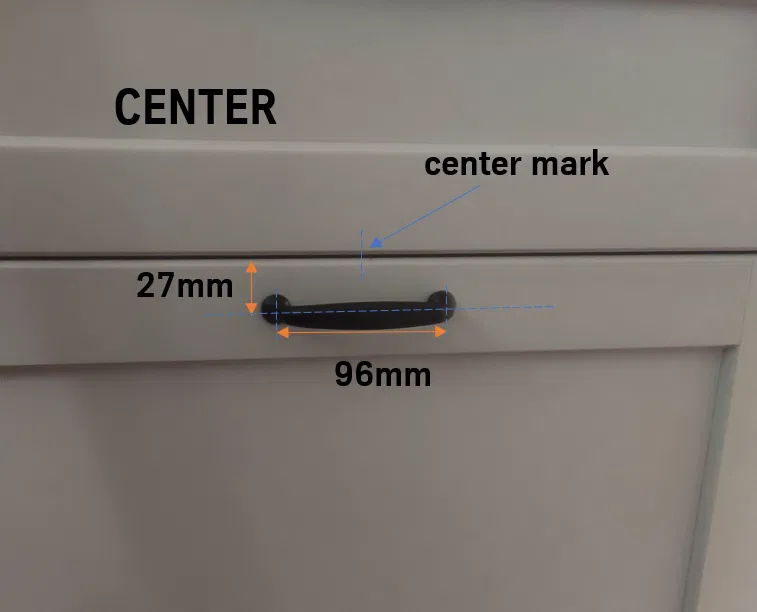
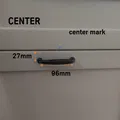
Cái này là khuôn mẫu để khoan lỗ trên cánh tủ bếp IKEA METHOD, dùng cho mẫu LERHYTTAN với tay nắm ENERYDA. Khoảng cách giữa các lỗ tay nắm là 96mm, và tay nắm sẽ cách mép ngoài 27mm. Hướng dẫn chi tiết cách canh chỉnh cho tay nắm ở cạnh hoặc ở giữa.

Mô tả
🇬🇧 Description (English)
Template for drilling holes on IKEA METHOD kitchen fronts with LERHYTTAN design and ENERYDA handles. The distance between the handle holes is 96 mm (for 112 mm handles), and the handles are positioned 27 mm from the outer edge of the frame.
Usage – Edge Handles
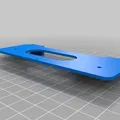
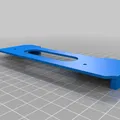
For handles mounted near the edges: Simply push all positioning blocks of the template to the edges of the door, drill using a 3 mm bit, remove the template, then enlarge the holes to 4 mm. For doors that are flipped, you can also use the inside of the door as the reference surface.
Usage – Center Handles
For handles centered on drawers: Mark the center of the drawer front with a pencil. Push the template against the upper edge and align the center triangle of the template with your mark. Drill with a 3 mm bit, remove the template, then enlarge the holes to 4 mm. For flipped doors, again use the inside of the door for alignment.
Tip
You can also print only the edge template, drill all edge-mounted handles, and then break off one of the blocks to “convert” it into a center template.
🇩🇪 Beschreibung (Deutsch)
Bohrschablone für IKEA METHOD Küchen mit LERHYTTAN Front und ENERYDA Griffen. Der Lochabstand beträgt 96 mm (für 112 mm Griffe) und die Griffe sitzen 27 mm von der Außenkante des umlaufenden Rahmens.
Verwendung – Edge-Variante (Kanten-Griffe)
Für Griffe, die an den Ecken montiert werden: Schablone einfach mit den Anlageklötzen an die Kanten drücken, mit einem 3 mm Holzbohrer vorbohren, anschließend die Löcher mit einem 4 mm Bohrer aufweiten. Bei gedrehten Türen kann die Schablone auch an der Innenseite angelegt werden.
Verwendung – Center-Variante (Innen-/Mittel-Griffe)
Für Griffe, die mittig an Schubkästen angebracht sind: Mitte der Front markieren, Schablone mit den Klötzen an die obere Kante anlegen und das kleine Mittel-Dreieck auf die Markierung ausrichten. Mit 3 mm vorbohren, dann mit 4 mm aufbohren. Auch hier gilt: Bei gedrehten Türen die Schablone einfach innen anlegen.
Tipp
Nur die Ecken-Schablone drucken, alle Eckgriffe montieren und anschließend einen Block abknipsen, um die Schablone für mittige Griffe zu erhalten.
Giấy phép

File mô hình


Chưa có bản in nào được khoe. Hãy là người đầu tiên!

Chưa có bình luận nào. Hãy là người đầu tiên!