F3D
Nhà Phố Hà Lan 1

19 images

Large file collection Miniatures

Nhà Phố Hà Lan

By MiniMakerspace

Downloads
533
Likes
140
Views
2,773

Files 36 8.9 MB

  • Building_1_Windows_0.2mm_PLA_MK3S_11m_1766658351.gcodeGCODE · 239 KB
  • Building_1_Front_0.2mm_PLA_MK3S_24m_1766658352.gcodeGCODE · 425.1 KB
  • Building_1_Back_0.2mm_PLA_MK3S_56m_1766658353.gcodeGCODE · 390.2 KB
  • Building_2_Windows_0.2mm_PLA_MK3S_17m_1766658354.gcodeGCODE · 368.5 KB

Make a variant with AI

Build another version of this model.

Open Studio

Details

Model ID
#81267
Category
Miniatures
Published

Description

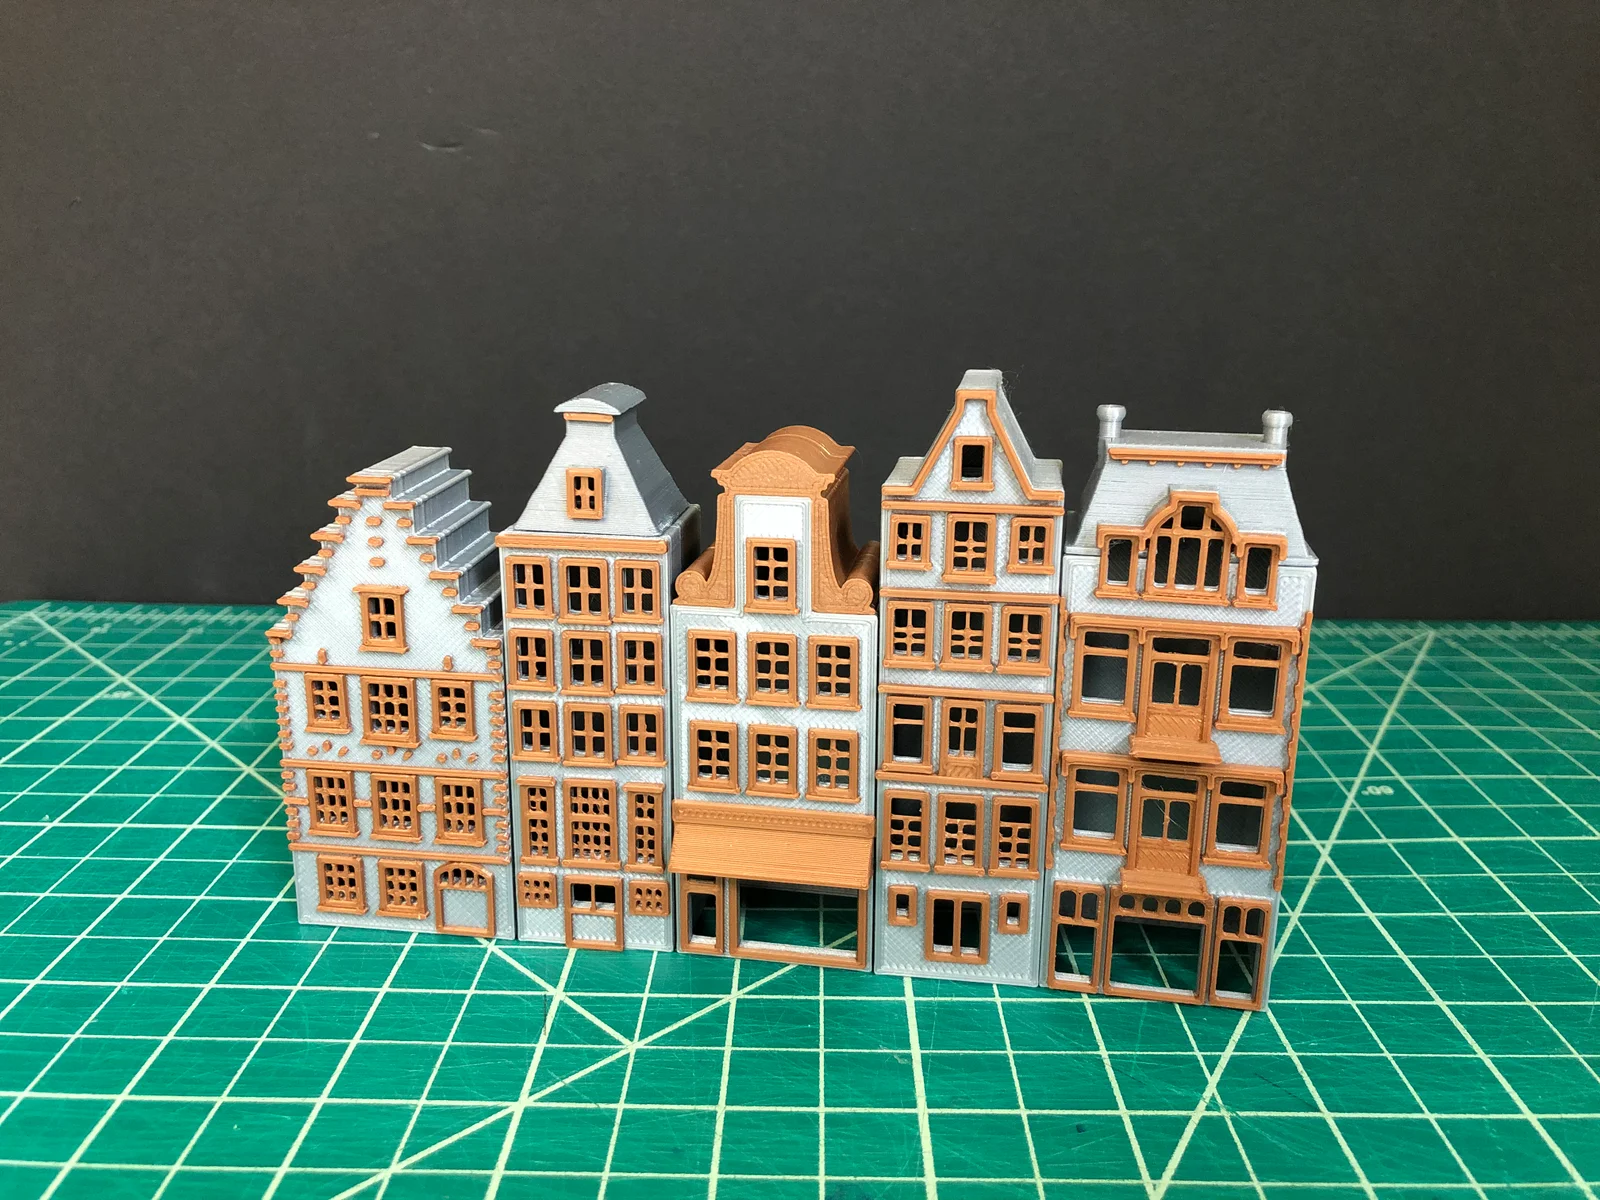
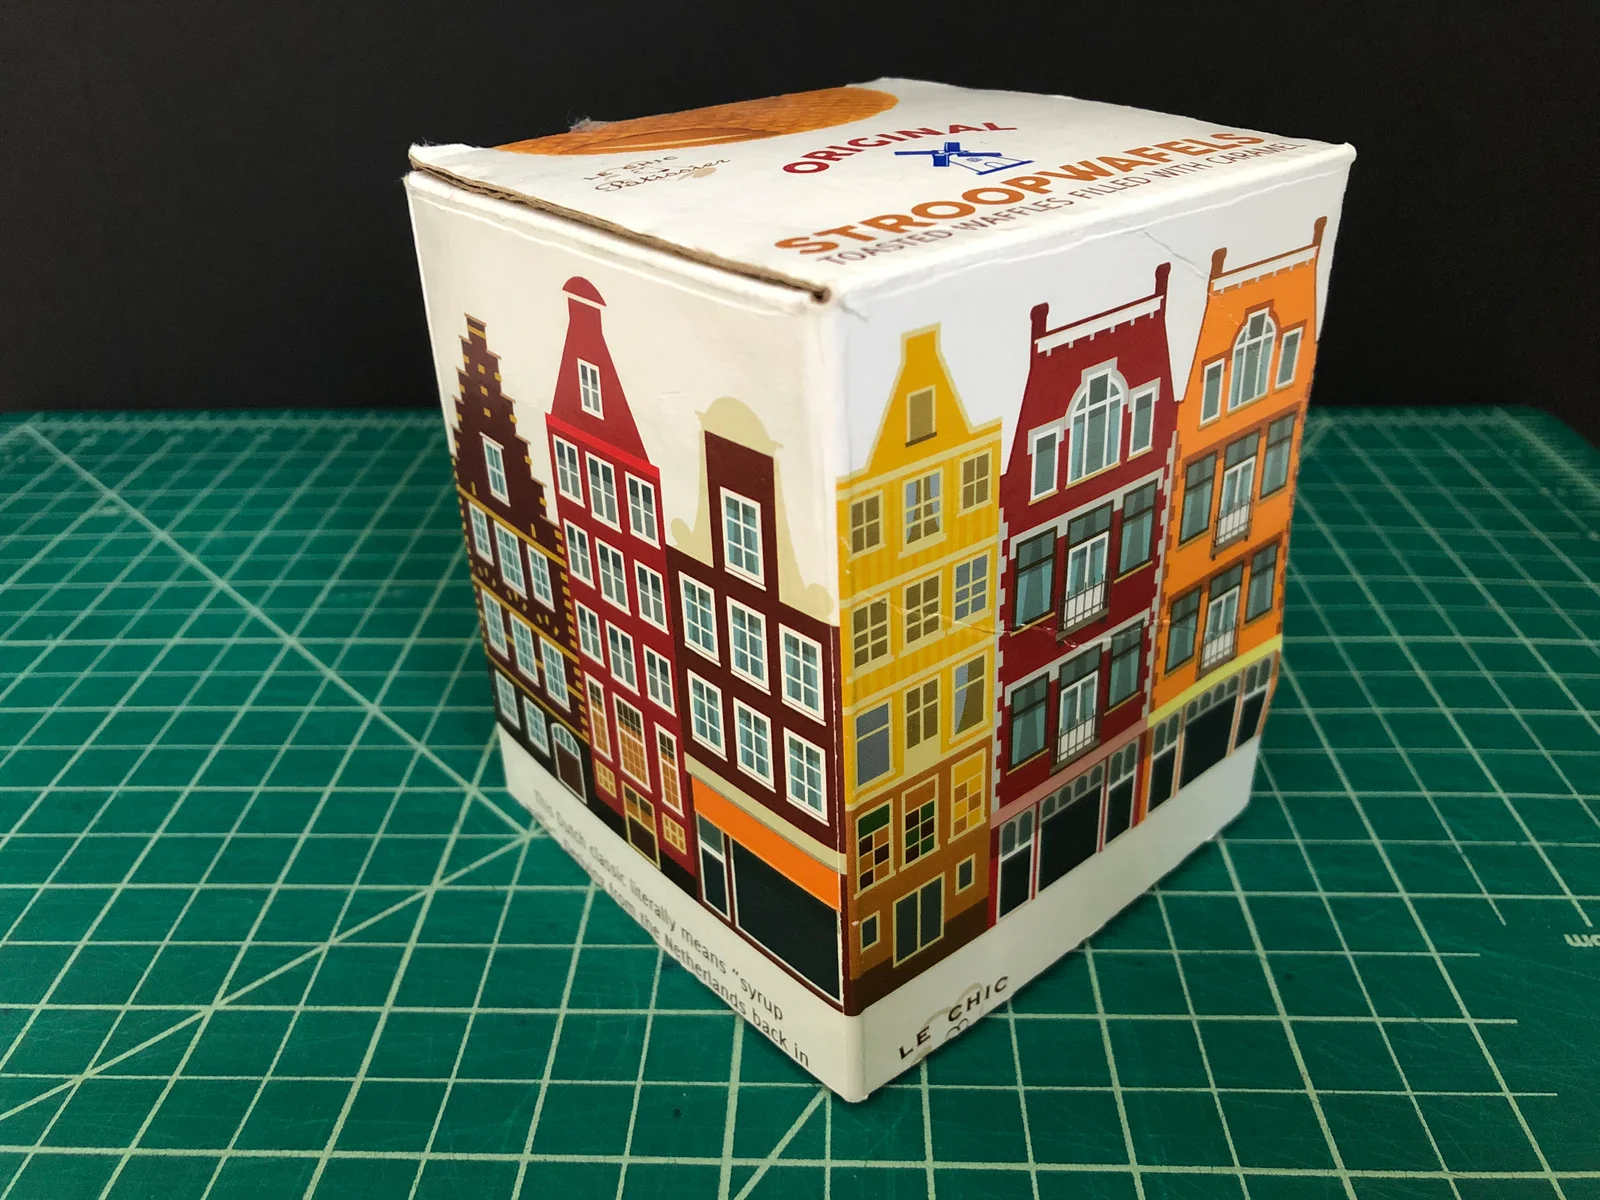
I modeled the Dutch row houses featured on the Stroopwafels box. These models are the same size as the picture on the box and roughly 1∶160 scale (n scale) to a real building.  To create the models follow the steps below:

Note 1: the buildings are shown in the image from left to right as Building 3, Building 4, Building 5, Building 1, and Building 2.

Note 2: the windows can be difficult to print, make sure the print bed is level and has good adhesion. 

Building 1:

  1. Print the windows. If they are not printing well try scaling up the size of the model.
  2. Print the front. To get the best surface finish on the front make sure there are one or two layers of infill.
  3. Print the back.
  4. Superglue the windows onto the front of the building. 
  5. Superglue the front to the back of the building. 

Building 2: 

  1. Print the windows. If they are not printing well try scaling up the size of the model.
  2. Print the top and make sure to enable supports for this piece. 
  3. Print the front. To get the best surface finish make sure there are one or two layers of infill.
  4. Print the back. 
  5. Superglue the windows (except for the top one) onto the front of the building. 
  6. Superglue the front to the back of the building. 
  7. Superglue the top onto the back/front. 
  8. Superglue the top set of windows onto the top/front. 

Building 3: 

  1. Print the windows. If they are not printing well try scaling up the size of the model.
  2. Print the front. To get the best surface finish make sure there are one or two layers of infill. A filament change can be added to make the front details a different color, if these details are not printing well try scaling up the model. 
  3. Print the back. 
  4. Superglue the windows onto the front of the building. 
  5. Superglue the front to the back of the building. 

Building 4: 

  1. Print the windows. If they are not printing well try scaling up the size of the model.
  2. Print the top and make sure to enable all supports for this piece. 
  3. Print the front. To get the best surface finish make sure there are one or two layers of infill.
  4. Print the back. 
  5. Superglue the windows (except for the top one) onto the front of the building. 
  6. Superglue the front to the back of the building. 
  7. Superglue the top onto the back/front. 
  8. Superglue the top set of windows and the top trim to the top. 

Building 5: 

  1. Print the windows. If they are not printing well try scaling up the size of the model.
  2. Print the top front face down. 
  3. Print the front. To get the best surface finish make sure there are one or two layers of infill.
  4. Print the back. 
  5. Superglue the windows onto the front of the building. 
  6. Superglue the front to the back of the building. 
  7. Superglue the top onto the back/front. Put the side of the top that was attached to the bed front-facing for the best surface finish. 

These models were printed on an Anycubic Mega Zero 2.0 with a 0.4 mm nozzle in HATCHBOX PLA filament.

Read more Show less

Print spec

Formats
gcodestl
Model files
36
Total size
8.9 MB
Largest file
1.4 MB

0 comments

See all