
F3D
Spring Loaded Variable Height Cnc Dust Shoe for OpenBuilds… 11 / 4

4 images

DIY

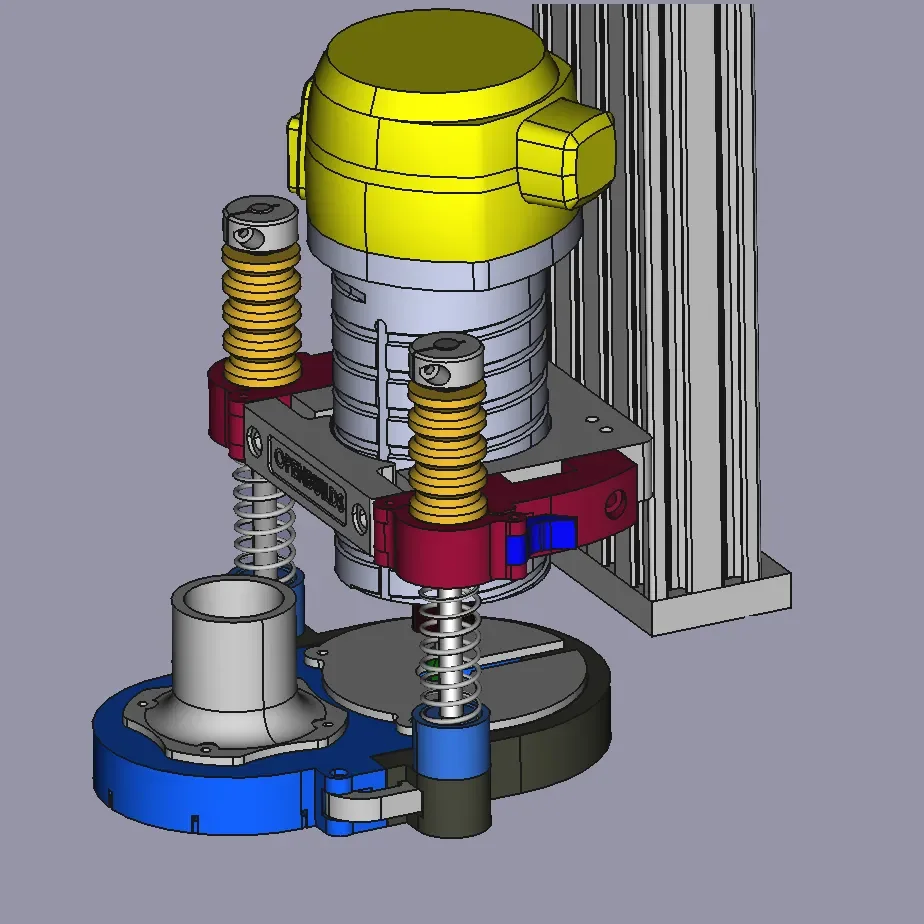
Spring Loaded Variable Height Cnc Dust Shoe for OpenBuilds Cnc.

By DanielFreche_1407581

Downloads
76
Likes
12
Views
694
Comments
3

Files 13 13.1 MB

  • Spring_Loaded_Dustshoe_Open_Builds-OpenBuild_Spring_AssyBearing_Latch_1766318849.stlSTL · 19.4 KB
  • Spring_Loaded_Dustshoe_Open_Builds-OpenBuild_Spring_AssyFixed_Bearing_Mount_1766318850.stlSTL · 362.9 KB
  • Spring_Loaded_Dustshoe_Open_Builds-OpenBuild_Spring_AssyBearing_Swing_Mount_1766318851.stlSTL · 255.7 KB
  • Spring_Loaded_Dustshoe_Open_Builds-OpenBuild_Spring_AssyAdjustable_Bearing_Housing_1766318852.stlSTL · 935.2 KB

Make a variant with AI

Build another version of this model.

Open Studio

Description

This design allows for an adjustable low profile floating dust shoe, which is intended for use with the OpenBuild Cnc's.  FreeCad files have been provide to allow you to make modifications for additional  dust collector options or to facilitate various mounts.  The current model allows for 1 ¼  Shop Vacuum Connector

Build Materials:

  • 8: M3 x 10mm Screws
  • 2: M3 x 15mm Screws
  • 4: M3 x 25mm Screws
  • 8: M3 Nuts
  • 6: M3 Brass Knurl Insert Nuts Metric Threaded (Outside diameter: 4.2/3mm)
  • 2: 8.0mm Linear Motion Rods 146.00mm/5.75 inch long
  • 2: Compression springs OD. 0.75 inch., Length 3.25 inch. 0.75 Max Compression
  • Brush Weather Stripping, 11/32 inch x 11/32 inch
  • 4: 1/8 inch Dia.  x 3/16 inch long Neodymium Magnets
  • Optional 1/8 inch Clear Polycarbonate
  • Needle and Nylon thread.

Assembly Notes:

  1. Print out the STL models.
  2. Insert magnets with a small amount of CA glue.
  3. Insert the brass inserts into the models.
  4. Attach the weather strip to the Brush Pallet.  The weather strip I used had an adhesive back, however included holes on the brush pallet to allow the stripping to be secured using a nylon thread.  After securing the adhesive strip with the nylon thread, place a drop of CA glue bound threads.
  5. Assemble the parts grouped in the Openbuild Mount Assembly folder.  Next, mount the assemblies to the OpenBuild Spindle Mount.
  6. Assemble the parts grouped in the Spring Assembly folder.  Once the plunger is assemble screw it into the Plunger Pallet Mount.
  7. Assemble the parts grouped in the Pallet Assembly folder.

Overall Impression:

This dust boot worked well for me, prior to updating my CNC to a spindle.  It provided me the ability to adjust for multiple cut plans and quickly change out bits by removing the pallet.  My only criticism was when it came to adjusting the height, I feel I should have arranged the latches to allow additional clearance.

Printer Settings:

Layer Height : 0.2

Infill : 50%

Material : PLA

Supports : See File Notes.

Read more Show less

Print spec

Formats
fcstdstlsvg
Model files
13
Total size
13.1 MB
Largest file
7.7 MB

3 comments

See all