



HiveBox - Hệ thống lưu trữ mô-đun hình lục giác đa năng
 ByVinors3DLabLikes393Downloads1K
Build another version of this model.
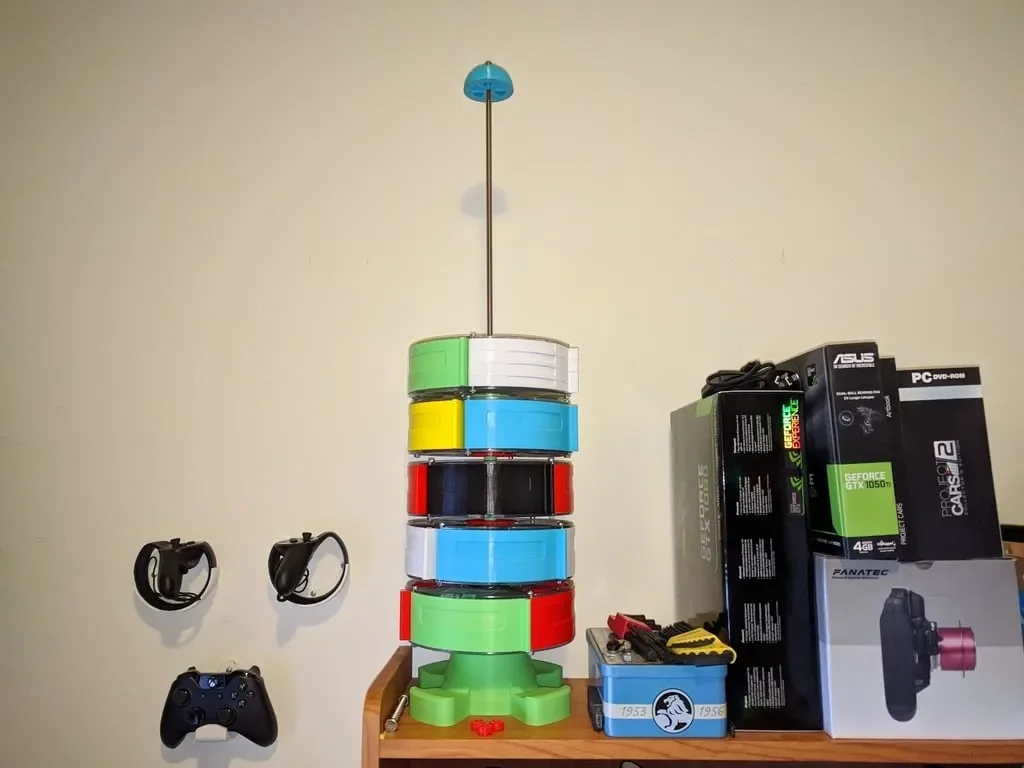
I looked around for a decent base for a stack of Spool Drawer's and wasn't a fan of what was out there. My first crack at designing my own was way too flimsy and it quickly became a leaning tower. This new version is much more stable and keeps the stack upright.
This is based around a length of M8 (8mm diameter) Threaded Rod as a spine and utilises a couple of M8 Nuts to secure everything. The base itself is in two parts allowing the rod to be secured with a nut in 2 places, keeping everything much more rigid.
Parts Required:
Assembly:
-Base-
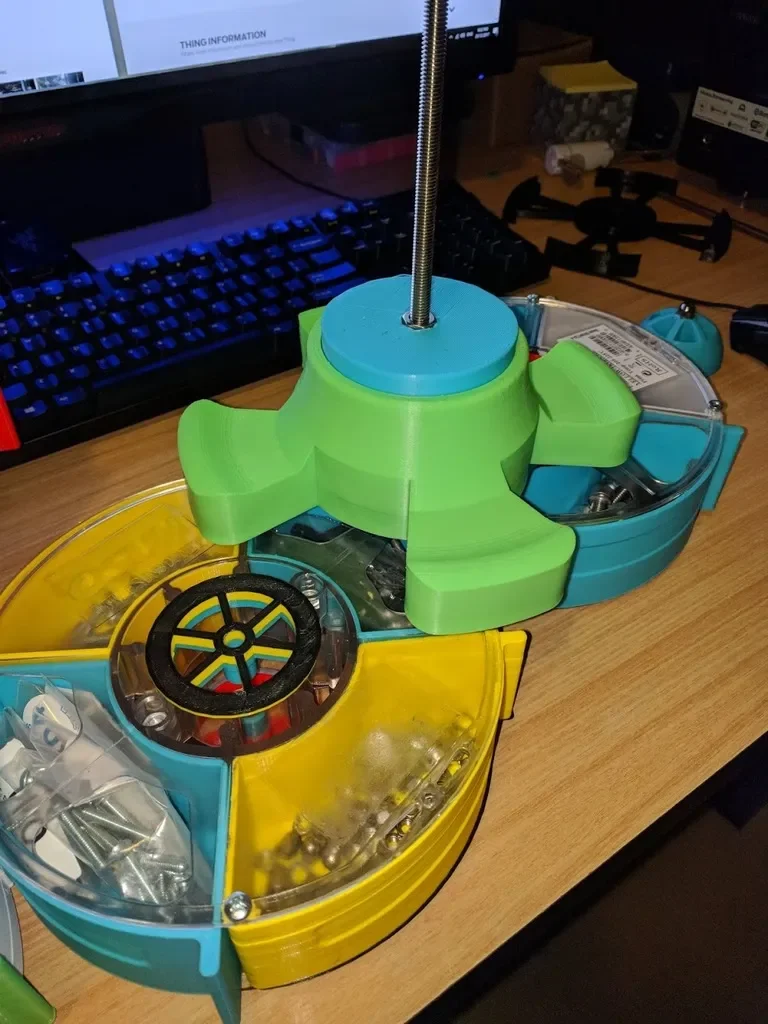
The inner piece requires two M8 Nuts to be press fitted into the top and bottom. Then screw the threaded rod into place ensuring it does not pass beyond the bottom of the piece (top side when printing). I personally used a bit of Loctite to keep it all extra snug.
Depending on your printer, the Inner and outer pieces should be a snug fit. To attach them, push the inner piece into the outer piece until as far as it will travel. Then whilst applying some downward pressure, rotate the pieces until the nubs at the bottom of the centre piece lock into the holes inside the base.
-Spacers-
This is the fiddly bit! Print 2 of the spacers for each Spool Drawer in your stack, the small columns can be press fitted into the holes and then 2 pieces pressed together (see pictures for a demo). I personally use a dab of super glue to bind it all nice and tightly.
I also found I had enough clearance between the nuts & bolts keeping the drawers in place that I could print the Spacers and 3/4's height. You don't need one at the bottom and can use regular washers if you would prefer.
-Cap-
The cap is designed for a M8 Dome Nut, you can use a regular Nut though if you would prefer. Do not over-tighten the cap or you may struggle to spin the top drawer.
-Spool Centre's-
Use whichever Spool centre pieces you prefer - ideally ones which can be used or drilled to suit M8 thread (8mm).
I personally use these: https://www.thingiverse.com/thing:1842680 - Drilled out to 8mm.
Designed Wholly In FreeCAD
FreeCAD was used from start to finish to design the parts for this build.
Printed on a (heavily modified) Anet A6.
Category: Organization
ByVinors3DLabLikes393Downloads1K

 BybobmakesLikes2.5KDownloads17.5K

 Byextrablind_178817Likes40Downloads226

 ByTommy3DLab_2023125Likes636Downloads2.5K

 Byquibeck_3353173Likes1.5KDownloads11.5K

 ByTheMerchant_560996Likes104Downloads273

 ByklworxLikes0Downloads478

 ByHydratedMini_1690513Likes173Downloads721

 ByimanorangutanLikes0Downloads672

 ByKittenRaeeLikes381Downloads905

 ByScooLikes35Downloads186

 ByVeco_2904087Likes46Downloads109