




Thằn lằn cử động linh hoạt - In tại chỗ (Không cần support)
 Bycream110_291842Likes924Downloads7.7K
Build another version of this model.
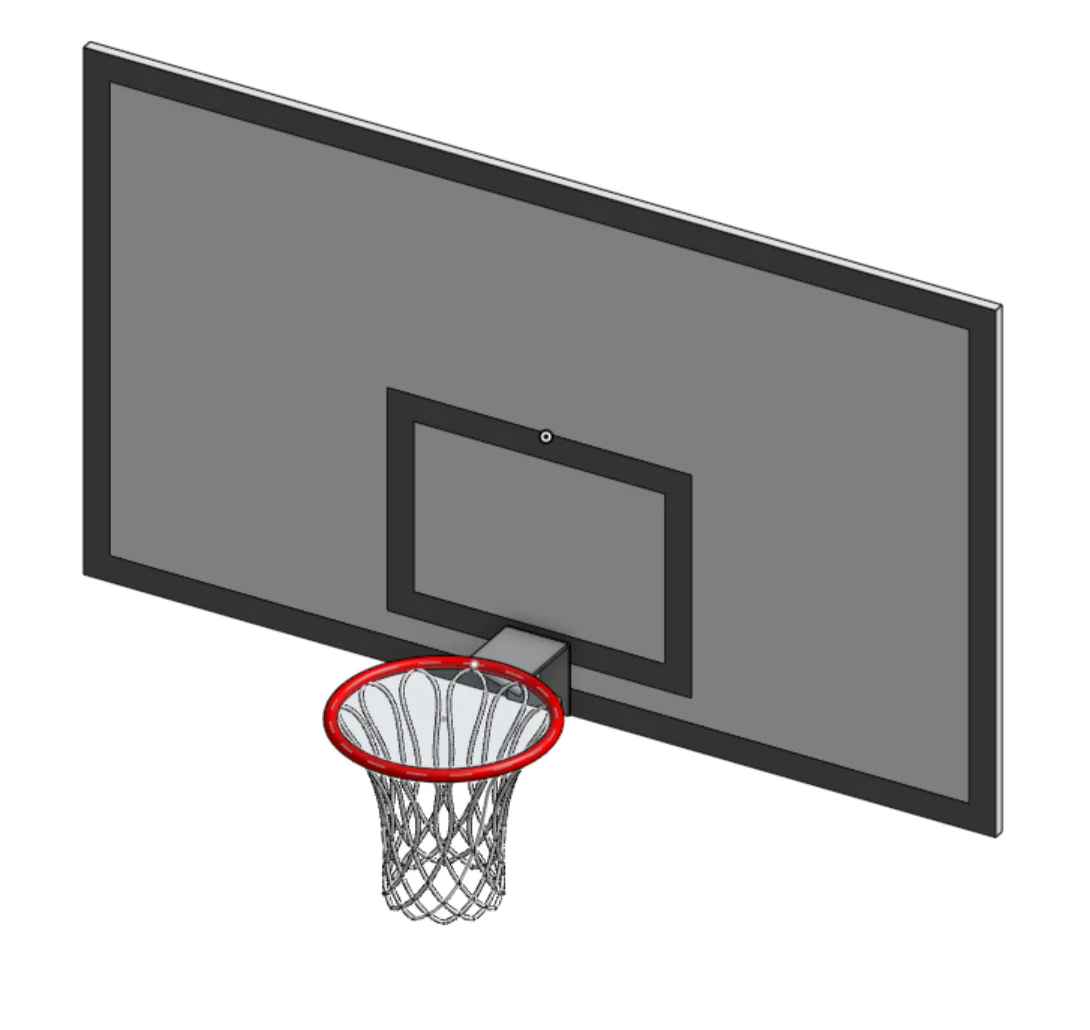
Locate the Parts: Gather the main backboard and the small, blue curved L-shaped piece.
Assembly: Attach the blue curved piece upside down onto the vertical side of the larger L-shaped metal bracket.
Locate the Parts: Use the assembled L-shaped metal bracket and locate the three circular markings at the bottom center of the backboard target box.
Assembly: The three holes are strictly for alignment and indication, not for screws. Apply heavy-duty glue to the base of the L-shaped metal sheet and permanently bond it directly over the three indication holes on the backboard.
Locate the Parts: Gather the red rim and the woven net.
Assembly: Attach the net to the underside of the red rim using glue or tape. Once secured, use adhesive to permanently attach the back edge of the red rim to the top face of the mounted L-shaped metal supporting bracket.
Locate the Parts: Gather the two small white pillars.
Assembly: Position these white pillars as structural supports. Secure them so they bridge the gap, extending from the base of the L-shaped metal sheet bracket up to the underside of the red rim to keep the hoop stable.
Bycream110_291842Likes924Downloads7.7K

 ByOnemoredaveLikes861Downloads6.9K

 Byjs14581_2767550Likes118Downloads3.3K

 Byquibeck_3353173Likes351Downloads2.1K

 ByTheMakerStuffLikes315Downloads1.9K

 ByGoolow_295072Likes598Downloads1.6K

 ByMikWantecLikes264Downloads1.5K

 BySzvmkn_3779340Likes231Downloads1.3K

 ByHacker Man ManLikes248Downloads1.5K

 Bycentarico_3241219Likes257Downloads970

 Byfluffytails37Likes184Downloads765

 ByAristotelisNellasLikes18Downloads701