



Dụng cụ chặn cửa sổ / Mở cửa sổ
 ByAWSWLikes148Downloads580
Build another version of this model.
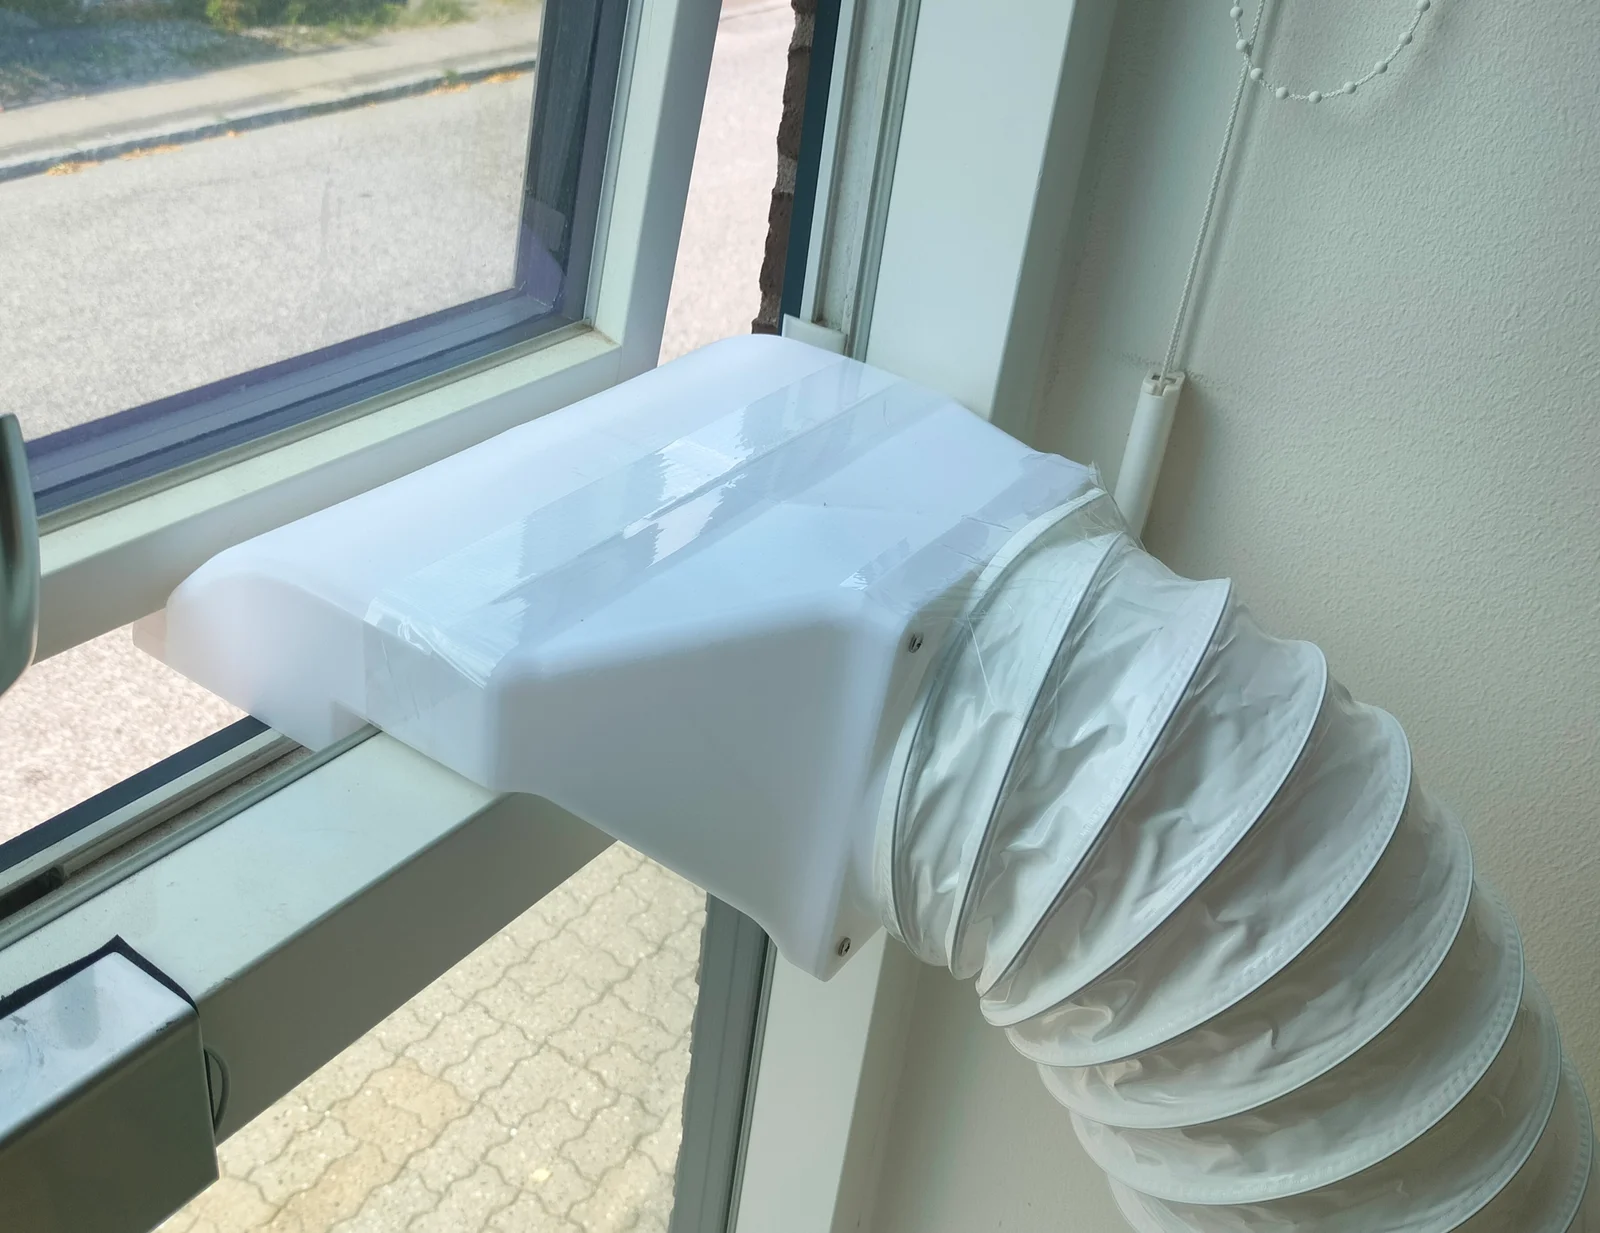
Nozzle for mounting ventilation ducting through window opening.
Originally made as part of a ducting system for venting my gaming PC exhaust outside(Fractal North ducting shroud), but also works for single-room AC, 3D printers etc.
Comes default with an adapter for 150mm ducting/hose, which mounts on an interface that also fits a 140mm PC fan screw pattern(in case you need to help the air along a bit).
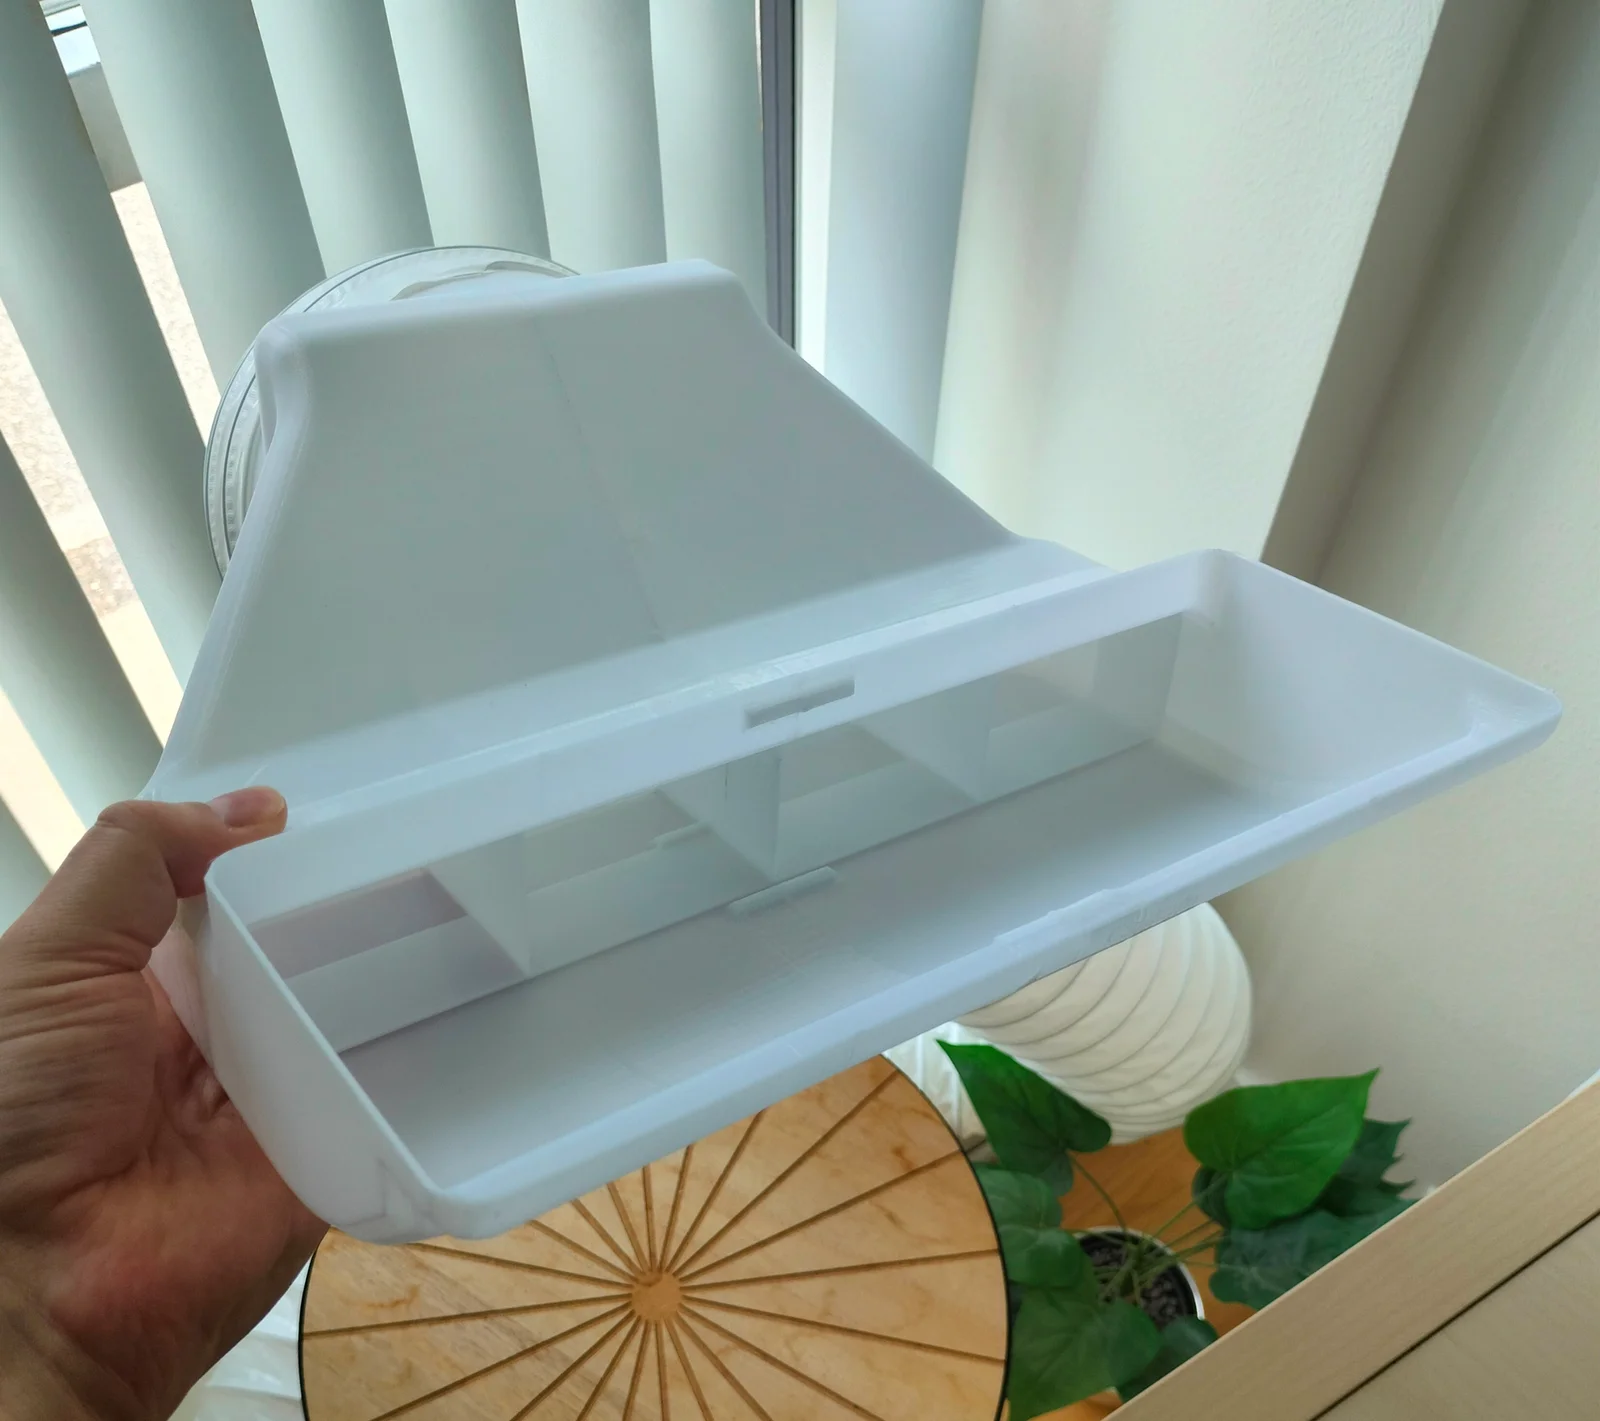
The nozzle itself is divided up into 4 pieces in order to print on regular printers(such as Prusa mk3, mk4 and Core One).
Bear in mind that the nozzle is held in by wedging between the window and the frame, so if you open the window up too far, it might fall down. If you have anti-break-in latches but it keeps the window open in different distances, you could try and scale the nozzle parts.
I have added a small "test card" to test if the nozzle fits your specific windows, without having to print the whole thing. Also good for testing scaling if necessary.
Print in PETG or similar, as venting hot air could potentially slowly deform PLA.
I recommend you try the included 3mf-file, which includes necessary settings and custom support. The parts are a bit flimsy and can flex during printing. The two nozzle parts comes with small connector pieces between the two parts during printing, but the funnel parts need a bit of paint-on support(see image).
Settings used:
Layer height: 0.2.
Avoid crossing curled overhangs: ON.
Brim: On, 7mm.
Support: On, Organic, For support enforcers only(paint on supports in strategic positions on the "funnel").
Print time total on Core One: ~10.5h
Filament used total: ~365g
Cut 7 ~26mm long pieces of 1.75 filament and use as guides in small holes along seams for assembling. You might need to drill the holes out slightly after printing.
I recommend you line the halves of each section up and temporarily fixate parts with packing tape or similar along the outside of each joint. Then once everything is in place, glue the parts together with superglue or similar along the inside.
The nozzle and funnel parts should slide together once individually glued, but tolerances might require a bit of sanding/scraping. Otherwise you can glue all of it together in one go instead. I ended up just taping the funnel and nozzle together.
The hose adapter simply screws into the funnel with PC fan screws or similar.
ByAWSWLikes148Downloads580

 BybobmakesLikes2.5KDownloads17.5K

 ByfifindrLikes141Downloads421

 By178222178222_2484344Likes449Downloads1.7K

 Byquibeck_3353173Likes1.5KDownloads11.5K

 ByVaclav_ZahradkaLikes181Downloads1.2K


 ByowlartLikes527Downloads1.3K

 ByphilLikes0Downloads116

 Bytjfenwick_306961Likes385Downloads1K


 ByNiranvandenE_1763764Likes8Downloads120