



Kẹp giữ sợi Filament
 Bytinx_1344834Likes1.2KDownloads6K
Build another version of this model.
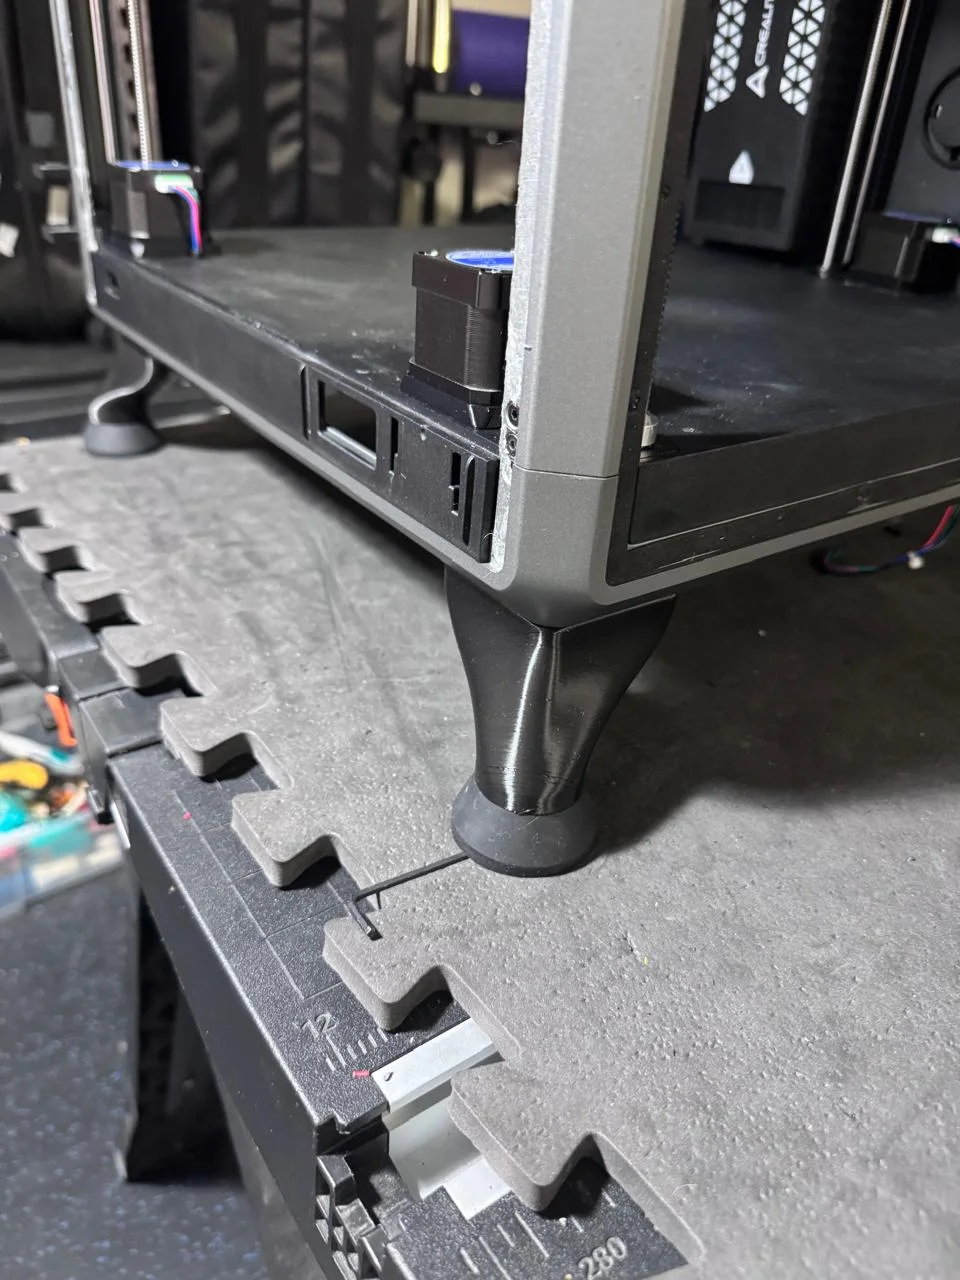
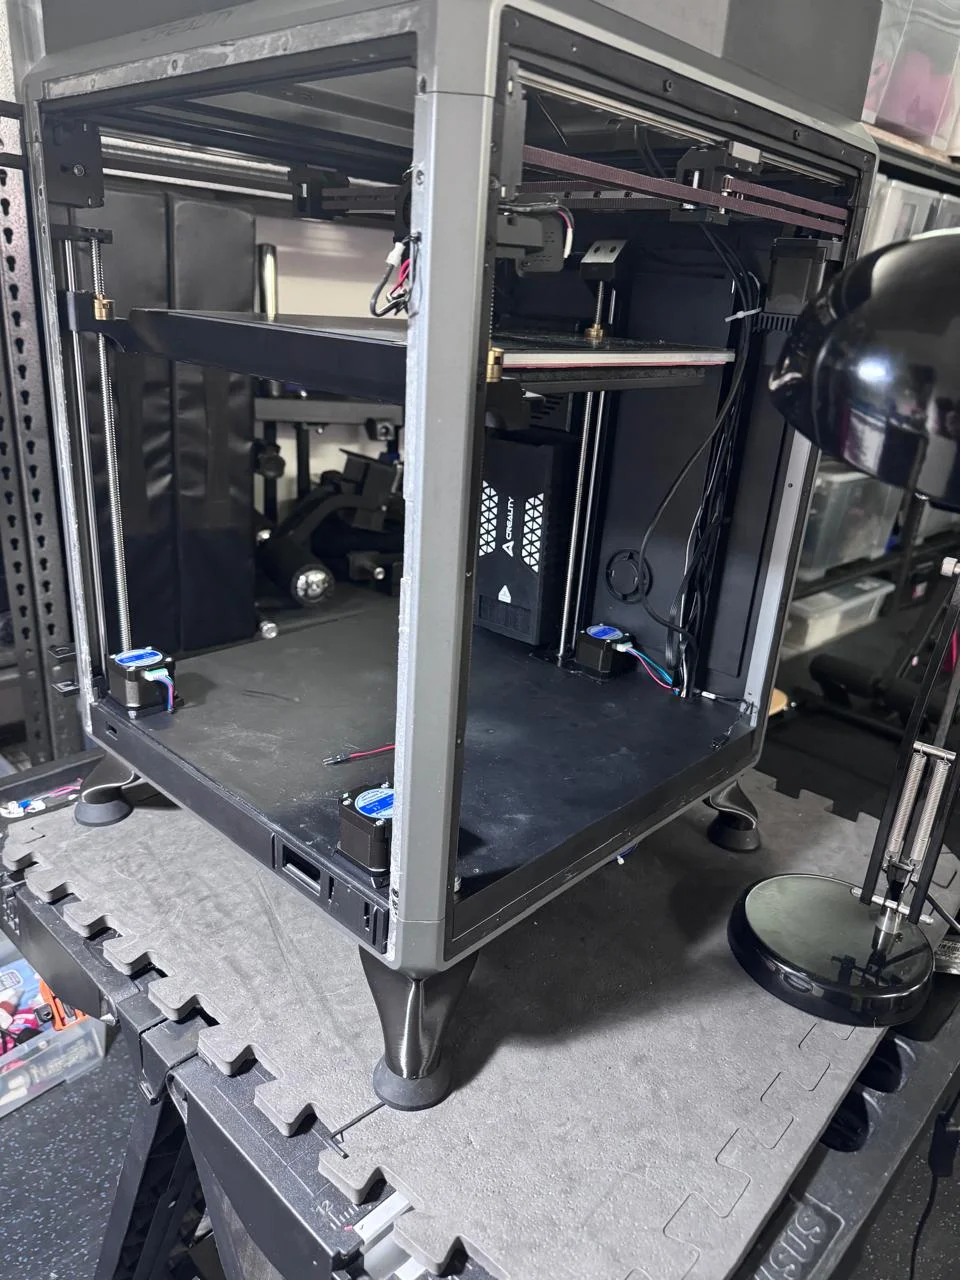
I designed these simple lofted leg extensions for the Creality K1 Max because I couldn't find anything that met my requirements. My main goal was to increase the printer height while keeping the original footprint as close as possible, without large outriggers or bulky replacement feet.
The legs are designed to be a snug fit on the underside of the printer and reuse the original rubber feet for grip and vibration damping.
Printing:
Print in your preferred material. I printed mine in PLA-CF, but they should also work well in:
PLA+
PLA-CF/GF
ASA
PETG (if preferred)
No supports are required. Simply orient the parts on the build plate as shown below.
Assembly:
Reuse the original large Creality rubber feet.
Place the stock rubber foot into the bottom of the leg and secure it using the printed end cap.
M3 × 15 mm countersunk screw – secures the end cap and rubber foot. The screw threads directly into the printed plastic.
M3 × 20 mm socket head cap screw – clamps the leg to the printer using the existing threaded hole in the K1 Max chassis.
The sliding fit onto the underside of the frame is intentionally quite snug to maximise rigidity. Push the leg fully into position before installing the M3 fixing screw. If required, a light tap with a small rubber mallet can help seat the leg fully.
Design Philosophy:
The objective of these legs is to:
Increase ground clearance without significantly increasing the printer's footprint.
Retain the excellent grip of the original Creality rubber feet.
Provide a rigid mounting solution with minimal added compliance.
Keep the design simple, lightweight and quick to print.
Require no permanent modifications to the printer.
PLEASE NOTE THE METAL BOTTOM COVER WILL NEED TO BE REMOVED.
Bytinx_1344834Likes1.2KDownloads6K

 Byprusa-researchLikes0Downloads2.7K

 BydalleLikes0Downloads147

 Byarhi_585078Likes64Downloads542

 ByHanzo3dLikes155Downloads415

 BydarienLikes0Downloads1K

 ByGeek5DLikes147Downloads488

 ByBrokentooth_designsLikes23Downloads410

 Byla-cave-au-chatLikes0Downloads967

 Bycrawler-3903250Likes0Downloads907

 ByvertigomakesLikes0Downloads563

 ByWyomingWolf_261196Likes52Downloads431