



Bộ sưu tập 11 nhân vật mô hình Mecca Chameleon in 3D vui nhộn
 ByZED4EverLikes313Downloads5.2K
Build another version of this model.
This is a work in progress, while I've printed and used it, I feel there are improvements that can be made to the concept, so thought I'd throw it out there, see if there's any feedback. Despite this being relatively specialised.
If you're familiar with products like SmartStrings or the BG Racing String line kit, this should make sense to you. I'm not going to tell you how to align the toe on your car, just talk about the models.
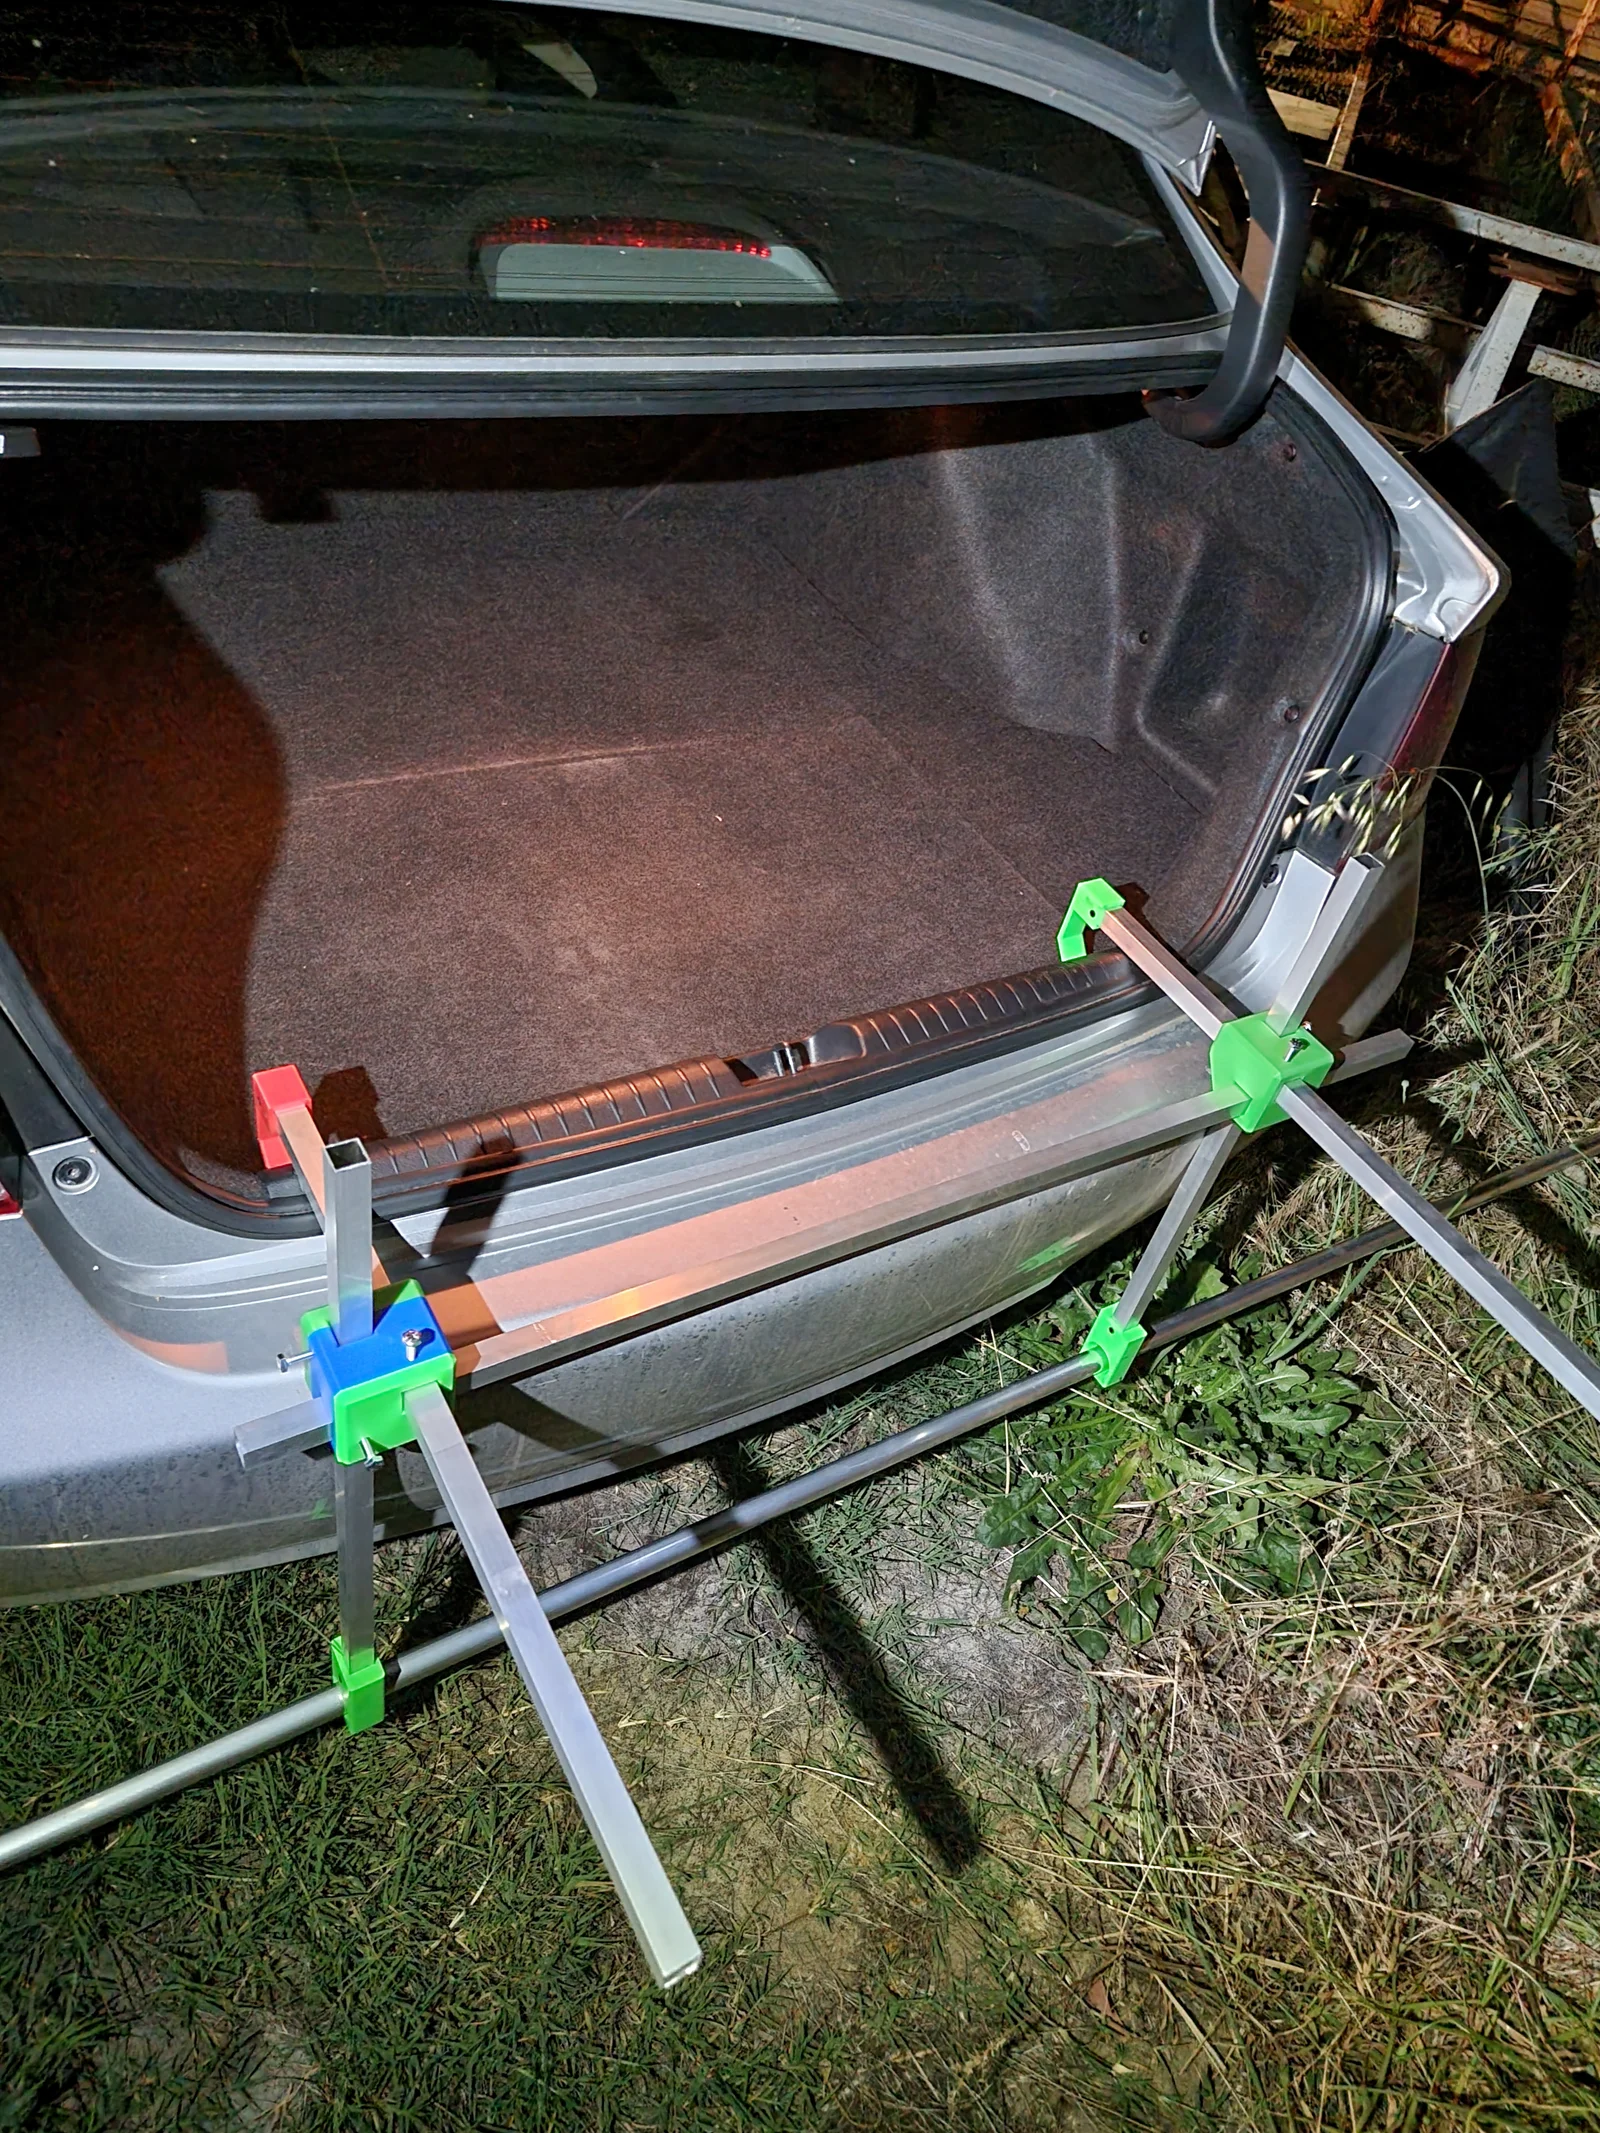
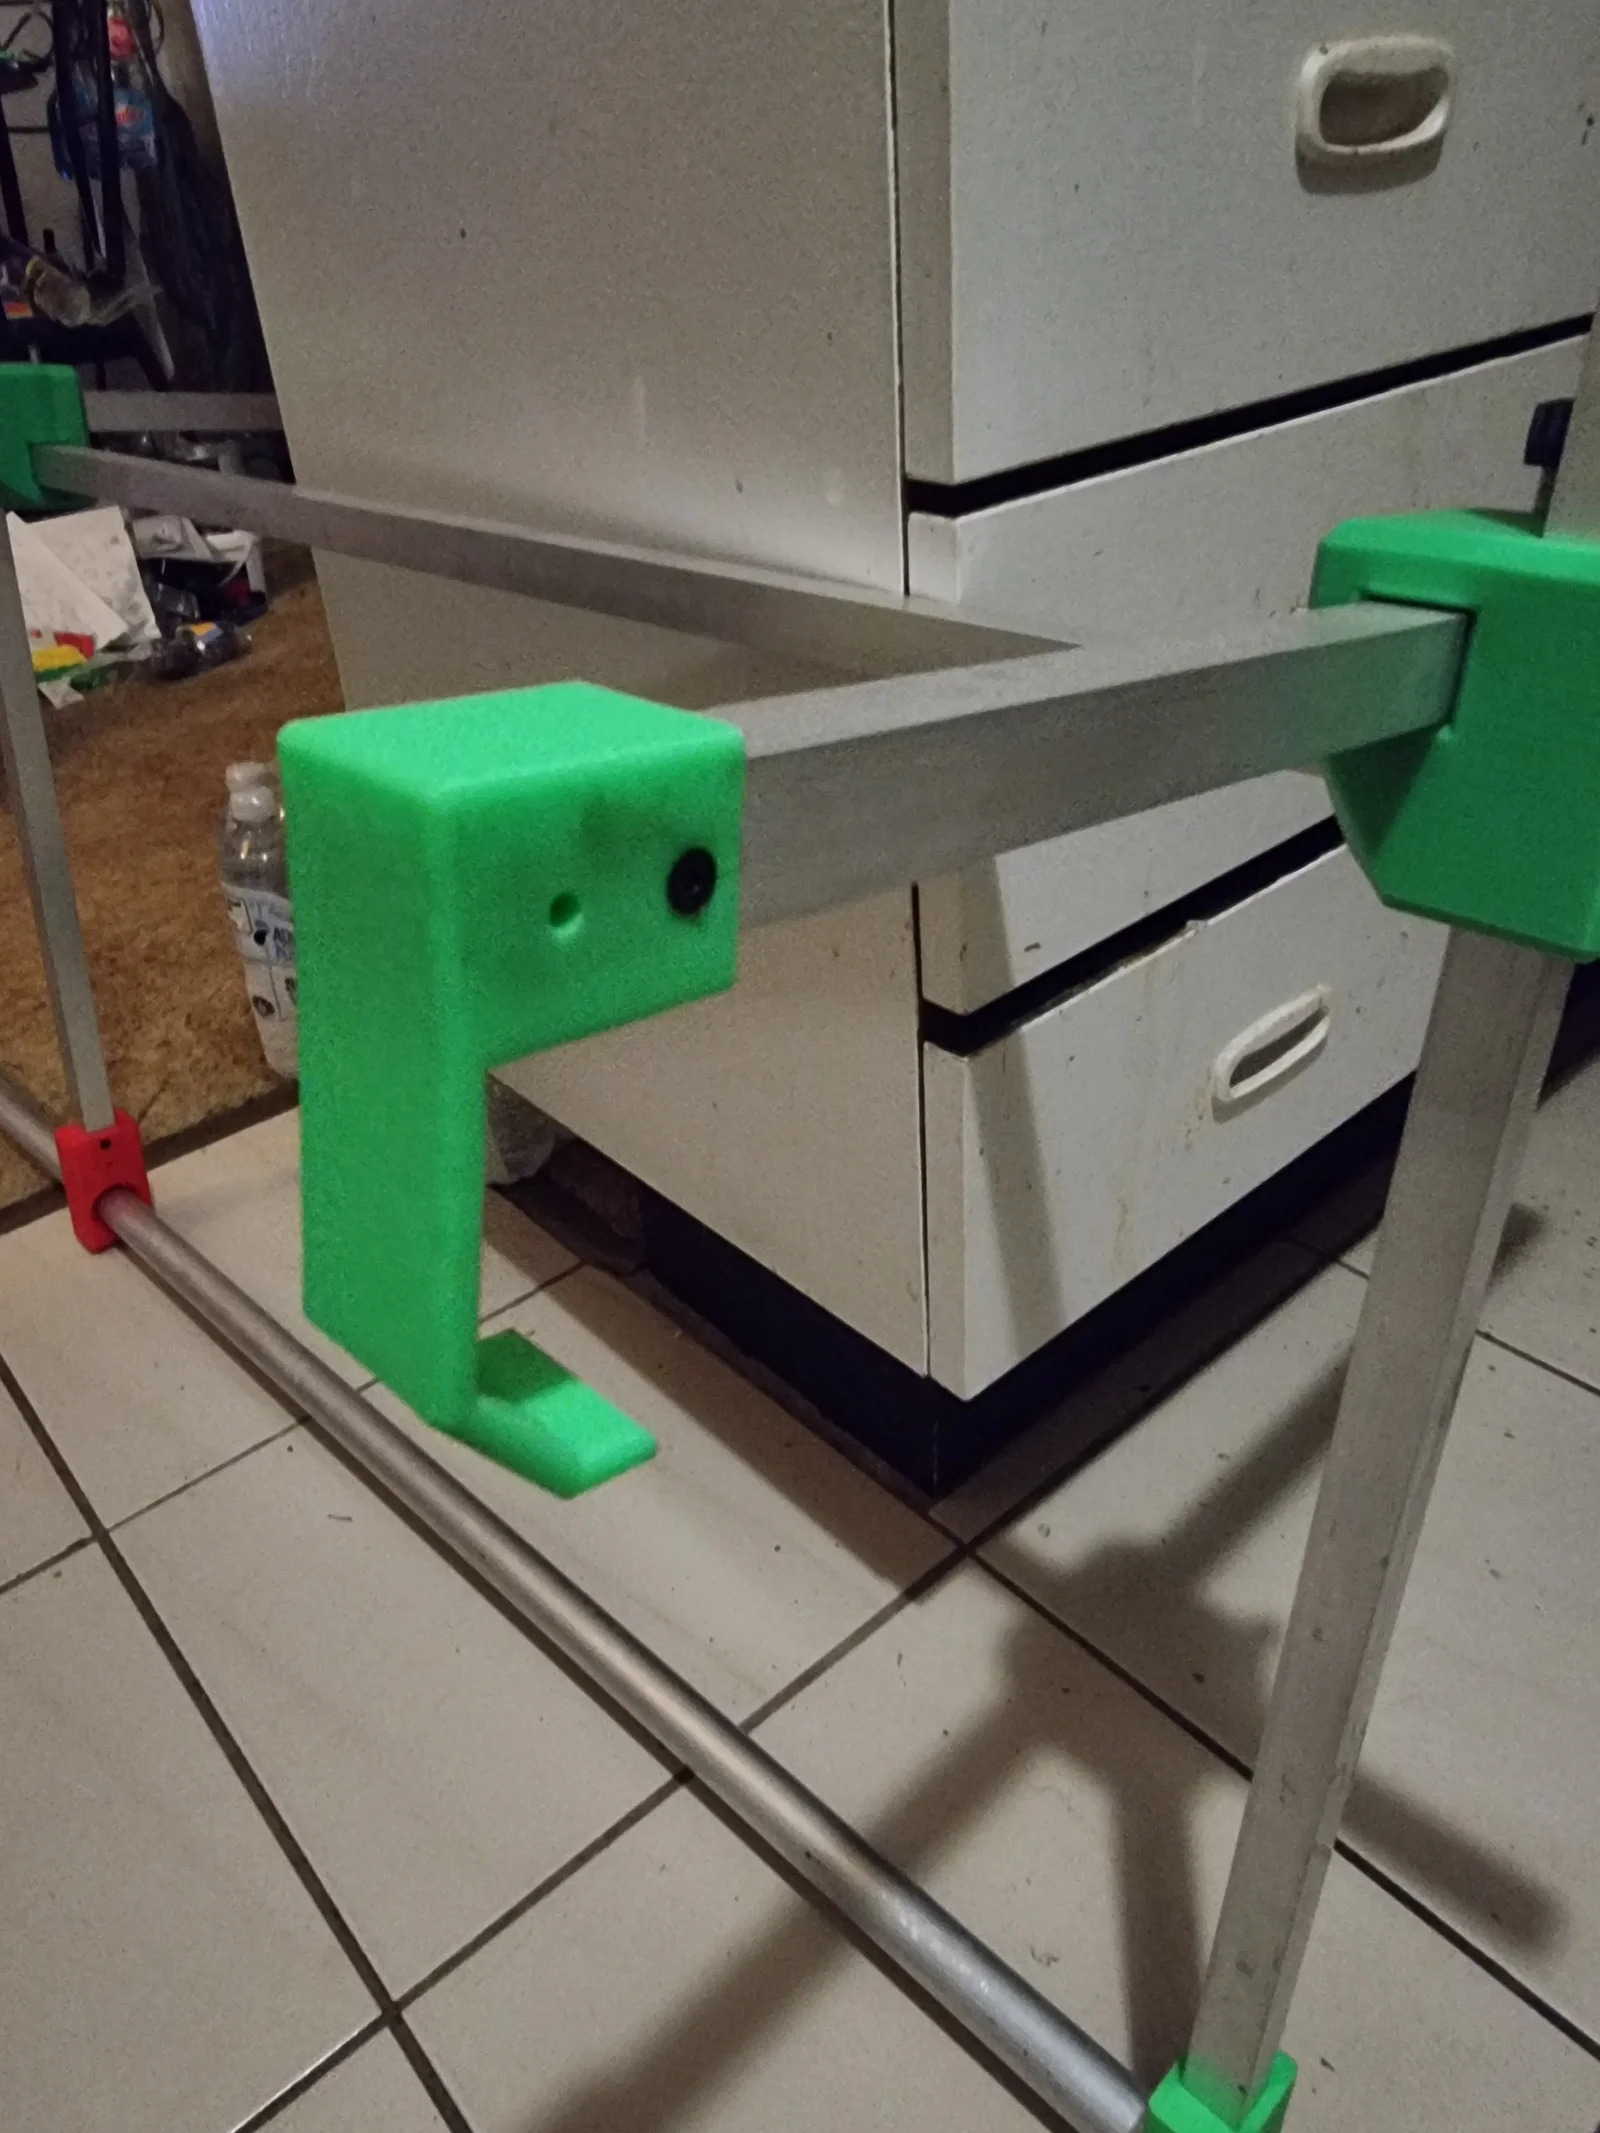
The Print is designed to slip onto 3/4" or 19mm aluminium tubing. The hooks and such are a reasonably snug fit. I used pieces ~600mm long. There's multiple holes in the prints,, but I've only used 2 x 1/8" pop rivets per piece to secure it to the tube and it seems fine. The photo's show an early version of the Hooks, which were a little light, what's included in the files is a heavier version. The hooks work pretty well over the radiator support panel, but for the rear, especially with trim still in the way, I printed the long T-like sections and just clamped the rear bumper (as you can see in the photo). The photo's show a captured 25mm (1") tube, what's included in the files is an open hook design that allows for removal of the alignment tubes, bit easier to store away. I've printed them, but not used them. Other systems have this and seem to work OK. To stop the tubes moving, you will need a small spring to tension the fishing line, this pressure alone seems to be enough to stop the tubes just sliding all over the place (at least with the captured design). There's a jig piece included for drilling the tubes to make it easier to get the holes the same distance apart and parallel with each other in the same tube.
The adjustment blocks are the piece that I'm not reall happy with, just chunky and take a while to print. No matter the orientation, at least 2 channels will have support and may need light filing to achieve a nice sliding fit on the square tube,. The initial version allows for an M6 nut to be squeezed into eaxch adjustment opening, with the 'Tue Gauge Square Pad' acting as the clamp against the tube so the purchased adjustment screws don't damage the tube. It was a PITA to assemble, though works OK. I've recently updated this with a HeatSert model (untested print) that allows for an M6 heat sert to be put in the hole and does away with the pad. A friend has used the original design without the pads and as long as you're gentle with the screws, the tube doesn't seem to dent ..much. To achieve the same as I have, you will need to Mirror the parts on the Build plate, in effect creating 2 x left and 2 x right, though this isn't strictly necessary, it makes it a bit nicer.
You will probably need to use some cardboard packing, or soft material to protect the bumper and get the bars reasonably square to the wheels. I measure from Wheel CL back to the bar. Even if you get it slightly trapezoidal on the car, with the bars drilled at the same length it will still work OK. Some use 3D printed blocks that clamp to the tube, but I like the positive action of clipping the spring to the split pin, that it does then make the bar a captured piece, hence the now open hook. Otherwise you'd have to get the blocks holding the strings at the same distance apart each time. Maybe that's not such a big deal ?
Printed with 0.2mm layer height, tree supports where applicable and 4-5 wall layers for a bit of extra strength.
The aluminium tube is exxy (Bunnings for those in Australia), but you should still be able to create a decent alignment jig for WELL under what they sell for
ByZED4EverLikes313Downloads5.2K

 ByfifindrLikes500Downloads4K

 ByVC_DesignLikes679Downloads3.6K

 ByDan Schwartz SchwartzLikes744Downloads3.4K

 ByJordanK_858807Likes42Downloads434

 ByMAFIXMAFIX_337316Likes130Downloads382

 Byvc-designLikes0Downloads3.2K

 ByUpcrid3D_1585693Likes808Downloads2.1K

 ByWilko_SLOLikes935Downloads2K

 Bystephenhiras_1439037Likes15Downloads237

 Bychubbs8697_2027893Likes585Downloads1.7K

 Byquibeck_3353173Likes965Downloads1.9K