



New
Clean Storage Boxes | 16 Sizes
 BymoonyxLikes0Downloads701
Build another version of this model.
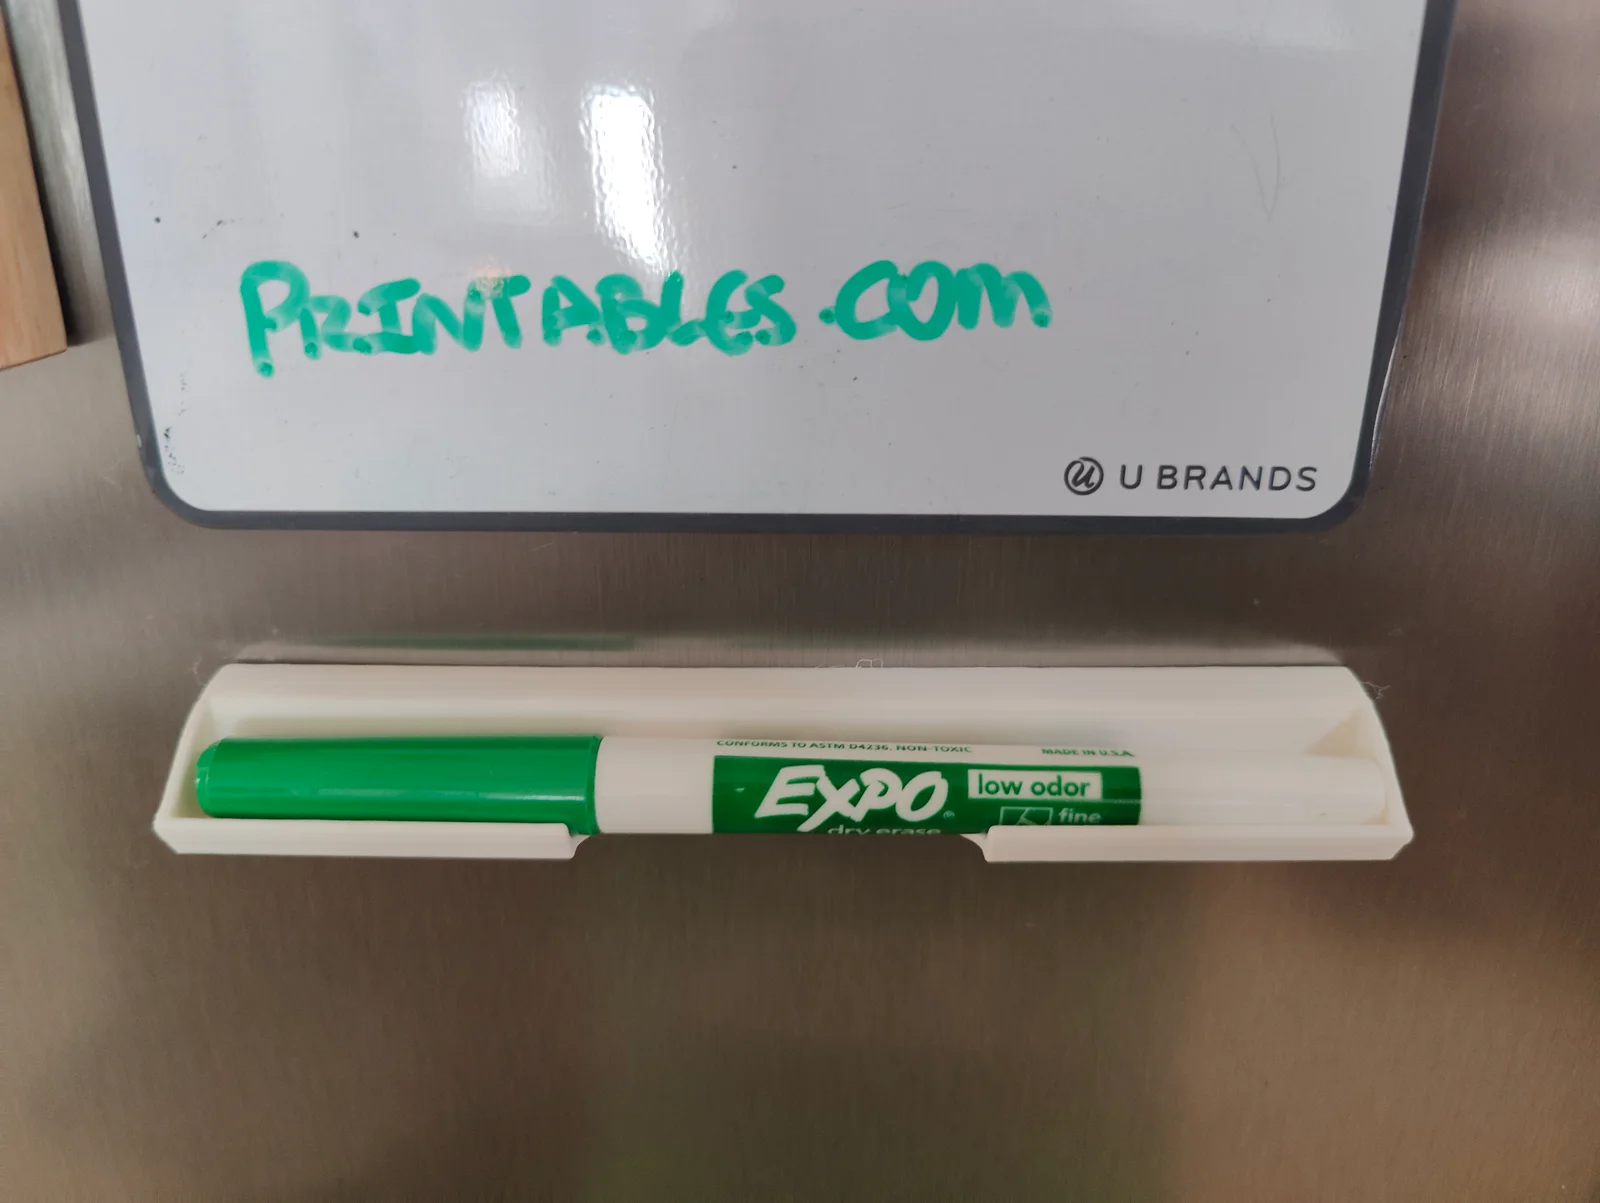
Print In Place living hinge magnets will “conform” to curved surfaces of many different diameters.
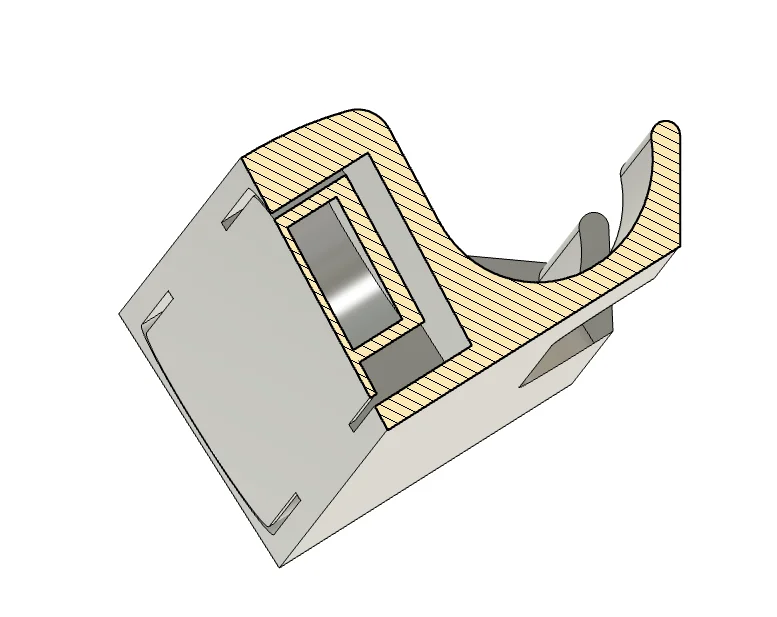
3 magnets - The model has holes for 3/8in x 1/8in magnets which you can get from the link below for account 77 cents US, each.
https://www.kjmagnetics.com/proddetail.asp?prod=D62-N52&cat=2
I am including the F360 model with params for the magnet sizes if you want to use a different size.
It started simply enough. We have a small magnetic whiteboard on our fridge for grocery lists and such and we needed a way to have a dry-erase marker close by. I thought this would be a great excuse to try my hand at designing something with captive magnets.
So I naively modeled up a simple holder with a straight back and three captive magnets. One in the center, and 2 at either end. I printed it and proudly admired my work, only to realize seconds later, that our fridge has a slight curve to it. So only 2 of the magnets were ever in contact with the fridge so it didn't have enough “stick” to be reliable.
Back to the drawing board. I made a new version where I (once again naively) moved all the magnets close to the center. I figured since the curve was so slight that it would be good enough. And it was. It stuck on there nicely. However, when I added and retrieved the marker a few times, I quickly realized that the magnets in the center were acting like an axel, so the thing just kept spinning around 😀
So after about 3 showers (this is where all my great ideas hit me), I settled on the idea of encapsulating the outer magnets in a living hinge so they have to move forward and backward to match the radius of whatever it was stuck to. And I have to say, it was a joy to model and I think it works really nicely.
If you use the gcode provided here, the printer should pause at a z height of 3.6mm, approximately 25 minutes after the print starts.
If you are slicing it yourself, you can add a color change at 3.6mm, right before the bridges are added above the magnet compartments. This will add an M600 command to the gcode, which is a Filament Change command.
That will work just fine, but if you want to avoid the hassle of unloading and reloading the filament, you can:
M600 (there may be more than one instance, but find the one on its own line without a semicolon in front).;) in front to “comment out” this lineG1 X10.000 Y200.000 E0; move the printer bed forwardM1; pauseM105; continueThis should work on most printers
Also, I found that changing the bridging angle to 45 degrees will keep the underside a little neater.
Optional - there is a bit of tolerance around the magnets. You may hear a slight “rattle” in the finished print. If this sort of thing bothers you, just add a tiny drop of superglue into the three magnet compartments before dropping in the magnets.
Happy printing and please share your makes, feedback, and remixes!
BymoonyxLikes0Downloads701

 ByVC_DesignLikes721Downloads2.9K

 ByUpcrid3D_1585693Likes808Downloads2.1K

 ByshoheiyLikes0Downloads436

 ByWilko_SLOLikes935Downloads2K

 ByRobertoGalloc_356815Likes549Downloads1.8K

 ByTater_364200Likes486Downloads1.6K

 ByfifindrLikes709Downloads1.7K

 Bywhilex_1739192Likes644Downloads1.1K

 ByGi_TLikes801Downloads1.3K

 ByzeroflowLikes186Downloads1.2K

 ByMatthew_GhostLikes350Downloads943