



Còi Tàu Hơi Nước Mini
 ByfifindrLikes500Downloads4K
Build another version of this model.
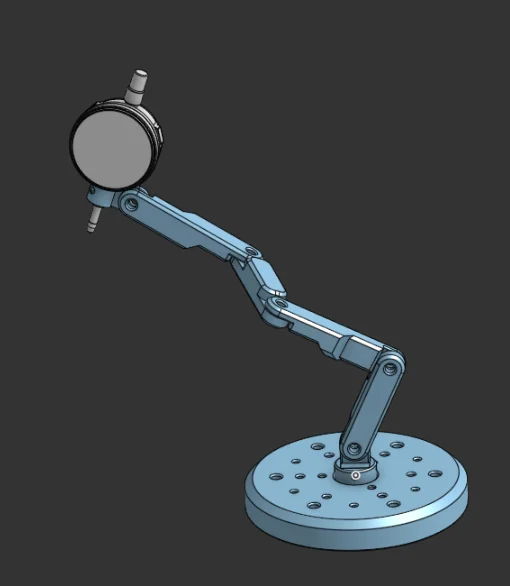
This was a very quick and simple design. There are much better ways of achieving this. I only made it for the purpose of saving myself money.
I printed it in PETg, though I would imagine PLA works about as well. Nothing should require supports though they could help improve the durability of the joints (which should work perfectly fine even with vertical layers so long as you use your hands). At the time of uploading I don't actually have a dial indicator though I will update once I test with one.
Intended Materials:
For Base:
1-3 M3 machine screws
1-3 M3 threaded inserts
6 8x3mm neodymium magnets and/or
Optional Additions:
For Swivel:
For Each Joint: (You could probably get away with M5)
1 (not necessarily hex head) M6x20 bolt
2 washers (M6)
1 wing nut (M6)
For Dial Indicator Holder:
Set Screw Version (recommended):
1-2 M2 brass threaded inserts
1-2 M2 worm/set screws or
1-2 M2 machine screws
Collared version (untested):
1 M2 machine screw
1 M2 nut
// Todo:
make printable dowels & increase pivot hole depth to go all the way through
redesign the collared holder
ByfifindrLikes500Downloads4K

 ByVC_DesignLikes679Downloads3.6K

 ByDan Schwartz SchwartzLikes744Downloads3.4K

 Bychubbs8697_2027893Likes585Downloads1.7K

 Byquibeck_3353173Likes965Downloads1.9K

 ByRungeKuttaLikes229Downloads1.2K

 ByEadubsLikes228Downloads1.3K

 ByWolf_115355Likes513Downloads8.4K

 ByJeremyVillalo_760366Likes68Downloads764

 ByZED4EverLikes313Downloads5.2K

 Bykjus_448782Likes314Downloads673

 BySchmitzBertLikes95Downloads627